
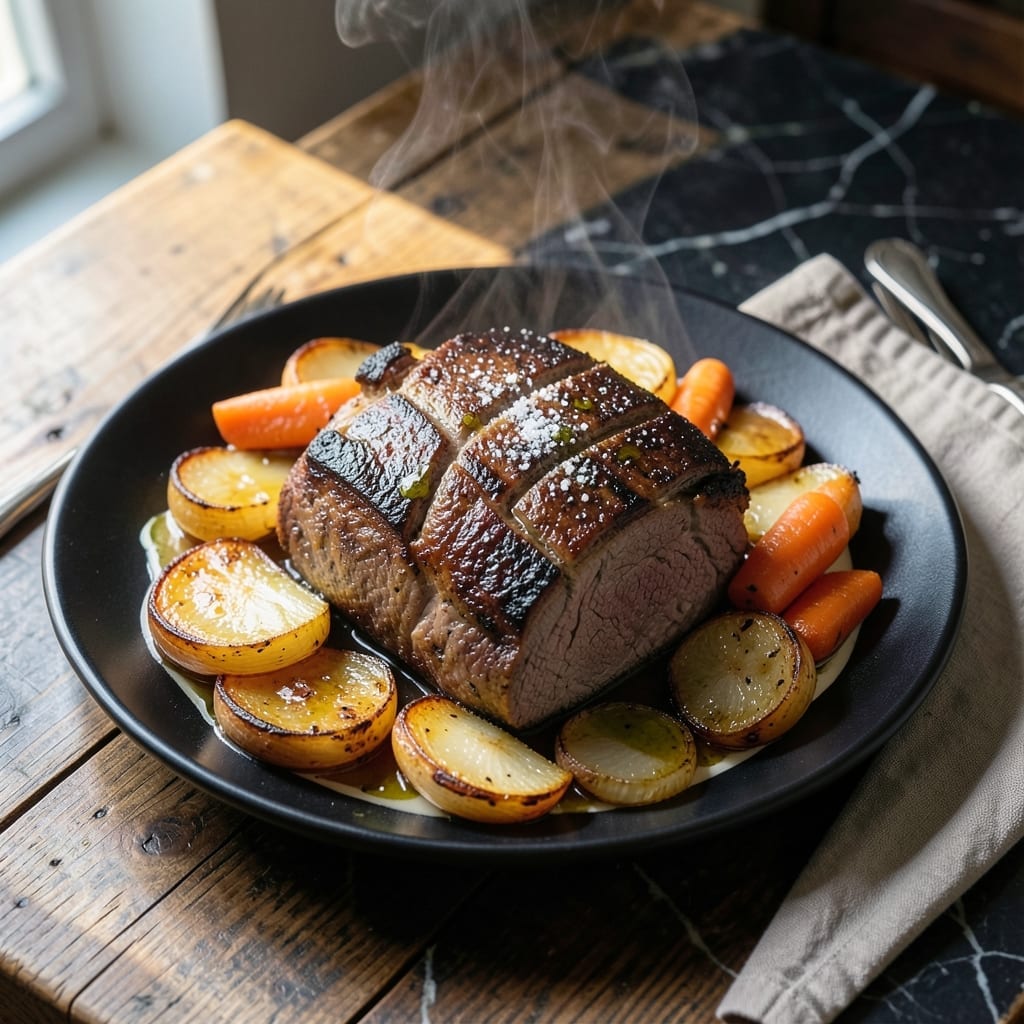
This top blade pot roast transforms a budget-friendly cut into a fork-tender masterpiece with minimal effort. Low and slow braising breaks down the connective tissue, creating melt-in-your-mouth beef swimming in a rich, velvety gravy.
The key is patience and the right technique. Searing the beef first develops deep flavor, while a long, gentle cook in the oven or slow cooker ensures the meat becomes impossibly tender.
You’ll end up with succulent beef that falls apart at the touch of a fork, surrounded by a gravy so flavorful it deserves its own praise. The top blade cut is ideal—affordable, marbled, and full of beefy richness.
Pair with mashed potatoes or crusty bread to soak up every last drop. This is comfort food at its finest.
Ingredients for Top Blade Pot Roast
A few quality ingredients and some patience create this melt-in-your-mouth dish.
| Ingredient | Amount | Notes |
|---|---|---|
| Top Blade Roast 🥩 | 2 ½ lb | Well-marbled, trimmed of excess fat |
| Kosher Salt 🧂 | 2 tsp | Diamond Crystal preferred for even seasoning |
| Black Pepper 🌶️ | 1 tsp | Freshly ground for best flavor |
| Olive Oil 🫒 | 2 tbsp | Divided for searing and deglazing |
| Yellow Onion 🧅 | 1 whole | Large, diced for gravy base |
| Carrots 🥕 | 3 whole | Peeled and cut into chunks |
| Celery Stalks 🌿 | 2 whole | Sliced for aromatic base |
| Garlic Cloves 🧄 | 4 cloves | Minced for depth of flavor |
| Tomato Paste 🍅 | 2 tbsp | For umami-rich gravy |
| Red Wine 🍷 | 1 cup | Dry variety like Cabernet Sauvignon |
| Beef Broth 🥘 | 2 cups | Low-sodium preferred for control |
| Bay Leaf 🍃 | 1 whole | Dried, for aromatic depth |
| Fresh Thyme Sprigs 🌿 | 2 whole | Stems removed before serving |
| Fresh Rosemary Sprig 🌿 | 1 whole | For earthy herb notes |
The beef is everything here. Top blade roast (sometimes labeled as flat iron) has the marbling you need for that fork-tender result. I grab mine from Costco—big pieces, great price, and always consistent quality. Look for bright red color with white fat streaks throughout. If your butcher has it on sale, buy extra and freeze it (vacuum-sealed is best).
No red wine? Beef broth plus a splash of balsamic vinegar works in a pinch. Tomato paste can be swapped with 1 tbsp ketchup if that’s all you’ve got. Fresh herbs not on hand? Dried thyme and rosemary at half the amount get you close. The broth can be homemade or store-bought, but Better Than Bouillon is my go-to for rich, concentrated flavor.
Leftovers taste even better the next day. Store in the fridge for up to 4 days, or freeze for 3 months. I like to shred the beef and mix it with the gravy for sandwiches (or just reheat as-is). The gravy will thicken as it cools—thin with a splash of broth when reheating.
Why You’ll Love This Recipe
- I’ll be real: this is my go-to for Sunday dinner when the whole family’s over.
- One Pan Meal: Honestly, just sear the beef, toss in onions, and let the oven do the rest.
- Rich and Tender: The top blade roast soaks up the olive oil and caramelized onion flavor—fall-apart good.
- Feeds a Crowd: I’ll be real: this is my go-to for Sunday dinner when the whole family’s over.
Step-by-Step Instructions for Top Blade Pot Roast
Here’s the method that guarantees fall-apart meat and a gravy so good you’ll want to drink it.
Step 1: Sear the Roast to Lock in Flavor
Pat the 2.5 lb Top Blade Roast completely dry with paper towels. This is non-negotiable—moisture prevents a good sear. Season it aggressively with the 2 tsp Kosher Salt and 1 tsp Black Pepper, pressing the seasoning into the meat so it adheres well.
Heat 1 tbsp Olive Oil in a large Dutch oven over medium-high heat until it shimmers. Add the roast and sear undisturbed for 4-5 minutes per side until you’ve got a deep, dark brown crust on all sides. The fond (those browned bits) left in the pot is pure flavor gold—don’t scrape it off. Transfer the meat to a plate.
Step 2: Build the Aromatic Foundation
In the same pot, add the remaining 1 tbsp Olive Oil if needed. Toss in the diced 1 whole Yellow Onion, chunked 3 whole Carrots, and sliced 2 whole Celery Stalks. Cook for 5-6 minutes until the onion softens and turns translucent.
Add the minced 4 cloves Garlic Cloves and cook for 30 seconds until fragrant—don’t let it burn. Stir in the 2 tbsp Tomato Paste and cook for 1-2 minutes until it darkens slightly. This step deepens the umami and builds the base for your gravy.
Step 3: Deglaze and Braise to Perfection
Pour in the 1 cup Red Wine and scrape up all those browned bits from the bottom of the pot with a wooden spoon. Let it simmer for 2-3 minutes until the liquid reduces by about half. The alcohol smell should cook off completely.
Return the roast to the pot along with any accumulated juices. Add the 2 cups Beef Broth, 1 whole Bay Leaf, 2 whole Fresh Thyme Sprigs, and 1 whole Fresh Rosemary Sprig. The liquid should come about halfway up the roast. Bring to a simmer, then cover and transfer to a 325°F oven.
Step 4: Slow Cook Until Fork-Tender
Braise for 2.5 to 3 hours, turning the roast every 45 minutes and basting with the cooking liquid. You’ll know it’s done when the meat shreds easily with a fork. I usually start checking at the 2.5-hour mark—every oven runs a little differently.
The carrots and onion should be soft and nearly melting into the gravy by now. If the liquid level gets too low, add a splash of water or broth to keep things moist. The house will smell incredible at this point—try to resist sneaking bites until it’s ready.
Step 5: Rest and Serve with Rich Gravy
Carefully transfer the roast to a cutting board and tent loosely with foil. Let it rest for 15 minutes—this keeps all those juices inside the meat where they belong. Skim any excess fat from the surface of the cooking liquid if you prefer, though I usually leave most of it for flavor.
Discard the bay leaf, thyme sprigs, and rosemary sprig stems. The gravy should coat the back of a spoon; if it’s too thin, simmer it for a few minutes to reduce. Slice or shred the meat against the grain and serve it smothered in that rich, aromatic gravy.
Pro Tips For Making Top Blade Pot Roast
- Sear Hard First: Get your pan screaming hot before adding the top blade—about 2 tablespoons of olive oil, then sear each side until deep brown, 3-4 minutes. I learned this the hard way after pulling out gray, steamed meat from my first few attempts.
- Salt the Night Before: Pat the roast dry, then coat it with kosher salt at least 12 hours ahead. Sounds weird, but it works: the salt penetrates deep, and the meat stays juicier after the long cook.
- Don’t Crowd the Pan: If your pot isn’t big enough for the roast and onions in a single layer, sear the meat first, then cook the onions separately. Steer clear of steaming the beef—it’ll turn tough instead of tender.
- Use the Onion Right: Slice the yellow onion thick—about ½-inch pieces—so they hold up during the long braise. My grandmother swore by this, and she was right: thin slices dissolve into mush by the time the roast is done.
Storing and Reheating Leftovers
Refrigerator Storage
Let the pot roast cool completely, then transfer it with gravy to airtight containers. I use glass Pyrex for easy reheating. It keeps beautifully in the fridge at 40°F or below for up to 4 days. The flavors deepen overnight, making leftovers taste even better. ❄️
Freezer Storage
For longer storage, portion the roast and gravy into freezer-safe bags or containers, leaving 1 inch headspace for expansion. It freezes well for up to 3 months without losing texture. I recommend vacuum-sealing for best results.
Stovetop Reheating
Gently reheat in a pot over medium-low heat for 10-15 minutes, stirring occasionally. Add a splash of beef broth or water if the gravy thickens too much. This method preserves the meat’s tenderness perfectly.
Microwave Reheating
For quick meals, microwave individual portions covered with a damp paper towel. Use 50% power in 1-minute intervals, stirring between each, until heated to 165°F. Add a little broth to prevent drying.
Oven Reheating
Preheat oven to 300°F, cover the pot roast with foil, and warm for 20-25 minutes. This works best for larger portions and keeps the meat juicy. Check the internal temperature to ensure it’s fully reheated. 🔥
Repurposing Leftovers
Shred the beef and mix with gravy for incredible sandwiches or tacos. The gravy also makes a fantastic base for beef stew. I love turning leftovers into a new meal—waste not, want not!
Nutrition Facts
Frequently Asked Questions
What cut can I use instead of top blade?
Chuck roast is the best substitute—it has similar marbling and becomes just as tender. Brisket or round roast also work well for braising.
Can I make this in a slow cooker?
Yes! Sear the roast first, then cook on low for 8 hours or high for 5-6 hours. The results will be just as delicious.
Why is my gravy too thin?
Simmer it uncovered for 5-10 minutes to reduce. For a quicker fix, mix 1 tbsp cornstarch with cold water and stir in.
How do I know when it’s done?
The meat should reach 195-205°F internally and shred easily with a fork. This ensures perfect tenderness.

- 4C Bread Crumbs Meatballs Recipe: Crispy Crust and Juicy Centers - September 25, 2026
- 6 Oz Chocolate Chip Cookie Recipe: Perfectly Balanced Crispy Edges and Chewy Hearts - September 25, 2026
- 6-Inch Coffee Cake Recipe: Vanilla Bean Swirls and Buttery Streusel Topping - September 25, 2026