
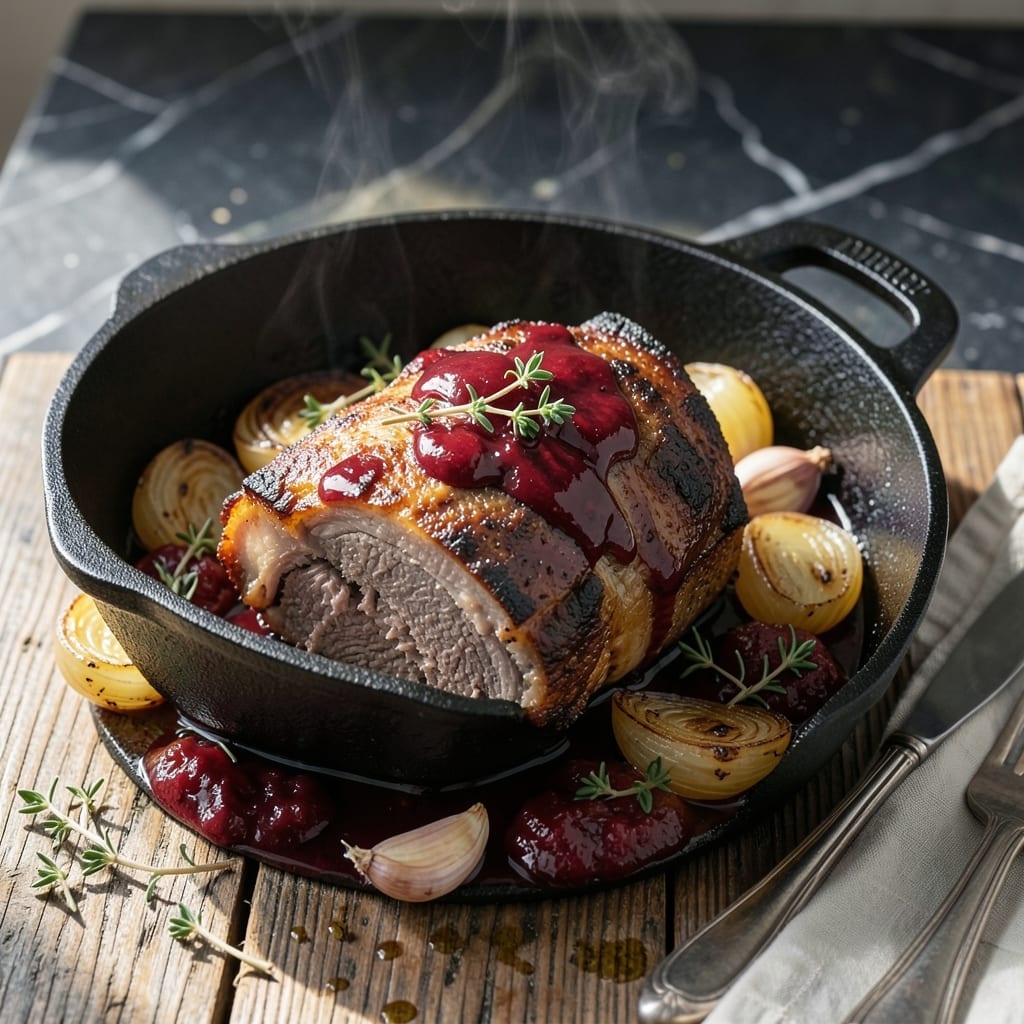
This Dutch oven pot roast delivers the rich, comforting flavors that made it a top-rated favorite. The secret lies in the slow braising process that transforms tough cuts into fall-apart tender meat.
Caramelized onions build a deep, sweet foundation while the liquid reduces into a velvety gravy. I’ve refined this method over years of Sunday dinners to ensure consistent, restaurant-quality results every time.
The Dutch oven distributes heat evenly, allowing the roast to cook low and slow for 3-4 hours. This hands-off approach guarantees meat so tender it nearly melts in your mouth.
Serve with mashed potatoes or crusty bread to soak up every drop of flavor. The aroma alone will have everyone gathering around the table.
Ingredients for Top Rated Pot Roast
A few quality ingredients transform into something extraordinary with time and low heat.
| Ingredient | Amount | Notes |
|---|---|---|
| Chuck Roast 🥩 | 3 lb | Well-marbled for tenderness |
| Yellow Onions 🧅 | 3 whole | Thinly sliced for caramelizing |
| Garlic Cloves 🧄 | 6 cloves | Minced for depth of flavor |
| Beef Broth 🥣 | 2 cups | Low-sodium preferred |
| Red Wine 🍷 | 1 cup | Dry variety like Cabernet |
| Tomato Paste 🍅 | 2 tbsp | For umami richness |
| Worcestershire Sauce 💧 | 1 tbsp | Adds savory complexity |
| Fresh Thyme 🌿 | 2 tsp | Chopped, or 1 tsp dried |
| Bay Leaves 🍃 | 2 whole | For aromatic infusion |
| Carrots 🥕 | 4 whole | Cut into large chunks |
| Celery Stalks 🥬 | 3 whole | Cut into large chunks |
| Olive Oil 🫒 | 2 tbsp | For searing the roast |
| Salt 🧂 | 1 ½ tsp | Kosher or sea salt |
| Black Pepper 🌶️ | 1 tsp | Freshly ground preferred |
The chuck roast is non-negotiable here. Look for heavy marbling—that fat renders down, keeping the meat moist during the long braise. Costco has great options, or ask your butcher for a well-marbled piece. The onions should be yellow (the good old reliable kind) and sliced thin for even caramelization. It’s a slow process, but worth every minute for that deep, sweet foundation.
No red wine? Extra beef broth with a splash of balsamic vinegar works in a pinch. Short on time? Swap fresh thyme for dried (use one-third the amount). The Worcestershire sauce adds serious depth—Annie’s or Lea & Perrins are solid choices. If you’re missing tomato paste, a tablespoon of ketchup (yes, really) can sub, but the paste is better for that concentrated flavor.
This pot roast actually improves overnight—flavors meld and deepen. Keeps 4-5 days in the fridge, freezes beautifully for 3 months. I always make extra gravy to drizzle over mashed potatoes the next day. The leftovers might be even better than the first serving.
Why You’ll Love This Recipe
- Set It and Forget: I toss everything in the Dutch oven in the morning and dinner’s ready when we walk in the door.
- Deep, Rich Flavor: The red wine and beef broth turn the chuck roast so tender it practically melts, and the garlic and onions build layers that taste like Sunday dinner every time.
- Feeds Us Twice: One roast gives us dinner tonight plus sandwiches for lunch tomorrow—honestly, the leftovers might be even better.
- Budget Hero: A big cut of chuck and pantry staples stretch to feed a crowd without breaking the bank.
Step-by-Step Instructions for Dutch Oven Braised Pot Roast With Caramelized Onions
This method transforms tough chuck roast into fall-apart tender perfection with rich, deep flavors.
Step 1: Sear the Chuck Roast
Heat the 2 tbsp olive oil in a Dutch oven over medium-high heat until it shimmers. Pat the 3 lb chuck roast dry with paper towels, then season generously with the 1.5 tsp salt and 1 tsp black pepper. I press the seasoning in firmly so it adheres well to the meat’s surface.
Sear the roast for 4-5 minutes per side until deeply browned on all surfaces. You’ll know it’s ready to flip when it releases easily from the pot. This high-heat sear creates a flavorful fond that becomes the base of your braising liquid. Don’t rush this step—proper browning equals maximum flavor.
Step 2: Caramelize the Onions and Build the Base
Remove the chuck roast and set aside. In the same pot, add the 3 whole yellow onions (thinly sliced). Cook over medium heat for 10-12 minutes, stirring occasionally, until they turn a deep amber color. The natural sugars will caramelize, creating a sweet foundation for the braise.
Add the 6 cloves garlic cloves (minced), 2 tbsp tomato paste, and 1 tbsp Worcestershire sauce. Stir for 1-2 minutes until the tomato paste darkens slightly. This step intensifies the umami flavors that will penetrate the meat during braising. The mixture should be fragrant and starting to stick to the bottom of the pot.
Step 3: Deglaze and Add Aromatics
Pour in the 1 cup red wine, scraping up all the browned bits from the bottom with a wooden spoon. Let it simmer for 3-4 minutes until reduced by half. The alcohol cooks off, leaving behind concentrated flavor. This deglazing step is crucial—it incorporates all those caramelized onion and meat juices into the sauce.
Add the 2 cups beef broth, 2 tsp fresh thyme, and 2 whole bay leaves. Return the chuck roast to the pot along with any accumulated juices. The liquid should come about two-thirds up the side of the meat. If it doesn’t, add a bit more beef broth—this ensures even cooking and prevents drying out.
Step 4: Braise with Vegetables
Add the 4 whole carrots (cut into large chunks) and 3 whole celery stalks (cut into large chunks) to the pot. The vegetables will soften and absorb the rich braising liquid, adding depth to both the dish and the sauce. Bring everything to a gentle simmer.
Cover the Dutch oven and transfer to a preheated 325°F oven. Braise for 3 to 3.5 hours, turning the chuck roast every hour. You’ll know it’s done when a fork slides in with no resistance and the meat shreds easily. The onions should be jammy, and the carrots and celery should be fork-tender.
Step 5: Rest and Serve
Carefully remove the chuck roast from the pot and transfer to a cutting board. Skim any excess fat from the surface of the braising liquid, then simmer for 5 minutes to thicken slightly. The sauce should coat the back of a spoon but still be pourable.
Slice the chuck roast against the grain into thick pieces or shred with forks. Arrange on a platter and spoon the vegetables and sauce over the top. Let it rest for 10 minutes before serving—this allows the juices to redistribute for maximum tenderness. The sauce should be rich, deeply flavored, and perfect for soaking into mashed potatoes or crusty bread.
Pro Tips For Making Top Rated Pot Roast
- Sear the Chuck: I learned this the hard way—brown that chuck roast hard in batches, about 4-5 minutes per side, until it forms a dark crust. Sounds tedious, but it builds the deep flavor that makes pot roast unforgettable.
- Deglaze with Wine: After searing, pour in that red wine and scrape the bottom of the pot like your dinner depends on it. Those browned bits are pure flavor waiting to infuse your broth.
- Don’t Rush the Cook: My first few attempts were tough because I cranked the heat to speed it up. Low and slow—3 to 4 hours at 325°F—turns that chuck roast buttery and fall-apart tender.
- Use Enough Liquid: I used to skimp on the beef broth, and the onions would burn before the meat was done. Cover about two-thirds of the roast with liquid—about 3-4 cups—to keep everything moist and cooking evenly.
Essential Equipment for Great top rated pot roast
Dutch Oven Essentials
I swear by my 5.5-quart Le Creuset Dutch oven for even heat distribution and retention. The heavy enamel-coated cast iron maintains steady 325°F for hours. A tight-fitting lid traps moisture, which is key for that fall-apart texture. 🔥
Thermometer Importance
An instant-read thermometer like ThermoWorks Dot ensures your roast hits the perfect internal temp. I check for 195-205°F in the thickest part. This small investment prevents overcooking and guarantees consistent results every time.
Wooden Spoon Necessity
A high-quality wooden spoon won’t scratch your Dutch oven’s surface while deglazing. I use mine to scrape up all those flavorful browned bits when adding the red wine. The flat edge gets into corners better than silicone or metal utensils.
Sharp Knife
For slicing the finished roast, a 8-inch chef’s knife like Wüsthof Classic gives clean cuts. Slice against the grain into ½-inch thick pieces. A sharp blade prevents tearing the tender meat and makes for beautiful presentation.
Cutting Board
A large, stable cutting board with a juice groove catches all the precious drippings. I prefer bamboo or maple for durability. The groove prevents messy spills when transferring the roast from Dutch oven to serving platter.
Tongs for Turning
Long 12-inch locking tongs let you turn the roast without piercing it. I use mine to rotate the meat every hour during braising. This ensures even cooking and prevents the bottom from sticking to the pot.
Nutrition Facts
Frequently Asked Questions
What cut works best for braising?
Chuck roast is ideal for its marbling and connective tissue. The fat renders down during the long cook, creating that fall-apart tenderness. Avoid lean cuts like sirloin as they dry out.
Can I use a slow cooker instead?
Yes! Sear the meat first, then transfer to a slow cooker with all ingredients. Cook on low for 8-10 hours or high for 5-6 hours. The flavor won’t be as concentrated as Dutch oven braising.
Why is my roast tough?
It likely didn’t cook long enough. The collagen needs 3-4 hours at 325°F to fully break down. Also, ensure there’s enough liquid to cover two-thirds of the meat.
What can I substitute for red wine?
Use extra beef broth with 1 tbsp balsamic vinegar for acidity. In a pinch, apple cider vinegar works too. The flavor profile will be slightly different but still delicious.

- 4C Bread Crumbs Meatballs Recipe: Crispy Crust and Juicy Centers - September 25, 2026
- 6 Oz Chocolate Chip Cookie Recipe: Perfectly Balanced Crispy Edges and Chewy Hearts - September 25, 2026
- 6-Inch Coffee Cake Recipe: Vanilla Bean Swirls and Buttery Streusel Topping - September 25, 2026