
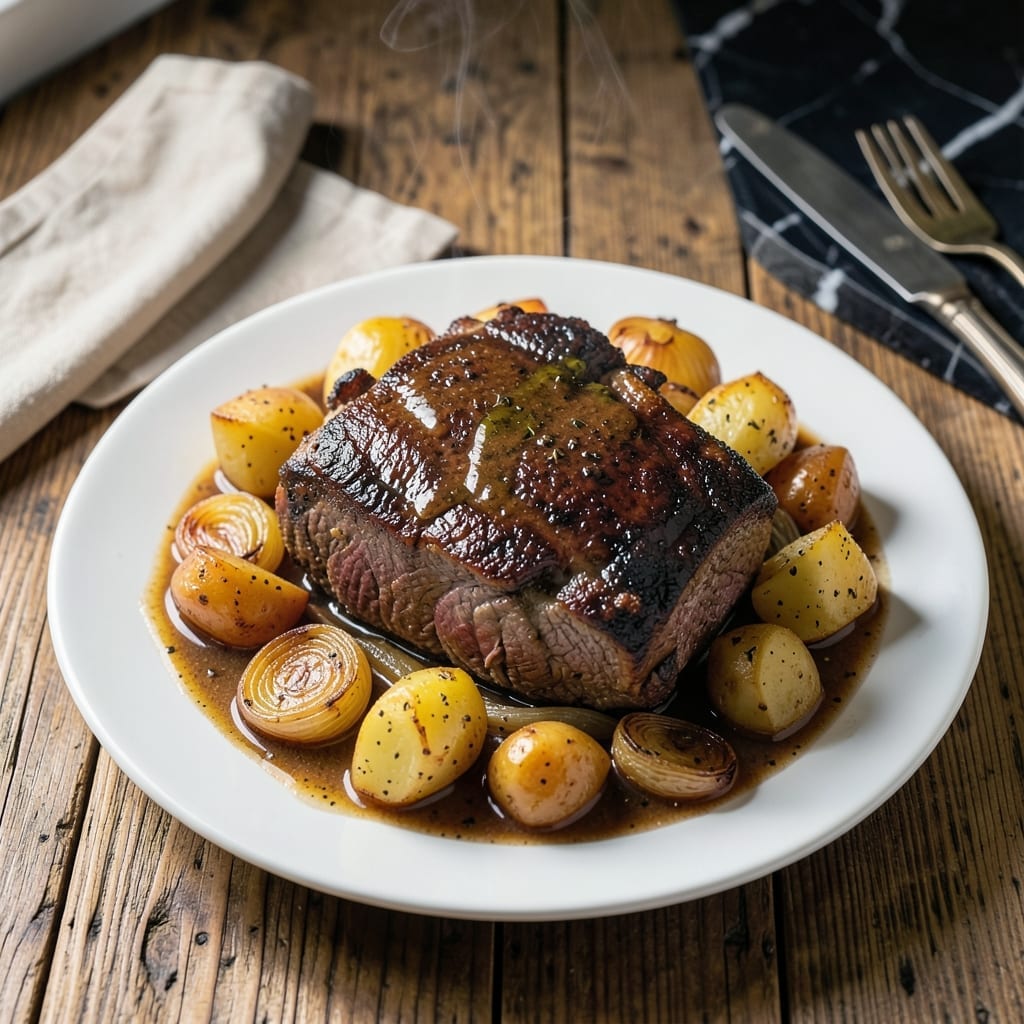
Sunday dinner just got better with this slow-cooked classic that fills your home with incredible aromas. The beef transforms into tender, fall-apart perfection while the vegetables soak up all that rich flavor.
This traditional method uses simple ingredients and time to create something extraordinary. A 3-hour braise works magic on tough cuts, turning them into melt-in-your-mouth deliciousness that tastes like love on a plate.
You’ll end up with juicy beef, perfectly soft carrots and potatoes, all swimming in a gravy so good you’ll want to drink it. It’s the kind of meal that brings everyone to the table.
Serve with crusty bread to soak up every last drop. This is comfort food at its finest.
Ingredients for Traditional Beef Pot Roast
Sunday dinner starts with chuck roast, vegetables, and a few pantry staples for that melt-in-your-mouth magic.
| Ingredient | Amount | Notes |
|---|---|---|
| Chuck Roast 🥩 | 3 lb | Well-marbled, trimmed of excess fat |
| Kosher Salt 🧂 | 2 tsp | Diamond Crystal preferred for even seasoning |
| Black Pepper 🌶️ | 1 tsp | Freshly ground for best flavor |
| All-Purpose Flour 🌾 | ¼ cup | For thickening gravy later |
| Olive Oil 🫒 | 2 tbsp | Divided for searing and vegetables |
| Yellow Onions 🧅 | 2 whole | Large, quartered for depth |
| Carrots 🥕 | 4 whole | Peeled, cut into 2-inch chunks |
| Yukon Gold Potatoes 🥔 | 1 ½ lb | Peeled, halved if small |
| Garlic Cloves 🧄 | 5 cloves | Smashed for bold flavor |
| Beef Stock 🥘 | 2 cups | Low-sodium preferred for control |
| Dry Red Wine 🍷 | 1 cup | Bold variety like Cabernet |
| Tomato Paste 🍅 | 2 tbsp | For umami depth in gravy |
| Fresh Thyme Sprigs 🌿 | 3 whole | Tied with twine for easy removal |
| Bay Leaves 🍃 | 2 whole | Dried, for aromatic base |
| Fresh Parsley 🌿 | ¼ cup | Chopped, for finishing garnish |
The beef is everything here. Chuck roast with good marbling (look for white streaks in the meat) gives you that fall-apart texture. Whole Foods or Costco have great options—ask the butcher for a well-marbled piece if you’re unsure. The potatoes should be Yukon Gold (they hold shape better than Russets). Don’t skip the wine; it adds depth you can’t fake (any bold red works, even that half-empty bottle from last weekend).
No red wine? Beef broth with a splash of balsamic vinegar gets you 80% there. Fresh thyme is ideal but dried works at one-third the amount. Swap Yukon Golds for red potatoes if that’s what’s in your bin. The tomato paste can be from a can or those Trader Joe’s squeeze tubes (zero waste). If you’re out of fresh garlic, jarred minced works in a pinch (but fresh is always better).
This tastes even better the next day once all the flavors meld. Keeps in the fridge for 4-5 days, freezes for 3 months. I always make extra gravy—it’s perfect over mashed potatoes or for dipping that crusty bread promised in the intro.
Why You’ll Love This Recipe
- Set It and Forget: Honestly, after searing the chuck roast and tossing in the basics, the oven does all the work.
- Rich and Tender: That slow-cooked chuck roast soaks up the olive oil and flour crust into every bite.
- Sunday or Wednesday: I’ll make this for company or just because it’s Tuesday and we deserve comfort food.
- Leftovers for Days: One roast stretches to sandwiches, tacos, or stew—my wallet and my freezer both thank me.
Step-by-Step Instructions for Beef Pot Roast
This traditional method delivers fork-tender meat and rich, velvety gravy every time.
Step 1: Season and Sear the Chuck Roast
Pat the 3 lb chuck roast completely dry with paper towels—this ensures a proper sear. Season all sides aggressively with the 2 tsp kosher salt and 1 tsp black pepper. I use Diamond Crystal kosher salt for its clean, even distribution.
Heat 1 tbsp olive oil in a Dutch oven over medium-high heat until shimmering. Sear the roast for 4-5 minutes per side until deeply browned. You want a crust so dark it looks almost burnt—that’s where the flavor develops. Remove the roast and set aside.
Step 2: Sauté the Aromatic Vegetables
In the same pot, add the remaining 1 tbsp olive oil. Toss in the 2 whole yellow onions (quartered), 4 whole carrots (cut into 2-inch chunks), and 1.5 lb Yukon Gold potatoes (peeled and halved). Cook for 5-7 minutes until the onions start to soften and brown.
Add the 5 cloves garlic cloves (smashed) and cook for 30 seconds until fragrant. Stir in the 2 tbsp tomato paste and cook for 1-2 minutes until it darkens slightly. This builds the base for your gravy’s deep, savory flavor.
Step 3: Deglaze and Build the Braising Liquid
Pour in the 1 cup dry red wine and scrape up all the browned bits from the bottom of the pot. Let it simmer for 3-4 minutes until reduced by half. This step captures all the fond (those delicious browned bits) for maximum flavor.
Add the 2 cups beef stock, 3 whole fresh thyme sprigs (tied with twine), and 2 whole bay leaves. Return the seared roast to the pot. The liquid should come about halfway up the meat. If it doesn’t, add a splash of water.
Step 4: Braise Until Fork-Tender
Bring the liquid to a simmer, then cover and transfer to a 325°F oven. Braise for 2.5-3 hours until the chuck roast is fork-tender and easily pulls apart. I check at the 2.5-hour mark—your nose will tell you it’s ready when the aroma fills your kitchen.
Carefully remove the roast and set it aside. Skim any excess fat from the surface of the braising liquid. For the gravy, whisk in the 0.25 cup all-purpose flour and simmer for 5 minutes until thickened to your desired consistency.
Step 5: Rest, Slice, and Serve
Let the roast rest for 15 minutes before slicing against the grain. This allows the juices to redistribute, ensuring every bite is moist and flavorful. Serve the sliced roast with the vegetables and gravy spooned over the top.
Garnish with the 0.25 cup fresh parsley (chopped) for a pop of color and freshness. The meat should fall apart with a gentle nudge, and the gravy should be rich and velvety, coating every piece beautifully.
Pro Tips For Making Traditional Beef Pot Roast
- Pat It Dry: Dab the chuck roast thoroughly with paper towels before seasoning—wet meat won’t sear properly, and you’ll end up with a pale, steamed exterior instead of that deep brown crust.
- Sear in Batches: Don’t crowd the pan when browning the floured roast; cook it in two batches if needed. I learned this the hard way—overcrowding drops the pan’s temperature, and the flour turns gummy instead of crisp.
- Use a Heavy Pot: A Dutch oven or enameled cast iron distributes heat evenly and holds it, which keeps the braise steady. Thin pots lead to hot spots and uneven cooking—your roast will be dry on one end and tough on the other.
- Let It Rest: After pulling the pot roast from the oven, resist the urge to slice it immediately—give it a solid 15 minutes under foil so the juices redistribute. Sounds tedious, but it’s the only way to guarantee tender, moist meat.
Essential Equipment for This Dish
Dutch Oven Essentials
I swear by my 5.5-quart Le Creuset for this dish—its heavy enameled cast iron distributes heat evenly and retains it perfectly. The tight-fitting lid traps steam, which is crucial for that fall-apart tenderness. If you’re on a budget, Lodge’s enameled Dutch oven works just as well for a fraction of the price. 💛
Quality Knives Matter
A sharp 8-inch chef’s knife makes prepping the vegetables quick and safe. I use Wüsthof for its balance and durability. Don’t overlook a good paring knife for trimming fat from the chuck roast—this small step makes a big difference in texture.
Measuring Tools
Accurate measurements ensure consistent results. I keep OXO Good Grips measuring cups and spoons in my drawer for the flour, salt, and pepper. A liquid measuring cup with clear markings helps with the wine and stock—eyeballing can lead to uneven braising liquid.
Thermometer for Perfection
While not strictly necessary, a instant-read thermometer takes the guesswork out of knowing when your roast is done. I use ThermoWorks’ ThermoPop—it’s fast, accurate, and affordable. The beef is ready when it hits 195-205°F internally. 🌡️
Wooden Spoons
Wooden spoons won’t scratch your Dutch oven’s surface while stirring the braising liquid. I prefer bamboo spoons because they’re sturdy and won’t absorb flavors. They’re also gentle on your cookware, which helps it last longer.
Resting Equipment
Let your roast rest on a carving board with a groove to catch juices. I use a bamboo board with a drip channel—it keeps my counter clean while the meat reabsorbs its juices. This small step ensures every bite is as juicy as possible.
Nutrition Facts
Frequently Asked Questions
What’s the best cut for this dish?
Chuck roast is ideal for its marbling and connective tissue. These break down during the 2.5-3 hour braise, creating tender, flavorful meat. Avoid lean cuts like sirloin.
Can I make this on the stovetop?
Yes! After searing, cover and simmer on low heat for the same 2.5-3 hours. Check occasionally to ensure liquid doesn’t evaporate. A heavy pot with a tight lid works best.
How do I prevent dry meat?
Don’t skip the sear—it locks in juices. Also, resist the urge to peek while braising. Let it rest 15 minutes before slicing to redistribute those precious juices.
Can I add other vegetables?
Try parsnips, mushrooms, or turnips. Add heartier veggies at the start; delicate ones like peas should go in during the last 30 minutes.

- 4C Bread Crumbs Meatballs Recipe: Crispy Crust and Juicy Centers - September 25, 2026
- 6 Oz Chocolate Chip Cookie Recipe: Perfectly Balanced Crispy Edges and Chewy Hearts - September 25, 2026
- 6-Inch Coffee Cake Recipe: Vanilla Bean Swirls and Buttery Streusel Topping - September 25, 2026