
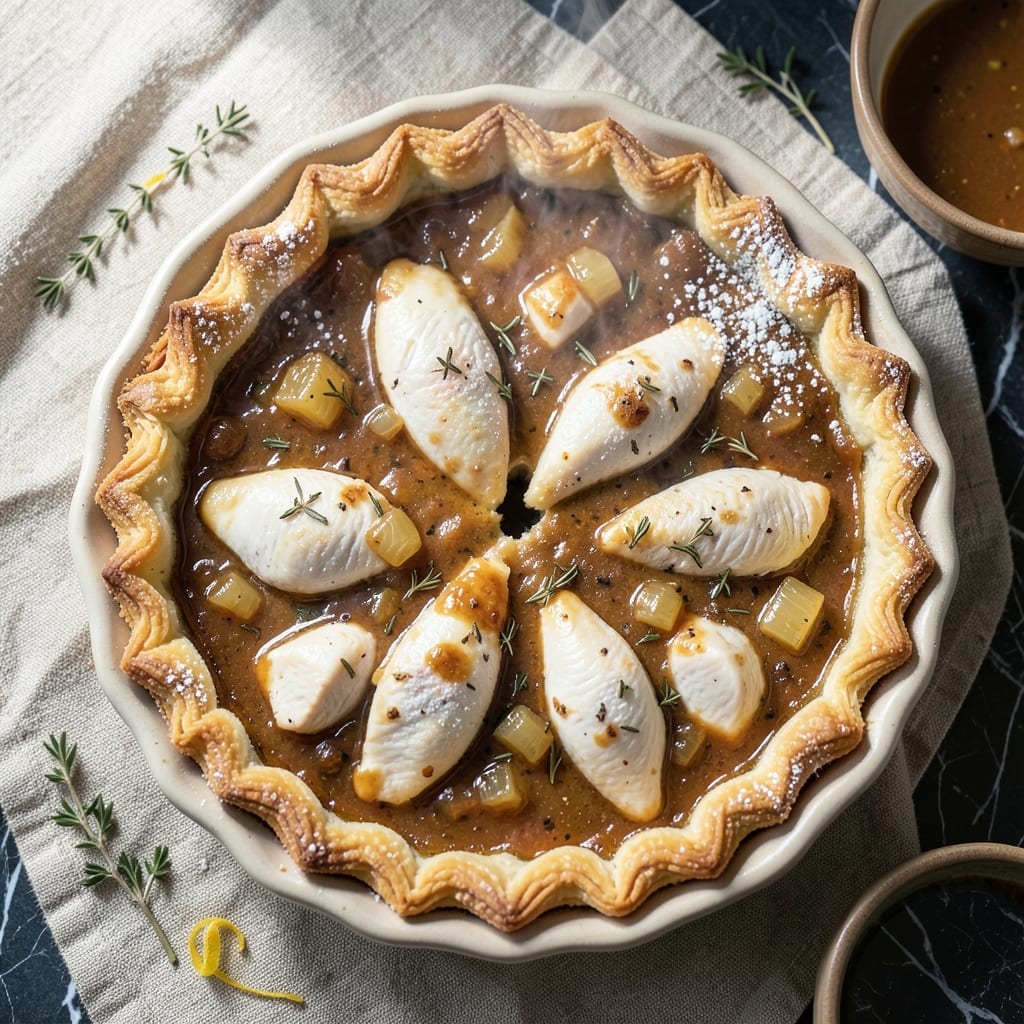
There’s nothing quite like a traditional pot pie with its flaky crust and hearty filling to bring comfort to the table. This version stays true to classic techniques while ensuring every bite delivers that nostalgic satisfaction.
The filling combines tender chunks of chicken and vegetables in a rich, creamy sauce that bubbles up through the lattice crust. I’ve refined the method to guarantee a golden, crisp top without a soggy bottom.
What sets this apart is the attention to detail—properly seasoned filling and a perfectly woven crust that looks as impressive as it tastes. It’s the kind of dish that feels like a warm hug on a chilly evening.
Serve it straight from the oven for a meal that’s both nourishing and deeply satisfying. Here’s how to make it right.
Ingredients for Traditional Pot Pie
Classic comfort in a dish with flaky crust and hearty filling ingredients.
| Ingredient | Amount | Notes |
|---|---|---|
| All-Purpose Flour 🌾 | 3 cups | Divided for crust and filling |
| Unsalted Butter 🧈 | 1 cup | Cold, cubed for crust |
| Ice Water 💧 | ½ cup | For pie dough moisture |
| Salt 🧂 | 1 ½ tsp | Divided for dough and filling |
| Boneless Chicken Breast 🍗 | 1 ½ lb | Diced into bite-sized pieces |
| Yellow Onion 🧅 | 1 whole | Medium, finely diced |
| Carrots 🥕 | 2 whole | Peeled and sliced |
| Celery Stalks 🥬 | 2 whole | Diced for filling |
| Frozen Peas 🌱 | 1 cup | No need to thaw |
| Garlic Cloves 🧄 | 3 cloves | Minced for sauce |
| Chicken Broth 🥣 | 1 ½ cups | Low-sodium preferred |
| Whole Milk 🥛 | 1 cup | For creamy sauce |
| Heavy Cream 🥛 | ½ cup | Full-fat for richness |
| Black Pepper 🌶️ | 1 tsp | Freshly ground preferred |
| Dried Thyme 🌿 | ½ tsp | For aromatic depth |
The crust demands cold butter—Land O’Lakes or Kerrygold work beautifully. Use all-purpose flour with a high protein content (look for King Arthur or Gold Medal on the label) for the best structure. For the chicken, boneless, skinless breasts stay juicy if you don’t overcook them. The vegetables should be fresh, with carrots and celery providing that classic mirepoix base (the good stuff, not the pre-cut kind).
No chicken? Rotisserie chicken at half the amount saves time. Vegetarian? Swap in cremini mushrooms or chickpeas for heartiness. Out of thyme? Poultry seasoning at the same amount works. The milk and cream can be 2% and half-and-half if you’re cutting calories (but full-fat tastes better). Fresh peas are lovely, but frozen is fine—no need to thaw before adding.
The dough keeps in the fridge for 3 days or freezes for 1 month. The filling can be prepped a day ahead—just cool it completely before assembling. Baked pot pie stays fresh for 3-4 days in the fridge (reheat in the oven, not the microwave).
Why You’ll Love This Recipe
- One Pan Magic: The buttery crust comes together with just flour, butter, and ice water—no fancy techniques, just a fork and a bowl.
- That Golden Crust: The flaky layers from the butter and the savory chicken filling make every bite ridiculously good.
- Feeds the Crew: I make a big batch on Sunday and we’re set for leftovers that taste even better the next day.
- Budget Friendly: Boneless chicken breast stretches far, and the simple pantry staples keep costs low. Honestly, it’s my go-to for tight weeks.
Step-by-Step Instructions for Traditional Pot Pie
This method delivers a flaky golden crust and rich, creamy filling that defines classic comfort food.
Step 1: Prepare the Pie Dough
In a large bowl, combine 3 cups all-purpose flour and ½ tsp salt. Add 1 cup cold, cubed unsalted butter and cut it into the flour using a pastry cutter or your fingers until the mixture resembles coarse crumbs with pea-sized butter pieces visible.
Gradually add ½ cup ice water, one tablespoon at a time, mixing just until the dough comes together. Overworking the dough will make it tough. Divide the dough into two equal portions, shape into discs, wrap in plastic, and refrigerate for 1 hour.
Step 2: Make the Filling Base
In a large pot, melt 2 tablespoons unsalted butter over medium heat. Add the finely diced yellow onion, sliced carrots, and diced celery stalks. Cook for 8-10 minutes until the vegetables are softened but not browned.
Stir in the minced 3 cloves garlic cloves and cook for 30 seconds until fragrant. Sprinkle 2 tablespoons all-purpose flour over the vegetables and stir to coat. This creates a roux that will thicken your filling beautifully.
Step 3: Build the Creamy Chicken Filling
Slowly pour in 1.5 cups chicken broth, 1 cup whole milk, and ½ cup heavy cream, whisking constantly to prevent lumps. Add the diced 1.5 lb boneless chicken breast, 1 cup frozen peas, 1 tsp black pepper, and ½ tsp dried thyme.
Bring to a gentle simmer and cook for 15-20 minutes, stirring occasionally, until the chicken is cooked through and the sauce has thickened enough to coat the back of a spoon. Taste and adjust seasoning with the remaining 1 tsp salt if needed.
Step 4: Assemble and Bake the Pot Pie
Roll out one disc of dough on a lightly floured surface to fit a 9-inch pie dish. Transfer to the dish, pressing gently into the bottom and up the sides. Pour in the cooled filling—it should be just below the rim.
Roll out the second disc and cut into strips for a lattice top, or use as a full crust with slits cut for steam to escape. Crimp the edges to seal. Brush with a little milk for extra browning. Bake at 375°F for 45-50 minutes until the crust is golden brown and the filling is bubbling.
Step 5: Rest and Serve
Let the pot pie rest for 15 minutes after removing from the oven. This allows the filling to set slightly, making it easier to serve neat portions. The crust should be flaky and golden, with a rich, creamy filling that clings to your spoon.
Serve warm, with each portion showcasing the beautiful lattice crust and hearty filling beneath. The contrast between the crisp top and creamy interior defines this traditional dish.
Pro Tips For Making Traditional Pot Pie
- Chill the Dough: Keep your butter cold when making the crust—work quickly and pop the dough in the fridge for 15 minutes if it starts feeling sticky. I learned this the hard way after my first few crusts turned tough instead of flaky.
- Poach the Chicken: Simmer the boneless chicken breast in your pot pie filling liquid until just cooked through (165°F), then shred it. This keeps the meat juicy and infuses extra flavor, unlike dry, overcooked cubes.
- Vent the Top: Cut a few small slits in the top crust before baking—steam needs to escape or you’ll end up with a soggy mess under that golden layer. Sounds obvious, but I skipped it once and ruined a perfect pot pie.
- Use Ice Water: Always use ice-cold water for the dough—about 4-6 tablespoons mixed with the flour and butter. This creates pockets of steam for a lighter crust, and yes, even a few degrees warmer actually changes the outcome.
Storing and Reheating This traditional pot pie
Refrigerator Storage
Let your pot pie cool completely before covering with plastic wrap or transferring to an airtight container. It keeps beautifully in the fridge at 40°F or below for up to 3-4 days. The flavors deepen as it rests, making leftovers just as delicious. ❄️
Freezer Storage
For longer storage, wrap individual slices or the whole pie tightly in plastic wrap, then foil. Freeze for up to 3 months without quality loss. I always label with the date—I use Glad Press’n Seal for maximum freshness.
Oven Reheating
Preheat oven to 350°F and place pot pie on a baking sheet. Cover with foil and heat for 20-25 minutes (or 30-35 minutes if frozen). Remove foil for the last 5 minutes to crisp the crust. This method preserves that flaky texture. 🔥
Portion Reheating
For single servings, microwave on 50% power for 2-3 minutes, checking frequently. Add a splash of milk or broth to maintain creaminess. Avoid high power—it makes the crust rubbery.
I prefer the oven method for best texture, but the microwave works in a pinch.
Nutrition Facts
Frequently Asked Questions
Can I use store-bought pie crust?
Yes, but the texture won’t be as flaky. If using pre-made, choose all-butter crust for best flavor. Thaw it first, and roll it slightly thinner for even baking.
How do I prevent a soggy bottom crust?
Pre-bake the bottom crust for 10 minutes before adding filling. Also, ensure the filling is cooled slightly so it doesn’t release excess moisture during baking.
Can I make this ahead of time?
Assemble the pie, cover tightly, and refrigerate for up to 12 hours before baking. Or freeze unbaked for up to 1 month—bake straight from frozen, adding 10-15 minutes.
Why did my filling turn out watery?
Likely the roux wasn’t cooked long enough or the filling wasn’t thick enough before baking. Simmer until it coats the spoon, and let the pie rest 15 minutes after baking.

- 4C Bread Crumbs Meatballs Recipe: Crispy Crust and Juicy Centers - September 25, 2026
- 6 Oz Chocolate Chip Cookie Recipe: Perfectly Balanced Crispy Edges and Chewy Hearts - September 25, 2026
- 6-Inch Coffee Cake Recipe: Vanilla Bean Swirls and Buttery Streusel Topping - September 25, 2026