
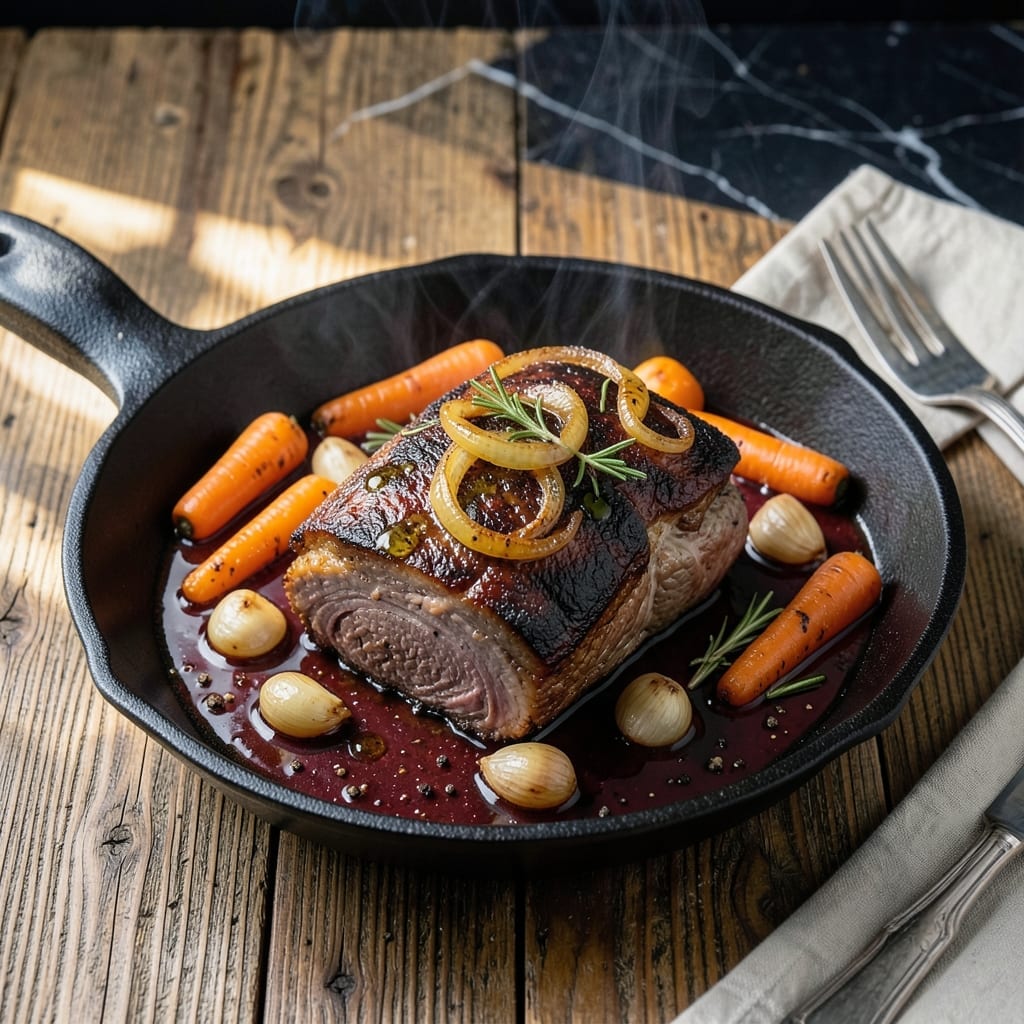
There’s nothing quite like the deep, smoky flavor a Traeger brings to a classic pot roast. This method transforms tough cuts into tender, fall-apart meat that soaks up every bit of wood-fired goodness.
The secret lies in low and slow cooking with the right wood pellet blend. I’ve perfected this technique to ensure the roast stays juicy while developing a rich, caramelized crust on the outside.
What you’ll get is a meal that’s hearty, flavorful, and impossible to resist. The smoky aroma alone will have everyone gathering around the table well before it’s done.
With just a few hours and simple ingredients, this dish delivers results that taste like they came from a professional pitmaster.
Ingredients for Traeger Pot Roast
Simple, hearty ingredients come together for wood-fired perfection on your Traeger.
| Ingredient | Amount | Notes |
|---|---|---|
| Chuck Roast 🥩 | 3 lb | Well-marbled, boneless preferred |
| Kosher Salt 🧂 | 1 ½ tbsp | Diamond Crystal preferred for even seasoning |
| Coarse Black Pepper 🌶️ | 1 tbsp | Freshly ground for maximum flavor |
| Garlic Cloves 🧄 | 6 cloves | Peeled, smashed for robust flavor |
| Yellow Onion 🧅 | 2 whole | Large, quartered with skin on |
| Carrots 🥕 | 4 whole | Peeled, cut into 2-inch chunks |
| Russet Potatoes 🥔 | 1 ½ lb | Peeled, cut into large chunks |
| Beef Broth 🥣 | 2 cups | Low-sodium preferred for seasoning control |
| Worcestershire Sauce 🫒 | 2 tbsp | Adds umami depth to the braising liquid |
| Tomato Paste 🍅 | 2 tbsp | For richness and body in the sauce |
| Dried Thyme 🌿 | 1 tsp | Crushed between fingers to release oils |
| Dried Rosemary 🍃 | 1 tsp | Crushed to enhance aromatic qualities |
| Bay Leaves 🌿 | 2 whole | For subtle earthy background notes |
| Olive Oil 🫒 | 2 tbsp | For searing the roast initially |
| Apple Cider Vinegar 🍏 | 1 tbsp | Balances richness with subtle acidity |
The chuck roast is non-negotiable here—it’s the marbling that renders down during the long cook, basting the meat from within. Source from a reputable butcher or Whole Foods for grass-fed options if available. The potatoes should be starchy (Russets or Yukon Golds) to soak up the braising liquid without turning to mush. For the broth, Better Than Bouillon beef base (dissolved in hot water) delivers superior depth to canned versions.
No chuck roast? Brisket or short ribs work but require adjusted cook times. Out of fresh garlic? Granulated garlic at one-third the amount in a pinch. Vegetable broth can sub for beef broth, though the flavor profile will shift. Balsamic vinegar stands in for apple cider vinegar if needed. The Worcestershire can be omitted, but add an extra teaspoon of soy sauce to compensate for the umami loss.
The roast can rest in its juices for up to 2 hours before serving—flavor only improves. Leftovers keep 4 days refrigerated or freeze for 3 months. Reheat gently in the braising liquid to maintain moisture (don’t skip this part).
Why You’ll Love This Recipe
- Set It and Forget: The Traeger does all the work—I just season the chuck roast, toss in the garlic and onions, and walk away.
- Smoky and Rich: The wood-fired flavor turns that simple chuck roast into something deep and crave-worthy, especially with the garlic and onion melting into every bite.
- Feeds the Whole Crew: One big chuck roast means Sunday supper plus leftovers for sandwiches or tacos the next day.
- Budget Beef Win: Chuck roast is cheap, but after hours on the Traeger it tastes like a fancy cut—honestly, my wallet and my taste buds both thank me.
Step-by-Step Instructions for Smoky Wood-Fired Pot Roast
Master the technique for fall-apart tender meat and rich, smoky depth in every bite.
Step 1: Season and Sear the Chuck Roast
Pat the 3 lb chuck roast completely dry with paper towels—this ensures a proper sear. Season all sides aggressively with the 1.5 tbsp kosher salt and 1 tbsp coarse black pepper. I always use my hands to press the seasoning into the meat so it adheres well.
Heat the 2 tbsp olive oil in a cast-iron skillet over high heat until shimmering. Sear the roast for 4-5 minutes per side until deeply browned. This step creates a flavorful crust that will translate into rich depth during the braising process. Transfer the seared roast to a plate and set aside.
Step 2: Build the Aromatic Base
In the same skillet, add the 2 whole yellow onion (quartered with skin on), 4 whole carrots (cut into 2-inch chunks), and the 6 cloves garlic cloves (peeled and smashed). Cook over medium heat for 5 minutes, stirring occasionally, until the onions begin to soften and the garlic is fragrant.
Stir in the 2 tbsp tomato paste and cook for 1-2 minutes until it deepens in color. This step intensifies the umami flavor and helps thicken the braising liquid. Pour in the 1 tbsp apple cider vinegar to deglaze the pan, scraping up any browned bits with a wooden spoon.
Step 3: Combine and Braise on the Traeger
Transfer the vegetable mixture to a Dutch oven or heavy pot. Place the seared chuck roast on top of the vegetables. Pour in the 2 cups beef broth and 2 tbsp Worcestershire sauce. Sprinkle the 1 tsp dried thyme, 1 tsp dried rosemary, and add the 2 whole bay leaves around the roast.
Cover the pot tightly with a lid or foil. Preheat your Traeger to 275°F using your preferred wood (hickory or oak work beautifully). Place the pot on the grill grates and smoke for 3-4 hours, or until the roast is fork-tender and easily pulls apart. Check occasionally and add a splash of water or broth if the liquid level gets too low.
Step 4: Add Potatoes and Finish
After the roast has cooked for 2 hours, add the 1.5 lb russet potatoes (peeled and cut into large chunks) to the pot, submerging them in the braising liquid as much as possible. This timing ensures the potatoes cook through without turning to mush.
Continue cooking for another 1-2 hours until the potatoes are tender when pierced with a knife and the chuck roast shreds easily with a fork. The internal temperature of the meat should reach at least 195°F for optimal tenderness.
Step 5: Rest and Serve
Carefully remove the pot from the Traeger and let the roast rest in its juices for 15-20 minutes. This resting period allows the meat to reabsorb some of the braising liquid, ensuring it stays moist when sliced.
Discard the bay leaves before serving. Use two forks to shred the chuck roast slightly or serve it in large chunks with the vegetables and potatoes. Spoon some of the rich braising liquid over each serving for maximum flavor. The meat should be incredibly tender with a smoky depth that only wood-fired cooking can provide.
Pro Tips For Making Traeger Pot Roast
- Dry the Roast: Pat the chuck roast completely dry with paper towels before seasoning—I learned this the hard way after my first few pot roasts came out steamed instead of seared.
- Smoke First, Braise Later: Start with 1-2 hours of pure smoke at 225°F before adding liquid, then finish low and slow at 275°F for fall-apart tenderness.
- Crush the Garlic: Smash the garlic cloves with the flat of your knife before peeling—they’ll release more flavor into the meat as it cooks.
- Skip the Overcrowding: Leave at least an inch of space around the roast in the pan so the heat circulates properly, or you’ll end up with uneven cooking.
Pro Cooking Tips for Perfect Results
Pellet Selection Matters
For this dish, I always use hickory or oak pellets—they provide a strong, smoky backbone that complements beef beautifully. Avoid fruit woods like apple or cherry, which can make the roast taste overly sweet. A 50/50 blend of hickory and oak gives me the most consistent results. 🌡️
Maintain Consistent Heat
Your Traeger should hold 275°F steady throughout the cook. If the ambient temperature is cold, the grill may struggle to maintain heat, so I use a grill blanket in winter. Check the temperature probe every 30 minutes to ensure accuracy.
Liquid Level Check
After 2 hours of cooking, peek inside and add ½ cup hot water or broth if the liquid looks low. The potatoes will absorb moisture, so keep the braising liquid at least halfway up the roast. I use a meat thermometer to track internal temp without losing heat.
Rest for Maximum Juiciness
Once the roast hits 195°F internal temperature, resist the urge to serve immediately. Let it rest in the Dutch oven for 15-20 minutes—this lets the collagen redistribute, making every bite tender. The temperature will rise another 5-10°F during resting.
Sear for Extra Flavor
Before adding the roast to the Traeger, sear it in a cast-iron skillet with 2 tbsp olive oil for 4-5 minutes per side. This creates a deep crust that locks in juices and adds complexity to the braising liquid.
Use Quality Cookware
I swear by my Lodge Dutch oven for this recipe—it retains heat evenly and transitions from stovetop to Traeger seamlessly. A heavy pot prevents hot spots that can dry out the meat. Avoid thin aluminum pans that warps under high heat. 🔥
Nutrition Facts
Frequently Asked Questions
What’s the ideal cooking temperature?
Maintain a steady 275°F on your Traeger for even cooking. This low-and-slow approach ensures the meat stays tender while absorbing smoky flavor from the wood pellets.
Can I use a different cut of beef?
Chuck roast is best for its marbling, but brisket or short ribs work too. Adjust cook time as these cuts may need longer to reach the same tenderness. Always check internal temp.
How do I know when it’s done?
The roast is ready at 195°F internal temperature, when it shreds easily with a fork. Let it rest for 15-20 minutes before serving to lock in juices.
Which wood pellets work best?
Hickory or oak pellets provide the perfect smoky depth. Avoid fruit woods like apple or cherry, which can add unwanted sweetness to the beef.

- 4C Bread Crumbs Meatballs Recipe: Crispy Crust and Juicy Centers - September 25, 2026
- 6 Oz Chocolate Chip Cookie Recipe: Perfectly Balanced Crispy Edges and Chewy Hearts - September 25, 2026
- 6-Inch Coffee Cake Recipe: Vanilla Bean Swirls and Buttery Streusel Topping - September 25, 2026