
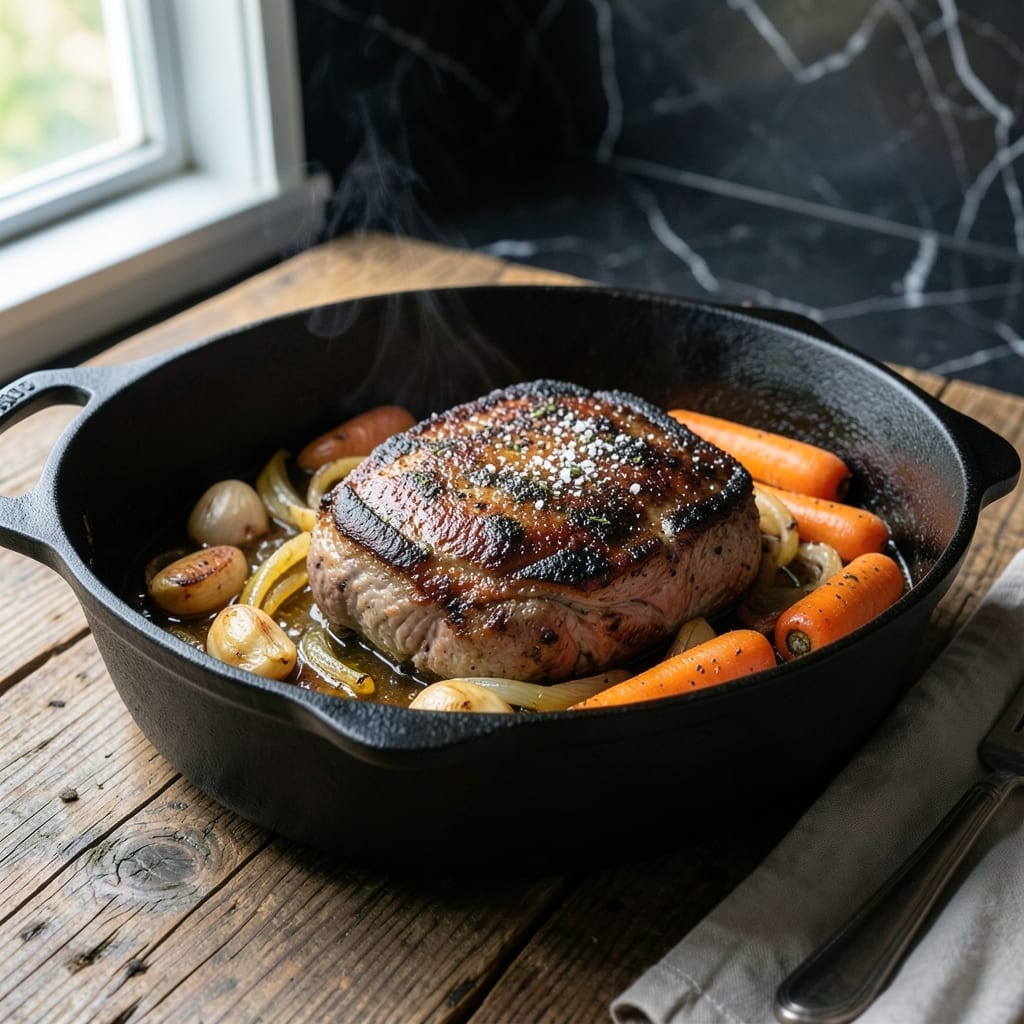
California-style tri tip pot roast brings rich, slow-cooked flavor to your table with minimal effort. This method transforms a tough cut into fork-tender perfection through patient braising and careful seasoning.
The secret lies in searing the meat first to develop deep, caramelized flavors before the long, slow cook. Aromatic vegetables and beef broth create a hearty base that infuses every bite with savory depth.
After hours in the oven, the tri tip emerges fall-apart tender, bathed in a velvety sauce that begs to be soaked up with crusty bread. The result is a comforting, restaurant-quality meal that satisfies completely.
Perfect for Sunday suppers or special occasions, this dish delivers consistent results every time. The slow cooking process ensures maximum tenderness and flavor development.
Ingredients for Tri Tip Pot Roast
Fifteen ingredients transform a humble cut into a restaurant-quality California classic with deep, layered flavors.
| Ingredient | Amount | Notes |
|---|---|---|
| Tri Tip Roast 🥩 | 2 ½ lb | Well-marbled, trimmed of excess fat |
| Kosher Salt 🧂 | 1 ½ tsp | Diamond Crystal preferred for even seasoning |
| Freshly Ground Black Pepper 🌶️ | 1 tsp | Coarse grind for texture |
| Garlic Cloves 🧄 | 6 cloves | Smashed for maximum flavor release |
| Yellow Onion 🧅 | 1 whole | Large, cut into thick wedges |
| Carrots 🥕 | 3 whole | Peeled, cut into 2-inch chunks |
| Celery Stalks 🌿 | 3 whole | Cut into 2-inch pieces |
| Beef Broth 💧 | 3 cups | Low-sodium preferred for control |
| Tomato Paste 🍅 | 2 tbsp | For umami depth |
| Dried Thyme 🌿 | 1 tsp | Rubbed between fingers to release oils |
| Dried Rosemary 🍃 | 1 tsp | Crushed to activate flavor |
| Bay Leaves 🌿 | 2 whole | Fresh or dried |
| Olive Oil 🫒 | 2 tbsp | For searing the roast |
| Red Wine 🍷 | 1 cup | Dry variety for acidity |
The tri tip is everything here. Look for well-marbled cuts at Costco or Whole Foods—they’ll break down beautifully during the long braise. Avoid pre-cut stew meat; whole roasts give you better control over size and marbling. If buying from a butcher, ask for the bottom sirloin subprimal (that’s where tri tip comes from). Kosher salt makes a difference—Diamond Crystal is the gold standard for even distribution.
Out of red wine? Substitute 1 cup beef broth plus 1 tbsp balsamic vinegar for similar depth. No thyme? Use one-third the amount of dried Italian seasoning. Fresh rosemary works too, but use half the quantity. The tomato paste can be swapped for 2 tbsp ketchup in a pinch (don’t judge). Carrots holding you up? Parsnips or potatoes work just as well.
Braise leftovers taste even better the next day—store in an airtight container for up to 4 days. The cooked roast freezes beautifully for 3 months. For best results, cool the meat in its juices before refrigerating (that’s where the flavor lives).
Why You’ll Love This Recipe
- One Pot Wonder: I toss the tri tip, garlic, and onion in one pot and let the oven do the work.
- Rich and Garlicky: The garlic and onion melt into the meat, giving every bite a deep, savory flavor.
- Feeds a Crowd: I serve this for Sunday dinner, and it’s always a hit with the whole family.
- Leftovers for Days: Honestly, it tastes even better the next day—perfect for sandwiches or tacos.
Step-by-Step Instructions for Tri Tip Pot Roast
Master the technique for fall-off-the-bone tenderness and rich, developed flavors every time.
Step 1: Sear and Season the Tri Tip Roast
Pat the 2.5 lb Tri Tip Roast completely dry with paper towels to ensure a proper sear. Season all sides aggressively with the 1.5 tsp Kosher Salt and 1 tsp Freshly Ground Black Pepper, pressing the seasoning into the meat so it adheres well.
Heat the 2 tbsp Olive Oil in a heavy Dutch oven over medium-high heat until shimmering. Add the roast and sear undisturbed for 4-5 minutes per side until a deep, rich brown crust forms. This caramelization creates the flavor foundation for your pot roast.
Step 2: Build the Aromatic Base
Remove the roast and set it aside. In the same pot, add the 1 whole Yellow Onion (cut into thick wedges), 3 whole Carrots (peeled and cut into 2-inch chunks), and 3 whole Celery Stalks (cut into 2-inch pieces). Sauté for 5 minutes until the vegetables begin to soften and develop color.
Add the 6 cloves Garlic Cloves (smashed) and cook for 1 minute until fragrant. Stir in the 2 tbsp Tomato Paste and cook for another 2 minutes, allowing it to deepen in color and lose its raw edge. This step intensifies the umami richness of your dish.
Step 3: Deglaze and Add Liquids
Pour in the 1 cup Red Wine and scrape up all the browned bits from the bottom of the pot with a wooden spoon. Let the wine reduce by half, about 3-4 minutes, to concentrate its flavor and mellow its acidity.
Add the 3 cups Beef Broth, 1 tsp Dried Thyme (rubbed between your fingers), 1 tsp Dried Rosemary (crushed), and 2 whole Bay Leaves. Stir to combine, then return the roast to the pot along with any accumulated juices.
Step 4: Braise to Perfection
Bring the liquid to a gentle simmer, then reduce the heat to low. Cover the pot and let it braise for 2.5 to 3 hours, turning the roast halfway through cooking. The meat is done when it shreds easily with a fork and reaches an internal temperature of 195-200°F.
During cooking, check occasionally to ensure the liquid maintains a gentle simmer. If it reduces too much, add a splash of water or additional broth. The braising liquid should be rich and flavorful, with the vegetables nearly dissolving into the sauce.
Step 5: Rest and Serve
Carefully transfer the roast to a cutting board and tent loosely with foil. Let it rest for 15 minutes before slicing against the grain. This resting period allows the juices to redistribute, ensuring moist, tender meat.
Strain the braising liquid if desired, or serve it as-is with the softened vegetables. Slice the roast and arrange it on a platter, then spoon the rich braising liquid over the top. The sauce should be thick enough to cling to the meat but still fluid enough to soak into every bite.
Pro Tips For Making Tri Tip Pot Roast
- Sear It Hard: I learned this the hard way—get your pan screaming hot before adding the tri tip, and don’t move it for at least 3-4 minutes per side to develop that deep brown crust that locks in flavor.
- Slice Against Grain: Tri tip has a visible grain direction that changes halfway through—slice it perpendicular to the grain in both sections for tender bites, not chewy ones.
- Don’t Drown the Onions: After burning a few batches, I now caramelize the onions in the same pan as the seared roast but remove them before they steam in the pot, so they stay sweet and golden.
- Use a Meat Thermometer: Sounds obvious, but I used to guess and ended up with dry roasts—pull the tri tip at 135°F for medium-rare, then let it rest 10 minutes under foil before slicing.
Troubleshooting Great tri tip pot roast
Tough Meat Fix
If your roast isn’t tender after 3 hours, don’t panic. Check your liquid level first—low moisture means tough meat. Add 1 cup hot beef broth and return to a gentle simmer for another 30-45 minutes. The collagen needs time to break down completely.
Dry Pot Roast
Dry results often come from insufficient fat. Next time, use a well-marbled cut and ensure you sear it properly. If it’s already dry, try shredding the meat and mixing it back into the braising liquid to rehydrate the fibers. 💡
Weak Flavor
Bland pot roast usually means under-seasoning or rushed browning. Be aggressive with the 1.5 tsp Kosher Salt and ensure your sear creates a deep brown crust. A splash of red wine vinegar at the end can brighten dull flavors.
Sauce Too Thin
For a thicker sauce, remove the meat and vegetables, then simmer the braising liquid uncovered over medium heat for 10-15 minutes. Mash a few pieces of the softened vegetables to help thicken it naturally.
Overcooked Vegetables
If your veggies dissolve completely, add them later next time. Try adding the carrots and celery during the last 45 minutes of cooking. This maintains their texture while still infusing the broth with flavor.
I learned this the hard way with my first pot roast—now I always add the veggies in stages. 🔥
Nutrition Facts
Frequently Asked Questions
What’s the best cooking temperature for this dish?
Maintain a gentle simmer at low heat during braising. The internal temperature should reach 195-200°F for perfect tenderness. Too high heat will toughen the meat.
How long should I let it rest before serving?
Always rest the roast for 15 minutes after cooking. This allows juices to redistribute, ensuring moist, flavorful meat. Skipping this step can make it dry.
Can I make this in a slow cooker?
Yes! Sear the meat first, then transfer everything to a slow cooker. Cook on low for 8-10 hours or high for 5-6 hours for the same tender results.
Why is my sauce too thin?
Simmer the braising liquid uncovered for 10-15 minutes after removing the meat. Mashing some vegetables will also help thicken it naturally.

- 4C Bread Crumbs Meatballs Recipe: Crispy Crust and Juicy Centers - September 25, 2026
- 6 Oz Chocolate Chip Cookie Recipe: Perfectly Balanced Crispy Edges and Chewy Hearts - September 25, 2026
- 6-Inch Coffee Cake Recipe: Vanilla Bean Swirls and Buttery Streusel Topping - September 25, 2026