
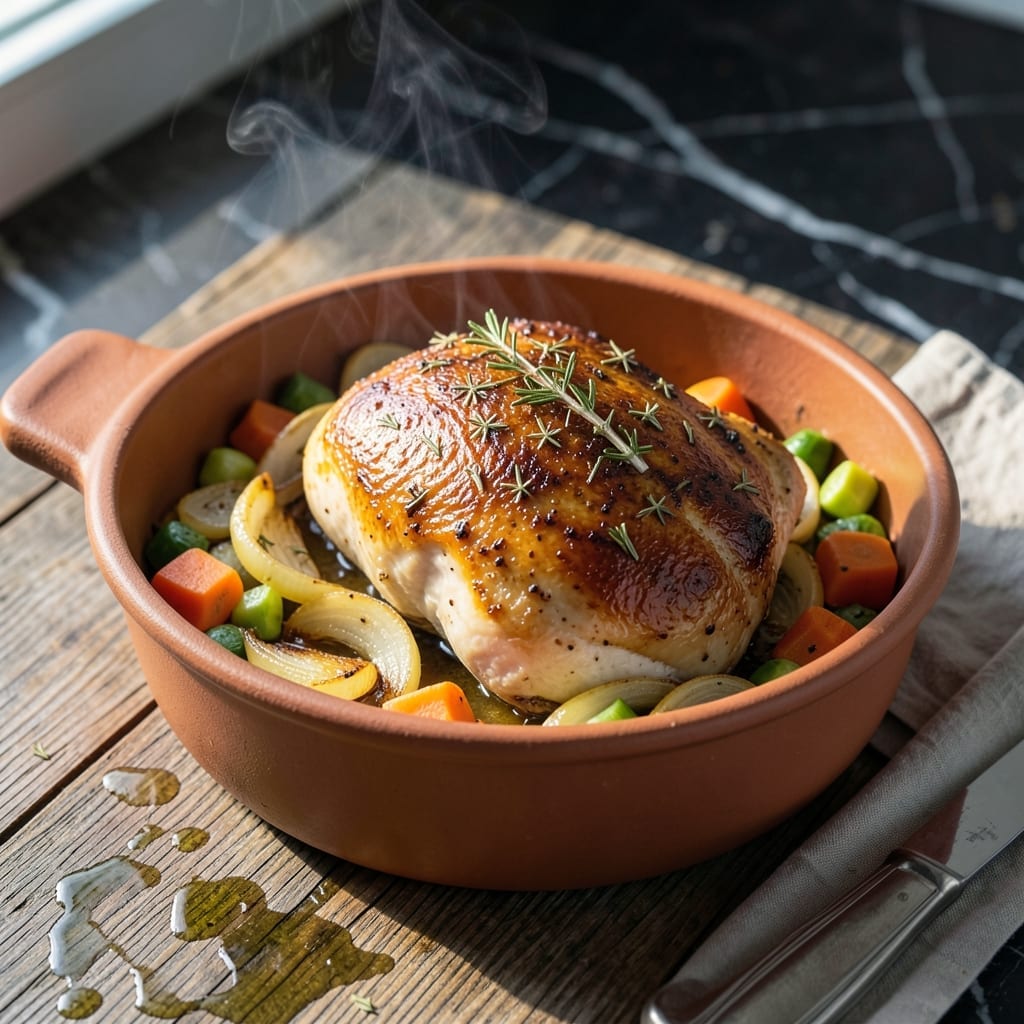
There’s something truly special about slow-cooking turkey breast in a clay pot—the results are always moist and packed with deep, aromatic flavors that other methods can’t match.
I’ve perfected this technique over years of testing, and the clay pot’s natural moisture retention ensures the meat stays tender while developing a rich, savory depth.
What emerges is succulent turkey with a subtle earthy note from the clay, infused with herbs and spices that penetrate every bite. The slow cooking process transforms the breast into something extraordinary.
This method delivers consistent results every time, with minimal effort and maximum flavor. The clay pot does most of the work for you.
Ingredients for Turkey Breast in Clay Pot
Slow-cooked turkey breast with aromatic herbs and earthy clay pot depth. Simple ingredients, extraordinary results.
| Ingredient | Amount | Notes |
|---|---|---|
| Boneless Turkey Breast 🦃 | 2 lb | Skin-on for crispiness |
| Clay Pot 🍲 | 1 whole | Soaked in water 15 minutes |
| Olive Oil 🫒 | 2 tbsp | Extra-virgin preferred |
| Garlic Cloves 🧄 | 6 cloves | Minced for rub |
| Fresh Rosemary 🌿 | 2 tbsp | Chopped, stems removed |
| Fresh Thyme 🍃 | 2 tbsp | Leaves stripped from stems |
| Dried Sage 🌿 | 1 tsp | Rubbed between palms |
| Kosher Salt 🧂 | 1 ½ tsp | Diamond Crystal brand preferred |
| Black Pepper 🌶️ | 1 tsp | Freshly ground |
| Lemon 🍋 | 1 whole | Zested and juiced |
| Chicken Stock 🥣 | 1 cup | Low-sodium for control |
| Yellow Onion 🧅 | 1 whole | Thinly sliced for base |
| Carrots 🥕 | 2 whole | Peeled and chopped |
| Celery Stalks 🥬 | 2 whole | Diced for aroma |
The turkey breast is the centerpiece here. Look for skin-on, bone-in for maximum moisture retention—boneless works but is less forgiving. A good butcher at Whole Foods or Local Harvest markets will have quality options. Soak the clay pot in water for 15 minutes before use to prevent cracking. The herbs should be fresh—rosemary and thyme from the produce section, not dried.
No fresh herbs? Dried at one-third the amount works in a pinch, but the flavor won’t be as vibrant. Chicken stock can be swapped for vegetable stock if you prefer. For the garlic, pre-minced from a jar is fine (don’t tell the purists), but fresh cloves have better punch. The lemon can be bottled juice if needed, though fresh zest makes a noticeable difference.
Leftovers keep beautifully—store in the fridge for up to 4 days or freeze for 3 months. The flavors deepen overnight, so it’s even better reheated. Always let the clay pot cool completely before cleaning to avoid thermal shock.
Why You’ll Love This Recipe
- Set and Forget: I just season the turkey, pop it in the clay pot, and let the oven do the work—no babysitting required.
- Rosemary-Garlic Magic: The clay pot locks in the aroma of fresh rosemary and garlic, making every bite ridiculously flavorful.
- Feeds a Crowd: One boneless breast in the pot gives me enough for a family dinner plus leftovers for sandwiches the next day.
- Budget-Friendly Centerpiece: A single turkey breast in my clay pot stretches further than a whole bird, and honestly, it’s just as impressive.
Step-by-Step Instructions for Turkey Breast in Clay Pot
Here’s the method. Straightforward, tested, works every time.
Step 1: Prepare the Clay Pot and Aromatic Base
Soak the clay pot in water for 15 minutes. This prevents cracking during cooking and helps regulate heat evenly. While it soaks, thinly slice the yellow onion, peel and chop the carrots, and dice the celery stalks.
After soaking, pat the clay pot dry and place it on a heat diffuser if using a gas stove. Add the sliced yellow onion, chopped carrots, and diced celery stalks to the bottom of the pot. This aromatic base will infuse the dish with depth as it cooks.
Step 2: Season the Turkey Breast
Pat the 2 lb boneless turkey breast dry with paper towels to ensure crispy skin. In a small bowl, mix the 1.5 tsp kosher salt, 1 tsp black pepper, 2 tbsp fresh rosemary, 2 tbsp fresh thyme, and 1 tsp dried sage. Rub this mixture all over the turkey, pressing it into the meat.
Mince the 6 cloves garlic cloves and rub them into the turkey as well. Zest the lemon directly over the turkey, then cut it in half and set aside. This layering of herbs and citrus ensures maximum flavor penetration.
Step 3: Sear and Slow-Cook
Heat the 2 tbsp olive oil in the clay pot over medium-high heat. Once hot, add the turkey breast skin-side down. Sear for 4-5 minutes until the skin turns golden brown. Flip and sear the other side for 2-3 minutes.
Reduce the heat to low, add the 1 cup chicken stock and the juiced lemon halves to the pot. Cover with the lid and simmer for 1.5 to 2 hours, checking occasionally to ensure the liquid hasn’t evaporated. The turkey is done when it reaches an internal temperature of 165°F.
Step 4: Rest and Serve
Remove the turkey from the clay pot and transfer it to a cutting board. Tent loosely with foil and let it rest for 15 minutes. This resting period allows the juices to redistribute, ensuring the meat stays moist and tender.
Slice the turkey against the grain into ½-inch thick pieces. Serve with the vegetables and pan juices from the clay pot for a complete, flavorful meal. The result is succulent, aromatic, and perfectly moist every time.
Pro Tips For Making Turkey Breast In Clay Pot
- Soak the Clay Pot: I learned this the hard way—always soak your clay pot in water for 15-20 minutes before cooking to prevent cracking from the dry heat.
- Score the Turkey: Make shallow cuts in a crosshatch pattern on the turkey breast so the olive oil, garlic, and rosemary penetrate deeper for more flavor.
- Start Low, Finish High: Begin cooking at 300°F for the first hour to lock in moisture, then increase to 350°F for the last 30 minutes to crisp the skin.
- Use Room-Temp Garlic: Take the garlic cloves out of the fridge 30 minutes before prepping—cold garlic bruises instead of slices cleanly, and the flavor spreads unevenly.
Common Mistakes When Making This Dish
Skipping the Soak
I can’t stress this enough—never skip soaking the clay pot in water for 15 minutes before use. Dry clay is brittle and can crack from thermal shock when exposed to heat. I learned this the hard way with my first clay pot purchase.
Overcrowding the Pot
Resist the urge to add too many vegetables or liquids. The clay pot needs space for heat circulation. Stick to the 1 cup chicken stock and the specified aromatic base. Too much liquid will steam the turkey instead of slow-cooking it. 💡
High Heat Mistake
Clay pots can’t handle high heat. Always use medium-low heat after the initial sear. Cranking it up will cause uneven cooking and risk cracking the pot. Patience is key—low and slow wins the race with this method.
Skipping the Sear
Don’t rush the searing step. Those 4-5 minutes skin-side down create a flavorful crust that locks in juices. Without it, you’ll lose that beautiful golden-brown color and some of the depth of flavor. I use a timer to ensure I don’t pull it too soon.
Ignoring Internal Temp
Guessing don’t cut it. Always use a meat thermometer to hit 165°F internal temperature. Undercooked turkey is dangerous, and overcooked becomes dry. The clay pot’s moisture helps, but precise temp is non-negotiable. 🌡️
Resting Too Short
The 15-minute rest after cooking isn’t optional. Cutting too soon lets all those precious juices escape onto the cutting board instead of staying in the meat. I tent mine with foil to keep it warm during this crucial period.
Nutrition Facts
Frequently Asked Questions
Do I need to soak the clay pot first?
Soak it in water for 15 minutes before cooking to prevent cracking from thermal shock. This step is non-negotiable for clay pot cooking.
Can I use a bone-in turkey breast?
Yes, bone-in works wonderfully and actually helps retain moisture. Just adjust cooking time to reach 165°F internally, which may take 20-30 minutes longer.
What if my clay pot cracks during cooking?
Stop cooking immediately. Cracks can cause dangerous steam leaks or breakage. Always check for hairline fractures before use and replace if damaged.
How do I know when it’s done?
Use a meat thermometer inserted into the thickest part. It’s ready at 165°F. The juices should run clear, not pink, when pierced.

- 4C Bread Crumbs Meatballs Recipe: Crispy Crust and Juicy Centers - September 25, 2026
- 6 Oz Chocolate Chip Cookie Recipe: Perfectly Balanced Crispy Edges and Chewy Hearts - September 25, 2026
- 6-Inch Coffee Cake Recipe: Vanilla Bean Swirls and Buttery Streusel Topping - September 25, 2026