
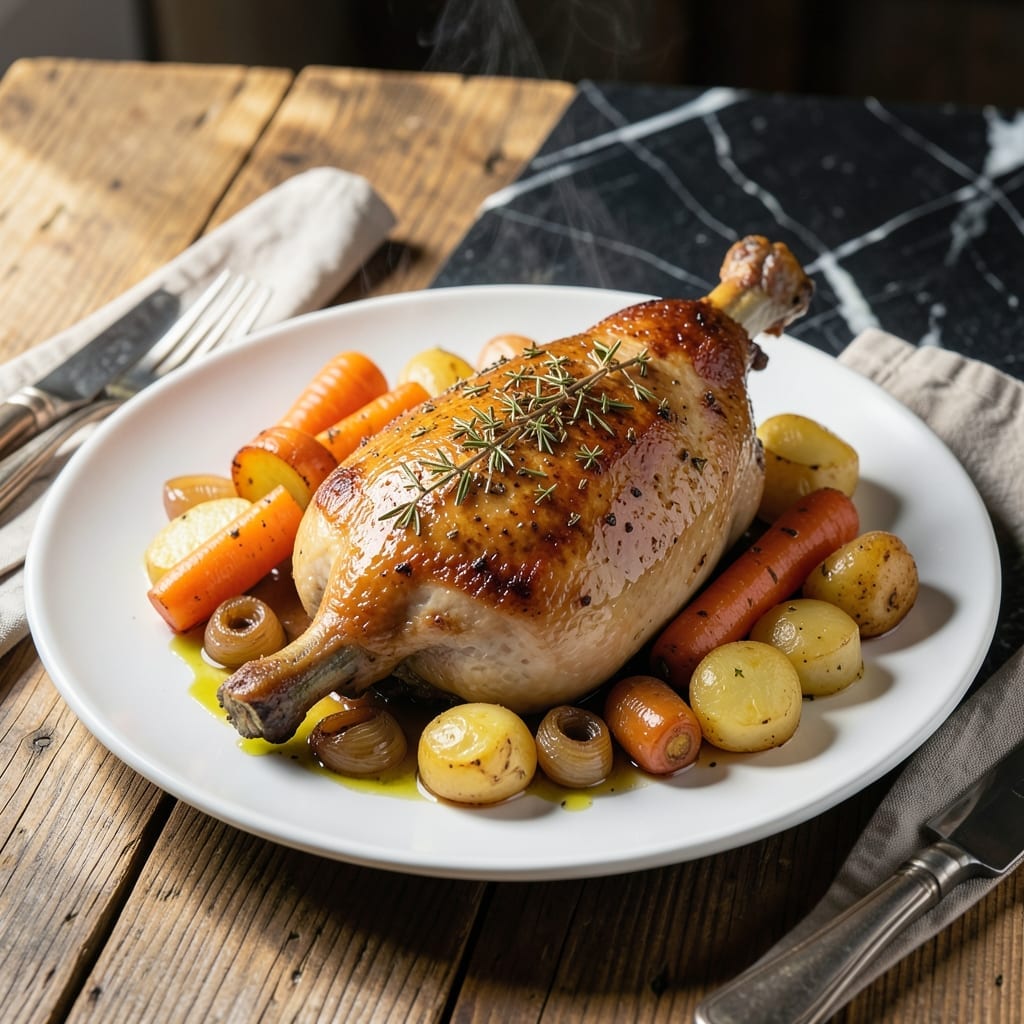
This pot roast transforms humble turkey thighs into a fork-tender masterpiece with minimal effort. The slow cooking process works magic on the meat, breaking down connective tissue until it falls apart at the slightest touch.
I developed this method to create restaurant-quality results at home, using a simple herb blend and pantry staples. The turkey thighs emerge juicy and flavorful, with a rich, aromatic gravy that forms naturally during cooking.
The secret lies in the low, steady heat that coaxes out every bit of flavor. By the time it’s done, you’ll have a dish that’s hearty enough for Sunday dinner but simple enough for any weeknight.
Serve with mashed potatoes or crusty bread to soak up every last drop of that herb-infused gravy. Here’s how to make it perfectly every time.
Ingredients for Turkey Thigh Pot Roast
Pantry staples and a few fresh items create this hearty, flavorful dish.
| Ingredient | Amount | Notes |
|---|---|---|
| Bone-In Turkey Thighs 🦃 | 2 ½ lb | Skin-on for extra flavor |
| Olive Oil 🫒 | 2 tbsp | Divided for searing and browning |
| Kosher Salt 🧂 | 1 ½ tsp | Diamond Crystal preferred |
| Black Pepper 🌶️ | 1 tsp | Freshly ground for best flavor |
| Dried Thyme 🌿 | 1 tsp | Rubbed between fingers to release oils |
| Dried Rosemary 🍃 | 1 tsp | Crushed lightly before using |
| Garlic Cloves 🧄 | 6 cloves | Smashed and peeled |
| Yellow Onion 🧅 | 1 whole | Large, roughly chopped |
| Carrots 🥕 | 3 whole | Peeled and cut into chunks |
| Celery Stalks 🥬 | 3 pieces | Cut into large pieces |
| Chicken Broth 🥣 | 2 cups | Low-sodium preferred |
| Dry White Wine 🍷 | ½ cup | Optional, deglaze the pan |
| Bay Leaves 🌿 | 2 pieces | Dried, for aromatic depth |
| All-Purpose Flour 🌾 | 2 tbsp | For thickening gravy |
The turkey thighs are key here. Bone-in, skin-on gives the best texture and flavor. Look for thighs that are similar in size so they cook evenly. Most grocery stores carry them in the poultry section—Whole Foods or Trader Joe’s usually have the best quality. If you can only find boneless, they’ll still work, but the bone-in version stays juicier during the long cook time.
No dry white wine? Extra chicken broth with a splash of white vinegar works in a pinch. Fresh herbs can replace dried—use one-third the amount (so about 1 tbsp fresh for every 1 tsp dried). Don’t have celery? Fennel or extra carrots add a similar sweetness. The flour for thickening can be swapped for cornstarch (mix 1 tbsp with 1 tbsp cold water before adding).
This tastes even better the next day—make it ahead if you can. Stores in the fridge for 4-5 days or freezes for 3 months. The gravy thickens as it cools, so reheat gently with a splash of broth to loosen it up (worth the extra minute).
Why You’ll Love This Recipe
- One Pot Wonder: I just season the thighs, sear them, and let the oven do the rest—no fancy techniques.
- Rich & Herby: The thyme and black pepper give the meat this deep, savory flavor that’s hard to resist.
- Feeds a Crowd: Honestly, it’s my go-to for Sunday dinner or when friends drop by unannounced.
- Budget Stretcher: Bone-in thighs are cheap, and leftovers make killer sandwiches the next day.
Step-by-Step Instructions for Turkey Thigh Pot Roast
Here’s the method that transforms humble turkey thighs into fork-tender perfection with a rich herb gravy.
Step 1: Season and Sear the Turkey Thighs
Pat the 2.5 lb bone-in turkey thighs dry with paper towels and season both sides generously with 1.5 tsp kosher salt, 1 tsp black pepper, 1 tsp dried thyme, and 1 tsp dried rosemary. I always rub the dried herbs between my fingers to release their oils before applying.
Heat 1 tbsp olive oil in a large Dutch oven over medium-high heat until shimmering. Sear the turkey thighs skin-side down for 6-8 minutes until the skin is deep golden brown and crispy. Flip and sear the other side for 4-5 minutes. This creates a flavorful fond that will enrich your gravy.
Step 2: Sauté Aromatics and Build Flavor
Remove the turkey thighs to a plate and reduce heat to medium. Add the remaining 1 tbsp olive oil to the pot, then add 1 whole yellow onion (roughly chopped), 3 whole carrots (in chunks), and 3 pieces celery stalks (in large pieces). Cook for 5 minutes until the vegetables start to soften.
Add the 6 cloves garlic cloves (smashed) and 2 pieces bay leaves to the pot, stirring for 1 minute until fragrant. Be careful not to let the garlic burn—it should turn just slightly golden. The aroma at this stage will be incredible, a sign you’re building deep flavor.
Step 3: Deglaze and Braise to Tenderness
Pour in 0.5 cup dry white wine to deglaze the pot, scraping up all the browned bits with a wooden spoon. The wine should sizzle and reduce by half in about 2-3 minutes. These browned bits contain concentrated flavor that will make your gravy rich and complex.
Return the turkey thighs to the pot along with any accumulated juices. Pour in 2 cups chicken broth until the liquid comes about halfway up the turkey. The liquid should barely simmer—just a gentle bubble or two. Cover and cook for 1.5 to 2 hours, turning the turkey thighs once halfway through.
Step 4: Thicken the Gravy and Finish
When the turkey is fork-tender (it should pull apart easily with a fork), transfer it to a serving platter. Skim any excess fat from the surface of the cooking liquid, then bring it to a gentle boil over medium heat.
Whisk 2 tbsp all-purpose flour with 2 tbsp of the hot cooking liquid to create a slurry. Stir this into the pot and simmer for 3-5 minutes until the gravy thickens enough to coat the back of a spoon. Taste and adjust seasoning if needed, then pour this herb-infused gravy over the turkey thighs before serving.
Pro Tips For Making Turkey Thigh Pot Roast
- Brown the Skin: Sear the turkey thighs skin-side down in hot olive oil for 5-7 minutes until deep golden—I learned this the hard way when my first attempts came out pale and soggy.
- Season Generously: Use 1 teaspoon kosher salt per pound of thigh, and don’t forget the bone side; the meat absorbs less seasoning than you’d expect.
- Skip the Crowding: If your pot is too small, brown the thighs in batches—steam from overcrowding will ruin the crust you worked for.
- Add Liquid Late: Deglaze with just ½ cup water or broth after browning to lift the fond, but don’t drown the thighs; they release plenty of juices as they cook.
Essential Equipment for This Dish
Dutch Oven Essentials
A heavy 5-6 quart Dutch oven with a tight-fitting lid is non-negotiable. I swear by my Lodge enameled cast iron—it distributes heat evenly and retains it perfectly for slow cooking. The enameled surface prevents reactions with acidic ingredients like wine and tomatoes. 🔥
Thermometer for Precision
An instant-read thermometer takes the guesswork out of doneness. I use a ThermoWorks ThermaPen to check internal temp—175°F in the thickest part means your turkey thighs are perfectly tender. It’s a small investment that prevents overcooking every time.
Wooden Spoon Basics
A sturdy wooden spoon is perfect for deglazing and stirring without scratching your cookware. I keep a 12-inch spoon dedicated to my Dutch oven. It’s long enough to reach all corners when scraping up those precious browned bits.
Fat Skimmer Tool
After braising, you’ll want to remove excess fat from the cooking liquid. A stainless steel fat skimmer lets you do this quickly without losing the flavorful juices. I find the OXO Good Grips version works beautifully for this task.
Serving Platter
Transfer your finished turkey thighs to a warm platter before making the gravy. I use a large ceramic platter that keeps the meat warm while I work. Choose one with a rim to catch any juices that might escape.
Gravy Separator
For extra-rich gravy, a gravy separator helps remove more fat after cooking. Pour the cooking liquid into the separator, then pour out the defatted gravy from the spout. This gives you restaurant-quality results with minimal effort.
Nutrition Facts
Frequently Asked Questions
Can I use boneless thighs instead?
Yes, but bone-in gives better flavor and stays juicier. If using boneless, reduce cooking time by 30 minutes and check for doneness at 165°F.
Why do I need to sear first?
Searing creates a flavorful crust and fond in the pot, which builds the base for your rich gravy. Skip this and you’ll miss depth of flavor.
How do I know when it’s done?
The meat should pull apart easily with a fork. For precision, use a thermometer—175°F in the thickest part guarantees tenderness.
Can I make this in a slow cooker?
Brown the thighs first, then cook on low for 6-7 hours or high for 4-5 hours. Add a splash of broth before serving.

- 4C Bread Crumbs Meatballs Recipe: Crispy Crust and Juicy Centers - September 25, 2026
- 6 Oz Chocolate Chip Cookie Recipe: Perfectly Balanced Crispy Edges and Chewy Hearts - September 25, 2026
- 6-Inch Coffee Cake Recipe: Vanilla Bean Swirls and Buttery Streusel Topping - September 25, 2026