
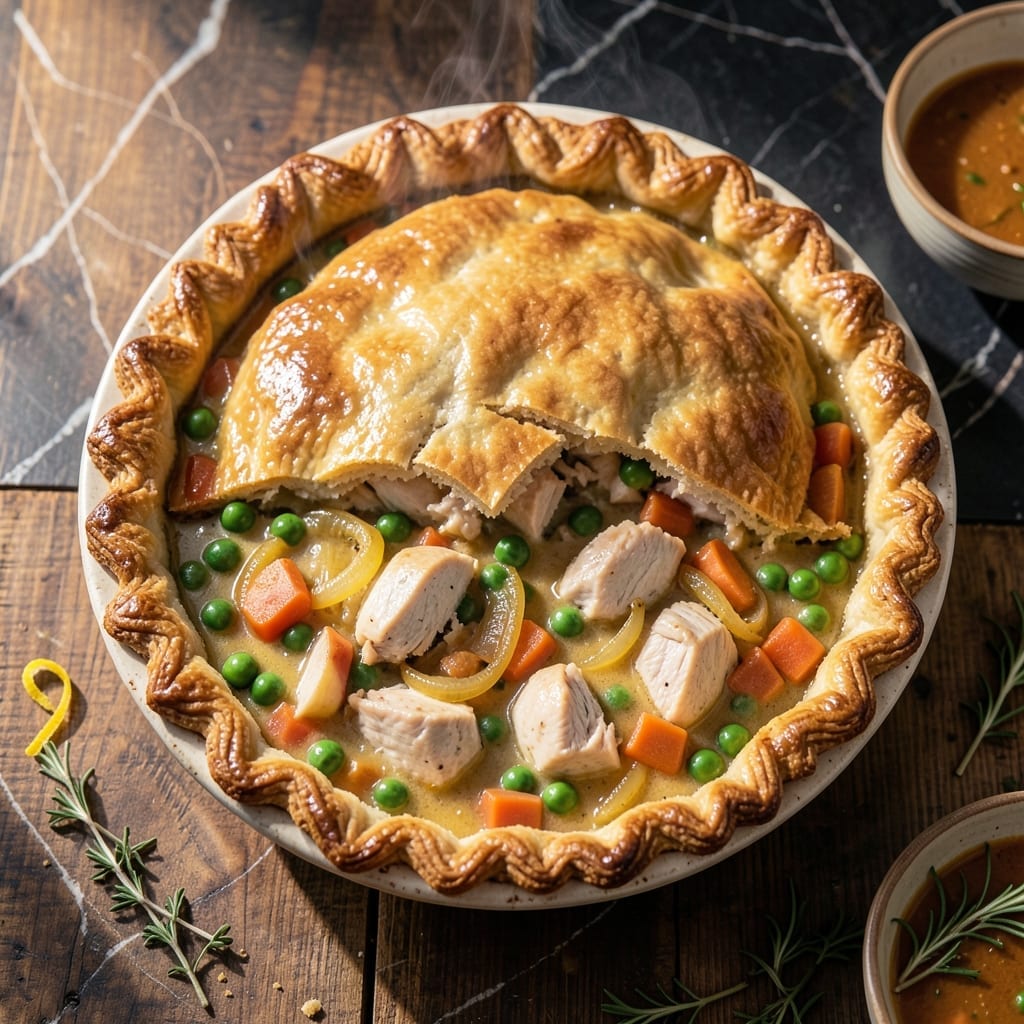
There’s nothing quite like a golden, flaky chicken pot pie with both a bottom and top crust to encase a rich herb gravy. This is comfort food at its finest—warm, hearty, and deeply satisfying.
I’ve refined this recipe to ensure the crusts stay perfectly crisp while the filling remains creamy and packed with tender chicken and vegetables. The double crust seals in every bit of flavor, making each bite a true delight.
The herb-infused gravy ties everything together, complementing the buttery layers without overpowering them. It’s a dish that feels special enough for company but simple enough for a cozy weeknight.
Baking it until the crusts turn golden brown guarantees that satisfying crunch with every forkful. Let’s bring this classic to life.
Ingredients for Two Crust Chicken Pot Pie
A double crust demands precision: butter, flour, tender chicken, and herb-infused gravy come together beautifully here.
| Ingredient | Amount | Notes |
|---|---|---|
| All-Purpose Flour 🌾 | 3 cups | Plus extra for dusting surface |
| Unsalted Butter 🧈 | 1 ½ cups | Cold, cubed for crust |
| Ice Water 💧 | ½ cup | Plus 1 tbsp as needed |
| Salt 🧂 | 1 ½ tsp | Divided between crust and filling |
| Boneless Skinless Chicken Breasts 🍗 | 1 ½ lb | Diced into bite-sized pieces |
| Yellow Onion 🧅 | 1 whole | Medium, finely diced |
| Carrots 🥕 | 2 whole | Peeled and diced |
| Celery Stalks 🌿 | 2 whole | Diced, leaves removed |
| Garlic Cloves 🧄 | 3 cloves | Minced for filling |
| Fresh Thyme Leaves 🌿 | 2 tsp | Chopped, or 1 tsp dried |
| Fresh Rosemary 🌿 | 1 tsp | Finely chopped |
| All-Purpose Flour 🌾 | ⅓ cup | For thickening gravy |
| Chicken Stock 🍲 | 1 ½ cups | Low-sodium preferred |
| Whole Milk 🥛 | ½ cup | For creamy gravy |
| Frozen Peas 🌱 | ¾ cup | No need to thaw |
| Large Egg 🥚 | 1 whole | For egg wash |
The butter is critical for that flaky texture—use a high-fat European-style brand like Plugrá or Kerrygold (82% fat content). Cold is non-negotiable; if your kitchen is warm, chill the cubes for 10 minutes before starting. For the flour, King Arthur or Gold Medal are reliable. The chicken should be bone-in for maximum flavor, but boneless works in a pinch (just don’t overcook). Most supermarkets carry pre-diced mirepoix—Trader Joe’s has a great mix.
No fresh thyme or rosemary? Dried herbs at one-third the amount work fine, but fresh brings the brightness the dish deserves. Swap the peas for diced green beans or corn if that’s what’s in the freezer. The milk can be half-and-half for extra richness, or whole milk in a pinch. Vegetable stock works too, but chicken stock adds depth. If you’re skipping the egg wash, a quick brush of milk or cream gives a decent golden color.
Assembled pie keeps in the fridge for 1 day before baking. Leftovers? They’ll stay good for 3-4 days—reheat in the oven to keep the crust crisp. The dough can be made ahead and frozen for up to 3 months. Always let it thaw in the fridge overnight before rolling.
Why You’ll Love This Recipe
- One Bowl Crust: I love that the flaky two-crust pastry comes together right in one bowl—just flour, cold butter, ice water, and a pinch of salt.
- Rich Chicken Filling: The boneless chicken breasts soak up all the savory juices, making every bite tender and packed with flavor.
- Feeds the Whole Table: Honestly, it’s my go-to for Sunday dinners or potlucks because it serves a crowd without extra effort.
- Leftovers for Days: Between us, the filling tastes even better the next day, and the crust holds up surprisingly well.
Step-by-Step Instructions for Two Crust Chicken Pot Pie
Master the technique for achieving flaky layers encasing a rich, herb-infused filling every time.
Step 1: Prepare the Double Crust Dough
In a large bowl, combine the 3 cups All-Purpose Flour with ½ teaspoon Salt. Cut in the 1½ cups Unsalted Butter using a pastry cutter or your fingers until the mixture resembles coarse crumbs with pea-sized butter pieces visible. This texture is crucial for flakiness.
Gradually add the ½ cup Ice Water, 1 tablespoon at a time, mixing just until the dough comes together. Overworking develops gluten, resulting in tough crust. Divide the dough into two equal portions, flatten into discs, wrap in plastic, and refrigerate for 1 hour to relax the gluten.
Step 2: Create the Herb-Infused Chicken Filling
In a large skillet over medium-high heat, cook the diced 1½ lb Boneless Skinless Chicken Breasts until no longer pink, about 6-8 minutes. Transfer to a plate and set aside. In the same skillet, sauté the finely diced Yellow Onion, Carrots, and Celery Stalks until softened, about 5 minutes.
Add the minced 3 cloves Garlic Cloves, 2 tsp Fresh Thyme Leaves, and 1 tsp Fresh Rosemary, cooking for 30 seconds until fragrant. Sprinkle the ⅓ cup All-Purpose Flour over the vegetables, stirring to coat, then gradually whisk in the 1½ cups Chicken Stock and ½ cup Whole Milk until smooth.
Step 3: Assemble and Bake the Pot Pie
Roll out one dough disc on a floured surface to fit a 9-inch pie dish. Transfer to the dish, pressing gently into the bottom and sides. Add the chicken back to the skillet with the ¾ cup Frozen Peas, stirring to combine. Pour the filling into the crust.
Roll out the second dough disc and place it over the filling. Trim and crimp the edges to seal, then cut several slits in the top crust to allow steam to escape. Brush the top with the Large Egg beaten with 1 tablespoon water for a golden finish.
Step 4: Bake to Perfection
Preheat the oven to 375°F. Bake the pot pie on a parchment-lined baking sheet for 45-50 minutes, or until the crust is deep golden brown and the filling is bubbly. The bottom crust should be crisp and the top flaky.
If the edges brown too quickly, tent them with foil. Let the pie rest for 15 minutes before serving to allow the filling to set. This resting period ensures clean slices and prevents the filling from running out when cut.
Pro Tips For Making Two Crust Chicken Pot Pie
- Chill the Dough: Let your crust rest in the fridge for at least 30 minutes before rolling—I learned this the hard way after my first few pies shrunk in the oven.
- Dry Your Chicken: Pat the chicken breasts completely dry before cooking, or you’ll end up with a watery filling that soaks the bottom crust.
- Vent the Top: Cut 3-4 small slits in the top crust to let steam escape, otherwise you risk a soggy mess under that beautiful golden lid.
- Use Cold Butter: Keep your butter ice cold when making the crust—sounds obvious, but I used to rush it and wondered why my pastry was tough instead of flaky.
Essential Equipment for Perfect Results
Pastry Mat Essentials
For rolling out perfect crusts, I swear by a large silicone pastry mat—it provides a non-slip surface and built-in measurements. The 18×24-inch size gives plenty of room for 9-inch pie dough. It’s also easy to clean and stores flat. 💡
Dough Tools
A French rolling pin without handles gives you precise control for even thickness. I use my J.K. Adams maple wood pin. Pair it with a dough scraper to lift and turn dough easily. These tools make the process smoother and more professional.
Pie Dish Selection
For this recipe, a 9-inch glass pie dish works best—it conducts heat evenly and lets you monitor the bottom crust. I prefer Pyrex because it’s durable and transparent. Avoid dark metal pans, which can over-brown the crust.
Measuring Accuracy
Precise measurements matter for flaky crusts. I use OXO Good Grips measuring cups for dry ingredients and a liquid measuring cup with clear markings for water. A kitchen scale ensures your 1½ cups butter is exactly right.
Crimping Made Easy
For perfect edges, invest in a pie crust crimper or use the tines of a fork. I also keep a small bowl of water nearby to moisten edges for a tight seal. This prevents filling from leaking during baking.
Baking Setup
A parchment-lined baking sheet catches any spills and makes cleanup effortless. Place it on the middle rack for even heat circulation. I also keep aluminum foil on hand to tent edges if they brown too quickly. ✨
Nutrition Facts
Frequently Asked Questions
Can I use store-bought crust instead?
Yes, but homemade gives superior flakiness. If using store-bought, thaw it first and roll it slightly thinner for even baking.
How do I prevent a soggy bottom crust?
Blind-bake the bottom crust for 10 minutes before adding filling. Also, ensure your filling isn’t too wet before assembling.
Can I make this ahead of time?
Assemble the pie (unbaked) and refrigerate for up to 1 day. Or freeze the unbaked pie for 1 month—bake from frozen, adding 10-15 minutes to the baking time.
What if my filling is too thin?
Simmer it longer to thicken, or mix 1 tablespoon cornstarch with 1 tablespoon cold water and stir into the filling. Let it cook for 2-3 minutes to reach desired consistency.

- 6 Oz Chocolate Chip Cookie Recipe: Perfectly Balanced Crispy Edges and Chewy Hearts - September 25, 2026
- 6-Inch Coffee Cake Recipe: Vanilla Bean Swirls and Buttery Streusel Topping - September 25, 2026
- 1 Hour Soup Recipe: Velvety Richness Without the Wait - September 25, 2026