
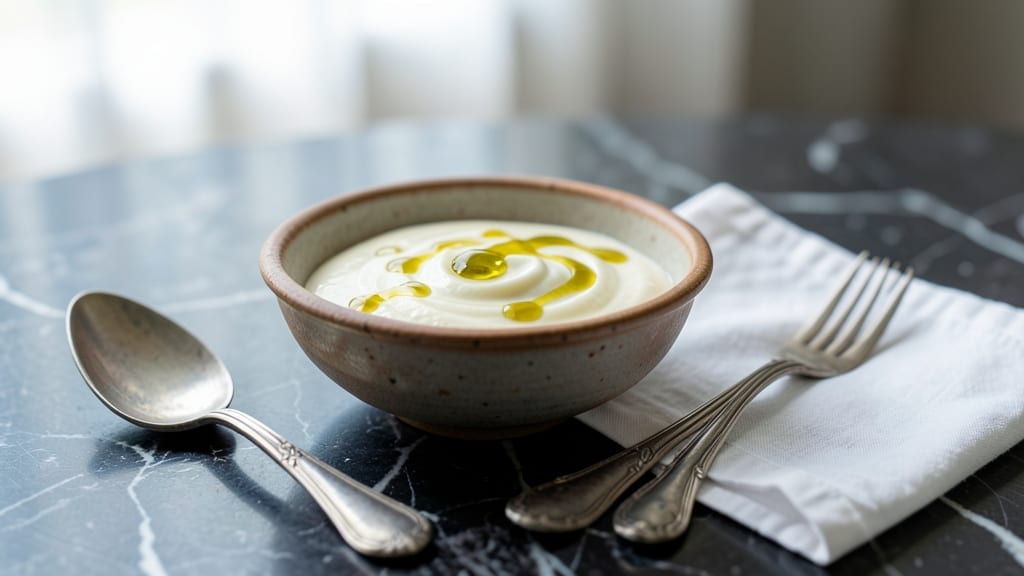
This vanilla pot de crème recipe delivers the creamiest, most luxurious custard you’ll ever make—silky smooth with real vanilla bean infusion that transforms an ordinary dessert into something truly special.
The secret lies in tempering the eggs just right and baking it in a water bath, which guarantees that velvety texture without a single speck of curdling. I’ve been perfecting this recipe for years, and it’s now my go-to for impressing guests or treating myself after a long week.
The beauty of pot de crème is how simple the ingredients are—just cream, egg yolks, sugar, and vanilla—but the technique makes all the difference. You’ll start by whisking the egg yolks and sugar until pale and thick, then slowly folding in the warm cream to keep everything smooth.
Baking it in a water bath ensures even cooking, so the center comes out perfectly set without overcooking the edges. It’s foolproof once you get the hang of it.
What you end up with is a rich, velvety custard that’s so creamy it practically melts in your mouth. The vanilla bean infusion adds layers of aromatic sweetness, making every spoonful taste like a little slice of heaven.
Serve it chilled with a sprinkle of toasted nuts or fresh berries, and you’ll have a dessert that feels like a restaurant-quality treat—without the fuss.
This recipe works just as well for special occasions or a quiet night in, and it keeps beautifully in the fridge for up to five days. If you want to get creative, try adding a hint of cinnamon or a splash of rum to the custard before baking.
Let’s get started—you’re going to love how this turns out!
Ingredients for vanilla pot de creme
Six ingredients, one luxurious custard. The secret? Real vanilla and perfect tempering.
| Ingredient | Amount | Notes |
|---|---|---|
| Heavy Cream 🥛 | 4 cups | Full-fat for creaminess |
| Large Egg Yolks 🥚 | 6 whole | Fresh, room temperature |
| Granulated Sugar 🍚 | 1 cup | White or light brown |
| Vanilla Beans 🌿 | 2 whole | Scraped seeds included |
| Salt 🧂 | ½ tsp | Fine sea salt preferred |
| Unsalted Butter 🧈 | 2 tbsp | For topping, softened |
| All-Purpose Flour 🌾 | 1 tbsp | For water bath barrier |
| Water 💧 | 2 cups | For water bath |
The vanilla beans are non-negotiable here. Madagascar or Tahitian from Penzeys or a specialty store make all the difference—their aromatic seeds infuse the custard with layers of flavor. If you can only find vanilla extract, use 2 tbsp pure extract plus 1 tbsp water to mimic the bean’s moisture. The heavy cream should be cold and straight from the fridge—room temperature cream can cause curdling. For the eggs, room temperature yolks whisk up smoother, so take them out 30 minutes before starting. If you’re in a rush, just whisk them vigorously for 2 minutes to warm them up.
No vanilla beans? Vanilla bean paste works in a pinch—just use 2 tbsp of the thick paste. The sugar can be swapped for light brown sugar for depth, but white sugar keeps it classic. Short on heavy cream? Whole milk plus 1 cup heavy cream gets you close, though the texture won’t be quite as rich. For a boozy twist, add 1 tbsp vanilla-infused rum or bourbon to the cream before heating. The water bath flour is optional but helps prevent the custard from sticking to the baking dish—just sprinkle it on the bottom before adding water.
This custard keeps for 5 days in the fridge, but it’s best within the first 3. For serving, I like to chill it for at least 4 hours—the longer it sits, the creamier it gets. To reheat, microwave in 20-second bursts until just warmed through. Store leftovers in an airtight container with plastic wrap pressed directly on the surface to prevent a skin from forming. If you make a double batch, freeze individual portions in ramekins for easy single servings—just thaw overnight in the fridge.
Why You’ll Love This Recipe
- No Thermometer Needed: I’ve made this a dozen times—just watch for that slight wobble when you pull it from the bain-marie, and you’ll nail it every time. No fancy tools, no stress.
- Vanilla That Sings: That split vanilla bean? It’s not just flavor—it’s layers. The first spoonful hits with bright, floral notes, then lingers with warm, custardy depth. Honestly, store-bought pudding can’t compete.
- Weeknight to Dinner Party: Same recipe, different vibes. Serve it chilled with berries for a lazy Sunday, or dust it with cocoa and a sprinkle of flaky salt for a fancier guest night. The yolks and cream do all the heavy lifting.
- Leftovers That Last: This keeps beautifully for days—no freezer burn, no weird textures. I’ll often make a double batch; the second round gets even richer as the flavors meld. Plus, it’s cheaper than buying individual desserts.
Step-by-step instructions for vanilla pot de crème
Here’s how to create velvety vanilla custard with perfect texture every time.
Infuse the Cream with Vanilla
Split the 2 whole vanilla beans lengthwise and scrape out the seeds using the edge of a knife. Add both the seeds and the split vanilla pods to the 4 cups heavy cream in a saucepan. Bring to a gentle simmer over medium heat, then reduce to low heat and let steep for 10 minutes. This infusion creates that signature vanilla aroma that sets this dessert apart.
Here’s the thing—don’t let the cream boil. You want it just below a simmer, where you see small bubbles forming at the edges but not a full rolling boil. The vanilla will release its oils more gently at this temperature, preventing bitterness. After steeping, remove from heat and let the cream cool completely to room temperature. This step is crucial for preventing scrambled egg yolks later.
Whisk Egg Yolks and Sugar
In a separate bowl, whisk together the 6 whole large egg yolks and 1 cup granulated sugar until the mixture is pale yellow and thickened, about 3-4 minutes. This process incorporates air and creates a stable emulsion for that signature silky texture. I like to use a whisk for this step—it gives me better control than a mixer.
Add the 0.5 teaspoon salt to the yolk mixture and whisk for another 30 seconds until fully dissolved. The salt enhances the vanilla flavor and balances the sweetness. Keep this bowl ready—you’ll be adding the warm cream to it in the next step. The temperature contrast between the warm cream and room-temperature yolks is what creates the perfect custard texture.
Temper the Egg Mixture
Slowly pour about 1 cup of the warm vanilla-infused cream into the yolk mixture while whisking constantly. This gradual addition is called tempering—it prevents the eggs from scrambling when exposed to heat. After adding the first cup, whisk until the mixture is smooth, then gradually add the remaining 3 cups of cream in a thin stream, whisking continuously.
Once all the cream is incorporated, strain the mixture through a fine-mesh sieve into a clean bowl to remove any vanilla bean fragments. This ensures your pot de crème has that ultra-smooth texture without any unexpected bits. The mixture should now be thick and creamy—almost like a light custard. If it looks too thin, let it sit for 5 minutes while you prepare the water bath.
Prepare the Water Bath
Preheat your oven to 325°F. While it heats, pour the 2 cups water into a deep baking dish large enough to hold 6 ramekins. Sprinkle the 1 tablespoon all-purpose flour evenly over the water’s surface. This creates a barrier that prevents the ramekins from floating and helps distribute heat evenly.
Place the ramekins in the baking dish and pour the custard mixture into them, filling each about ¾ full. The flour barrier is key here—it prevents the custard from absorbing too much water during baking. Tap the ramekins gently on the counter to remove any air bubbles that might have formed on the surface. This ensures a smooth finish when you unmold the custards later.
Bake to Perfect Texture
Carefully transfer the baking dish with ramekins to the preheated oven. Bake for 35-40 minutes until the custards are just set but still slightly wobbly in the center. You’ll know they’re ready when the edges are set but the center still has a slight jiggle—this indicates perfect texture. The custards should be firm enough to hold their shape when unmolded but still have that creamy interior.
Remove from the oven and let the custards cool completely in the ramekins. Once cooled, refrigerate for at least 4 hours or overnight. This chilling step is essential for developing the final texture. Before serving, top each with a small dollop of the 2 tablespoons softened unsalted butter. The butter adds richness and creates that beautiful glossy finish that makes this dessert look and taste even more luxurious.
Pro Tips For Making Vanilla Pot De Creme
- Temper the cream: Warm your heavy cream to just under boiling—around 160°F (71°C)—before mixing it with the yolks. Cold cream will cook the eggs instantly, turning your custard grainy. I learned this the hard way when my first batch curdled like scrambled eggs.
- Split the vanilla: Scrape both the seeds and scraped pulp from one vanilla bean into the cream, but save a few seeds for garnish. The pulp adds depth, but too much can make the custard bitter. (Yes, even if you’re impatient like me, resist the urge to skip this step—it makes a real difference.)
- Whisk like your life depends on it: After adding the yolks to the hot cream, whisk constantly for at least 2 minutes—no gaps. The heat shock is brutal on eggs, and uneven mixing is how you end up with lumps. I used to think 30 seconds was enough. It’s not.
- Chill the ramekins: Place your ramekins in the fridge for 10 minutes before baking to prevent the custard from cooking unevenly. Hot custard in cold dishes = cracked bottoms. (Your future self will thank you for this tiny effort.)
Pro cooking tips for vanilla pot de creme
Tempering Perfection
This is where the magic happens—tempering your egg yolks prevents curdling by gradually acclimating them to heat. Start by whisking yolks and sugar until pale and thick (about 3-4 minutes). Then, pour in 1 cup of warm vanilla cream while whisking constantly.
This slow introduction raises the yolk temperature just enough to stabilize before adding the remaining 3 cups cream. I’ve ruined custards by rushing this step—patience is key. 🌡️
Water Bath Secrets
The water bath isn’t just for even heating—it’s about gentle, indirect heat. Sprinkle 1 tbsp flour on the water’s surface first to create a barrier that prevents ramekins from floating. Use 2 cups water in a deep dish, ensuring it reaches halfway up the ramekins.
This method guarantees no overcooking at the edges while the center stays creamy. I always preheat my oven to 325°F before adding the dish to avoid temperature shocks.
Vanilla Infusion Tricks
Split the vanilla beans lengthwise and scrape every last seed—even the tiny black ones. Simmer the cream just below a boil (gentle bubbles at edges) for 10 minutes, then strain out the pods.
Pro tip: If your custard tastes faintly bitter, you over-infused the cream. For extra depth, add ½ tsp vanilla bean paste to the finished custard before serving. 💛
Baking Time Mastery
Your custards are done when they’re firm at the edges but slightly jiggly in the center—this takes 35-40 minutes at 325°F. Overbaking = rubbery texture. I test doneness by gently shaking a ramekin: if it wobbles but doesn’t spill, it’s perfect.
Let them cool completely in the ramekins before chilling—never rush this step or they’ll crack when unmolded.
Butter Topping Hack
The final touch: 2 tbsp softened butter swirled on top before serving. This isn’t just for flavor—it creates a luxurious sheen that makes your custard look restaurant-worthy.
Use European-style butter (like Plugrá) for richer flavor. For a modern twist, dust with toasted coconut flakes or a pinch of cinnamon right before serving. ✨
Troubleshooting Guide
Curdled custard? You likely added hot cream too quickly. Grainy texture? Your yolks weren’t whisked enough. Sunken centers? Overbaked! For a quick fix, whisk in 1 tbsp extra cream and rebake for 10 minutes at 300°F. Store leftovers with plastic wrap pressed directly on the surface to prevent skin formation. Double batches? Freeze in ramekins for easy single servings—thaw overnight in the fridge.
Nutrition facts
Frequently asked questions
Why does my vanilla custard sometimes curdle?
The most common cause is adding hot cream too quickly to the egg yolks. Always temper by slowly pouring 1 cup of warm cream into the yolks while whisking constantly, then gradually adding the rest. Also ensure your yolks are fully whisked to pale yellow before combining—this creates a stable emulsion.
Can I make this recipe without vanilla beans?
Yes! Use 2 tablespoons pure vanilla extract plus 1 tablespoon water to mimic the bean’s moisture. For depth, add ½ teaspoon vanilla bean paste to the finished custard. Tahitian vanilla extract works best for authentic flavor, though it has a different aroma profile than Madagascar beans.
How do I know when the custard is fully set?
Your custards are done when the edges are firm but the center still has a gentle wobble (like Jell-O). Gently shake a ramekin—if it moves but doesn’t spill, it’s perfect. Overbaking for even 5 extra minutes turns custard rubbery. Always check at 35 minutes when baking at 325°F.
Can I use this recipe for individual servings?
This recipe makes 6 perfect ramekin servings. For larger gatherings, double the ingredients and use 8-ounce custard cups. Freeze individual portions in ramekins for easy single servings—just thaw overnight in the fridge. The texture remains creamy when properly stored.
What’s the best way to store leftovers?
Press plastic wrap directly on the custard’s surface to prevent skin formation. Store in an airtight container for up to 5 days in the fridge. For reheating, microwave in 20-second bursts until just warmed. Never reheat to boiling—this ruins the silky texture.

- Baked Potatoes in Crock Pot Recipe: Buttery Interiors and Crispy Top Magic - November 1, 2026
- Braised Beef Short Ribs Recipe: Crock Pot Fall-Off-Bone Magic in 6 Hours - November 1, 2026
- Crock Pot Cocoa Recipe: Velvety Warmth With Hidden Spice Magic - November 1, 2026