
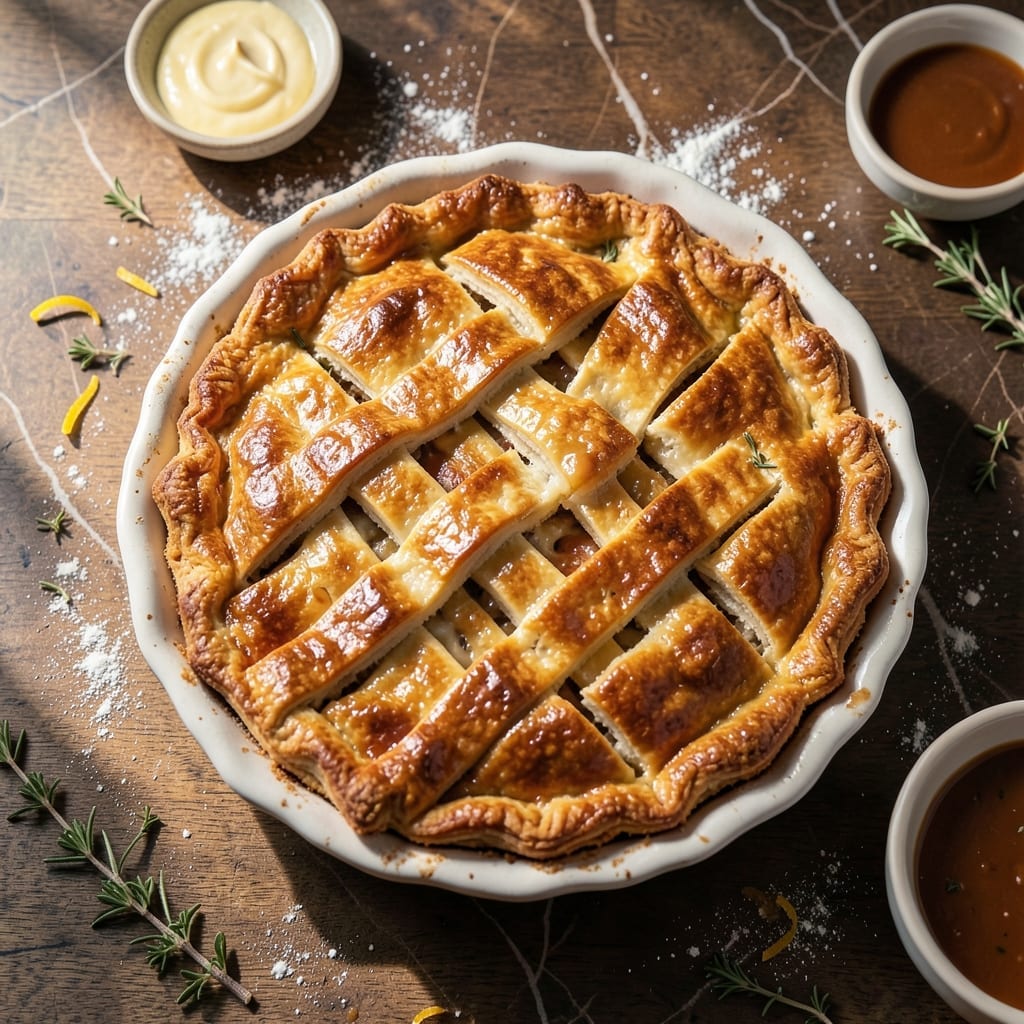
Achieving flaky layers without dairy is entirely possible with this proven technique. The secret lies in using cold vegan butter and minimal handling to create that coveted texture we all love.
This method delivers a vegan crust that holds its structure while remaining tender and golden. The key is chilling the dough between steps to prevent the fat from melting prematurely.
You’ll end up with a crust that’s both sturdy enough for pot pie and delicate enough to shatter at the touch. The layers separate beautifully, revealing that classic flaky appearance.
Perfect for both top and bottom crusts, this recipe ensures your pot pie has the professional finish it deserves.
Ingredients for Vegan Pot Pie Crust
Cold vegan butter and minimal handling create flaky, golden layers for your pot pie.
| Ingredient | Amount | Notes |
|---|---|---|
| All-Purpose Flour 🌾 | 2 ½ cups | Plus extra for dusting |
| Vegan Butter 🧈 | 1 cup | Cold, cubed, unsalted |
| Ice Water 💧 | ½ cup | Plus 1 tbsp as needed |
| Salt 🧂 | 1 tsp | Fine sea salt preferred |
| Apple Cider Vinegar 🍏 | 1 tbsp | For flakiness and structure |
| Plant-Based Milk 🥛 | 1 tbsp | Optional for brushing crust |
The vegan butter is non-negotiable here. Miyoko’s or Earth Balance are the best store-bought options—both have the right fat content and hold up well in dough. I always grab mine from Whole Foods or Sprouts since they keep it properly chilled. If you’re using a different brand, check that it’s at least 70% fat. The flour is just regular all-purpose, nothing fancy (the good stuff, not the self-rising kind).
No vegan butter on hand? Coconut oil works in a pinch—use the refined kind so it doesn’t taste like coconut. Out of apple cider vinegar? White vinegar at the same amount gets the job done. The plant milk for brushing can be any unsweetened variety—oat or almond milk are my go-tos. If your dough feels dry, add ice water 1 tbsp at a time (don’t overdo it).
Dough can be wrapped and refrigerated for 2-3 days or frozen for 1 month. Thaw in the fridge overnight before rolling. Baked crusts keep at room temp for 1 day—reheat to crisp if needed.
Why You’ll Love This Recipe
- Five Minute Mix: I can have this crust ready before the oven finishes preheating—just flour, vegan butter, and a splash of ice water.
- Buttery, Flaky Layers: The apple cider vinegar trick gives it that perfect crispness with a rich, savory depth.
- Freezer Friendly: I’ll often make a double batch and freeze half for next week’s pot pie craving.
- Pantry Staples Only: No special ingredients here—just what I already have on hand, and it still tastes indulgent.
Step-by-Step Instructions for Vegan Pot Pie Crust
This method delivers a flaky, golden crust that rivals any traditional version.
Step 1: Combine Dry Ingredients and Cut in Vegan Butter
In a large bowl, whisk together 2.5 cups All-Purpose Flour and 1 tsp Salt until evenly distributed. This step aerates the flour and prevents dense spots in your crust.
Add 1 cup Vegan Butter (cold and cubed) to the flour mixture. Using a pastry cutter or your fingers, work the butter into the flour until the mixture resembles coarse crumbs with pea-sized butter pieces visible. The key here is keeping the butter cold—this creates those flaky layers we’re after.
Step 2: Add Liquid Ingredients to Form the Dough
Create a well in the center of the flour-butter mixture. Pour in 0.5 cup Ice Water and 1 tbsp Apple Cider Vinegar. The vinegar tenderizes the gluten for a more delicate crust.
Using a fork, gently mix the liquid into the dry ingredients until the dough just starts to come together. It should look shaggy with some dry bits remaining. Don’t overwork it—this prevents a tough crust. If it’s too dry, add up to 1 tbsp more ice water as needed.
Step 3: Shape and Chill the Dough
Turn the dough onto a lightly floured surface and gently knead it just until it comes together into a smooth ball. Divide it into two equal portions and shape each into a disc about 1 inch thick.
Wrap each disc tightly in plastic wrap and refrigerate for at least 1 hour (or up to 2 days). Chilling relaxes the gluten and solidifies the butter, which is crucial for that flaky texture. The dough should feel firm but not rock-hard when ready to roll.
Step 4: Roll and Fit the Crust
On a lightly floured surface, roll one disc into a circle about 12 inches in diameter and ⅛ inch thick. To prevent sticking, lift and rotate the dough occasionally as you roll.
Transfer the rolled dough to your pie dish, pressing it gently into the bottom and up the sides. Trim the edges, leaving a ½ inch overhang. For a double-crust pie, repeat with the second disc for the top crust. Brush the top crust with 1 tbsp Plant-Based Milk for a golden finish.
Step 5: Blind Bake or Fill and Bake
For a pre-baked crust, line the dough with parchment paper and fill with pie weights or dried beans. Bake at 375°F for 15 minutes, then remove the weights and bake for another 10-12 minutes until lightly golden.
For a filled pie, add your filling to the bottom crust, cover with the top crust, and crimp the edges. Cut a few slits in the top crust to allow steam to escape. Bake according to your filling recipe until the crust is deep golden brown and the filling is bubbly.
Pro Tips For Making Vegan Pot Pie Crust
- Chill the Butter: Cut your vegan butter into small cubes and freeze for 10 minutes before mixing—I learned this the hard way after ending up with a tough, flat crust.
- Use Ice-Cold Water: Measure your water, then add ice cubes to it while you work. Sounds weird, but it works: the colder the water, the flakier the crust.
- Don’t Overmix: Stop mixing as soon as the dough comes together, even if it looks a little shaggy. After burning three batches, I finally figured out that overworking = tough crust.
- Add Vinegar Last: Stir in the apple cider vinegar at the very end, just before rolling. My grandmother swore by this, and she was right: it keeps the layers distinct.
Storing and Reheating vegan pot pie crust
Refrigerator Storage
Wrap the unbaked dough discs tightly in plastic wrap and store in the fridge for up to 2 days. I always label mine with the date to avoid guesswork. The cold keeps the vegan butter firm for maximum flakiness. ❄️
Freezer Storage
For longer storage, freeze wrapped dough for up to 1 month. Thaw overnight in the fridge before rolling. Pro tip: Freeze flat to save space and prevent odd shapes.
Baked Crust Storage
Once baked, keep the crust at room temperature for 1 day in an airtight container. The texture stays crisp if you separate layers with parchment paper.
Reheating Baked Crust
To revive a baked crust, warm it in a 350°F oven for 5-10 minutes. This restores the flakiness better than a microwave. Brush with plant-based milk for fresh-baked shine.
Preventing Soggy Bottoms
For filled pies, store leftovers in the fridge for 3-4 days. Reheat individual slices in the oven to maintain texture. The vinegar in the dough helps resist sogginess. 💡
Make-Ahead Tip
You can roll and fit the crust in the pie dish up to 1 day ahead. Cover tightly with plastic wrap and refrigerate. This saves time on baking day without sacrificing quality.
Nutrition Facts
Frequently Asked Questions
Can I use coconut oil instead of vegan butter?
Yes, refined coconut oil works as a substitute. Use the same amount, but ensure it’s solid and cold. The texture may be slightly different, but it will still create flaky layers.
Why do I need to chill the dough?
Chilling relaxes the gluten and solidifies the fat, which prevents shrinking and ensures flakiness. Skipping this step can result in a tough, dense crust.
Can I make this dough ahead of time?
The dough can be refrigerated for up to 2 days or frozen for 1 month. Thaw in the fridge before rolling for best results.
How do I prevent a soggy bottom crust?
Blind-bake the bottom crust for 15 minutes before adding filling. Also, ensure your filling isn’t too wet to maintain crispness.

- 6 Oz Chocolate Chip Cookie Recipe: Perfectly Balanced Crispy Edges and Chewy Hearts - September 25, 2026
- 6-Inch Coffee Cake Recipe: Vanilla Bean Swirls and Buttery Streusel Topping - September 25, 2026
- 1 Hour Soup Recipe: Velvety Richness Without the Wait - September 25, 2026