
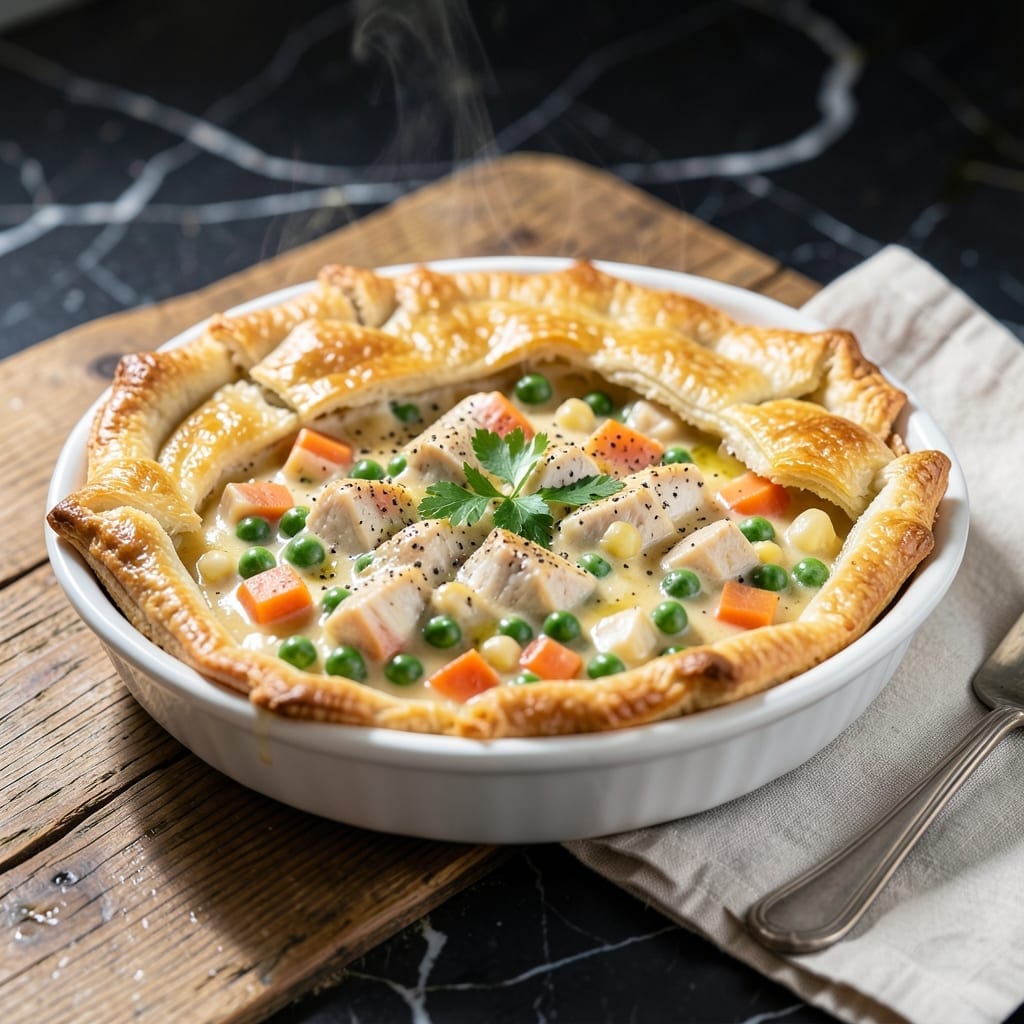
This lighter take on chicken pot pie delivers all the comfort of the classic without the guilt. I’ve refined the crust to stay flaky while cutting unnecessary calories, proving you can enjoy indulgence the smart way.
The filling stays rich and savory with tender chicken, hearty vegetables, and a velvety sauce. Every bite offers that nostalgic taste you love, just with a mindful approach to ingredients and preparation.
What you get is a dish that satisfies cravings and fits within a balanced plan. The crust bakes to golden perfection, while the filling remains creamy and packed with flavor.
Serve it fresh from the oven for a meal that feels decadent and aligns with your goals.
Ingredients for Weight Watchers Chicken Pot Pie
Pantry staples and smart swaps make this comfort classic guilt-free and delicious.
| Ingredient | Amount | Notes |
|---|---|---|
| Chicken Breast 🍗 | 1 ½ lb | Boneless, skinless, diced |
| All-Purpose Flour 🌾 | ½ cup | For sauce thickening |
| Low-Fat Milk 🥛 | 1 cup | 2% or skim preferred |
| Low-Sodium Chicken Broth 🍲 | 1 ½ cups | Reduced sodium for balance |
| Frozen Mixed Vegetables 🥕 | 2 cups | Peas, carrots, corn blend |
| Yellow Onion 🧅 | 1 whole | Medium, finely diced |
| Garlic Cloves 🧄 | 2 cloves | Minced for depth |
| Light Butter 🧈 | 4 tbsp | Divided for crust and filling |
| Puff Pastry 🥧 | 1 sheet | Reduced-fat if available |
| Olive Oil 🫒 | 1 tbsp | For sautéing vegetables |
| Salt 🧂 | ½ tsp | Kosher or sea salt |
| Black Pepper 🌶️ | ½ tsp | Freshly ground preferred |
| Dried Thyme 🌿 | 1 tsp | Or fresh thyme equivalent |
| Dried Rosemary 🍃 | ½ tsp | Crushed for aroma |
| Egg 🥚 | 1 whole | For pastry wash |
The crust is the game-changer here. Puff pastry sheets (look for all-butter or reduced-fat versions at Whole Foods or Trader Joe’s) give you that flaky texture without the fuss of homemade. The chicken breast stays tender if you dice it into even pieces—Costco sells pre-cut chicken that saves time. For the veggies, frozen works perfectly (and is often more nutritious than fresh).
No puff pastry? Phyllo dough with a light olive oil brush gets crispy but skips the buttery calories. Swap the low-fat milk for unsweetened almond milk to shave off more points. Fresh herbs are great if you have them—use one-third the amount of dried. The broth can be homemade, but Swanson’s low-sodium is my go-to for convenience.
This reheats like a dream—cover with foil to keep the crust crisp. Leftovers stay good for 3-4 days in the fridge or freeze for up to 3 months. Portion into single servings for easy grab-and-go lunches (or dinners when you’re too tired to cook).
Why You’ll Love This Recipe
- One Pot Wonder: I love that everything—chicken, veggies, and that creamy sauce—comes together in a single skillet. No extra bowls, no mess.
- Creamy Comfort: The low-fat milk and broth make a velvety filling that clings to the chicken and veggies. Honestly, it tastes indulgent without the guilt.
- Meal Prep Magic: I make a double batch on Sunday and portion it out for the week. Between us, it reheats like a dream.
- Budget Friendly: Frozen veggies and chicken breast keep the cost down. I’ll be real: it feeds my family for less than takeout.
Step-by-Step Instructions for Chicken Pot Pie
Here’s how I make this comforting classic lighter without sacrificing that flaky, golden crust we all love.
Step 1: Cook the Chicken and Vegetables
Heat the olive oil in a large skillet over medium-high heat. Add the diced chicken breast, season with salt and black pepper, and cook for 5-6 minutes until no longer pink inside. The chicken should be lightly browned and cooked through—cut a piece to check if unsure.
Remove the chicken and set aside. In the same skillet, add the finely diced yellow onion, minced garlic cloves, and frozen mixed vegetables. Sauté for 4-5 minutes until the onion softens and the vegetables thaw. This builds that classic pot pie flavor base.
Step 2: Make the Creamy Filling
Sprinkle the all-purpose flour over the vegetable mixture and stir well to coat. Cook for 1 minute to remove the raw flour taste. Slowly pour in the low-sodium chicken broth and low-fat milk, stirring constantly to prevent lumps from forming.
Add the dried thyme and dried rosemary, then return the cooked chicken to the skillet. Simmer for 3-4 minutes until the filling thickens enough to coat the back of a spoon. Taste and adjust seasoning with more salt or black pepper if needed.
Step 3: Prepare the Puff Pastry Topping
Unfold the puff pastry sheet on a lightly floured surface and roll it out slightly to fit your baking dish. Transfer the chicken and vegetable filling to a 9-inch pie dish or similar oven-safe dish. The filling should be bubbling hot before adding the pastry.
Drape the puff pastry over the filling, tucking the edges inside the dish to create a rustic look. Cut a few small slits in the center to allow steam to escape—this prevents a soggy crust.
Step 4: Bake to Golden Perfection
Whisk the egg with 1 tablespoon of water to make an egg wash. Brush this lightly over the puff pastry, being careful not to let it pool. This gives that beautiful golden-brown finish we expect from pot pie.
Bake at 375°F for 25-30 minutes until the crust is puffed and golden and the filling is bubbling at the edges. If the pastry browns too quickly, tent loosely with foil. Let it rest for 5 minutes before serving to allow the filling to set slightly.
Pro Tips For Making Weight Watchers Chicken Pot Pie
- Precook the Chicken: Poach the chicken breast in the low-sodium broth first—it keeps the meat juicy and infuses extra flavor into the filling. I learned this the hard way after ending up with dry, stringy chicken in my first few attempts.
- Thicken Gradually: Whisk the flour into the milk before adding it to the broth to prevent lumps. Sounds weird, but it works: this simple step guarantees a smooth, velvety filling every time.
- Thaw the Veggies: Drain and pat the frozen mixed vegetables dry before adding them to the filling. Skip this and you’ll end up with a watery, sad pot pie—yes, even if you’re impatient like me.
- Use Cold Butter: If your topping includes a biscuit or crust, cut in cold butter (about 2 tablespoons) for flakiness. My grandmother swore by this, and she was right: it makes a real difference in texture.
Pro Cooking Tips for This Recipe
Crust Perfection
For that signature flaky top, use cold puff pastry straight from the fridge. Roll it out just enough to cover your 9-inch dish, then dock with a fork to prevent air bubbles. I’ve found Pepperidge Farm works best for this recipe. 💡
Filling Consistency
Your filling should be thick but still pourable before baking. If it’s too thin, simmer an extra 2-3 minutes. If too thick, add ¼ cup low-sodium chicken broth to loosen it. The right consistency ensures every bite has perfect sauce coverage.
Seasoning Balance
With low-sodium ingredients, you’ll likely need extra seasoning. Taste after adding the herbs, then adjust with ½ tsp salt and ¼ tsp black pepper as needed. Fresh thyme and rosemary can be used at one-third the amount of dried.
Avoiding Soggy Bottoms
Prevent a soggy crust by ensuring your filling is bubbling hot before adding the pastry. Also, brush the pastry with egg wash only on the top—avoid the edges where it meets the dish. This keeps the underside crisp.
Even Baking
For golden, even baking, rotate your dish halfway through the 25-30 minute bake time. If the top browns too quickly, tent with foil. Let it rest 5 minutes after baking so the filling sets properly. 🔥
Ingredient Prep
Dice your chicken breast into uniform ½-inch pieces for even cooking. Finely dice the yellow onion so it melts into the filling. These small details make a big difference in texture and flavor distribution.
Nutrition Facts
Frequently Asked Questions
Can I use rotisserie chicken instead?
Use 2 cups of shredded rotisserie chicken to save time. Just skip the initial cooking step and add it directly to the filling when combining with vegetables.
How do I calculate the points for this?
Divide the dish into 4 equal servings. Each portion is approximately 8-10 points on most Weight Watchers plans, depending on your specific program’s calculations. Always double-check with your app.
Can I make this ahead of time?
Yes! Assemble the pie, cover, and refrigerate for up to 24 hours before baking. Add 5-10 minutes to the baking time if going straight from the fridge.
What if my crust isn’t browning?
Brush with extra egg wash and return to the oven for 3-5 minutes. For even browning, ensure your oven is fully preheated to 375°F before baking.

- 6 Oz Chocolate Chip Cookie Recipe: Perfectly Balanced Crispy Edges and Chewy Hearts - September 25, 2026
- 6-Inch Coffee Cake Recipe: Vanilla Bean Swirls and Buttery Streusel Topping - September 25, 2026
- 1 Hour Soup Recipe: Velvety Richness Without the Wait - September 25, 2026