
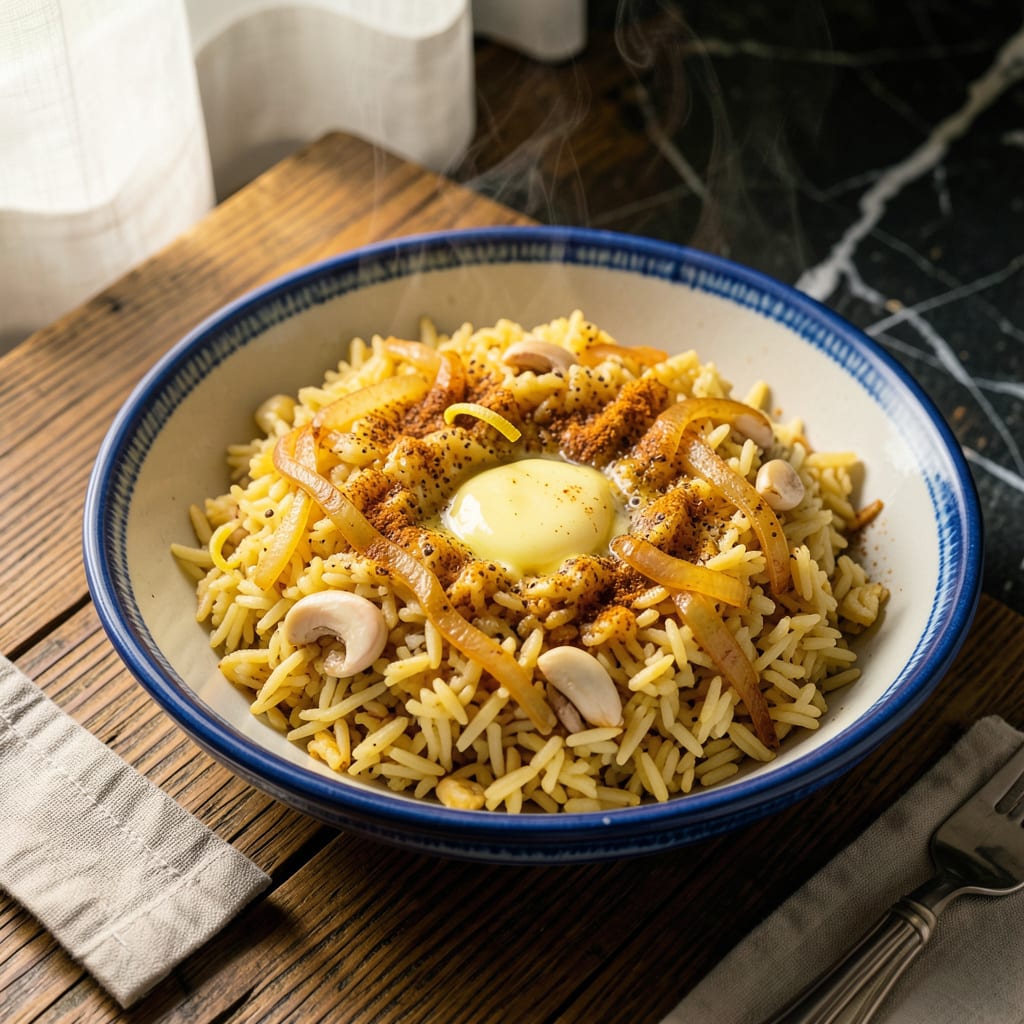
Perfectly fluffy, vibrant yellow rice is just 20 minutes away with this Instant Pot method. The pressure cooker transforms simple ingredients into a fragrant side dish with evenly distributed spices and ideal texture. No more watching pots or worrying about burnt bottoms—this technique delivers consistent results every time.
The combination of turmeric, garlic, and broth creates a rich, aromatic base that infuses every grain. Whether serving alongside grilled meats or as part of a vegetarian spread, this rice adapts effortlessly. The Instant Pot’s precision ensures the grains stay separate and tender, never mushy or undercooked.
Ingredients for Yellow Rice Recipe Instant Pot
These twelve carefully selected ingredients transform into vibrant, aromatic yellow rice with minimal effort and maximum flavor.
| Ingredient | Amount | Notes |
|---|---|---|
| Long-Grain White Rice 🍚 | 1 ½ cups | Rinsed until water runs clear |
| Vegetable Broth 💧 | 1 ¾ cups | Low-sodium preferred for control |
| Yellow Onion 🧅 | ½ whole | Finely diced for even distribution |
| Garlic Cloves 🧄 | 4 cloves | Minced to release maximum flavor |
| Ground Turmeric 🌿 | 1 ½ tsp | Provides vibrant color and earthiness |
| Ground Cumin 🌶️ | 1 tsp | Toasted for deeper aromatic profile |
| Diamond Crystal Kosher Salt 🧂 | 1 tsp | Adjust to taste after cooking |
| Freshly Ground Black Pepper 🌶️ | ½ tsp | Coarse grind for subtle texture |
| Unsalted Butter 🧈 | 2 tbsp | Clarified preferred for higher smoke point |
| Bay Leaf 🌿 | 1 whole | Removed before serving |
| Fresh Cilantro 🌿 | ¼ cup | Chopped for bright garnish |
| Lemon Juice 🍋 | 1 tbsp | Freshly squeezed for brightness |
The rice quality determines final texture. Basmati or jasmine rice yields optimal separation and fragrance. For broth, Imagine or Pacific Foods brands offer consistent low-sodium options without artificial flavors. Turmeric potency varies by brand—Primal Palate or Simply Organic deliver reliable color and flavor. Clarified butter (ghee) may be substituted for unsalted butter to achieve a higher smoke point during sautéing. Freshly ground spices are non-negotiable for achieving the recipe’s aromatic depth.
Cumin may be replaced with ground coriander at equal volume for a citrus-forward variation. If avoiding dairy, substitute butter with extra-virgin olive oil (use refined for neutral flavor). Onion powder (1 tbsp) can replace fresh onion when pressed for time, though texture will differ. For gluten-free adaptation, verify broth certification. The bay leaf may be omitted if unavailable, though its subtle contribution to the flavor profile will be missed. Lemon juice preserves the rice’s bright color—white vinegar at half quantity works in emergencies.
Cooked rice maintains optimal texture for 3-4 days refrigerated in an airtight container. Freezing is not recommended due to grain separation upon thawing. Store turmeric and cumin in opaque containers away from light to preserve potency for up to 6 months. Fresh cilantro keeps best with stems trimmed and wrapped in damp paper towels. The complete dish reheats beautifully in the Instant Pot using the ‘Steam’ function for 2-3 minutes with 1/4 cup water.
Why You’ll Love This Recipe
- Dump-and-Go Magic: I love that this is truly one-and-done—just toss in the rice, broth, diced onion, garlic, and turmeric, then walk away. The Instant Pot does all the work while I handle everything else (yes, even on a Tuesday night).
- Turmeric’s Golden Glow: That first whiff when the lid comes off—warm, earthy turmeric mingling with caramelized onion and garlic? It’s like sunshine in a bowl. The flavor is rich but not overpowering, with just enough depth to make plain rice feel special.
- Meal Prep MVP: This rice holds up for days without turning mushy, so I make a big batch Sunday and use it in burrito bowls, stuffed peppers, or just as a side. Honestly, it’s the only way I get ahead on lunches without resorting to sad desk salads.
- Budget Stretch Wonder: A pound of rice, a few pantry staples, and suddenly I’ve got 6 servings for under $3. Between us, it’s the reason I can afford the fancy cheese for tacos later—this fills everyone up first.
Step-by-Step Instructions for Yellow Rice in Instant Pot
This method delivers perfectly fluffy, aromatic rice with minimal effort and maximum flavor.
Step 1: Prepare the Aromatic Base
Set your Instant Pot to the Sauté function on Normal heat. Add the 2 tbsp unsalted butter and allow it to melt completely. The butter should foam but not brown. Immediately add the finely diced 0.5 whole yellow onion and cook for 3-4 minutes, stirring frequently, until the onions become translucent and just begin to soften at the edges.
Add the 4 minced garlic cloves and cook for an additional 30-45 seconds until fragrant. Be vigilant during this step—garlic burns easily and will impart a bitter flavor if overcooked. The mixture should release a rich, savory aroma that forms the flavor foundation for your rice.
Step 2: Toast the Spices and Rice
Stir in the 1.5 tsp ground turmeric and 1 tsp ground cumin into the onion-garlic mixture. Cook for 20-30 seconds until the spices become fragrant and slightly darken in color. This toasting step intensifies their aromatic qualities and prevents any raw spice flavor in the final dish.
Add the 1.5 cups long-grain white rice (already rinsed until water runs clear) to the pot. Stir continuously for 1-2 minutes to coat each grain with the spiced butter mixture. The rice should take on a uniform golden hue from the turmeric. This step ensures even seasoning distribution and prevents clumping during cooking.
Step 3: Add Liquids and Pressure Cook
Pour in the 1.75 cups vegetable broth, then add the 1 tsp Diamond Crystal kosher salt, 0.5 tsp freshly ground black pepper, and 1 whole bay leaf. Stir gently to combine all ingredients, ensuring the rice is fully submerged in the liquid. The liquid level should be just above the rice by about ¼ inch—this is the perfect ratio for fluffy results.
Secure the Instant Pot lid, set the valve to Sealing, and cook on High Pressure for 5 minutes. The pot will take approximately 8-10 minutes to come to pressure before the cooking time begins. Once the cooking cycle completes, allow the pressure to release naturally for 10 minutes, then carefully perform a quick release for any remaining pressure.
Step 4: Finish and Fluff the Rice
Open the lid and immediately remove the bay leaf. Use a fork to gently fluff the rice, separating any grains that may have stuck together during cooking. The rice should be tender with no resistance when tested, and the liquid should be fully absorbed. If any moisture remains at the bottom, let the rice sit uncovered for 2-3 minutes to absorb it completely.
Drizzle the 1 tbsp lemon juice evenly over the rice and fold gently to incorporate. This final acidity brightens all the flavors and balances the earthy spices. The rice should have a vibrant yellow color throughout, with distinct grains that hold their shape while remaining tender.
Step 5: Garnish and Serve
Transfer the rice to a serving dish and sprinkle with the 0.25 cup chopped fresh cilantro. The cilantro adds a fresh, herbal contrast to the warm spices. For best presentation, fluff the rice once more with a fork before serving to distribute the cilantro evenly throughout.
Serve immediately while hot. The texture should be light and fluffy, with each grain distinct yet perfectly cooked. The aroma will be fragrant with notes of turmeric and cumin, complemented by the bright citrus finish. This rice pairs exceptionally well with grilled proteins or as a base for vegetable bowls.
Flavor Customization for This Dish
Spice Level Adjustments
For a milder flavor profile, reduce the ground cumin to ½ tsp and add ¼ tsp ground coriander for a gentler warmth. I often make this adjustment when serving to kids or guests sensitive to bold spices. The turmeric’s earthiness remains dominant while the overall heat becomes more approachable. 💛
To increase the heat, add ¼ tsp cayenne pepper or ½ tsp smoked paprika when toasting the spices. For a complex heat that builds gradually, I recommend ½ tsp Aleppo pepper—it adds fruity notes alongside the warmth. Always taste your broth before adding salt if increasing spice levels.
Citrus Variations
Swap the lemon juice for lime juice to create a brighter, more tropical profile that pairs beautifully with seafood dishes. I use this variation when serving with grilled shrimp or fish tacos. The lime’s acidity cuts through the richness of the turmeric and butter.
For a deeper citrus complexity, add 1 tsp orange zest along with the garlic during sautéing. This works particularly well with chicken dishes, creating a Moroccan-inspired flavor profile. The zest should be finely grated to distribute evenly throughout the rice.
Herb Customizations
Replace the cilantro with flat-leaf parsley for a cleaner, more universal herb flavor. I prefer this when serving the rice with Mediterranean dishes like lamb kebabs. The parsley’s freshness complements the earthy spices without overpowering them.
For a bolder herb presence, add 2 tbsp chopped fresh dill along with the cilantro at the end. This combination works wonderfully with Greek or Middle Eastern meals. The dill’s slightly grassy notes balance the turmeric’s warmth beautifully.
Richness Adjustments
For a creamier texture, stir in ¼ cup coconut milk after pressure cooking but before fluffing. This creates a luxurious, slightly sticky rice that’s perfect with curries. I use full-fat coconut milk for maximum richness, but light works in a pinch.
To reduce richness, replace the butter with 1 tbsp olive oil and add ½ cup diced tomatoes with the broth. This creates a lighter, more tomato-forward version that still maintains the vibrant yellow color. The tomatoes add natural sweetness that balances the spices.
Protein Pairings
For a complete meal, stir in 1 cup cooked chickpeas after fluffing the rice. This adds plant-based protein and texture contrast. I often do this when making a vegetarian bowl meal, topping it with avocado and a fried egg.
To create a one-pot meal, add 1 lb diced chicken thighs when sautéing the onions. The chicken will cook perfectly during pressure cooking, absorbing all the wonderful spices. Just increase the broth to 2 cups to account for the additional protein.
Color Enhancements
For an even more vibrant yellow color, add ¼ tsp saffron threads to the broth before pressure cooking. The saffron will infuse the rice with a golden hue and subtle floral notes. I use this technique for special occasions when I want the rice to really stand out.
To create a sunset effect, stir in ½ cup grated carrots with the rice. The carrots will soften during cooking and distribute their orange color throughout the dish, creating a beautiful gradient effect with the turmeric’s yellow.
Nutrition Facts
Frequently Asked Questions
Can I use brown rice instead of white?
Yes, but you’ll need to adjust the liquid and cooking time. Use 2 cups broth for 1.5 cups brown rice and increase pressure cooking time to 22 minutes with a 15-minute natural release. The texture will be chewier but equally flavorful.
Why did my rice turn out mushy?
Mushy rice usually means too much liquid or overcooking. Stick to the 1:1.25 rice-to-broth ratio and avoid stirring after pressure cooking. Always use the natural release for at least 10 minutes to prevent excess moisture.
Can I double the recipe?
For 3 cups rice, use 3.5 cups broth and keep all other ingredients proportional. The cooking time remains 5 minutes, but you may need to increase sauté time slightly for even toasting. Don’t exceed half the Instant Pot’s capacity for best results.
What if I don’t have turmeric?
For color, use ½ tsp saffron threads steeped in 2 tbsp warm broth before adding. For flavor without color, substitute with 1 tsp curry powder (milder) or ½ tsp ground mustard (sharper). The dish will taste different but still delicious.

- 8 Bean Soup Recipe Crock Pot: Hearty Vegetable Medley in One Pot - September 25, 2026
- 4C Bread Crumbs Meatballs Recipe: Crispy Crust and Juicy Centers - September 25, 2026
- 6 Oz Chocolate Chip Cookie Recipe: Perfectly Balanced Crispy Edges and Chewy Hearts - September 25, 2026