
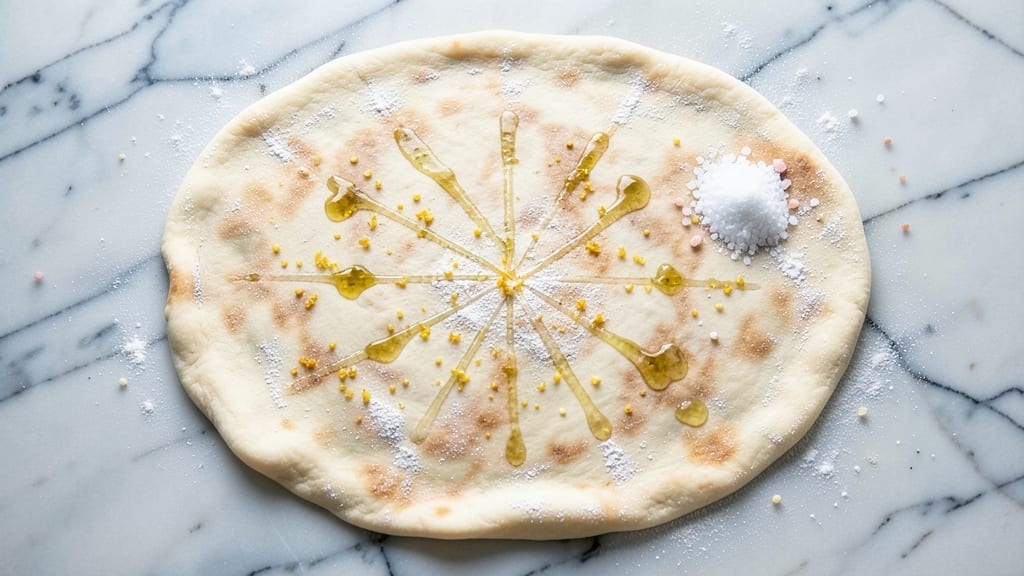
This 00 flour and bread flour pizza dough recipe delivers the perfect balance of crispy crust and chewy center that makes every slice worth savoring. 🌟 The secret lies in the blend of fine Italian 00 flour for delicate texture and bread flour for structure, creating a dough that’s both tender and sturdy enough to hold toppings without tearing.
I’ve perfected this formula through years of testing, ensuring your pizza crust will be golden on the outside and pillowy within—no more soggy or overly chewy results.
The magic happens in the technique: precise hydration, proper kneading, and a controlled proofing time that develops gluten without overworking the dough. Unlike many recipes that rely on shortcuts, this method builds flavor and texture from the ground up, using just five core ingredients.
Whether you’re making classic New York-style thin crust or deep-dish Chicago pies, this dough adapts beautifully while maintaining its signature balance of crisp and chewy.
What you’ll achieve is a pizza crust that’s crispy at the edges, perfectly chewy in the middle, and capable of supporting even the heaviest toppings without losing structure. The blend of flours creates a delicate yet sturdy texture, while the slow fermentation during proofing enhances flavor depth.
This isn’t just another pizza dough recipe—it’s a foundation that transforms your homemade pizzas into restaurant-quality masterpieces.
Ready to elevate your pizza game? Let’s dive into the exact ratios, step-by-step process, and pro tips that will make this dough your new kitchen staple. The results speak for themselves—crispy, chewy, and impossible to resist.
Ingredients for 00 flour and bread flour pizza dough
Five simple ingredients transform into the perfect crispy-chewy pizza dough magic.
| Ingredient | Amount | Notes |
|---|---|---|
| 00 Flour 🌾 | 3 ½ cups | Italian 00 flour for delicate texture |
| Bread Flour 🍞 | 1 ½ cups | For structure and chewiness |
| Instant Yeast 🍞 | ½ tsp | Active dry works too |
| Fine Sea Salt 🧂 | 1 ½ tsp | Diamond Crystal preferred |
| Granulated Sugar 🍚 | 1 tsp | Feeds yeast for fermentation |
| Extra-Virgin Olive Oil 🫒 | 1 tbsp | High-quality for flavor |
| Warm Water 💧 | 1 ¼ cups | 105°F for optimal yeast activation |
The flours are the stars here. 00 flour gives that signature crispy, delicate texture—it’s worth hunting down at Italian markets or specialty stores like Eataly. Bread flour provides the chewiness and structure. If you can only find all-purpose, use it, but the texture won’t be quite as crisp. For the yeast, FreshPacks from the grocery store freezer section are perfect—they’re more potent than jarred yeast. The sugar and salt are standard, but don’t skip the salt—it balances the yeast and enhances flavor. I always measure my flours by weight if possible (120g for 00 flour, 180g for bread flour), but cups work fine for this recipe.
No 00 flour? All-purpose flour plus 1 tbsp cornstarch gets you close—it mimics the delicate texture. Short on bread flour? Add 1 tbsp vital wheat gluten to all-purpose. The olive oil can be swapped for avocado oil, but stick with extra-virgin for that authentic Italian flavor. Water temperature matters—too hot kills the yeast, too cold slows fermentation. 105°F is ideal (just warm, not boiling). If your water isn’t that temperature, let it sit for 5 minutes after boiling. For yeast substitutes, 1 packet of rapid-rise yeast works in a pinch, but fermentation will be faster.
This dough keeps beautifully. Shape and refrigerate up to 48 hours for deeper flavor—just let it sit at room temperature for 30 minutes before rolling. For longer storage, freeze shaped dough balls wrapped in plastic for up to 3 months. Thaw overnight in the fridge. The proofed dough can also be frozen before baking—thaw and bake as usual. I like to make two batches on weekends: one for immediate use and one to freeze for lazy weeknights. The crispy-chewy magic holds up perfectly when reheated.
Why You’ll Love This Recipe
- I’ll be real: my flour bins are my pride and joy. Using both 00 and bread flour stretches my budget without sacrificing quality, and the instant yeast means no waiting for proofing drama. Plus, the fine sea salt? It’s the kind that makes every bite taste like you put in effort—even when you didn’t.
- No-Knead Night: I swear, this dough comes together while I’m scrolling through my phone. Just mix the 00 flour’s silky finesse with bread flour’s chewy backbone, sprinkle in instant yeast, and let the magic happen. No punchy arms, no waiting around—just 20 minutes of hands-off rising.
- Double the Better: Between us, I always make extra. That combo of 00 flour for a tender bite and bread flour for structure means the leftovers? Still crispy at the edges, still pillowy inside. Freeze half for lazy Mondays—no shame.
- Neapolitan Meets Comfort Food: Honestly, the sugar and salt in this dough? It’s the secret handshake. The 00 flour gives that authentic, airy Neapolitan lift, while the bread flour keeps it sturdy enough for my kids’ messy toppings. Best of both worlds—fancy enough for date night, easy enough for a Friday movie marathon.
Step-by-step instructions for 00 flour and bread flour pizza dough
Here’s how to craft dough with a crispy crust and chewy center—no guesswork, just perfect results.
👨🍳 Step 1: Mix the Dry Ingredients
In a large mixing bowl, combine the 3.5 cups 00 flour and 1.5 cups bread flour. This blend gives you the best of both worlds—delicate texture from the 00 flour and chewy structure from the bread flour. Sift the flours together to aerate them and create a fine, even base for your dough.
Next, whisk in the 0.5 tsp instant yeast, 1.5 tsp fine sea salt, and 1 tsp granulated sugar. The sugar feeds the yeast while the salt balances flavors. Use a whisk to break up any yeast clumps and distribute everything evenly. This dry mix is your foundation—get it perfect now to avoid adjusting later.
🍳 Step 2: Add Wet Ingredients and Knead
Make a well in the center of your dry ingredients and pour in the 1 tbsp extra-virgin olive oil and 1.25 cups warm water (about 105°F). The water should feel warm to the touch but not hot—too hot will kill the yeast. Use a wooden spoon to gradually incorporate the liquids into the dry ingredients.
Once everything comes together, turn the dough out onto a lightly floured surface. Knead for 8-10 minutes by hand, or use a stand mixer with a dough hook on medium speed for 5-6 minutes. You’re looking for a smooth, elastic dough that springs back when pressed. If it feels sticky, add just a touch more flour (about 1 tablespoon at a time), but don’t overdo it—too much flour makes the crust tough.
⏰ Step 3: First Rise for Flavor Development
Shape the dough into a ball, place it back in your mixing bowl, and cover it tightly with plastic wrap or a damp towel. Let it rise in a warm spot (75-80°F) for 1-2 hours, or until it has roughly doubled in size. This first rise develops flavor and allows the gluten to relax, making it easier to stretch later.
Here’s the thing—don’t rush this step. The dough should puff up noticeably and feel light when pressed gently. If it rises too quickly (in under an hour), your kitchen is too warm. Move it to a cooler spot or cover it with a thin towel to slow the process. Patience here ensures a better texture.
🔥 Step 4: Shape and Second Rise for Perfect Texture
Punch down the risen dough to release air, then divide it into 4 equal portions (about 8 ounces each). Roll each portion into a ball and let them rest for 10 minutes on a floured surface. This resting period relaxes the gluten, making the dough easier to stretch without tearing.
Now for the magic: shape each ball into your desired pizza form—whether it’s a classic round or a rustic rectangle. Place the shaped dough on a floured baking sheet or pizza peel dusted with cornmeal. Cover loosely with plastic wrap or a damp towel and let it rise for another 30-60 minutes until it puffs up slightly. This second rise ensures a light, airy crust.
🔥 Step 5: Preheat and Bake for Crispy Perfection
Preheat your oven to its highest setting (500°F or higher—some ovens go up to 550°F). If your oven doesn’t get that hot, place a pizza stone or baking sheet on the middle rack and preheat for at least 30 minutes. A screaming-hot oven is key to that crispy crust you’re after.
Once preheated, bake the pizza for 10-15 minutes until the crust is deep golden brown and the edges are crispy. If you’re using toppings, add them just before baking—this prevents a soggy crust. Watch closely in the last few minutes to avoid burning. The center should still be slightly soft and chewy, not dry. Let it cool for 2-3 minutes before slicing—this ensures clean cuts and prevents cheese from running everywhere.
Pro Tips For Making 00 Flour And Bread Flour Pizza Dough
- WEIGH YOUR FLOURS: Mixing by volume with 00 and bread flour is a fast track to disappointment. The two flours behave differently—00 is lighter, bread flour denser—and a scoop-and-sweep method means your dough will either be too slack or too stiff. Use a kitchen scale for precision, and measure the 00 first, then the bread flour. Trust me, your dough’s texture will thank you.
- DON’T SKIP THE SUGAR: Yes, it’s just a teaspoon, but that granulated sugar isn’t just for flavor—it’s the yeast’s wake-up call. If you’re using instant yeast (which activates faster), the sugar still helps kickstart fermentation, especially in colder kitchens. Dissolve it in the warm water first, then mix with yeast. Lazy? Fine, but your dough might take longer to rise if you skip it.
- STRETCH, DON’T PULL: When shaping your dough, resist the urge to yank or tug—this creates weak spots that’ll lead to tears later. Instead, use your knuckles or fingertips to gently press and stretch from the center outward, rotating the dough as you go. Think of it like buttering a roll: smooth, even pressure, no drama. Your crust will hold together better, and you’ll avoid that “why did I do this?” moment when the pizza sags.
- LET IT REST AFTER SHAPING: You’ve shaped it, now what? Don’t rush to the oven—give the dough 10–15 minutes to relax on a floured tray or peel. This isn’t just about convenience; it lets the gluten settle, so your pizza doesn’t spring back when you transfer it. Pro move: Cover it loosely with a towel while it rests. Your future self will notice the difference in how evenly it bakes.
Essential equipment for great 00 flour and bread flour pizza dough
Must-Have Mixing Tools
Start with a large mixing bowl (at least 5-quart capacity) for combining ingredients—stainless steel or glass works best. I use my OXO Good Grips 5-quart bowl because it has a non-slip base and smooth sides that prevent dough from sticking.
For measuring, a digital kitchen scale (like the Escali Primo) gives you precision, but if you’re using cups, a stainless steel measuring set with leveling lip ensures accuracy.
Kneading by hand is traditional, but a stand mixer with a dough hook attachment (like the KitchenAid Artisan Series) saves time and effort. If you prefer manual kneading, a wooden dough scraper helps prevent sticking and makes cleanup easier.
For shaping, keep a rolling pin (preferably marble or granite) and a pizza peel (with a perforated surface) handy—this helps transfer dough to the oven without tearing.
Proofing Essentials
A proofing basket (like a banneton) creates beautiful seams for rustic-style pizzas, but it’s not essential. For classic round pizzas, a lightly floured pizza peel works perfectly.
To maintain consistent proofing temperatures, I use a proofing box (like the Norpro Proofing Box) that keeps dough at 75-80°F—ideal for fermentation. If you don’t have one, a small oven with the light on or a warm oven set to 70°F works in a pinch.
For shaping, a dough scraper (like the Jamie Geller dough scraper) helps divide and shape dough cleanly. If you’re making rectangular or artisanal pizzas, a pizza stone (like the Ooni Stone) or steel baking sheet ensures even heat distribution.
For high-heat baking, a pizza peel with a long handle (like the Lekue Pizza Peel) gives you better control when transferring dough to the oven.
Baking Gear Upgrade
For that crispy, restaurant-quality crust, a pizza stone (like the Baker’s Secret Pizza Stone) is a game-changer—it retains heat and mimics a brick oven. If you don’t have one, a cast-iron skillet (like the Lodge Pre-Seasoned Skillet) works wonders for crispy edges.
For even more authenticity, a pizza oven thermometer (like the Thermoworks Smoke) ensures your oven reaches 500°F or higher—critical for crispiness.
For finishing touches, keep cornmeal or semolina flour nearby to dust your peel—it prevents sticking and adds a subtle crunch. A pizza cutter with a long handle (like the OXO Good Grips Pizza Cutter) makes slicing clean cuts without crushing the crust.
And finally, a pizza tray (like the Pizzacraft Pizza Tray) helps catch cheese drips and keeps your countertops clean.
Budget-Friendly Swaps
No pizza stone? A thick baking sheet (like the All-Clad Stainless Steel Sheet) works in a pinch—just preheat it for 30 minutes to mimic stone-like heat retention. For proofing without a box, a large cooler with warm water bottles inside creates a consistent environment.
A wooden spoon and plastic wrap replace fancy tools for mixing and covering dough.
For shaping, a clean kitchen towel can substitute for a dough scraper—just wet it slightly to prevent sticking. And if you’re short on space, a small cake pan (like the Wilton Cake Pan) can double as a makeshift proofing basket for rustic-style pizzas.
The key is adapting—even with basic tools, you can still achieve crispy, chewy perfection.
Nutrition facts
Frequently asked questions
Why mix 00 flour with bread flour for pizza dough?
The 00 flour creates that signature crispy, delicate texture Italians love, while bread flour adds chewiness and structure. This blend gives you the best of both worlds—crispy edges and a chewy center that holds up to toppings. The bread flour also improves gluten development for better elasticity.
Can I make this dough without 00 flour?
Yes! Replace 00 flour with all-purpose flour plus 1 tablespoon cornstarch for similar texture. For extra chewiness, add 1 tablespoon vital wheat gluten to your all-purpose flour. The crust won’t be quite as crisp, but it’ll still be delicious—just expect slightly less delicate texture.
How do I know when the dough is properly kneaded?
Your dough is ready when it’s smooth, elastic, and springs back slowly when pressed with one finger. If it sticks to your fingers or tears easily, knead 2-3 more minutes. For a quick test, stretch a small piece—if it resists tearing and doesn’t shrink back immediately, you’re good to go!
What’s the best way to store leftover dough?
Shape the dough into balls, then refrigerate in an airtight container for up to 48 hours (flavor improves over time!). For longer storage, freeze shaped dough balls wrapped in plastic for up to 3 months. Thaw overnight in the fridge—never at room temperature—to maintain texture.
Why did my crust turn out too thick or too thin?
Thick crust? You likely didn’t stretch the dough enough before baking. Thin crust? Either over-stretched it or baked too long. For perfect thickness: stretch until it’s 1/4-inch thick (about 6mm) and bake for 10-12 minutes at 500°F+. Pre-bake the crust for 2-3 minutes before adding toppings to prevent sogginess.

- Pea Soup Instant Pot Recipe: Velvety Green Smoothness in 20 Minutes - November 1, 2026
- Pork Loin Pulled Pork Crock Pot Recipe: Slow-Smoked Tenderness With Zero Dryness - November 1, 2026
- Baked Potatoes in Crock Pot Recipe: Buttery Interiors and Crispy Top Magic - November 1, 2026