
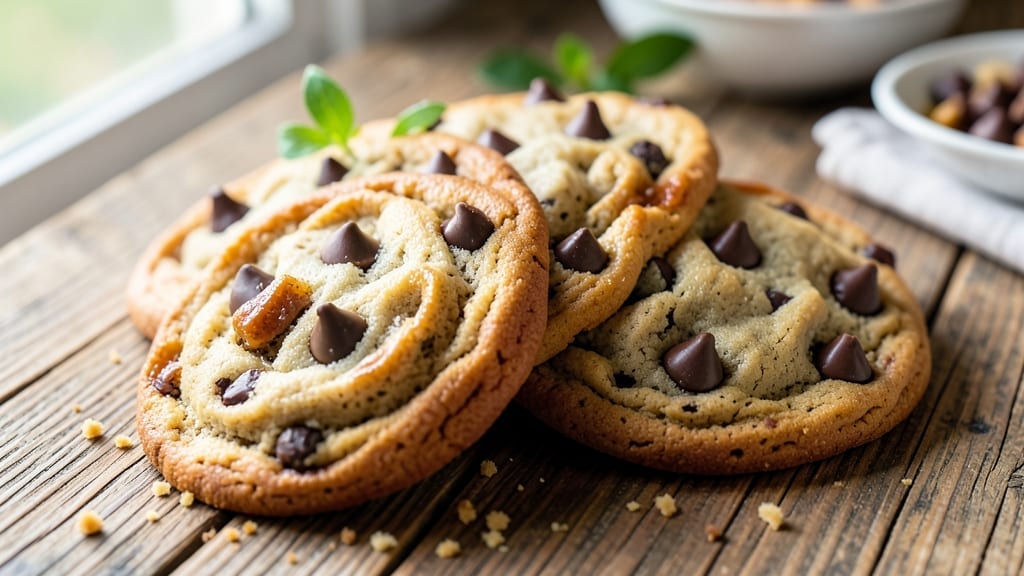
This 1/2-batch chocolate chip cookie recipe delivers all the warmth of a full batch without the overwhelming leftovers—just the right amount for two people or a small treat. 💛 The secret lies in precise measurements and baking techniques that ensure tender centers and crispy edges every time, no matter how many times you’ve burned them before.
This recipe uses a 50-50 mix of brown and white sugar for that perfect balance of chewiness and crispness, while a touch of cornstarch keeps the dough from spreading too much. The dough rests for 30 minutes—critical for even baking—before being scooped into perfect, bite-sized cookies.
Bake at 350°F for 10-12 minutes until golden at the edges but still soft in the middle.
What you’ll end up with is a tray of golden, aromatic cookies with pools of melted chocolate in every bite, their edges just crisp enough to contrast the chewy interior.
The aroma alone will fill your kitchen with nostalgia, and the texture? That perfect balance of tender and crispy that makes them impossible to resist.
Perfect for sharing with a friend, a quick dessert after dinner, or even a small batch for testing new variations. Store in an airtight container for up to a week, or freeze for longer shelf life. Let’s get baking!
Ingredients for 1 2 batch chocolate chip cookie
Here’s your perfect half-batch: tender cookies with crisp edges and melty chocolate—no leftovers, just joy.
| Ingredient | Amount | Notes |
|---|---|---|
| Unsalted Butter 🧈 | ½ cup | Cold, cubed for even baking |
| Granulated White Sugar 🍚 | ¼ cup | For crispy edges |
| Packed Brown Sugar 🍚 | ¼ cup | Light or dark variety |
| Large Eggs 🥚 | 1 whole | Room temperature preferred |
| Vanilla Extract 🌿 | 1 tsp | Pure vanilla for flavor |
| All-Purpose Flour 🌾 | 1 cup | Sifted for light texture |
| Cornstarch 🌾 | 1 tbsp | Prevents excessive spread |
| Salt 🧂 | ½ tsp | Kosher or sea salt |
| Chocolate Chips 🍫 | ½ cup | Semi-sweet preferred |
| Baking Soda 🍃 | ½ tsp | For lift and flavor |
The butter is non-negotiable here—use cold, cubed butter for those signature tender pockets. Land O’Lakes unsalted is my go-to, but any good-quality brand works. Skip the salted version (trust me, you’ll taste it). For the sugars, equal parts white and brown gives that perfect chewy-crisp balance. Brown sugar should be packed—use a spoon to scoop it straight from the bag. Chocolate chips? Semi-sweet is classic, but dark or milk works too if that’s what you’ve got. Pro tip: Toast your chocolate chips for 2-3 minutes in the microwave before adding—they’ll taste like they just came from a bakery.
No vanilla extract? Vanilla sugar works in a pinch (use 1 tbsp instead). Short on cornstarch? Add an extra 1 tbsp flour—it’ll still work, just might spread a bit more. The dough will look under-mixed, but don’t overwork it—that’s how cookies get tough. Swapping chocolate chips for chopped chocolate bars? Use the same amount, but chop it into small, even pieces. And if you’re feeling fancy, fold in white chocolate or nuts for a twist. The egg needs to be room temp—microwave it 20 seconds if it’s straight from the fridge for perfect creaminess.
This dough keeps 3 days in the fridge, wrapped tightly in plastic. For longer storage, freeze the dough balls—bake straight from frozen, adding 1-2 minutes to the time. Cookies stay fresh 5 days in an airtight container, but honestly? They won’t last that long. Store-bought chocolate chips last 12 months unopened, but once you crack the bag, freeze them to keep them from turning into sad, greasy clumps. And if you make extra dough? Portion into freezer bags—perfect for spontaneous cookie cravings later.
Why You’ll Love This Recipe
- No Weighing Hassle: I just eyeball the butter and sugars straight from the pantry—no scale needed. That creamy brown sugar-butter combo alone makes me want to skip the measuring cups entirely.
- Chewy-Crispy Magic: The cold butter chunks in the dough give those edges just enough snap, while the brown sugar keeps the centers soft and gooey. Honestly, it’s the kind of texture that makes you pause mid-bite.
- Doubles as Dessert or Snack: Bake a batch for after-dinner treats, then pull out the leftovers for lunches the next day. My kids pack them in their backpacks—no judgment here.
- Pantry Staple Power: Uses ingredients you already have sitting around: butter, sugar, eggs, vanilla. Between us, this is my go-to when I’m too tired to shop but still crave something sweet.
Step-by-step instructions for 1½ batch chocolate chip cookies
Here’s how to make perfect cookies with minimal dough—crisp edges, gooey centers, and just the right amount of chocolate!
🍳 Step 1: Cream Butter and Sugars for Perfect Texture
In a stand mixer fitted with the paddle attachment, beat the 0.5 cup unsalted butter (cold, cubed) with 0.25 cup granulated white sugar and 0.25 cup packed brown sugar on medium speed for 3-4 minutes. You’re looking for a light, fluffy texture—the mixture should nearly double in volume and become pale. This creaming process incorporates air, which creates those beautiful crackly tops and helps the cookies spread just enough.
Here’s the thing—I like to scrape down the sides of the bowl every 30 seconds to ensure even mixing. The butter should be fully incorporated but still slightly grainy. If it looks too soft, chill the bowl in the freezer for 5 minutes before proceeding. This ensures the cookies hold their shape without spreading too thin.
👨🍳 Step 2: Add Eggs and Vanilla for Rich Flavor
Add the 1 whole large egg (room temperature) and mix on low speed for 30 seconds until fully incorporated. Then add the 1 tsp vanilla extract and mix for another 10 seconds. The mixture might look slightly curdled, but that’s normal—it will come together once the dry ingredients are added.
I always crack the egg directly into the mixer bowl (no shells!) and use a fine-mesh strainer to catch any stray bits. This step is where the flavor really starts to come together. The egg adds moisture and richness, while the vanilla infuses its warm aroma throughout the dough.
👨🍳 Step 3: Combine Dry Ingredients for Light Texture
In a separate bowl, whisk together the 1 cup all-purpose flour, 1 tbsp cornstarch, 0.5 tsp salt, and 0.5 tsp baking soda. This combination gives you the perfect balance of structure and lift. Gradually add the dry mixture to the wet ingredients, mixing on low speed for 30-45 seconds until just combined—you should still see a few flour streaks. Over-mixing develops gluten and makes cookies tough.
Here’s where it gets fun—fold in the 0.5 cup chocolate chips by hand using a silicone spatula. Make sure they’re evenly distributed throughout the dough. I like to use a mix of semi-sweet and dark chocolate chips for depth of flavor. If your dough seems too sticky, chill it for 10-15 minutes to make it easier to handle.
⏰ Step 4: Chill the Dough (Don’t Skip This!)
Cover the bowl with plastic wrap and refrigerate for at least 30 minutes (I prefer 1 hour for best results). Chilling solidifies the butter, which prevents the cookies from spreading too thin in the oven. It also allows the flour to fully hydrate, creating better texture. Real talk: Skipping this step leads to flat, cakey cookies instead of the perfect chewy texture you want.
While the dough chills, preheat your oven to 350°F and line two baking sheets with parchment paper. The cold dough will hold its shape better when it hits the hot oven, resulting in thicker cookies with crispy edges and gooey centers. This step makes a MASSIVE difference in the final result—trust me!
🔥 Step 5: Bake to Golden Perfection
Scoop the chilled dough into 2-tablespoon portions (I use a cookie scoop for uniform size) and place them 3 inches apart on the prepared baking sheets. Bake for 11-13 minutes until the edges are golden brown but the centers still look slightly underdone. They’ll continue cooking on the hot pan after you remove them from the oven.
Let them cool on the baking sheet for 5 minutes before transferring to a wire rack. This brief resting period helps them set slightly so they don’t fall apart when you move them. Enjoy them warm for the ultimate experience—crispy edges, soft centers, and melty chocolate in every bite! The perfect 1½ batch of cookies, with none of the mess.
Pro Tips For Making 1 2 Batch Chocolate Chip Cookie
- Use Room-Temp Butter: I learned this the hard way—cold butter makes cookies spread like pancakes. Take the butter out of the fridge 30 minutes before mixing, or microwave it in 5-second bursts until just soft enough to press with your finger. That’s the sweet spot for thick, chewy centers.
- Mix Sugar and Butter First: Dumping everything in the bowl at once leads to dry dough. Cream the butter and sugars (both white and brown) until light and fluffy—about 2-3 minutes with a mixer. This step actually dissolves the sugar crystals, so your cookies bake evenly and don’t crack.
- Skip Overmixing the Dough: The moment the dough starts to look shiny and stretchy, stop. Overworking it develops gluten, turning your cookies into tough, flat hockey pucks. Just fold in the chips and chill—no need to overthink it.
- Bake One Sheet at a Time: I used to stack trays in the oven, thinking I’d save time. Bad idea. Cookies bake unevenly, and the second sheet gets overdone while the first one’s still raw. One tray at a time guarantees golden edges and gooey centers every time. (Yes, even if you’re impatient like me.)
Wine and beer pairings for this recipe
Warm Milk Pairing
A classic choice for chocolate chip cookies is warm milk—it’s simple, comforting, and enhances the cookie’s buttery richness. Heat 1 cup whole milk until steaming (not boiling), then pour over the cookies.
The warmth melts the chocolate faster, creating a decadent, gooey experience. For extra indulgence, add ½ tsp vanilla extract or a pinch of cinnamon to the milk. 💛
Creamy Vanilla Ice Cream
Vanilla bean ice cream is a match made in heaven with these cookies. The cold, creamy texture contrasts beautifully with the warm, crispy cookies. I recommend Breyer’s vanilla bean or a high-quality store-bought brand for that authentic flavor.
For a fun twist, try a scoop of salted caramel ice cream to complement the chocolate chips. The salt enhances the sweetness, making every bite even more satisfying.
Red Wine for Adults
If you’re serving cookies to adults, a glass of Pinot Noir or Merlot pairs wonderfully. The wine’s acidity cuts through the richness of the butter and chocolate, cleansing your palate between bites.
A 2018 California Pinot Noir with its red fruit notes balances the sweetness perfectly. For a lighter option, try a dry Riesling—its citrus notes add a refreshing contrast. 🍷
Coffee or Espresso
For a sophisticated touch, serve cookies with a cup of freshly brewed coffee or espresso. The bitterness of the coffee enhances the chocolate flavor, creating a delightful balance. I love a medium-roast dark coffee like Starbucks Sumatra or a double shot of espresso for a stronger kick.
The caffeine also helps keep you alert while enjoying these sweet treats—perfect for a late-afternoon pick-me-up.
Spiced Chai Latte
For a cozy, aromatic pairing, try a spiced chai latte. The warm spices like cinnamon, cardamom, and ginger complement the cookie’s vanilla and chocolate notes. Brew a strong cup of chai tea, then steam it with 1 cup whole milk and a splash of vanilla syrup.
The warmth and spices make the cookies taste even more indulgent, especially on chilly evenings. 🌟
Beer Pairing
For beer lovers, a Belgian witbier like Hoegaarden or a light lager such as Heineken works beautifully. The citrusy notes in witbier brighten the cookie’s sweetness, while the crispness of a lager cleanses the palate.
Avoid heavy stouts or IPAs—they can overpower the delicate flavors of the cookies. A cold beer also helps balance the richness, making each bite feel lighter. 🍺
Nutrition facts
Frequently asked questions
Why does the recipe use both white and brown sugar?
The 50-50 mix of white and brown sugar creates the perfect balance—white sugar gives crispy edges while brown sugar adds moisture and chewiness. The molasses in brown sugar also enhances the cookie’s rich flavor and aroma. For extra caramel notes, you can increase brown sugar to ⅓ of the total sugar.
Can I make these cookies without a mixer?
Use a large bowl and a sturdy wooden spoon or silicone spatula. Cream the butter and sugars by hand for 5-7 minutes until light and fluffy, scraping the bowl often. The dough will be slightly less aerated but still delicious. For best results, chill the dough longer (1 hour) to compensate.
What if my cookies spread too much?
Over-spreading usually means the butter was too soft or the dough wasn’t chilled long enough. Next time, use cold butter straight from the fridge and chill the dough for at least 1 hour. Also try scooping slightly smaller portions (1.5 tablespoons) and baking on a pre-warmed baking sheet.
How can I tell when cookies are fully baked?
Your cookies are done when the edges are golden brown but the centers still look slightly underdone—they’ll firm up as they cool. The classic “toothpick test” works: insert a toothpick in the center—if it comes out with a few moist crumbs but no wet dough, they’re perfect. Overbaking makes cookies dry.
Can I substitute butter with oil?
While possible, butter gives cookies their signature flavor and texture. For a 1:1 substitution, use melted coconut oil (for neutral flavor) or vegetable oil. Expect slightly cake-like cookies with less spread. If using oil, reduce the flour by 1 tablespoon since oil is more moist than butter.

- 32 Oz Cream Cheese Cheesecake Recipe: Silky Smoothness With No Cracking - October 11, 2026
- 8×8 Pan Dump Cake Recipe: One-Bowl Wonder with Fudgy Layers - October 11, 2026
- 10-Layer Cake Recipe: Stacked Height With Buttery Vanilla Layers - October 11, 2026