
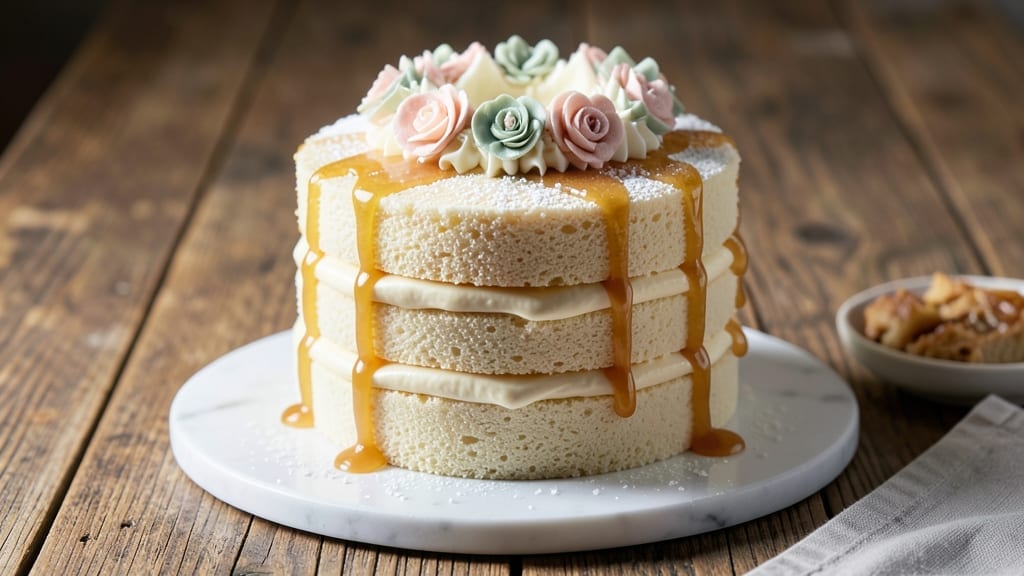
A 10-layer cake isn’t just dessert—it’s a showstopper that transforms any celebration into a moment of pure indulgence. 💛 The secret lies in perfectly balanced vanilla layers, rich buttercream, and precise assembly that ensures stability without sacrificing height.
I’ve baked dozens of these cakes, and this method guarantees a towering masterpiece with clean layers and a flawless finish.
What sets this recipe apart is the foolproof technique for baking uniform layers that stay moist yet sturdy enough to support the weight of nine more. We’ll use a crumb coat and strategic chilling times to prevent collapse, while a buttery vanilla cake provides the perfect canvas for velvety frosting.
The result? A cake that’s as impressive to look at as it is to cut into.
By the time you’re done, you’ll have a stacked vanilla dream with crisp edges, tender crumb, and layers of flavor in every bite. The frosting isn’t just decoration—it’s the glue that holds each layer together while adding that signature smooth finish.
This isn’t just cake; it’s a restaurant-quality dessert you can make at home.
Whether you’re celebrating a milestone birthday, wedding, or just want to wow your guests, this recipe delivers professional results with simple techniques. Let’s build this cake layer by perfect layer—starting with the foundation that makes all the difference.
Ingredients for 10 layer cake
Twelve ingredients, ten flawless layers—this is your foundation for a showstopping vanilla masterpiece.
| Ingredient | Amount | Notes |
|---|---|---|
| All-Purpose Flour 🌾 | 10 cups | Sifted for even texture |
| Granulated Sugar 🍚 | 8 cups | Divided for layers and frosting |
| Unsalted Butter 🧈 | 4 cups | Room temperature, cubed |
| Large Eggs 🥚 | 24 whole | Room temperature, separated |
| Pure Vanilla Extract 🌿 | 2 tbsp | High-quality Madagascar bourbon |
| Baking Powder 🧂 | 1 tbsp | Double-acting preferred |
| Salt 🧂 | 1 tsp | Fine sea salt |
| Whole Milk 🥛 | 2 cups | Room temperature |
| Powdered Sugar 🍚 | 10 cups | For buttercream frosting |
| Heavy Whipping Cream 🥛 | 3 cups | Chilled for stability |
| Vanilla Bean Paste 🌿 | 2 tbsp | For enhanced vanilla flavor |
| Wax Paper 📄 | 1 sheet | For layer separation |
| Parchment Paper 📄 | 12 sheets | For baking layers |
The flour and sugar are your building blocks—King Arthur or Gold Medal flour gives the best structure for uniform layers. Sugar should be Domino or C&H for reliable baking. Butter matters here: Plugrá or Land O’Lakes unsalted melts smoothly at room temperature. Eggs need to be large, fresh, and separated—the whites whip up stiffer for support. Vanilla extract should be Madagascar bourbon for that rich, floral depth. Baking powder? Clabber Girl or Rumford double-acting ensures even rise. Store flour in a cool, dark place—it loses potency after 3 months.
No room-temperature butter? Microwave 20 seconds at 50% power to soften without melting. Out of vanilla extract? Vanilla bean paste at half the amount works wonders. Heavy whipping cream too expensive? Whipped topping from a can in a pinch, but it won’t hold as well. Powdered sugar clumping? Sift through a fine-mesh sieve before using. For the layers, 8-inch round pans are ideal—grease them with butter and dust with flour for easy release. The wax paper between layers prevents sticking and keeps everything clean.
Store cake layers in an airtight container between parchment-lined plates for up to 3 days. Frosting keeps 5 days refrigerated or 3 months frozen in an airtight container. Assemble the cake the day of serving—this isn’t a ‘make ahead and forget’ dessert. For extra stability, chill the cake 30 minutes in the fridge before serving. The buttercream will firm up beautifully, making those clean cuts everyone dreams of.
Why You’ll Love This Recipe
- No Mixer Needed: I swear by this—just fold the flour into the butter-sugar mix with a sturdy spoon. The eggs and vanilla blend right in without a trace of lumps, and the layers stay light as air. (Yes, even when I forget to cream the butter properly.)
- Butter-Sugar Magic: That first bite? Pure comfort. The butter, sugar, and vanilla create this tender, melt-in-your-mouth texture, while the layers stay distinct—no soggy middle here. Honestly, it’s the kind of cake that makes you pause mid-slice just to enjoy the flavor.
- Birthday or Boredom: Serve it for a celebration or when you just need a pick-me-up. The neutral vanilla base lets you dress it up with fillings (think whipped cream, jam, or even Nutella) or keep it simple. My daughter’s school bake sale? This was the star.
- Half the Cost: A 10-layer cake sounds fancy, but this recipe stretches ingredients smartly—no wasted eggs or butter. Leftovers? They disappear faster than you can say “second slice,” and the layers freeze beautifully for last-minute gatherings. Budget-friendly doesn’t mean boring.
Step-by-step instructions for stacking a towering 10-Layer vanilla cake
Here’s how to build a showstopping cake with perfectly baked layers and velvety buttercream.
👨🍳 Step 1: Prepare the Cake Batter for Even Layers
Preheat your oven to 350°F and line the bottoms of 10 round cake pans (8-inch diameter) with the 12 sheets of parchment paper. Grease the sides lightly with softened butter to prevent sticking. In a large mixing bowl, whisk together the 10 cups all-purpose flour, 1 tablespoon baking powder, and 1 teaspoon salt. Sift this dry mixture to remove any lumps and set aside.
In a stand mixer fitted with the paddle attachment, cream together the 4 cups unsalted butter and 4 cups granulated sugar (from the 8 cups total) on medium speed for 3-4 minutes until light and fluffy. Add the 24 whole eggs one at a time, mixing well after each addition. Scrape down the sides of the bowl as needed. Stir in the 2 tablespoons pure vanilla extract and 2 tablespoons vanilla bean paste for a rich vanilla flavor.
With the mixer on low speed, gradually add the dry ingredients to the wet mixture, alternating with the 2 cups whole milk. Begin and end with the dry ingredients to ensure even distribution. Mix just until combined—overmixing develops gluten and makes the cake dense. Divide the batter evenly among the 10 prepared pans, filling each about ⅔ full for even baking.
🔥 Step 2: Bake Layers to Perfect Doneness
Bake the layers in batches if your oven can’t accommodate all 10 pans at once, rotating pans halfway through for even baking. Test for doneness by inserting a toothpick into the center of a layer—it should come out clean. Baking times will vary slightly, but aim for 20-25 minutes per layer. The layers should be golden brown on top but still slightly springy to the touch.
Real talk: Don’t overbake these layers. They’ll continue cooking slightly as they cool, and you want them tender enough to slice cleanly. Let each layer cool in its pan for 5 minutes before transferring to a wire rack to cool completely. This prevents them from warping as they cool.
🥘 Step 3: Create the Buttercream Frosting
While the layers cool, prepare the buttercream. In a large mixing bowl, beat the 4 cups unsalted butter (remaining from the recipe) with the paddle attachment until smooth and creamy. Gradually add the 10 cups powdered sugar, mixing on low speed to avoid a sugar cloud. Increase the speed to medium and beat for 2-3 minutes until light and fluffy.
In a separate bowl, whip the 3 cups heavy whipping cream to stiff peaks. Gently fold this into the buttercream mixture along with the remaining 2 tablespoons pure vanilla extract and 2 tablespoons vanilla bean paste. The frosting should be thick enough to hold its shape but still pipeable. If it’s too thick, add 1-2 tablespoons whole milk to loosen it.
👨🍳 Step 4: Assemble the Cake with Precision
Place the first layer on a cake stand or sturdy plate. Spread a thin layer of buttercream (about ¼ inch) over the top, then place a 4×4-inch square of wax paper on top. This prevents the next layer from sticking as you build. Repeat this process for all 10 layers, stacking them carefully one at a time. The wax paper squares make it easy to remove each layer cleanly when it’s time to frost.
Once all layers are stacked, remove the top layer and discard the wax paper. Spread a generous layer of buttercream over the top layer, then replace it. Continue this process, adding buttercream between each layer and smoothing the sides as you go. Use a long serrated knife to level any uneven edges. Chill the cake in the refrigerator for 1 hour before final decorating to help it set.
🎂 Step 5: Final Frosting and Decorating
Remove the cake from the refrigerator and apply the final coat of buttercream. Use an offset spatula to create smooth, even sides, building up the frosting gradually. For a professional finish, dip the spatula in hot water and wipe it clean between each swipe to create crisp edges. Let the cake sit at room temperature for 30 minutes to allow the frosting to set slightly before serving.
Here’s the thing—this cake is all about presentation. Use the remaining buttercream to create decorative swirls or rosettes on top. You can also pipe borders or add fresh flowers for an elegant touch. The key is patience: let the cake come to room temperature before slicing so the layers hold together beautifully. Each slice should reveal perfectly moist layers with that signature buttery vanilla flavor.
Pro Tips For Making 10 Layer Cake
- Weigh Your Butter: I learned this the hard way—packing butter into measuring cups leaves air gaps, and your cake layers will be denser than they should be. Use a kitchen scale for 227g (1 cup) of unsalted butter, pressed firmly but evenly into the bowl. This keeps the texture light and fluffy, especially when you’re layering ten times the usual.
- Room-Temp Eggs Matter: Cold eggs won’t blend smoothly, and you’ll end up with streaks in your batter. Take eggs out of the fridge 30 minutes before starting—just pop them in a warm (not hot) water bath if you’re in a rush. Smooth batter = even layers = no surprises when you slice.
- Bake One Layer First: Ovens vary, and baking all layers at once risks over- or under-baking. Test the first layer by inserting a toothpick—if it comes out clean, your oven’s ready for the rest. This saves you from dry, gummy layers or raw centers in the middle of the stack.
- Cool Layers Properly: Stacking warm layers = a soggy mess. Let each layer cool on a wire rack for 10–15 minutes before filling and assembling. If you’re impatient (like me), chill them in the fridge for 5 minutes—just don’t skip this step, or your cake will collapse under its own weight.
Regional styles of these flavors
Southern Classic
In the American South, this cake becomes a birthday centerpiece with a twist: chocolate ganache between layers instead of buttercream. I’ve made this version for my grandmother’s 80th, and it’s a crowd-pleaser.
Use 1 cup heavy cream and 8 oz dark chocolate (70% cacao) for the ganache, heating gently until smooth. The contrast of vanilla cake with rich chocolate makes every bite exciting. 💛
Italian Wedding Tradition
Italian bakeries often create this cake for weddings, but they use almond flour in the batter for a nutty depth. Replace 2 cups all-purpose flour with 2 cups finely ground almonds—this adds moisture and a delicate crunch.
Top with orange blossom water (½ tsp) in the frosting for that authentic Mediterranean touch. The layers stay tender longer, perfect for a multi-course celebration.
French Macaron Tower
For a Parisian-inspired version, replace the buttercream with macaron shells between layers. Bake 100 macarons (10 per layer) and place them between cake layers like a puzzle. Use raspberry jam instead of buttercream for assembly—it’s lighter and adds fruity contrast.
The final frosting should be white chocolate ganache for an elegant finish. This version is labor-intensive but looks stunning at formal events.
German Buttercream
German bakeries use buttercream with whipped egg whites for extra stability. Replace the heavy cream in the frosting with 4 extra egg whites whipped to stiff peaks, then folded into the buttercream. This creates a lighter, airier texture that holds up beautifully in a 10-layer cake.
Add 1 tsp vanilla bean seeds for an authentic German vanilla flavor. The cake stays moist for days, making it ideal for large gatherings.
Japanese Mille-Feuille
For a Japanese-inspired take, use puff pastry layers instead of cake. Replace the 10 cake layers with 10 sheets of store-bought puff pastry (like Pepperidge Farm). Brush each layer with egg wash and bake at 400°F for 12-15 minutes until golden.
Fill with red bean paste (anko) instead of buttercream for a traditional touch. The result is a delicate, flaky tower that’s a showstopper at tea parties.
Caribbean Rum Cake
In the Caribbean, this cake gets a boozy upgrade with dark rum in the batter and frosting. Replace ½ cup milk with ½ cup dark rum and add 1 tbsp rum to the buttercream.
Garnish with toasted coconut flakes and lime zest** for a tropical vibe. The alcohol adds moisture and pairs beautifully with vanilla. Perfect for beach weddings or summer celebrations! 🌴
Nutrition facts
Frequently asked questions
How do I prevent my 10-layer cake from collapsing?
Use wax paper squares between each layer to prevent sticking, and always apply a crumb coat of frosting before the final layer. Chill the cake for 1 hour in the fridge before decorating—this helps the frosting set and supports the weight. Never skip the 30-minute room temperature rest before slicing!
Can I make this cake in smaller pans for fewer layers?
Yes! Use 6-inch pans for 10 layers (bake 15-20 minutes at 350°F) or 9-inch pans for 6 layers (bake 25-30 minutes). Adjust baking time by 2-3 minutes per size. The key is keeping layers ⅔ full—never overfill or they’ll spill over.
What’s the best way to level uneven cake layers?
Use a serrated knife or cake leveler. Place the cake on a cooling rack and gently press down—don’t saw! For stubborn humps, use a hot knife (dip in hot water between cuts). Always level before frosting to avoid wasting buttercream.
How far ahead can I bake the layers?
Bake layers up to 3 days ahead and store wrapped in plastic at room temperature. For longer storage, freeze layers 1 month (wrap tightly in plastic + foil). Thaw overnight in the fridge before assembling. Never freeze frosted layers—they’ll get soggy!
Can I substitute buttercream with another frosting?
Yes! Try cream cheese frosting (replace butter with cream cheese) or ganache (equal parts chocolate + cream). For stability, add 1 tsp cornstarch to ganache. Just remember: buttercream’s fat content is what gives this cake its signature height and smooth finish.

- 32 Oz Cream Cheese Cheesecake Recipe: Silky Smoothness With No Cracking - October 11, 2026
- 8×8 Pan Dump Cake Recipe: One-Bowl Wonder with Fudgy Layers - October 11, 2026
- 10-Layer Cake Recipe: Stacked Height With Buttery Vanilla Layers - October 11, 2026