
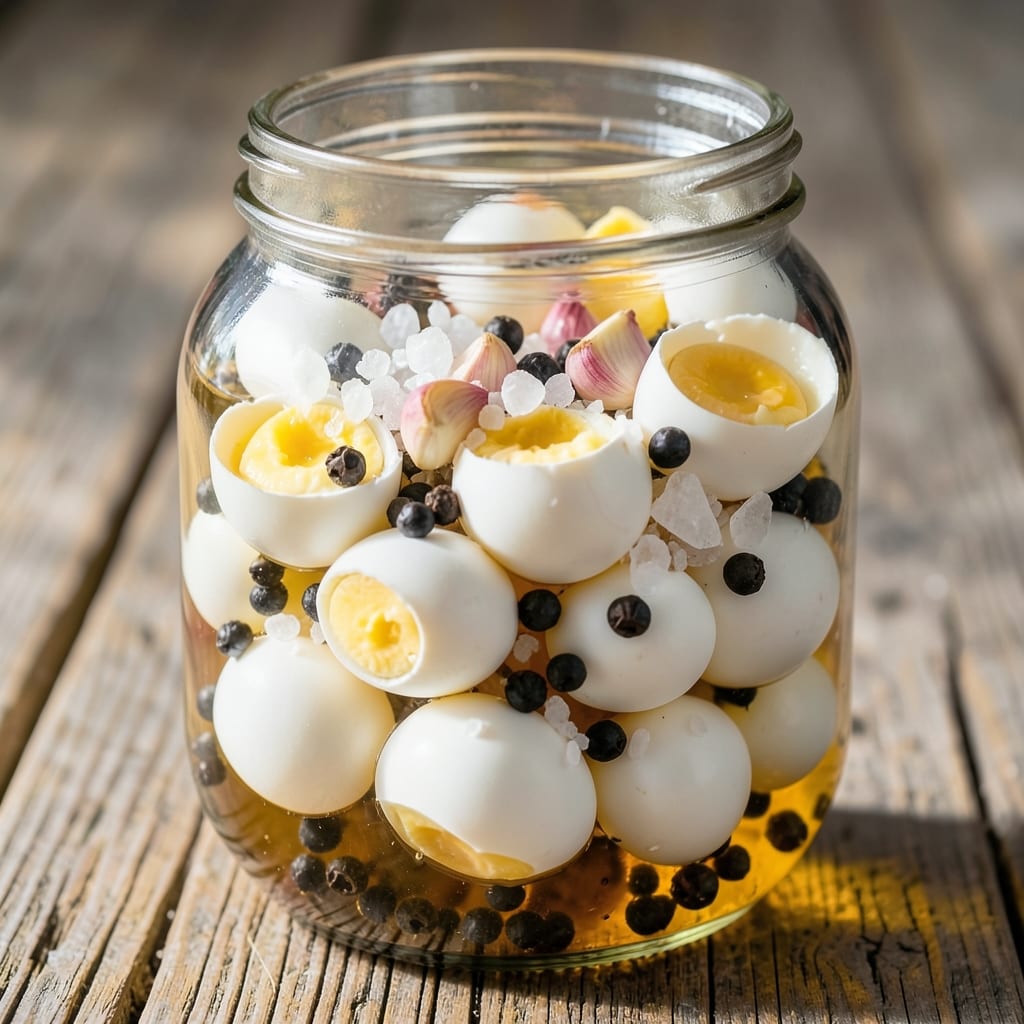
This 1 gallon pickled eggs recipe transforms simple boiled eggs into tangy, crunchy bites perfect for parties, snacks, or game day. 💛 The secret lies in a precise brine blend of vinegar, water, and spices that penetrates each egg, creating a flavor profile that’s both bold and refreshing.
I’ve perfected this method over years of hosting gatherings—everyone reaches for seconds, and leftovers vanish within hours.
What makes this recipe stand out is its foolproof approach to pickling: no special equipment needed, just a gallon jar and a simple brine that balances acidity and flavor. The eggs develop their signature crunch and tang after just 48 hours, though they taste even better after a week.
This method ensures safety while delivering restaurant-quality results at home, with minimal effort.
By the time you’re done, you’ll have a jar of vibrant, zesty eggs that add a tangy crunch to any meal. They’re perfect for snacking straight from the jar, tossing into salads, or serving alongside charcuterie boards.
The recipe scales easily, so you can make multiple jars for gifts or future cravings.
Storage is simple: keep the jar refrigerated for up to 3 months, and the flavor only deepens over time. Whether you’re prepping for a crowd or stocking your pantry, these pickled eggs are a game-changer. Let’s get started!
Ingredients for 1 gallon pickled egg
Twelve eggs plus a few pantry staples—this jar delivers restaurant-style crunch for parties or snacks.
| Ingredient | Amount | Notes |
|---|---|---|
| Large Eggs 🥚 | 12 whole | Freshly boiled, room temperature |
| White Vinegar 💧 | 2 cups | Distilled for clarity |
| Water 💧 | 2 cups | Filtered preferred |
| Diamond Crystal Kosher Salt 🧂 | ½ cup | Fine grain preferred |
| Granulated Garlic 🧄 | 2 tbsp | Or 6 fresh garlic cloves minced |
| Black Peppercorns 🌶️ | 1 tbsp | Crushed lightly |
| Mustard Seeds 🌿 | 1 tbsp | Yellow or brown |
| Dill Seeds 🌿 | 1 tbsp | Or 2 tbsp dried dill |
| Red Pepper Flakes 🌶️ | 1 tsp | Adjust for heat preference |
| Bay Leaves 🍃 | 2 whole | Removed before serving |
| Sugar 🍚 | ¼ cup | White granulated |
| 1-Gallon Mason Jar 🍯 | 1 jar | With airtight lid |
The eggs are your canvas, so start with fresh, large eggs—they hold up best to pickling. Boil them for 9 minutes from a rolling boil (not overcooked or they’ll get rubbery), then cool in ice water. For the brine, white vinegar is key—it’s milder than apple cider and won’t overpower the eggs. Grab Diamond Crystal kosher salt if you can—it dissolves better than table salt. The spices? Penzeys or bulk bins have the best quality, but the grocery store stuff works in a pinch. Just make sure everything’s dry before adding to the jar—moisture ruins the crunch.
No mustard seeds? Skip them—they’re more for texture than flavor. Out of dill? Dried oregano at half the amount works in a bind, though fresh dill is ideal. Want more heat? Add cayenne to taste—just start small. The sugar balances the acidity, but if you’re avoiding it, use 1 tbsp honey instead (though it’ll darken the vinegar). For the jar, Ball or Mason brand are foolproof—make sure the lid seals properly. Pro tip: Wear gloves when handling vinegar and salt; they’re harsh on skin.
This jar keeps 3 months in the fridge, but honestly? Flavor peaks at 2-3 weeks. The longer it sits, the more the eggs develop that signature crunch. Store it in the coldest part of your fridge—away from strong-smelling foods. To serve, pop an egg out and slice it in half—that bright yellow yolk is the real star. Leftovers? Portion into small jars for gifts or lunches. And if someone asks for seconds? You’ll have more jars ready.
Why You’ll Love This Recipe
- Pantry Magic: I swear by this recipe because it uses stuff I already have—no special trips to the store. White vinegar, salt, garlic? That’s it. Honestly, I keep a gallon jar of these in my fridge year-round because they’re my go-to for snack attacks or last-minute charcuterie.
- Garlic Bomb: That crushed granulated garlic in the brine? It’s the star. The eggs soak up just enough to give every bite a slow, savory punch—no overpowering bite, just a warm, lingering finish that makes them disappear faster than I can say “pickle me.”
- Weeknight Hero: I make a fresh batch every month because they’re perfect for lazy nights. Toss them in a sandwich, snack on them straight from the jar, or shatter them over ramen. They’re my secret weapon for when I don’t feel like cooking but still want something good.
- Cheap & Lasts: A gallon of eggs costs less than takeout, and this recipe stretches it into weeks of snacks. Between us, I’ve had jars sitting for two months, and they’re still crisp and tangy. Budget-friendly? Absolutely. Reliable? Even more so.
Step-by-step instructions for 1 gallon pickled eggs
Here’s how to make tangy, crunchy pickled eggs that’ll disappear fast at parties.
🍳 Step 1: Boil the Eggs to Perfection
Place the 12 whole large eggs in a saucepan and cover them with cold water by about 1 inch. Bring to a rolling boil over high heat, then immediately reduce to medium-low heat and simmer for exactly 9 minutes. Set a timer—this precision ensures perfectly firm yolks that won’t turn rubbery.
Transfer the eggs to an ice bath for 10 minutes to stop the cooking process. The water should be cold enough to make the eggs visibly contract. Once cooled, peel the eggs under running water using your fingers—no tools needed. The shells should slip off easily if boiled properly. If any eggs crack during boiling, use them anyway—they’ll still pickle beautifully.
👨🍳 Step 2: Prepare the Pickling Spice Mixture
In a small bowl, combine the 2 tbsp granulated garlic, 1 tbsp black peppercorns, 1 tbsp mustard seeds, 1 tbsp dill seeds, 1 tsp red pepper flakes, and 2 whole bay leaves. Crush the peppercorns lightly with the side of a spoon—just enough to break them open, not powder them. This releases their flavor without making the brine cloudy.
Add the 0.5 cup Diamond Crystal kosher salt and 0.25 cup sugar to the bowl. Mix everything together until the salt and sugar are evenly distributed among the spices. This dry blend will infuse the vinegar with layers of flavor as it steeps. I like to give it a quick shake in a sealed bag to ensure even distribution before adding to the jar.
🥘 Step 3: Assemble the Pickling Liquid
In the 1-gallon mason jar, combine the 2 cups white vinegar and 2 cups water. Add the spice mixture to the jar and stir until fully dissolved. The liquid should turn a pale golden color with visible specks of spices. This is your flavor base—don’t skip stirring, as the spices need to steep evenly.
Here’s the thing—if you notice any undissolved salt or sugar at the bottom, just give it another quick stir. The eggs will absorb the liquid as they pickle, so we want everything fully incorporated. The vinegar should smell sharp and clean, not sour or funky. If it smells off, start fresh with fresh vinegar.
🔪 Step 4: Pack and Seal the Eggs
Gently place the peeled eggs into the jar, packing them snugly but not forcefully. You should be able to fit all 12 eggs comfortably. Pour the pickling liquid over the eggs until they’re completely covered by about 1 inch of liquid. This prevents mold growth and ensures even pickling.
Remove any air bubbles by gently tapping the jar on the counter or using a long utensil to pop them. Seal the jar tightly with the airtight lid. The eggs will float initially, but as they pickle, they’ll sink and absorb the flavor. Leave about 1 inch of headspace to prevent pressure buildup—this is crucial for long-term storage.
⏰ Step 5: Pickle and Rest for Maximum Flavor
Let the eggs pickle at room temperature for 24 hours first. This initial period allows the flavors to penetrate the eggs’ surfaces. After 24 hours, transfer the jar to the refrigerator where they’ll continue pickling and develop deeper flavor over 3-5 days. The longer they pickle, the more complex the taste becomes.
You’ll know they’re ready when the eggs have a bright yellow hue and the liquid is infused with golden spice particles. The texture should be firm yet tender—no more rubbery yolks! For best results, eat them within 2 weeks for peak crunch and tang. The eggs will keep in the fridge for up to 3 months, but flavor peaks around the 1-week mark.
Pro Tips For Making 1 Gallon Pickled Egg
- BOIL EGGS UNTIL COOL: Drop your eggs into a rolling boil, then turn off the heat and let them sit for 15 minutes. I learned this the hard way—rushing the cooling makes them crack under the brine, and nobody wants a vinegar bath for their yolk.
- WEIGH YOUR SALT: Diamond Crystal measures differently—use 1/4 cup by weight (about 50g), not volume. I used to eyeball it and ended up with either bland eggs or a jar that looked like ocean water.
- COOL BRINE BEFORE ADDING EGGS: Let your vinegar-water mix sit at room temp for 10 minutes after dissolving the salt. Cold brine shocks eggs and clouds the liquid; warm brine keeps things clear and crisp.
- PACK EGGS TIGHT, THEN WEIGH: Stuff your jar with eggs as snugly as possible, then top with the remaining brine. If you leave gaps, the eggs float and never pickle evenly—no one wants half-fermented eggs.
Pro cooking tips for 1 gallon pickled egg
Brine Temperature Matters
Always use room-temperature vinegar and water for your brine—never hot or cold. Cold liquids create condensation inside the jar, which dilutes the flavor and encourages mold growth. I keep my vinegar in the pantry and let it sit out for 30 minutes before mixing.
The ideal brine temp is 70-75°F, which helps the spices infuse evenly and speeds up the pickling process without compromising safety. 🌡️
Egg Selection Secrets
Choose fresh, large eggs with thick whites—they hold their shape best during pickling. I avoid store-brand eggs with thin shells because they often crack during boiling. For extra insurance, I use organic or pasture-raised eggs—their yolks stay vibrant and firm.
If you’re pickling store-bought eggs, select ones with USDA Grade AA labels for the best texture. Never use eggs older than 2 weeks from the pack date.
Spice Infusion Trick
For deeper flavor, I toast the spices before adding them to the vinegar. Lightly dry-toast the mustard seeds and dill seeds in a small pan over low heat for 1-2 minutes until fragrant. This releases their essential oils and creates a more complex flavor profile.
Skip this step if you’re using dried herbs instead of seeds—they don’t benefit from toasting. The toasted spices will make your brine smell like a spice shop! 🌿
Crunch Control
The key to that perfect crunchy texture is proper cooling after boiling. If your eggs sit too long in warm water, they’ll develop a rubbery texture. I use an ice bath with crushed ice and cold water—the eggs should be ice cold within 5 minutes.
For extra crunch, I also pat them dry before adding to the jar. Any moisture left on the eggs will make the brine watery and dilute the flavor.
Safety First
Always ensure the eggs are fully submerged in the brine—at least 1 inch of liquid above them. This prevents mold and bacteria growth. I check the liquid level after 24 hours and add more vinegar if needed.
Never use a jar that’s more than half-full of eggs, as this reduces the protective liquid layer. If you notice any fuzz or mold after refrigeration, discard the entire jar immediately—pickled eggs can spoil even in the fridge. 🚨
Flavor Boost Shortcut
Add 1 tbsp of lemon juice to your brine for an extra tangy kick. The acidity complements the vinegar and brightens the overall flavor. I also like adding 1 tsp of celery seeds for a subtle herbal note that pairs perfectly with the garlic and dill.
For a smoky twist, add ½ tsp of smoked paprika to the dry spice mix. These small additions elevate your eggs from good to restaurant-quality in seconds. ✨
Nutrition facts
Frequently asked questions about pickled eggs
Can I use brown eggs instead of white for pickling?
Brown eggs work perfectly for pickling—they often have thicker shells and richer yolks that hold up even better. The color difference won’t affect the flavor or texture, though the yolks will be slightly deeper in hue. Just ensure they’re fresh (within 2 weeks of pack date) for the best results.
How do I know when the pickled eggs are ready to eat?
Your eggs are ready when they’ve developed a bright yellow hue and the liquid is infused with golden spice particles. After 48 hours at room temperature, transfer to the fridge and taste one after 3-5 days. They should have a firm yet tender texture with a tangy crunch—no rubbery yolks! The flavor deepens over time, peaking around 1-2 weeks.
What if my pickled eggs smell off after refrigeration?
If you notice any sour, rotten, or fermented odors, discard the entire jar immediately—this indicates spoilage. Properly pickled eggs should smell sharp and vinegary, not funky. To prevent this, always ensure eggs are fully submerged in brine (at least 1 inch of liquid) and check the seal regularly. If mold appears, it’s a sign the eggs weren’t properly preserved.
Can I make this recipe with fewer eggs?
Yes! Scale down the recipe by using a quart jar instead of a gallon. For a quart, use 3 eggs, ½ cup vinegar, ½ cup water, and halve all other ingredients. The ratios remain the same, and the pickling time stays identical. This works perfectly for small gatherings or gifts. Just ensure the eggs stay fully submerged in the reduced liquid volume.
Why did my pickled eggs turn cloudy?
Cloudiness usually means the eggs weren’t cooled properly after boiling or the brine wasn’t room temperature when mixed. For crystal-clear eggs, always use an ice bath to cool boiled eggs completely and let your vinegar/water mixture sit at room temperature before combining. If cloudiness appears after pickling, it’s harmless but may affect presentation—just eat them anyway! The flavor won’t be compromised.

- 32 Oz Cream Cheese Cheesecake Recipe: Silky Smoothness With No Cracking - October 11, 2026
- 8×8 Pan Dump Cake Recipe: One-Bowl Wonder with Fudgy Layers - October 11, 2026
- 10-Layer Cake Recipe: Stacked Height With Buttery Vanilla Layers - October 11, 2026