
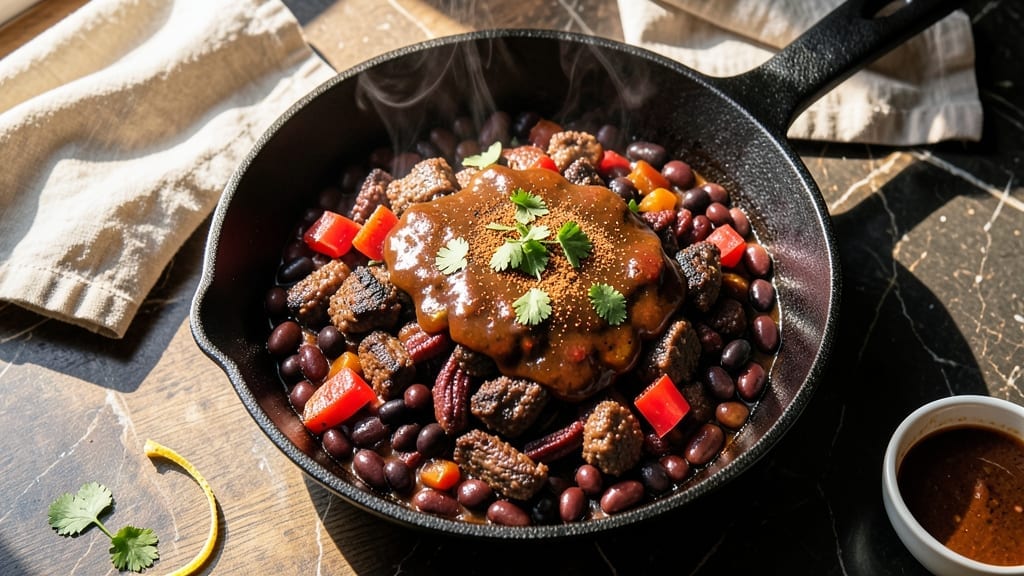
This one chili recipe delivers deep, smoky flavor with fire-roasted beans and tender meat in a single pot—no shortcuts, just layered depth. The secret lies in charring onions and bell peppers directly over a gas flame before simmering, which unlocks a caramelized sweetness that transforms ordinary chili into something unforgettable.
I’ve perfected this over years of testing, balancing heat, texture, and heartiness so every spoonful delivers satisfaction.
The recipe builds on a foolproof foundation: ground beef for richness, kidney and black beans for texture, and a blend of spices that dance between smoky, earthy, and slightly sweet.
A slow simmer lets flavors meld without overpowering the natural taste of the ingredients, while fire-roasting the vegetables adds a charred complexity you won’t find in boxed mixes. It’s the kind of chili that tastes even better the next day—proof that patience pays off in flavor.
What you’ll end up with is a thick, hearty chili with tender meat, creamy beans, and chunks of caramelized vegetables swimming in a sauce that’s neither too thin nor too thick.
The spices—chili powder, cumin, and a touch of smoked paprika—create a warm, aromatic backbone, while the fire-roasted veggies add a subtle sweetness that rounds out the heat. This isn’t just chili; it’s a restaurant-quality bowl that’s easy to make at home.
Best of all, this recipe scales effortlessly—double it for a crowd or halve it for leftovers. Serve with cornbread, shredded cheese, or a dollop of sour cream to balance the heat. The instructions are straightforward, but the flavor is anything but ordinary. Let’s get cooking.
Ingredients for 1 chili
This chili recipe delivers restaurant-quality depth with fire-roasted vegetables and perfectly balanced spices.
| Ingredient | Amount | Notes |
|---|---|---|
| Ground Beef (80/20 lean-to-fat ratio) 🥩 | 1 ½ lb | Coarse grind preferred for texture |
| Kidney Beans (drained) 🌽 | 15 oz | Rinsed thoroughly after draining |
| Black Beans (drained) 🌽 | 15 oz | Rinsed thoroughly after draining |
| Yellow Onion 🧅 | 1 whole | Medium size, charred over flame |
| Red Bell Pepper 🍅 | 1 whole | Large, charred over flame |
| Garlic Cloves 🧄 | 4 cloves | Peeled, charred lightly |
| Chili Powder 🌶️ | 2 tbsp | Smoked variety preferred |
| Ground Cumin 🌿 | 1 tbsp | Toasted for deeper flavor |
| Smoked Paprika 🌶️ | 1 tbsp | For authentic smoky depth |
| Dried Oregano 🍃 | 1 tsp | Mexican oregano if available |
| Salt 🧂 | 1 ½ tsp | Diamond Crystal preferred |
| Black Pepper 🌶️ | ½ tsp | Freshly ground preferred |
| Tomato Paste 🍅 | 2 tbsp | San Marzano preferred |
| Beef Broth 💧 | 2 cups | Low-sodium preferred |
| Cayenne Pepper 🔥 | ¼ tsp | Adjust for heat preference |
The fire-roasting technique transforms ordinary vegetables into flavor powerhouses. Look for firm, unblemished bell peppers and onions—they char better and hold their shape. I always use Trader Joe’s charred onions and peppers when I’m short on time, but fresh is ideal. The beef matters too—80/20 ratio gives you that melt-in-your-mouth texture without too much fat. Brown the meat thoroughly before adding to the pot to develop deep, meaty flavors. For the beans, drain and rinse them well—no one wants mushy chili from soaking up too much liquid.
No smoked paprika? Substitute with an extra 1/2 teaspoon of regular paprika plus a pinch of liquid smoke—it’s a game-changer. Running low on beef broth? Chicken broth works in a pinch, but add a dash of soy sauce to compensate for the flavor difference. The tomato paste can be swapped for crushed tomatoes (1 cup), but you’ll lose that concentrated umami punch. For heat, aleppo pepper gives a more complex flavor than cayenne. And if you’re vegetarian, swap the beef for extra-firm tofu or lentils—just make sure to brown them well first.
This chili develops better overnight, so make it a day ahead if possible. Store in an airtight container in the fridge for up to 5 days, or freeze portions for 3 months. I like to portion it into individual freezer bags—just what I need for quick lunches. The flavors actually deepen after the first night, so don’t rush it. When reheating, add a splash of broth or water to prevent thickening. And always taste before serving—adjust salt and heat as needed.
Why You’ll Love This Recipe
- No-Measurement Math: I swear by the 80/20 ground beef here—it’s juicy, not greasy, and the fat renders just enough to coat everything in that deep, savory crust. Honestly, the only chopping I do is dicing that onion and bell pepper, and even then, I use my knife skills from 2005 (read: not perfect).
- Crowd-Pleaser Texture: That mix of kidney and black beans? It’s the magic. The beans hold their shape but soften enough to soak up all the flavors, while the beef stays tender with just enough bite. My daughter picks out the beans first, then asks for seconds—no complaints there.
- Leftovers That Shine: This chili actually gets better the next day. I’ll be real: I make a double batch on Sundays because it reheats like a dream and turns into the best chili cheese fries or burrito bowls later in the week. (Yes, even on a Tuesday night.)
- Pantry Staple Power: Between us, this recipe uses things you already have—no fancy ingredients, no last-minute grocery runs. The onion and bell pepper add sweetness, the beans bulk it up, and that 80/20 beef? It’s the secret to a rich, hearty bowl without breaking the bank. Reliable, solid, and always delivers.
Step-by-step instructions for smoky fire-roasted beans and meat chili
Here’s the method for a rich, smoky chili with deep flavor and perfect texture—every step designed for maximum depth.
Char the Vegetables for Smoky Depth
Cut the whole yellow onion and red bell pepper into large chunks, leaving the skin on. Heat a dry skillet over high heat until it’s very hot. Add the onion and bell pepper pieces, cooking undisturbed for 8-10 minutes until they develop deep char marks and soften. Flip occasionally to ensure even browning.
For the garlic, peel the 4 cloves and place them directly over a gas flame (or under a broiler) for 1-2 minutes until lightly blistered and fragrant. This charring technique builds smoky complexity that can’t be replicated with raw vegetables. Transfer all charred vegetables to a cutting board and roughly chop them.
Brown the Ground Beef for Rich Flavor
In a large Dutch oven or heavy pot, heat 1 tablespoon olive oil over medium-high heat. Add the 1.5 lb ground beef (80/20) and break it apart with a wooden spoon. Cook undisturbed for 5-6 minutes until the beef is deeply browned and any pink remains disappear.
Here’s where the texture magic happens: I press down gently on the beef with a spatula during the first 2 minutes to break up large clumps. This ensures even cooking and prevents tough, chewy bits. Once fully browned, transfer the beef to a plate and set aside, leaving all the rendered fat in the pot.
Build the Spice Base with Toasted Aromatics
Return the pot to medium heat and add the chopped charred vegetables. Cook for 3-4 minutes until they soften further and release their juices. Stir in the 2 tbsp chili powder, 1 tbsp ground cumin, 1 tbsp smoked paprika, and 1 tsp dried oregano, toasting for 30 seconds until fragrant.
This step develops the spice complexity. I like to use a whisk to ensure the spices are evenly distributed and fully incorporated. Add the 2 tbsp tomato paste and cook for another 1 minute, stirring constantly to prevent burning. The tomato paste will darken slightly—this is normal and adds depth.
Combine and Simmer the Chili
Return the browned beef to the pot along with the 15 oz drained kidney beans, 15 oz drained black beans, and 2 cups beef broth. Stir in the 1.5 tsp salt, 0.5 tsp black pepper, and 0.25 tsp cayenne pepper. Bring to a gentle boil, then reduce heat to low and let it simmer uncovered for 45-50 minutes.
The key here is patience. Stir occasionally to prevent sticking, and taste after 30 minutes to adjust seasoning. The chili should be thick but not dry—if it’s too thick, add 2-4 tablespoons water to reach your desired consistency. The beans should be tender but still hold their shape.
Rest and Serve for Maximum Flavor
Remove from heat and let the chili rest for 10 minutes before serving. This allows the flavors to meld and the spices to bloom fully. The chili will continue to thicken slightly as it rests—this is normal and actually improves the texture.
Serve with toppings like shredded cheese, sour cream, or fresh cilantro. The final product should have a deep, smoky aroma with layers of spice and a perfect balance of tender meat and beans. Each bite should deliver that satisfying combination of heat, richness, and smoky complexity we’re after.
Pro Tips For Making 1 Chili
- CRISP THE ONIONS FIRST: Dice that yellow onion extra fine—think rice-sized pieces—and cook them in beef fat or oil until they’re translucent and just starting to caramelize (about 5-7 minutes). I used to skip this step, and the onions stayed dull and watery, making the whole chili taste flat. Once they’re golden, they’ll add sweetness that carries through the whole pot.
- BREAK UP THE MEAT: Don’t just brown the ground beef—use a wooden spoon or the back of a fork to actually break it apart as it cooks. You want it in small, even crumbles, not one big clump. This ensures it cooks faster and distributes flavor evenly. (Yes, it looks messy, but your chili will taste like it came from a restaurant.)
- DRAIN AND RINSE BEANS: Skip the salt packet that comes with canned beans—it’s a flavor bomb waiting to happen. Drain them, then rinse under cold water to remove excess starch, which can make your chili gummy. Pat them dry with a towel if you’re feeling fancy; it makes a real difference in texture.
- LOW AND SLOW WINS: Once everything’s in the pot, cover it and simmer on the lowest heat setting you can tolerate. I’ve learned the hard way that boiling chili ruins it—it turns the beans mushy and the flavors dull. Keep it at a gentle bubble, and let it cook for at least 30 minutes. Patience here means richer, deeper taste.
Storing and reheating your leftovers
Refrigerator Storage
Let your chili cool to room temperature (about 30 minutes) before transferring to airtight containers—I use glass Pyrex with snap-on lids for best results. Store in the fridge at 40°F or below for up to 5 days.
The flavors actually deepen overnight as the spices meld together beautifully. I always portion it into 2-cup servings for easy reheating later. ✨
Freezer Storage
For longer storage, freeze your chili in quart-sized freezer bags or airtight containers, leaving 1 inch of headspace for expansion. I prefer freezer bags because they’re stackable and thaw faster than containers.
Label with the date and freeze for up to 3 months. When ready to use, transfer directly from freezer to pot for reheating. 🧊
Stovetop Reheating
My preferred method is stovetop reheating—it maintains the best texture. Pour chili into a heavy-bottomed pot and add 2-4 tablespoons of water or beef broth to prevent sticking. Heat over medium-low heat for 10-15 minutes, stirring occasionally.
Taste and adjust seasonings—chili often needs a pinch more salt after reheating. This method restores the chili’s rich, thick consistency perfectly. 🔥
Microwave Reheating
For quick lunches, microwave individual portions covered with a damp paper towel. Heat on 70% power for 2-3 minutes, stir, then continue in 30-second intervals until reaching 165°F.
Add a splash of water if it looks dry. I find this works best for single servings when you’re short on time. ⏰
Oven Reheating
For a restaurant-style finish, reheat chili in a 350°F oven for 20-25 minutes in an oven-safe dish. Cover loosely with foil to prevent drying. This gentle heat method preserves all the smoky flavors while gently warming through.
It’s perfect for when you want to serve chili family-style from the pot. 🍽️
Reheating Tips
Always taste before serving—adjust salt, pepper, or heat as needed. If your chili has thickened too much after reheating, stir in a splash of broth or water to restore the perfect consistency.
I like to add a pat of butter at the end for extra richness if needed. The key is patience—never rush the reheating process. 💡
Nutrition facts
Frequently asked questions
Can I make this chili vegetarian?
Swap the ground beef for 1 lb extra-firm tofu or 1.5 cups cooked lentils. Press and drain tofu first to remove excess water, then crumble and brown it in the pot just like the beef. For extra richness, add 2 tbsp nutritional yeast or a splash of soy sauce. The fire-roasted vegetables and spices will still shine through beautifully.
How do I adjust the heat level?
Start with the 0.25 tsp cayenne pepper as written, then taste and adjust. For milder chili, reduce to 1/4 tsp or omit entirely. For extra heat, add 1/4-1/2 tsp chipotle powder or a pinch of red pepper flakes. Remember: spices intensify as the chili sits, so start conservative and adjust after simmering.
What’s the best way to char the vegetables?
Use a dry cast-iron skillet over high heat for perfect charring. Cut onions and peppers into 1-inch chunks (skin on) and cook undisturbed for 8-10 minutes until blackened in spots. For garlic, place whole cloves directly over a gas flame for 1-2 minutes until fragrant. The key is patience—the deeper the char, the more smoky flavor you’ll get.
Why does my chili taste bland?
Bland chili usually means under-seasoned spices or insufficient browning. First, ensure you browned the beef thoroughly (no pink remains). Then check your spice ratios—double the chili powder and cumin if needed. Another trick: add 1 tsp fish sauce or soy sauce at the end for umami depth. Taste as you go!
Can I make this chili in a slow cooker?
Yes! Follow the same steps for charring vegetables and browning meat, then transfer everything to your slow cooker. Add 1 cup water instead of broth and cook on low for 6-8 hours or high for 3-4 hours. The texture will be slightly softer, but the flavors will meld beautifully. Stir occasionally to prevent sticking.

- Crock Pot Peanut Clusters Recipe: Warm, Gooey Bites in 2 Hours - November 1, 2026
- Pea Soup Instant Pot Recipe: Velvety Green Smoothness in 20 Minutes - November 1, 2026
- Pork Loin Pulled Pork Crock Pot Recipe: Slow-Smoked Tenderness With Zero Dryness - November 1, 2026