
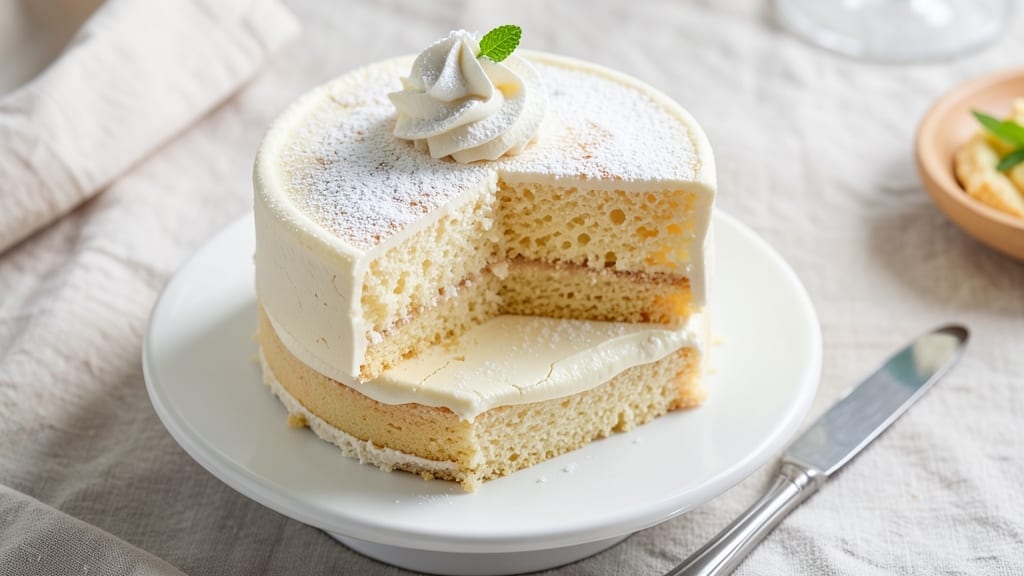
This 1-egg fairy cake recipe delivers delicate, melt-in-your-mouth sponge bites that crumble like clouds—perfect for tea parties or festive treats. 💛 The secret lies in the single egg’s light binding power, creating a texture that’s airy yet sturdy enough to hold vanilla frosting without collapsing.
I’ve baked these for years, and they’re foolproof for beginners or experienced bakers alike.
What makes these fairy cakes special is their 10-minute bake time at 350°F, resulting in a golden crust and tender crumb. The recipe uses simple pantry staples—flour, sugar, baking powder, and vanilla—plus that one egg to create magic. No fancy equipment needed, just a muffin tin and a whisk.
By the end, you’ll have a batch of light-as-air cakes that stack beautifully with vanilla buttercream or dusted with powdered sugar. The frosting clings to each bite without weighing them down, keeping that signature fairy cake crumbly texture intact. These are the kind of treats that turn ordinary gatherings extraordinary.
Perfect for celebrations, afternoon tea, or satisfying a sweet tooth in just 20 minutes of active time. Let’s get baking!
Ingredients for 1 egg fairy cake
Twelve simple ingredients transform into cloud-like fairy cakes with a crumbly magic you’ll crave.
| Ingredient | Amount | Notes |
|---|---|---|
| All-Purpose Flour 🌾 | 1 ½ cups | Sifted for light texture |
| Granulated Sugar 🍚 | ¾ cup | White or light brown |
| Large Egg 🥚 | 1 whole | Room temperature preferred |
| Unsalted Butter 🧈 | ½ cup | Cold, cubed for baking |
| Pure Vanilla Extract 🍯 | 1 tsp | High-quality, not imitation |
| Baking Powder 🧂 | ½ tsp | Freshly opened for lift |
| Salt 🧂 | ¼ tsp | Fine sea salt preferred |
| Milk 🥛 | ¼ cup | Whole milk for richness |
| Vanilla Buttercream Frosting 🍰 | 1 ½ cups | Homemade or store-bought |
| Powdered Sugar 🍚 | ½ cup | For dusting between layers |
| Mini Muffin Tin 🍳 | 1 whole | 24-cavity, greased well |
| Toothpicks 📌 | 12 whole | For securing layers |
The flour is your foundation—King Arthur or Bob’s Red Mill for that perfect crumb. I always grab the organic white flour at Whole Foods if I’m feeling fancy, but the regular grocery store stuff works just fine. The butter must be cold when you cube it—room temp butter makes these dense. For vanilla, Nielsen-Massey is my go-to, but any pure extract will do. The baking powder? Check the expiration date—old baking powder means flat cakes. If you’re unsure, test it by mixing with water and vinegar; it should fizz.
No vanilla extract? Vanilla bean paste at half the amount works in a pinch. Short on milk? Heavy cream or even water will keep things moist. The frosting can be store-bought (I won’t judge), but homemade is where the magic happens—just mix softened butter, powdered sugar, and more vanilla until fluffy. For extra flavor, add a pinch of salt. The powdered sugar dusting? Sift it—no lumps allowed. And if you’re feeling adventurous, swap half the flour for cake flour for an even lighter texture.
These cakes are best baked fresh, but you can prep the batter ahead and refrigerate it for up to 24 hours. Once baked, they keep at room temperature for 3 days in an airtight container, though they’re best enjoyed the first day. For stacking, let the frosting set for 10 minutes before adding the next layer. Freeze unfrosted cakes for 1 month—just thaw at room temp before decorating. And trust me, the first bite is worth every minute.
Why You’ll Love This Recipe
- No-Fuss Mixing: I swear, this batter comes together in one bowl—no sifting, no weird ratios. Just fold the melted butter into the egg and sugar until it’s almost too pretty, then dump in the flour. Five minutes tops, and honestly? That’s my kind of magic.
- Buttery-Vanilla Bliss: The moment those little cakes come out of the oven, you’ll get why I keep a jar of vanilla extract just for this. The butter keeps them tender, the vanilla makes them smell like a bakery, and that crispy top? That’s the part I eat first every time.
- Tea-Time Hero: Between us, these are my go-to for afternoon tea, potlucks, or when I need something to pair with coffee. They’re small enough to share but satisfying enough that no one will ask for seconds—until they do. (I’ve seen it happen.)
- Pantry Staple Power: Flour, sugar, butter, egg, vanilla—if you’ve got those, you’ve got a cake. No fancy substitutions, no last-minute store runs. And if you bake a batch? They stay fresh for days, so you’re never scrambling for dessert again. My wallet thanks me weekly.
Step-by-step instructions for light-as-air fairy cakes
Here’s how to bake these delicate, cloud-like cakes with perfect crumb and frosting.
👨🍳 Step 1: Prep Ingredients and Preheat
Start by sifting the 1.5 cups all-purpose flour with the 0.5 tsp baking powder and 0.25 tsp salt into a medium bowl. This step aerates the flour, creating a lighter texture for those signature fairy cake crumbs. In a separate bowl, whisk together the 0.75 cup granulated sugar, 1 whole large egg, 0.5 cup cold cubed unsalted butter, 1 tsp pure vanilla extract, and 0.25 cup milk until smooth and pale.
Preheat your oven to 350°F and grease the mini muffin tin thoroughly with butter or nonstick spray. I like to add a tiny dab of butter to each cavity for extra insurance against sticking. Place the tin on a baking sheet to catch any potential overflow—these cakes rise higher than they look!
🍳 Step 2: Combine Wet and Dry Ingredients
Gradually add the dry ingredients to the wet mixture, folding gently with a spatula just until combined. You want to maintain as much air as possible—overmixing develops gluten and makes the cakes dense. The batter should be thick but pourable, like heavy pudding. If it looks too stiff, add 1 teaspoon milk at a time until it reaches the right consistency.
Here’s the thing—fairy cakes need to be packed tightly into the mini muffin cups. Use a small ice cream scoop or spoon to fill each cavity ¾ full of batter. Tap the tin gently on the counter to release any air bubbles, then smooth the tops with the back of your spoon. This ensures even baking and that perfect domed shape.
🔥 Step 3: Bake Until Golden and Springy
Bake for 12-14 minutes until the tops are golden brown and a toothpick inserted comes out clean. Don’t open the oven door early—this causes the cakes to sink. You’ll know they’re done when they’ve puffed slightly and developed a crisp crust that gives way to a tender interior.
Let the cakes cool in the tin for 5 minutes, then transfer them to a wire rack. Here’s where patience pays off—wait until they’re completely cool before frosting. Rushing this step can cause the frosting to melt or slide off. I usually let them cool for at least 30 minutes for perfect stability.
🥘 Step 4: Frost with Vanilla Buttercream Magic
Once cooled, dust the tops of the cakes with 0.5 cup powdered sugar using a fine-mesh sieve. This creates a delicate barrier that helps the frosting adhere beautifully. Spread a generous layer of 1.5 cups vanilla buttercream frosting on the top of each cake, using an offset spatula for smooth, even coverage.
Here’s the secret to that professional look—pipe a small rosette or swirl of frosting on top of each cake using a piping bag fitted with a star tip. Insert a toothpick into the frosting and gently twist to create a decorative swirl. This adds that special touch that makes fairy cakes look extra magical.
⏰ Step 5: Chill and Serve
Place the frosted cakes in the refrigerator to set for at least 30 minutes—this ensures the frosting holds its shape and the cakes stay firm. The cold temperature also helps the flavors meld beautifully. Serve at room temperature for the best texture and flavor experience.
These delicate cakes are perfect for celebrations or as a sweet treat. The light, airy crumb paired with the rich vanilla frosting creates a balance that’s simply irresistible. Store any leftovers in an airtight container in the fridge for up to 3 days, though they rarely last that long!
Pro Tips For Making 1 Egg Fairy Cake
- Whisk Eggs Like Mad: Beat that single egg with sugar until it’s pale, thick, and nearly tripled in volume—about 3-4 minutes with a hand mixer. I learned this the hard way: skipping this step means dense, flat cakes, not the light, airy fairy cakes you’re after. (Yes, even if your arm gets tired.)
- Melt Butter Slowly: Warm the butter in the pan over medium-low heat until it’s just melted and foamy—not browned or bubbling. After burning three batches, I finally figured out that hot butter steals moisture from the batter, leaving you with dry edges. Let it cool slightly before adding the batter.
- Sift That Flour: Don’t just scoop—sift the flour into the egg mixture to avoid lumps and ensure even distribution. My grandmother swore by this, and she was right: unsifted flour packs down, making the cakes heavy. A quick shake in a fine-mesh strainer makes all the difference.
- Test Doneness with a Toothpick: Pull the cake from the oven when the edges look set but the center still jiggles slightly—then wait 30 seconds. I was skeptical until I tried it: overbaking turns fairy cakes into hockey pucks, and underbaking leaves them gummy. Trust the toothpick, not your timer.
Serving suggestions for leftovers
Tea Party Presentation
Fairy cakes shine at afternoon tea—stack them 2 layers high on a vintage plate with a delicate doily underneath. I like to arrange them in a circular pattern around a small teacup for a charming centerpiece.
Add a few sprigs of fresh mint or edible flowers for a pop of color that ties into your tea service. 💛
For an elegant touch, use a gold cake stand or tiered tray to display the cakes. Place the tallest cakes in the center and shorter ones toward the edges.
Serve with Earl Grey tea or chamomile to complement the vanilla frosting beautifully. Guests will love picking up these dainty treats with their fingers!
Festive Decorating Ideas
Transform these cakes for holidays with simple decorations. For Christmas, dust with powdered sugar and add a tiny red or green sprinkle on top. For birthdays, pipe a small swirl of frosting in the guest’s favorite color.
I once decorated these with mini fondant flowers for a wedding dessert table—they looked stunning!
For Halloween, use black or orange food coloring to tint the frosting, then add mini candy eyes or plastic spiders for a spooky effect. The key is keeping decorations lightweight so they don’t weigh down the delicate cakes. A toothpick inserted into the frosting helps secure any toppings.
Serving with Ice Cream
Pair these cakes with a scoop of vanilla bean ice cream for a decadent dessert. Place one cake on a small plate, top with a 1-scoop ice cream, and add a dollop of caramel sauce for drizzling.
The contrast of warm cake and cold ice cream is pure magic—especially on a warm summer day.
For a no-mess version, serve the cakes alongside ice cream sandwiches made with the same batter. Press two cakes together with a thin layer of frosting and a scoop of ice cream in between.
Wrap in parchment paper and freeze for 30 minutes before serving. This combo is always a crowd-pleaser!
Mini Dessert Platter
Create a mini dessert platter by arranging fairy cakes alongside other bite-sized treats like macarons, chocolate truffles, or shortbread cookies. Use a rectangular platter with compartments to separate the treats neatly. Add a small bowl of berries or chocolate-covered strawberries for freshness and color contrast.
For a cohesive look, stick to a color theme—pastels for spring, rich tones for fall, or metallic accents for holidays. Label each treat with a tiny flag or toothpick for a restaurant-style presentation. This works perfectly for wedding desserts or office parties where variety is key!
Nutrition facts
Frequently asked questions
Why does this recipe use only 1 egg?
The single egg creates the perfect light, airy texture fairy cakes are known for. The egg’s proteins provide gentle binding while maintaining that signature crumbly quality. Using more would make them dense—this recipe balances structure with delicate crumb perfectly.
Can I make these cakes gluten-free?
Yes! Replace the 1.5 cups all-purpose flour with a 1:1 gluten-free baking flour blend like Bob’s Red Mill. Add ½ tsp xanthan gum if your blend doesn’t include it. The texture will be slightly denser but still delicious. Always check your blend’s instructions for leavening adjustments.
How do I prevent the cakes from sticking to the tin?
Grease the muffin tin thoroughly with butter or nonstick spray, then add a tiny dab of butter to each cavity. For extra insurance, line the tin with paper liners—they create a perfect barrier. Never skip this step, as fairy cakes have a tendency to cling when baked.
What if my cakes sink in the middle?
This usually happens from opening the oven too early or underbaking. Always bake for the full 12-14 minutes at 350°F without checking until the timer goes off. If they sink slightly, they’re still fine—just ensure the toothpick comes out clean before removing them.
Can I make these without a muffin tin?
Use a mini loaf pan or even ramekins for individual portions. Line them with parchment paper cut to size. For a rustic look, bake in a cast-iron skillet with small mounds of batter—just reduce the baking time to 10-12 minutes and watch closely.

- 12 Bean Chili Recipe: Hearty Slow-Cooked Depth With 12 Legumes - October 17, 2026
- 5 Seed Bread Recipe: Nutty Crunch and Artisan Flavor in One Loaf - October 17, 2026
- 1 Lb Macaroni Salad Recipe: Bold, Crunchy, and Crowd-Pleasing - October 17, 2026