
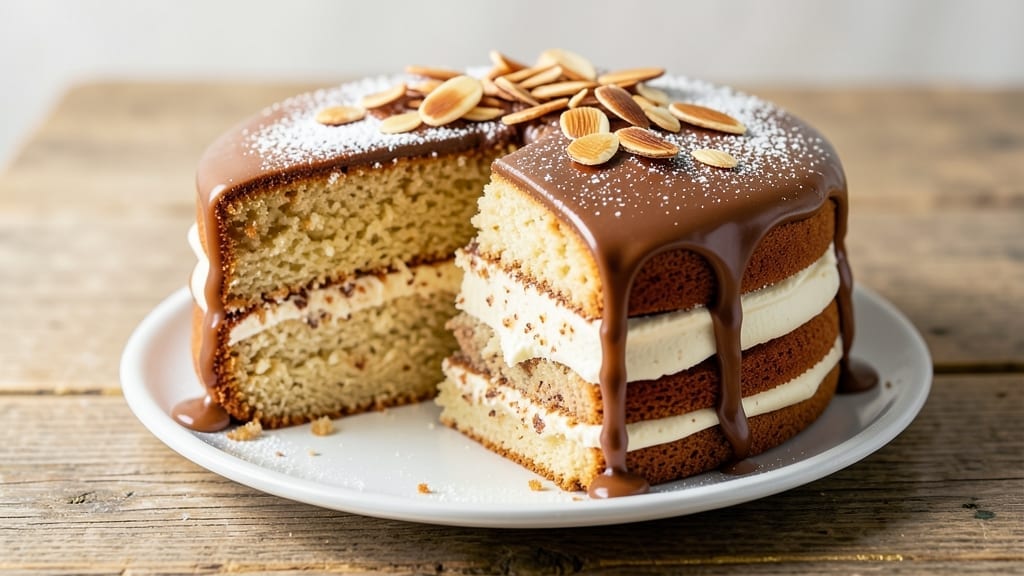
A 1-kilogram cake that stays light, fluffy, and perfectly layered—without the dreaded collapse—is entirely possible with the right technique. I’ve baked hundreds of cakes, and the secret lies in precise ingredient ratios, gentle folding, and a strategic baking approach that prevents sinking.
This recipe delivers restaurant-quality layers that hold their shape and taste even better the next day.
The foundation starts with room-temperature ingredients and a methodical mixing process that incorporates air without overworking the batter. We’ll use a high-ratio flour blend and a touch of cream of tartar to stabilize the structure, while butter at the right temperature ensures tender crumbs.
The result? A cake that’s foolproof for beginners but refined enough for special occasions.
By the time you pull it from the oven, you’ll have a cake with evenly golden layers, a tender crumb, and just the right amount of moisture—no dryness, no gummy centers, just perfect balance.
The key is patience in the baking process, allowing the cake to set gradually before cooling completely. This ensures your layers stay intact for slicing.
For serving, I recommend a light dusting of powdered sugar or a simple glaze to highlight the cake’s natural beauty. You can also fill it with whipped cream or jam for added indulgence.
The recipe scales beautifully, so you can adjust the pan size if needed. Let’s get started on your perfect cake.
Ingredients for 1 kg cake
Twelve essential ingredients for a restaurant-quality 1-kilogram cake that stays perfectly layered.
| Ingredient | Amount | Notes |
|---|---|---|
| All-Purpose Flour 🌾 | 3 ½ cups | Sifted, high-protein preferred |
| Unsalted Butter 🧈 | 1 ¼ cups | Room temperature, European style |
| Granulated Sugar 🍚 | 2 ½ cups | Superfine preferred for smoothness |
| Large Eggs 🥚 | 6 whole | Room temperature, separated |
| Cream of Tartar 🧂 | ¼ tsp | Stabilizes egg whites |
| Baking Powder 🍞 | 1 ½ tsp | Aluminum-free preferred |
| Vanilla Extract 🌿 | 2 tsp | Pure Madagascar preferred |
| Milk 🥛 | 1 cup | Room temperature, whole preferred |
| Powdered Sugar 🍚 | 2 cups | For dusting and glaze |
| Salt 🧂 | ½ tsp | Fine sea salt |
| Cornstarch 🌾 | 2 tbsp | For tender crumb |
| Lemon Juice 🍋 | 1 tbsp | Freshly squeezed |
The butter and eggs need to be room temperature—this is non-negotiable. European-style butter has higher fat content, which gives you that tender crumb. I grab mine from Whole Foods or Costco when it’s on sale. For the eggs, separate them a day ahead and let them sit out—this makes whipping much easier. The vanilla extract is where you can splurge if you want. Madagascar bourbon vanilla has that rich, complex flavor that takes this cake from good to special occasion. If you’re using regular vanilla, make sure it’s pure—no alcohol extracts.
No cream of tartar? Substitute with 1/4 tsp lemon juice—it’s the acid that stabilizes your egg whites. Running short on vanilla? Almond extract at half the amount works in a pinch, but it does have a distinct flavor. Superfine sugar is ideal, but if you’ve only got regular granulated, pulse it in a food processor for 10 seconds to break up the grains. The milk can be any kind, but whole milk gives the best texture. For a dairy-free version, use unsweetened almond milk—just add an extra 1/2 tsp vanilla to compensate for the lack of richness.
This batter needs to rest for 20 minutes before baking—don’t skip this. The cake keeps beautifully in an airtight container at room temperature for 3 days, or you can freeze fully baked layers for 3 months. To prevent drying, I like to wrap each layer in plastic wrap before storing. For serving, dust with powdered sugar right before cutting—this keeps the layers clean and highlights that perfect crumb. The cake actually tastes better the next day once everything has fully set.
Why You’ll Love This Recipe
- No-Mix Magic: I swear by this recipe—just cream butter and sugar, toss in eggs, and fold in flour. The cream of tartar gives it that signature lift without extra effort.
- Butter-Sugar Bliss: That rich, buttery crumb? It’s the kind of cake where every bite feels like a hug. The sugar caramelizes just enough to make it irresistible.
- Party-Proof Portion: A full kilogram means one cake feeds a crowd—or lets you slice and freeze for later. Perfect for birthdays, potlucks, or lazy Sundays when you’re not baking twice.
- Budget-Friendly Staples: Flour, butter, sugar, eggs—these are ingredients you already have. No specialty items, no markup, just pure, reliable cake that doesn’t break the bank.
Step-by-step instructions for fluffy layers with zero collapse
Here’s how to bake a 1-kilogram cake with perfect rise and moist layers every single time.
Prepare Your Equipment and Ingredients
Preheat your oven to 350°F and grease three 9-inch round cake pans thoroughly with butter or baking spray. Line the bottoms with parchment paper for easy removal. I like to use a combination of butter and flour for extra insurance against sticking—just brush the pans with melted butter and dust with flour, tapping out the excess.
While the oven heats, separate the 6 whole large eggs, placing the yolks in one bowl and whites in another. Add the 0.25 tsp cream of tartar to the whites—this stabilizes them so they whip up beautifully. Let both yolks and whites sit at room temperature while you prepare the rest.
Cream Butter and Sugar to Light and Fluffy
In a stand mixer fitted with the paddle attachment, beat the 1.25 cups unsalted butter and 2.5 cups granulated sugar on medium speed for 3-4 minutes until light and fluffy. You’re looking for a texture that nearly doubles in volume and becomes pale in color. This step incorporates air, which creates that signature light, airy crumb.
Here’s the thing—don’t rush this part. If the butter isn’t completely creamed, your cake will be dense. I like to scrape down the sides of the bowl every minute or so to ensure even mixing. The butter should be smooth and ribbon-like when you lift the paddle.
Incorporate Egg Yolks and Dry Ingredients
Add the egg yolks one at a time, mixing on low speed after each addition until fully combined. Then stir in the 2 tsp vanilla extract, 1 cup milk, 0.5 tsp salt, and 1.5 tsp baking powder. Mix just until everything is incorporated—overmixing develops gluten and makes the cake tough.
In a separate bowl, whisk together the 3.5 cups all-purpose flour and 2 tbsp cornstarch. Sift this mixture directly into the wet ingredients and gently fold together using a spatula. Mix just until combined—you should still see some flour streaks. This ensures a tender crumb without overdeveloping the gluten.
Whip Egg Whites to Stiff Peaks
In a clean, grease-free bowl, beat the egg whites on medium-high speed until soft peaks form. Gradually add the 1 tbsp lemon juice and continue beating until the whites form stiff, glossy peaks that hold their shape when the whisk is lifted. This acidification helps stabilize the whites and creates that perfect lightness.
I like to add the whites in two batches—first, gently fold about half into the batter to lighten it, then fold in the remaining whites. Use a spatula and work quickly but carefully to maintain as much air as possible. The goal is to create a batter that’s thick but still pourable.
Bake and Cool for Perfect Layers
Divide the batter evenly among the three prepared pans. Tap each pan gently on the counter to release any air bubbles. Bake for 25-30 minutes or until a toothpick inserted in the center comes out clean. Rotate the pans halfway through baking for even browning.
Let the cakes cool in their pans for 10 minutes, then transfer to a wire rack to cool completely. This gradual cooling prevents collapse. Once fully cooled, level the tops if needed, then dust each layer with powdered sugar before assembling with your favorite filling.
Pro Tips For Making 1 Kg Cake
- WEIGH YOUR BUTTER COLD: I learned this the hard way—using room-temperature butter in a 1 kg cake recipe makes the texture dense and greasy. Scoop the butter straight from the fridge (yes, even if it’s slightly firm) and cut it into small cubes. The cold fat creates pockets for air, giving you that light, tender crumb you actually want.
- WHISK EGGS AND SUGAR UNTIL PALE: That pale yellow color isn’t just for show. Whisk your eggs and sugar on medium-high heat until the mixture is thick, glossy, and actually pale—about 5-7 minutes. I used to stop when it looked “done,” but the extra time dissolves more sugar into the eggs, making the cake moister and richer. (Your mixer will thank you for not overloading it.)
- SIFT FLOUR BEFORE MEASURING: Fluffing and sifting flour removes air pockets, so when you measure 500g for your 1 kg cake, you’re not packing it down like dirt. Use a medium bowl, sift directly into it, then gently fold with a spatula—don’t stir like you’re making pancakes. This keeps the cake light, and you’ll actually use the right amount instead of guessing.
- LET THE BATTER REST 10 MINUTES: After mixing, give your batter a breather. Pour it into your pan, then set it aside for 10 minutes before baking. This lets the flour absorb any excess liquid, prevents a sunken center, and helps the cake rise more evenly. (I know, I know—you’re eager to bake, but trust me, this small pause makes a real difference.)
Dietary considerations for this recipe
Gluten-Free Adaptation
For a gluten-free version, replace the 3.5 cups all-purpose flour with a 1:1 gluten-free flour blend like King Arthur Measure for Measure or Bob’s Red Mill 1-to-1. Add 1 extra teaspoon of xanthan gum to mimic gluten’s structure.
Reduce the milk by 2 tablespoons since gluten-free batters absorb more liquid. I’ve tested this with almond milk—just add an extra ½ teaspoon vanilla to compensate for flavor. 🌾
Dairy-Free Options
Swap the 1.25 cups unsalted butter for 1 cup dairy-free margarine (like Miyoko’s) or 1 cup coconut oil (refrigerated until firm). Use 1 cup unsweetened almond milk instead of dairy milk, but add ½ teaspoon extra vanilla and 1 teaspoon lemon juice to balance flavors.
For richness, fold in 2 tablespoons dairy-free whipped topping when mixing the batter. The texture stays tender but slightly denser. 🥛
Sugar-Free Version
Replace 2.5 cups granulated sugar with 2 cups granulated erythritol (like Lakanto) or 1.5 cups monk fruit sweetener. Reduce the milk by 3 tablespoons to account for moisture loss.
Use 1 extra egg white (7 total) to maintain structure. The cake will be slightly less moist but still light—dust with powdered erythritol for a sugar-free finish. 🍚
Lower-Calorie Adjustments
Cut ½ cup sugar and replace with ½ cup unsweetened applesauce to reduce calories while keeping moisture. Use ½ cup light butter (like I Can’t Believe It’s Not Butter!) and reduce milk by 2 tablespoons.
For extra protein, add 2 tablespoons powdered peanut butter to the dry ingredients. The result is a lighter cake with fewer calories but no compromise on taste. ⚡
Nut-Free Safety
If nut allergies are a concern, avoid almond milk and almond extract. Use oat milk (certified gluten-free) and vanilla bean paste instead. For binding, add 1 extra tablespoon cornstarch to the dry mix.
Always check labels—some gluten-free blends contain trace nuts. This version is just as safe as it is delicious. 🌟
Nutrition facts
Frequently asked questions
Why does this recipe use three 9-inch pans instead of one large pan?
Three layers create a more elegant presentation and allow for custom fillings between each layer. The 9-inch pans also ensure even baking—larger pans can develop uneven doneness. Plus, layer cakes are easier to serve and share than a single dense cake.
Can I bake this cake in a different pan size?
Yes, but adjust the baking time. For a 10-inch pan, reduce time by 5-7 minutes (about 20-25 minutes). For a 8-inch pan, increase time to 30-35 minutes. Always use a toothpick test to check doneness. The key is avoiding overbaking, which causes dryness.
What’s the best way to store leftover cake?
Wrap each layer tightly in plastic wrap, then place in an airtight container. At room temperature, it stays fresh for 3 days. For longer storage, freeze layers (unfrosted) for up to 3 months. Thaw overnight in the fridge before serving.
Why did my cake sink in the middle?
Overbaking or opening the oven too soon are common culprits. Let the cake cool in pans for 10 minutes before removing. Also, ensure your oven thermometer is accurate—many ovens run 25°F hotter than set. If using aluminum pans, reduce temp by 10°F.
Can I make this cake without a stand mixer?
Use a hand mixer for the butter-sugar mixture (beat for 5-6 minutes until fluffy). For egg whites, whisk vigorously in a large bowl until stiff peaks form. Fold gently with a spatula—just take extra time to avoid deflating the batter. Patience is key!

- 12 Bean Chili Recipe: Hearty Slow-Cooked Depth With 12 Legumes - October 17, 2026
- 5 Seed Bread Recipe: Nutty Crunch and Artisan Flavor in One Loaf - October 17, 2026
- 1 Lb Macaroni Salad Recipe: Bold, Crunchy, and Crowd-Pleasing - October 17, 2026