
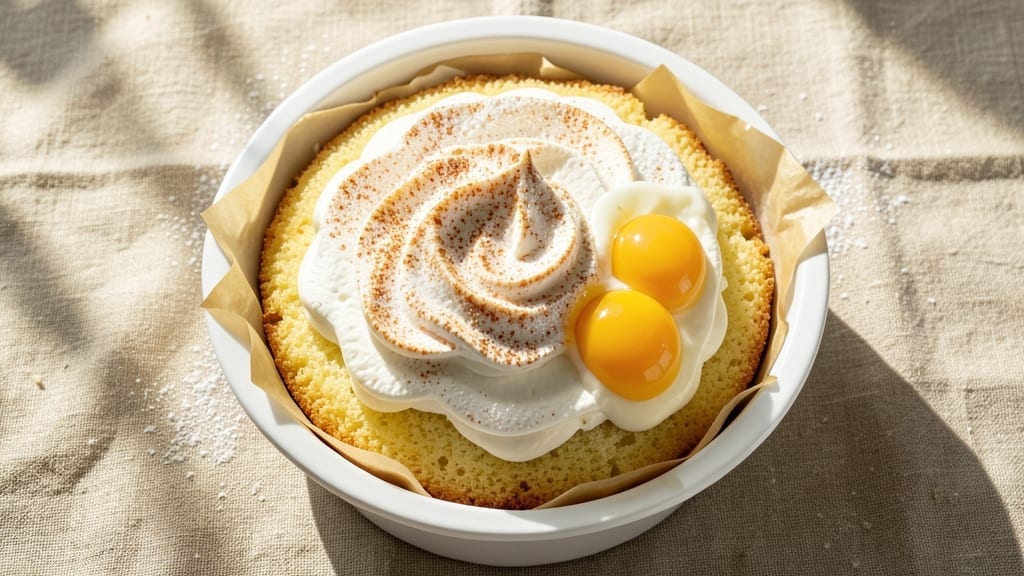
This 10-inch cake tin sponge recipe guarantees that signature light-as-air texture and even rise that makes every slice a revelation. The secret lies in precise technique—whisking egg whites to stiff peaks and folding them into the batter with delicate strokes to maintain that cloud-like structure.
This recipe has been perfected to create cakes that bake evenly in a standard tin, with a tender crumb and just enough structure to hold frosting beautifully.
The key to success is patience, particularly when it comes to the egg whites. Room-temperature eggs and a spotless bowl free of grease ensure maximum volume, while gradual folding preserves that airy quality.
Baking at 350°F for 25-30 minutes yields a golden dome with a springy texture that’s impossible to resist. Whether you’re making a Victoria sponge or a simple vanilla cake, this method guarantees professional results every time.
What sets this sponge apart is its versatility—use it as the base for layered cakes, trifles, or even a simple fruit cake. The recipe delivers a perfect rise in a standard 10-inch tin, with no doming or uneven baking.
The result is a cake that’s light enough to melt in your mouth yet sturdy enough to support generous fillings or frosting without collapsing.
For dietary adaptations, substitutions like applesauce or Greek yogurt can replace butter, while almond flour offers a gluten-free alternative. The beauty of this recipe is its reliability—once you master the technique, you’ll achieve flawless results time after time. Let’s get started on creating your perfect sponge.
Ingredients for 10 inch cake tin sponge
These simple, quality ingredients create the perfect light-as-air sponge for your 10-inch tin.
| Ingredient | Amount | Notes |
|---|---|---|
| Large Egg Whites 🥚 | 5 whole | Room temperature, no yolk trace |
| Granulated Sugar 🍚 | 1 ½ cups | Superfine preferred for smoothness |
| All-Purpose Flour 🌾 | 1 ½ cups | Sifted, spooned lightly |
| Unsalted Butter 🧈 | ½ cup | Cold, cubed for creaming |
| Vanilla Extract 🌿 | 1 tbsp | Pure, high-quality preferred |
| Large Egg Yolks 🥚 | 3 whole | Room temperature, separated |
| Milk 🥛 | ¼ cup | Room temperature, whole preferred |
| Baking Powder 🍞 | 1 ½ tsp | Freshly opened, sifted |
| Salt 🧂 | ¼ tsp | Fine sea salt preferred |
| Lemon Zest 🍋 | 1 tbsp | Freshly grated, organic preferred |
| Vanilla Bean Seeds 🌿 | ½ tbsp | Scraped from 1 pod, optional |
The egg whites are non-negotiable here—room temperature is key for maximum volume. Grab the freshest eggs you can find, preferably from a local farm or the coldest part of your grocery store. A spotless bowl (no grease!) and a whisk that’s been washed in hot, soapy water are your best friends. For extra insurance, add a pinch of cream of tartar to stabilize the whites. The butter? European-style if you can find it—it’s higher in fat content, which gives you that extra tender crumb. I always buy mine from Whole Foods or the bakery section of Kroger.
No vanilla extract? Vanilla bean paste works perfectly—just use half the amount. Running short on milk? Heavy cream or Greek yogurt are great substitutes, though the texture will be slightly denser. The baking powder needs to be fresh—if it’s more than six months old, toss it and buy a new can. For a nut-free option, swap the vanilla bean seeds for an extra teaspoon of extract. The lemon zest adds brightness, so if you don’t have fresh lemons, bottled lemon juice in a pinch (just skip the zest). And if you’re gluten-free? Almond flour or a 1:1 gluten-free blend works, but expect a slightly denser texture.
This batter is delicate—don’t overmix! Once combined, it should be just thick enough to hold its shape when dropped from a spoon. For the 10-inch tin, grease it thoroughly with butter and dust with flour (or use parchment paper for easy release). The cake keeps well in an airtight container for 3 days at room temperature or 1 week in the fridge. For longer storage, wrap tightly in plastic and freeze for up to 3 months. I always make a double batch—one for today, one for next week’s trifle!
Why You’ll Love This Recipe
- No Mixer Needed: I swear by this sponge—just whip those egg whites until they’re glossy and stiff, fold in the flour, and you’re done. No stand mixer? No problem. A whisk and your arm work just fine.
- Vanilla Buttercream Magic: That vanilla extract isn’t just for flavor—it’s the secret to a sponge that’s light but rich, with a buttery crumb that begs for another slice. Honestly, the first time I made this, I ate half before the cake even cooled.
- Birthday or Breakfast: Serve it with fresh berries for a brunch crowd or stack it with whipped cream for a last-minute birthday surprise. Same recipe, totally different vibes—and it’s always a hit.
- Budget-Friendly Leftovers: A 10-inch tin means one cake feeds a crowd, but the leftovers? They’re even better the next day, toasted lightly with a smear of butter. My wallet and my taste buds thank me every time.
Step-by-step instructions for a light-as-air 10-Inch cake tin sponge
Here’s how to create that signature high, even rise that fits perfectly in a 10-inch tin.
Prepare the Egg Whites for Maximum Volume
Start by separating the 5 whole large egg whites from the 3 whole large egg yolks—make absolutely certain no yolk traces remain in the whites. Place the whites in a spotless, grease-free bowl. I use a glass bowl because it’s non-reactive and won’t interfere with the meringue formation.
Add a pinch of the 0.25 teaspoon salt and beat them with an electric mixer on low speed until frothy. Gradually add the 1.5 cups granulated sugar, 1 tablespoon at a time, increasing the speed to medium-high. Beat for 5-7 minutes until stiff peaks form—when you lift the beaters, the peaks should stand straight up and hold their shape. This is your foundation for that light-as-air texture.
Cream Butter and Yolks for Rich Moisture
In a separate bowl, beat the 0.5 cup unsalted butter (cold, cubed) with the 3 whole large egg yolks on medium speed until light and fluffy, about 3-4 minutes. This step incorporates air into the butter, which helps create that tender crumb. The mixture should nearly double in volume and look pale and airy.
Add the 0.25 cup milk, 1 tablespoon vanilla extract, and 0.5 tablespoon vanilla bean seeds (if using), mixing until just combined. Fold in the 1.5 cups all-purpose flour and 1.5 teaspoons baking powder using a spatula—mix just until no flour streaks remain. Overmixing here develops gluten, which can make your sponge dense.
Fold Egg Whites into the Batter Gently
Now for the delicate part: fold one-third of the beaten egg whites into the yolk mixture using a spatula, cutting through the center to maintain air incorporation. Then gently fold in another third, followed by the remaining egg whites. Work quickly but carefully—you want to preserve that meringue volume while combining everything smoothly.
Add the 1 tablespoon lemon zest and mix just until evenly distributed. The batter should be thick but still pourable. If it’s too stiff, you’ve overfolded; if it’s too thin, your sponge may collapse. The ideal consistency is like thick pudding that holds its shape when spooned.
Bake in a 10-Inch Tin for Perfect Rings
Preheat your oven to 350°F and grease a 10-inch cake tin lightly with butter, then dust with flour. Pour the batter into the tin and smooth the top with a spatula. Bake for 25-30 minutes, or until the top springs back when gently pressed and a toothpick inserted comes out clean.
Here’s the secret: open the oven door slightly after 20 minutes to let steam escape. This prevents a dome from forming and ensures your sponge rises evenly in perfect rings. The edges should pull away from the tin cleanly, and the center should be just set—not dry or gummy.
Cool and Check for Success
Remove the cake from the oven and let it cool in the tin for 10 minutes before transferring to a wire rack. This gradual cooling prevents cracking. Once completely cooled, run a thin knife around the edges to loosen it from the tin. The result should be a light, even sponge with no dense spots or sunken centers.
If your sponge rises perfectly in the center with clean sides, you’ve nailed it. The texture should be tender yet sturdy enough to hold fillings or frosting without collapsing. This is the foundation of any great layered cake—get it right, and everything else builds beautifully.
Pro Tips For Making 10 Inch Cake Tin Sponge
- Whip Whites to Stiff Peaks: Use a stand mixer with the whisk attachment—no hand whisks here. Beat the egg whites on medium-high until they form stiff peaks that hold their shape when you lift the whisk. If you see any liquid pooling at the base, keep whipping; that’s your cue to push harder. I learned this the hard way—under-whipped whites mean a dense, sad sponge.
- Sift Flour Like Your Cake Depends on It: Sift that all-purpose flour twice before folding it into the egg whites. The first sift removes lumps, the second ensures no pockets of air get crushed when you mix. And for the love of cake, don’t pack the flour—just let it float in like snow. My first attempt had a brick in the middle because I rushed this step.
- Butter the Tin Like It’s 1953: Use room-temperature butter, and don’t just slap it on the tin—rub it in with your fingers until every inch of the 10-inch tin is coated, including the sides. A thin layer of flour dusted over the butter keeps the sponge from sticking, but skip the grease if you’re using a nonstick tin. Trust me, this is the thing that matters most for an even rise.
- Bake Until the Center Springs Back: Tap the tin gently—when the sponge springs back immediately and pulls away from the sides, it’s done. If you’re unsure, stick a skewer in the center; it should come out clean but with a few moist crumbs (not wet batter). I was skeptical until I tried it—overbaking turns a light sponge into a dry hockey puck.
Creative variations of these flavors
Citrus Twist Variation
Brighten up your sponge by adding 2 tablespoons of fresh orange zest along with the lemon zest. I love using Navel oranges for their sweetness, which pairs beautifully with the vanilla.
For extra zing, fold in 1 teaspoon of orange extract when mixing the yolks. This variation works wonderfully with a light orange glaze made from powdered sugar and orange juice. 🍊
Chocolate-Dipped Sponge
For a decadent twist, dip the cooled sponge in melted dark chocolate (I use Ghirardelli 70% cocoa) and let it set on parchment paper. This adds a rich contrast to the light sponge and turns it into a showstopper dessert.
Pair it with raspberry jam for a classic chocolate-raspberry combo. The chocolate adds moisture, so you might want to reduce the milk to ¼ cup to balance the texture.
Coconut Lime Delight
Swap the vanilla for 1 teaspoon of lime zest and add ½ cup of unsweetened shredded coconut to the dry ingredients. This tropical variation is perfect for summer and pairs beautifully with a lime curd filling.
For extra flair, toast the coconut in a dry pan for 2-3 minutes until golden before folding it into the batter. The result is a fragrant, slightly nutty sponge with a refreshing citrus kick. 🥥
Spiced Chai Sponge
Infuse your sponge with warm spices by adding ½ teaspoon of ground cinnamon, ¼ teaspoon of ground cardamom, and ¼ teaspoon of ground ginger to the dry ingredients.
For depth, steep 1 teaspoon of loose chai tea in 2 tablespoons of hot milk, let it cool, and use it to replace the regular milk in the recipe.
This variation is ideal for a cozy fall dessert and pairs wonderfully with a vanilla bean buttercream or a spiced apple compote.
Matcha Green Tea Sponge
For a sophisticated twist, replace ½ cup of the all-purpose flour with ¼ cup of matcha powder (I recommend Ippodo Tea for its smooth flavor). Add the matcha to the dry ingredients and fold it in gently to avoid overpowering the batter.
This earthy, slightly bitter variation is perfect for tea lovers and pairs beautifully with a white chocolate ganache or a light red bean paste. The matcha adds a subtle umami note that elevates the sponge to new heights. 🍵
Nut-Free Almond-Free Option
If you’re avoiding nuts but still want a moist sponge, replace the ½ cup butter with ½ cup of applesauce or Greek yogurt for a lighter texture. For extra richness, add 1 tablespoon of honey to the wet ingredients.
This variation works well with a lemon curd filling and a dusting of powdered sugar. The applesauce keeps the sponge tender while adding natural sweetness, making it a great option for dietary restrictions. 🍯
Nutrition facts
Frequently asked questions
Why do my sponge cakes sometimes collapse after baking?
Collapse usually happens when egg whites aren’t whipped enough or when the oven door is opened too early. Make sure your whites form stiff peaks (they should stand straight up when the beaters are lifted), and avoid opening the oven door until 20 minutes of baking time. Also, ensure your butter and eggs are room temperature—cold ingredients can cause uneven rising.
Can I bake this sponge in a different-sized tin?
Yes, but adjust the baking time. For a 9-inch tin, reduce to 20-25 minutes, and for an 8-inch tin, use 18-22 minutes. The key is to bake until the center springs back when pressed gently. If using a different size, check for doneness with a toothpick instead of relying on time.
How do I store leftover sponge cake?
Wrap the cooled cake tightly in plastic wrap or place it in an airtight container. It stays fresh for 3 days at room temperature or 1 week in the fridge. For longer storage, freeze for up to 3 months. Thaw overnight in the fridge to maintain texture.
What’s the best way to achieve an even rise?
Preheat your oven thoroughly and avoid opening it during the first 20 minutes of baking. Grease your tin well with butter and dust with flour (or use parchment paper) to prevent sticking. The secret is also in the folding—work gently to preserve those air bubbles in the egg whites.
Can I make this sponge gluten-free?
Yes! Replace the all-purpose flour with a 1:1 gluten-free blend or almond flour. Note that gluten-free versions may be slightly denser. For extra moisture, add 1 tablespoon of applesauce or Greek yogurt to the batter. Always check your blend’s baking instructions for leavening adjustments.

- 12 Bean Chili Recipe: Hearty Slow-Cooked Depth With 12 Legumes - October 17, 2026
- 5 Seed Bread Recipe: Nutty Crunch and Artisan Flavor in One Loaf - October 17, 2026
- 1 Lb Macaroni Salad Recipe: Bold, Crunchy, and Crowd-Pleasing - October 17, 2026