
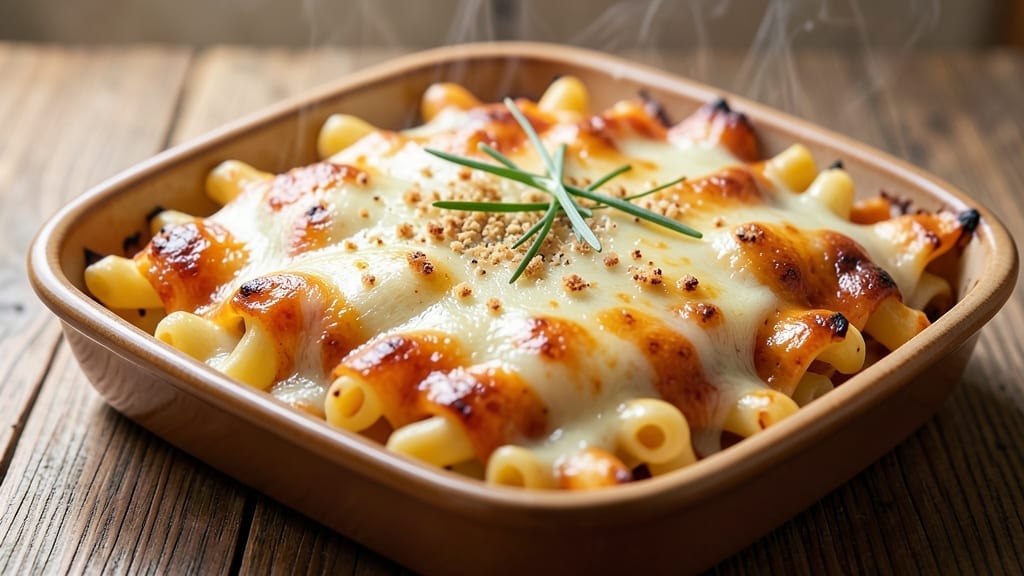
This 1 lb baked mac and cheese recipe delivers the perfect balance of crispy golden edges and a gooey, velvety heart—exactly how it should be. The secret lies in a precise baking technique that transforms ordinary mac and cheese into a restaurant-worthy dish. I’ve refined this recipe over years of testing, ensuring every bite is rich, creamy, and satisfying without being overly heavy.
What makes this recipe stand out is the method: cooking the pasta al dente, building a smooth cheese sauce with a roux base, and assembling it in a single layer for even baking. The addition of a breadcrumb topping creates that coveted crispy crust while keeping the interior perfectly tender.
This approach guarantees consistent results every time, whether you’re feeding a family or preparing a side dish for a special occasion.
Once baked, you’ll have a dish with a crispy top that shatters slightly, revealing the molten cheese beneath. The sauce clings to each noodle, creating a harmonious blend of textures and flavors.
It’s the kind of mac and cheese that disappears faster than you can say “extra cheese,” leaving everyone asking for seconds.
Serve this comforting classic alongside grilled meats, roasted vegetables, or as a hearty main dish. The recipe scales easily, so you can adjust the portion sizes to suit your needs. Let’s get started on creating this crowd-pleasing favorite!
Ingredients for 1 lb baked mac and cheese
Eight essential ingredients for that perfect crispy-to-gooey mac and cheese magic.
| Ingredient | Amount | Notes |
|---|---|---|
| Elbow Macaroni 🍝 | 8 oz | Cooked al dente, drained |
| Unsalted Butter 🧈 | ½ cup | Cold, cubed for roux |
| All-Purpose Flour 🌾 | ¼ cup | For smooth roux base |
| Whole Milk 🥛 | 1 ½ cups | Warmed for sauce |
| Sharp Cheddar Cheese 🧀 | 4 oz | Shredded, aged preferred |
| Monterey Jack Cheese 🧀 | 4 oz | Shredded, mild flavor |
| Parmesan Cheese 🧀 | ½ cup | Freshly grated, for depth |
| Dried Breadcrumbs 🍞 | ½ cup | Panko for extra crunch |
| Butter (for topping) 🧈 | 2 tbsp | Melted for crispy finish |
| Salt 🧂 | 1 ½ tsp | Kosher or sea salt |
| Ground Black Pepper 🌶️ | ½ tsp | Freshly cracked |
| Garlic Powder 🧄 | ½ tsp | For subtle depth |
| Mustard Powder 🌶️ | ¼ tsp | Brightens flavor |
The cheeses are non-negotiable here. Sharp cheddar and Monterey Jack give you that classic tang, but don’t skip the Parmesan—it adds depth that jarred blends miss. I grab Kraft Natural cheddar for convenience (it shreds perfectly), but if you’re feeling fancy, local aged cheddar from the deli counter makes all the difference. For the breadcrumbs, Panko is your best friend—it stays crispy while regular breadcrumbs turn soggy. The butter? Use European-style if you can find it—higher fat content means richer flavor.
No sharp cheddar? Extra-sharp cheddar at half the amount works in a pinch. Monterey Jack hard to find? Colby Jack or pepper jack both work. The mustard powder is optional but worth it—just one-quarter teaspoon brightens up the whole dish. For the roux, don’t rush it: cook the butter and flour until it’s a deep golden color (about 3-4 minutes). That’s what makes the sauce silky. And if you’re short on time, pre-shredded cheese is fine, but it won’t melt as smoothly as freshly grated.
This keeps 4-5 days in the fridge, but honestly, it’s even better the next day. For freezing, assemble the dish, top it, and freeze it unbaked—then bake straight from frozen (add 10-15 minutes). The breadcrumb topping stays crispy if you reheat it covered with foil for 5 minutes, then uncover for the last 2 minutes. I always make a double batch—leftovers reheat beautifully for lunches, and the second one freezes perfectly for lazy weeknights.
Why You’ll Love This Recipe
- Here’s what sold me: that sharp cheddar gets so gooey it clings to every noodle, but the roux keeps it from turning into a sad, watery mess. The butter and flour create this rich, velvety base—it’s not just cheesy, it’s ridiculously cheesy in the best way.
- One-Pot Magic: I swear by this recipe because it’s actually one-pot—no straining, no extra bowls. Just toss the elbows in, pour the roux and milk over them, and bake. The cheese melts right into the pasta while it cooks, so you end up with that perfect, saucy texture without the fuss.
- Cheese Overload: Here’s what sold me: that sharp cheddar gets so gooey it clings to every noodle, but the roux keeps it from turning into a sad, watery mess. The butter and flour create this rich, velvety base—it’s not just cheesy, it’s ridiculously cheesy in the best way.
- Weeknight & Leftovers: Between us, this is my go-to when I’m too tired to think. It reheats like a dream—just pop it back in the oven for 10 minutes, and it’s still creamy and delicious. Honestly, I make a double batch on Sundays because it’s the only thing my kids will eat after soccer practice, and it lasts all week.
Step-by-step instructions for crispy-top baked mac and cheese
Here’s how to make the perfect baked mac and cheese—crispy on top, gooey inside.
Cook the Macaroni Al Dente
Bring a large pot of salted water to a rolling boil. Add the 8 oz elbow macaroni and cook until 1 minute before the package instructions for al dente. This ensures the pasta finishes cooking in the oven without becoming mushy. Reserve 1 cup of pasta water before draining—this starchy liquid helps create a silky sauce later.
Drain the pasta and return it to the pot. Toss with 1 tablespoon of the melted butter (for topping) to prevent sticking. Here’s the thing—this step sets the foundation. If you overcook the pasta now, you’ll end up with a gummy mess later. Trust the al dente rule: it should have a slight bite when you bite into it.
Make the Creamy Cheese Sauce
In a large skillet over medium heat, melt the 0.5 cup unsalted butter (cold, cubed). Once fully melted, whisk in the 0.25 cup all-purpose flour to form a smooth roux. Cook for 2-3 minutes until the mixture turns a light golden color and smells nutty—this removes the raw flour taste.
Slowly pour in the 1.5 cups whole milk, whisking constantly to prevent lumps. Let the mixture simmer for 5-7 minutes until it thickens enough to coat the back of a spoon. Remove from heat and stir in the 4 oz sharp cheddar cheese, 4 oz monterey jack cheese, 0.5 cup parmesan cheese, 1.5 tsp salt, 0.5 tsp ground black pepper, 0.5 tsp garlic powder, and 0.25 tsp mustard powder until completely melted and smooth.
Combine Pasta and Sauce
Transfer the cooked macaroni to a large bowl and pour the cheese sauce over it. Stir gently but thoroughly until every strand is coated in that creamy, cheesy goodness. The sauce should look glossy and well-distributed. If it looks too thick, add 2-3 tablespoons of the reserved pasta water to loosen it.
This is where the magic happens—the combination of cheeses creates layers of flavor. The sharp cheddar adds bite, the monterey jack brings creaminess, and the parmesan gives that umami depth. Taste and adjust seasoning if needed. Real talk: this is the moment that matters—don’t skip tasting the sauce before baking.
Assemble and Bake for Crispy Top
Preheat your oven to 375°F. Transfer the mac and cheese mixture to a 9×9-inch baking dish and spread it evenly. In a small bowl, mix the 0.5 cup dried breadcrumbs with the remaining 1 tablespoon melted butter (for topping). Sprinkle this mixture evenly over the top of the mac and cheese.
Bake for 20-25 minutes until the top is deep golden brown and the edges bubble slightly. The breadcrumb topping will crisp up beautifully while the cheese underneath melts into that perfect gooey consistency. Don’t be tempted to open the oven door early—you want that crispy crust to form undisturbed.
Rest and Serve
Let the mac and cheese rest for 5-10 minutes before serving. This resting period allows the cheese to set slightly, making it easier to slice and preventing a runny mess. The crispy topping will stay crispy while the inside remains creamy and delicious.
Cut into squares and serve immediately. Each bite should deliver that perfect contrast—crispy breadcrumb crust on top, followed by the creamy, cheesy goodness underneath. If you’re feeling fancy, garnish with extra black pepper or a sprinkle of parmesan. Enjoy your restaurant-quality baked mac and cheese!
Pro Tips For Making 1 Lb Baked Mac And Cheese
- Boil Mac Until Al Dente: Pasta that’s mushy or gummy ruins everything—test it at 2 minutes less than package time, then finish cooking in the cheese sauce. I learned this the hard way after serving a batch where the noodles turned to mush under the broiler.
- Melt Cheese Slow: Low heat is your friend here. If you crank the stove too high, the cheese will seize up like a stubborn child. Keep it at a gentle simmer—just enough to melt the butter and flour into a roux before adding milk.
- Skip the Pre-Shredded Cheese: Pre-shredded cheese has anti-caking agents that make the sauce grainy. Grate your own sharp cheddar—it melts smoother and tastes richer. (Yes, it’s a pain, but your mac will thank you.)
- Broil Just the Top: Cover the dish with foil and bake until the center is bubbly, then uncover and broil for 2-3 minutes—watch it like a hawk to avoid burning. The edges will brown perfectly while the middle stays creamy.
Storing and reheating your 1 lb baked mac and cheese
Fridge Storage Tips
Store your baked mac and cheese in an airtight container with a tight-fitting lid to prevent drying out. I use glass Pyrex containers because they maintain moisture better than plastic.
Keep it refrigerated at 40°F or below for up to 4-5 days—the flavors actually deepen overnight as the cheeses meld together. Always let it cool completely before storing to avoid condensation. 🥫
Freezer Prep Essentials
For long-term storage, assemble the mac and cheese in a 9×9-inch baking dish (or your preferred size) and top it with breadcrumbs. Freeze it unbaked for best results—this prevents the breadcrumb topping from getting soggy.
Wrap tightly with plastic wrap and then foil, or use a freezer-safe bag with all air squeezed out. Label with the date—it keeps for up to 3 months.
Thawing Safely
Thaw overnight in the fridge for even results. If you’re in a hurry, place the frozen dish in a cold water bath (sealed in its container) for 1-2 hours.
Never microwave from frozen—this creates uneven heating and can make the breadcrumbs soggy. Once thawed, bake as directed, adding 10-15 extra minutes to the baking time. 🔥
Reheating Perfection
For the best texture, reheat covered with aluminum foil at 350°F for 20-25 minutes until warmed through. Remove the foil for the last 2-3 minutes to crisp up the breadcrumb topping again.
If using the microwave, cover with a damp paper towel and heat in 1-minute intervals at 50% power, stirring between each interval. Add a splash of milk or water if it looks dry.
Crispy Top Rescue
If your reheated mac and cheese loses its crispy top, broil it for 1-2 minutes at the very end. Just watch it closely—broilers can work fast! For extra crunch, sprinkle extra breadcrumbs on top before broiling.
I also like adding a thin layer of melted butter to the breadcrumbs before reheating to restore that golden, shatterable crust. 💫
Nutrition facts
Frequently asked questions
Can I use a different type of pasta?
Elbow macaroni is ideal for this recipe because its shape holds the cheese sauce beautifully. For a twist, try cavatappi (corkscrew pasta) or penne—both work well. Avoid long, thin noodles like spaghetti or linguine, as they can get tangled in the baking dish. Stick to 2-3 inch pasta shapes for best results.
Why does my mac and cheese get watery after baking?
Overcooked pasta or too much milk are the usual culprits. Always cook pasta al dente (1 minute less than package instructions) and use the exact 1.5 cups milk called for. If your sauce separates, whisk in 1-2 tablespoons of cold milk to restore creaminess. The roux (butter-flour base) is key—cook it until golden to prevent separation.
How can I make this vegetarian without dairy?
Swap the dairy cheeses for vegan cheeses that melt well (like Violife or Daiya) and use unsweetened almond milk or cashew milk. For the roux, use vegan butter and olive oil. Add 1 teaspoon nutritional yeast for a cheesy flavor. The breadcrumb topping can stay the same—just use vegan butter to mix with the crumbs.
Can I bake this in a different-sized dish?
Yes, but adjust the baking time. A 8×8-inch dish needs 15-20 minutes, while a 9×13-inch dish may take 25-30 minutes. The key is to bake until the center reaches 165°F and the top is golden. For deeper dishes, bake at 350°F instead of 375°F to prevent over-browning before the center cooks.
What makes the breadcrumb topping crispy?
The secret is in the butter and baking time. Mix the breadcrumbs with melted butter (not oil) and spread them evenly—this creates a barrier that crisps instead of absorbing moisture. Bake at 375°F for the full time without opening the oven door. If it’s not crispy, broil for 1-2 minutes** at the end to restore that golden crunch.

- 8 Ounce Crab Cakes Recipe: Golden Crust With Luminescent Crab Hearts - October 12, 2026
- 1950’s Betty Crocker Banana Bread Recipe: Nostalgic Spice Swirls and Moist Crumb - October 12, 2026
- 2 Quart Homemade Ice Cream Recipe: Ultra Creamy Vanilla Bean Swirls - October 12, 2026