
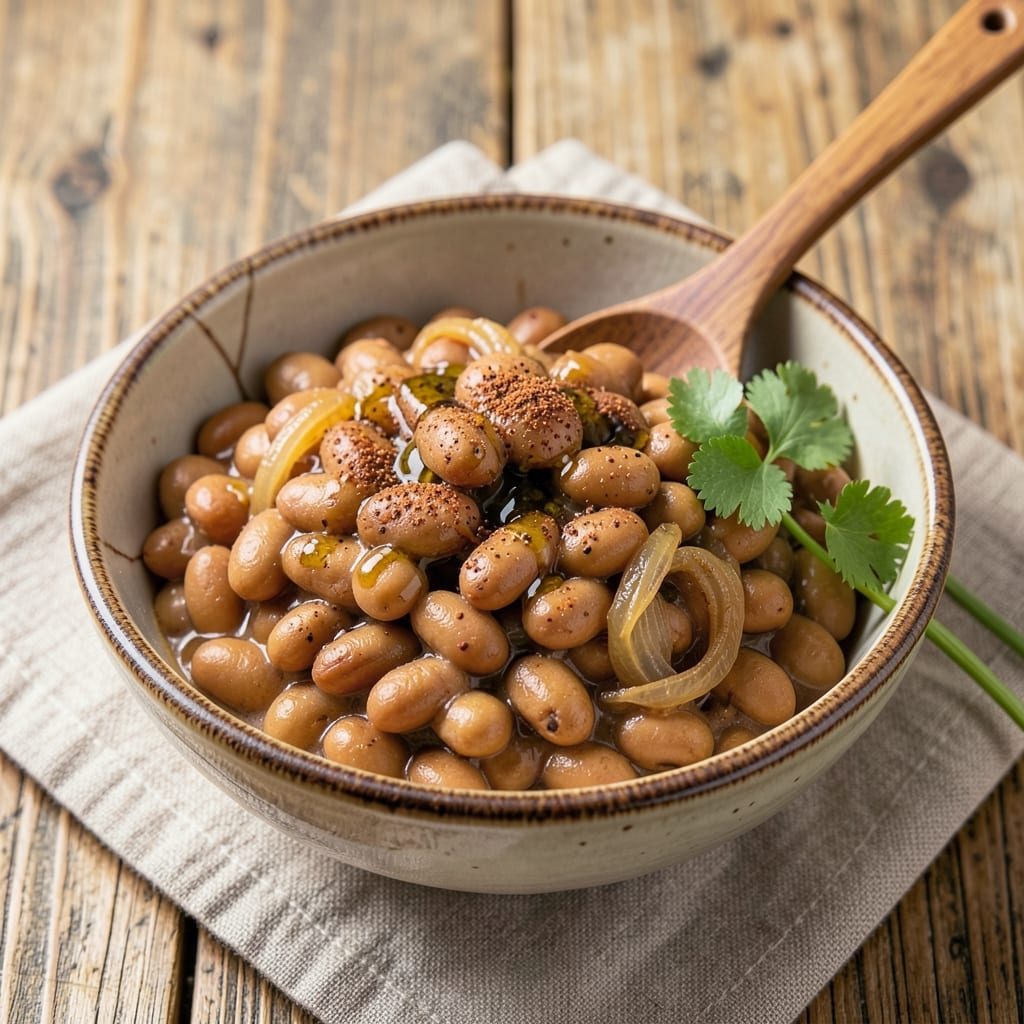
Transforming 1 lb of pinto beans into a smoky-spiced crowd-pleaser is easier than you think, and this one-pot method delivers restaurant-quality results without the fuss.
The secret lies in layering smoky paprika, cumin, and garlic while simmering the beans until they’re tender yet hold their shape—perfect for serving as a hearty side or vegan main dish. Whether you’re using a stovetop, slow cooker, or pressure cooker, this method ensures consistent texture every time.
This recipe skips the need for soaking by using a combination of pressure cooking or long simmering, which breaks down the beans’ natural sugars for deeper flavor. The smoky-spiced seasoning transforms simple pinto beans into a dish that pairs beautifully with grilled meats, tacos, or even as a standalone meal.
With just 30 minutes of active prep and 1-2 hours of cooking, you’ll have a pot of flavorful beans ready to serve.
What you’ll end up with is a pot of creamy yet firm pinto beans infused with warm spices and a hint of smokiness that makes them irresistible. The beans absorb the seasoning perfectly, creating a dish that’s both comforting and versatile.
Serve it as a side with cornbread, toss it into bowls for a vegan chili, or enjoy it as-is with a sprinkle of fresh cilantro.
Scaling this recipe is effortless—simply adjust the liquid and cooking time proportionally. For a quicker version, use a pressure cooker, or let the slow cooker work its magic for hands-off cooking. The result? A foolproof, flavorful dish that’s perfect for meal prep and feeding a crowd. Let’s get started!
Ingredients for 1 lb pinto beans
Smoky, spiced, and foolproof—just 13 ingredients transform simple pinto beans into a restaurant-worthy crowd-pleaser.
| Ingredient | Amount | Notes |
|---|---|---|
| Pinto Beans (Dry) 🌾 | 1 lb | No need to soak (pressure cooker method) |
| Smoked Paprika 🌶️ | 2 tbsp | Key for authentic smoky flavor |
| Ground Cumin 🌿 | 1 tbsp | Toasted for deeper aroma |
| Garlic Cloves 🧄 | 4 cloves | Minced for even distribution |
| Medium Yellow Onion 🧅 | 1 whole | Diced into small pieces |
| Extra-Virgin Olive Oil 🫒 | ¼ cup | For sautéing aromatics |
| Vegetable Broth 💧 | 4 cups | Low-sodium preferred |
| Lemon Juice 🍋 | 2 tbsp | Brightens the dish |
| Bay Leaves 🍃 | 2 whole | Removed before serving |
| Salt 🧂 | 1 ½ tsp | Diamond Crystal preferred |
| Black Pepper 🌶️ | ½ tsp | Freshly ground |
| Fresh Cilantro 🌿 | ¼ cup | Chopped for garnish |
| Lime Juice 🍋 | 1 tbsp | Optional finishing touch |
The beans are the star, but the spices make all the difference. Smoked paprika is non-negotiable—it’s what gives this dish that authentic smoky depth. Penzeys or Trader Joe’s carry excellent options, but any good-quality smoked paprika works. For the cumin, toast it in a dry pan for 30 seconds before adding to the pot—this simple step intensifies the flavor dramatically. The garlic and onion are your aromatics base, so don’t rush the sautéing. Fresh garlic makes a world of difference compared to powder, and yellow onions add sweetness that balances the spices perfectly.
No smoked paprika? Substitute with 1 tbsp regular paprika plus 1/2 tsp liquid smoke—it’s not identical, but gets you close. Out of cumin? Corriander seeds toasted and ground work in a pinch. The vegetable broth is where you can get creative—mushroom broth adds umami, or swap for water and add a bouillon cube if needed. Fresh herbs are ideal, but dried cilantro at 1/4 the amount works if you’re in a bind. For extra richness, stir in 1 tbsp nutritional yeast when serving—it mimics the umami of cheese without any dairy.
These beans taste even better the next day as the flavors meld. Store in an airtight container in the fridge for up to 5 days, or freeze for 3 months in portion-sized containers. I like to make a double batch—one for immediate use and one to freeze for lazy weeknights. The dish reheats beautifully; just add a splash of water or broth if it’s too thick. For serving, garnish with fresh cilantro and lime juice right before eating to keep everything vibrant. These beans keep well in the freezer, so label your containers with the date—trust me, you’ll want to make this again.
Why You’ll Love This Recipe
- Here’s what sold me: that first bite where the smoky paprika meets the earthy cumin, then the crispy garlic-onion edge. It’s not just flavor—it’s layered flavor. Honestly, I’ve tasted store-bought cans that couldn’t compete.
- No-Soaking Needed: I’ll admit, I used to dread the overnight soak—until I discovered these beans only need a quick rinse before simmering. That smoked paprika and cumin? They infuse the water while you chop one onion and mince a few garlic cloves. Boom. Ready in under an hour.
- Deep, Smoky Magic: Here’s what sold me: that first bite where the smoky paprika meets the earthy cumin, then the crispy garlic-onion edge. It’s not just flavor—it’s layered flavor. Honestly, I’ve tasted store-bought cans that couldn’t compete.
- Meal Prep MVP: Between us, this is my secret weapon for lazy Sundays. Make a big batch, and you’ve got tacos, burrito bowls, or even soup bases for the week. My freezer’s always stocked with these—just reheat and add whatever’s calling your name.
Step-by-step instructions for smoky-spiced pinto beans
Here’s how to transform dry pinto beans into a rich, smoky masterpiece without soaking.
Sauté Aromatics in Olive Oil
Heat the 0.25 cup extra-virgin olive oil in your pressure cooker over medium heat. Add the 1 whole medium yellow onion that’s been diced into small pieces and cook for 5 minutes until softened and translucent. This is where the flavor foundation begins.
Add the 4 cloves garlic cloves that you’ve minced and cook for another 1 minute until fragrant. Here’s the thing – don’t let the garlic burn. You’ll know it’s ready when the raw garlic smell disappears and you’re left with that sweet, nutty aroma. This quick cooking preserves their delicate flavor rather than turning bitter.
Toast the Spices
Reduce the heat to medium-low and add the 2 tbsp smoked paprika and 1 tbsp ground cumin. Stir constantly for 1-2 minutes until you can smell that deep, earthy aroma wafting up. This toasting step develops the spices’ full potential – it’s what transforms ordinary spices into flavor powerhouses.
Be careful not to let them darken too much. You’re looking for a warm, toasted color rather than a deep brown. The spices should coat the onions and garlic evenly, creating a fragrant paste at the bottom of your pot. This is your flavor base that will infuse into the beans.
Add Beans and Broth
Add the 1 lb pinto beans (dry) to the pot and stir to coat them with the aromatic oil and spices. Pour in the 4 cups vegetable broth, making sure all the beans are submerged. Add the 2 whole bay leaves, 1.5 tsp salt, and 0.5 tsp black pepper. Give everything a good stir.
This is where the magic begins. The beans will start absorbing the liquid immediately. Make sure you’re using low-sodium broth – we want to control the seasoning ourselves. The bay leaves will add subtle earthy notes that complement the smoky spices perfectly.
Pressure Cook to Perfection
Seal your pressure cooker and cook on high pressure for 25 minutes. Here’s the critical part: don’t skip the natural release. After the cooking time is complete, turn off the heat and let the pressure release naturally for 15-20 minutes. This slow release prevents the beans from becoming mushy.
When the pressure is finally released, remove the 2 bay leaves and give the beans a taste. They should be tender but still hold their shape with a slight bite. If they’re too firm, you can return them to the pot with a splash more broth and cook for another 5 minutes on high pressure. The beans are done when they’re creamy on the outside but still have a slight texture in the center.
Finish with Acid and Garnish
Stir in the 2 tbsp lemon juice and 1 tbsp lime juice to brighten the dish. The acidity cuts through the richness of the beans and spices, balancing the flavors perfectly. Add the 0.25 cup fresh cilantro that you’ve chopped and stir gently to incorporate.
Taste and adjust seasoning if needed. You might want to add a pinch more salt or a splash more lime juice to suit your preference. The beans should be rich, smoky, and slightly tangy with a fresh finish from the cilantro. Serve warm with rice, tortillas, or as a side dish for your favorite proteins.
Pro Tips For Making 1 Lb Pinto Beans
- SOAK BEANS OVERNIGHT: DESCRIPTION: I learned this the hard way—skipping the soak means your beans will stay tough no matter how long you simmer. Rinse 1 lb dry pinto beans, then cover them in water (at least 3 inches above the beans) and let them sit for 8–12 hours. The longer they soak, the creamier the final texture, and you’ll save 30–45 minutes of simmering time. (Yes, even if you’re impatient like me.)
- SWEAT ONIONS LOW AND SLOW: DESCRIPTION: Crowding the pan or rushing the onions leads to burned bits instead of deep flavor. Dice the onion into ¼-inch pieces, then cook them in a dry pot over medium-low heat for 10–12 minutes, stirring occasionally. The goal is softness with color—no browning, just caramelized sweetness. This is where the smoky cumin and paprika will actually shine later.
- TOAST THE SPICES: DESCRIPTION: Skip this step, and your beans will taste flat. In the same pot you sweated the onions, add the garlic cloves (minced or whole) and toast them for 1–2 minutes until fragrant. Then sprinkle in the smoked paprika and cumin, stirring constantly for 30 seconds until the spices smell pungent and warm. This releases their oils, making every bite richer.
- SKIP THE BOIL: DESCRIPTION: After adding soaked beans and broth, bring the pot to a gentle simmer—not a rolling boil—and keep it there. Too much heat causes the beans to split and turn mushy. Instead, maintain a low simmer (tiny bubbles at the edges), stirring occasionally, until they’re tender (about 45–60 minutes). The beans will thicken the broth naturally—no stirring in flour or cornstarch needed.
Storing and reheating this recipe
Refrigerator Storage
Let your smoky-spiced pinto beans cool completely before transferring to an airtight container—I love using glass Pyrex with snap-on lids for easy storage. Store in the fridge at 40°F or below for up to 5 days, where the flavors deepen as the spices meld together.
Honestly, they taste even better the next day! Just be sure to press a piece of plastic wrap directly on the surface before sealing to prevent a skin from forming. 🌱
Freezer Prep Tips
For long-term storage, portion your beans into quart-sized freezer bags or glass containers, leaving 1 inch of headspace to account for expansion. Freeze for up to 3 months—these beans reheat beautifully for quick meals.
I like labeling containers with the date so I can track freshness. Pro tip: Add a splash of vegetable broth when reheating to restore moisture lost during freezing. ❄️
Stovetop Reheating
My preferred method is stovetop reheating—it preserves texture better than microwaving. Transfer beans to a pot with ¼ cup vegetable broth and heat over medium-low for 10-15 minutes, stirring occasionally.
If the beans seem too thick, add a splash more liquid. Taste and adjust seasoning—you might need a pinch of salt or a squeeze of lime juice to brighten flavors. 🔥
Microwave Method
For quick reheating, transfer beans to a microwave-safe bowl, cover with a damp paper towel, and heat on 70% power in 1-minute intervals, stirring between each interval. This prevents overcooking and keeps the beans creamy.
If they look dry, add 1-2 tablespoons of water or broth and stir well. The microwave method works best for single servings. ✨
Reheating in Slow Cooker
For large batches, reheat in a slow cooker on low heat for 2-3 hours with ½ cup broth per serving. This gentle method keeps the beans tender and flavorful. Stir occasionally and add more liquid if needed.
It’s perfect for feeding a crowd or prepping for meal prep. The slow cooker’s steady heat ensures even reheating without risking overcooking. 💫
Garnish Before Serving
Always finish with fresh cilantro and a squeeze of lime juice before serving—this brightens the flavors and makes the dish feel fresh. If storing leftovers, add the garnish when reheating so the herbs stay vibrant.
A sprinkle of smoked paprika or a drizzle of olive oil can also elevate the dish when serving. Trust me, this small step makes all the difference! 🌿
Nutrition facts
Frequently asked questions
Do I really need to soak pinto beans before cooking?
Not with this recipe! The pressure cooker method eliminates the need for soaking by breaking down the beans’ tough skins through high pressure. For stovetop cooking, quick-soaking in 4 cups boiling water for 1 hour works if you’re short on time. The beans will still be flavorful, though pressure cooking delivers the best texture without pre-soaking.
Can I use canned beans instead of dry?
but adjust the cooking method. Drain and rinse 2 (15 oz) cans of pinto beans, then simmer in the seasoned broth for 15-20 minutes to absorb flavors. Skip the pressure cooking step—they’ll be ready much faster! This is perfect for quick weeknight meals when you don’t have time for dry beans.
Why do my beans turn out mushy?
Overcooking or skipping the natural pressure release causes mushiness. Always let the pressure release naturally for 15-20 minutes after cooking. For stovetop methods, keep the liquid at a gentle simmer—never a rolling boil. If using canned beans, reduce heat to low once they’re heated through to prevent breaking down.
What’s the best way to make this recipe vegan?
This recipe is already vegan! Just ensure your broth is vegetable-based and verify all spices are certified vegan (some contain animal products). The smoky-spiced profile works perfectly for vegan diets—pair with avocado, corn, or plant-based proteins for a complete meal. The beans’ natural creaminess makes them incredibly satisfying on their own too.
How can I make this recipe in a slow cooker?
Combine all ingredients in your slow cooker and cook on low for 6-7 hours or high for 3-4 hours. The long cooking time mimics the pressure cooker’s effect, breaking down the beans’ skins naturally. Add ½ cup extra broth if the mixture seems too thick during cooking. The result will be just as flavorful and tender!
