
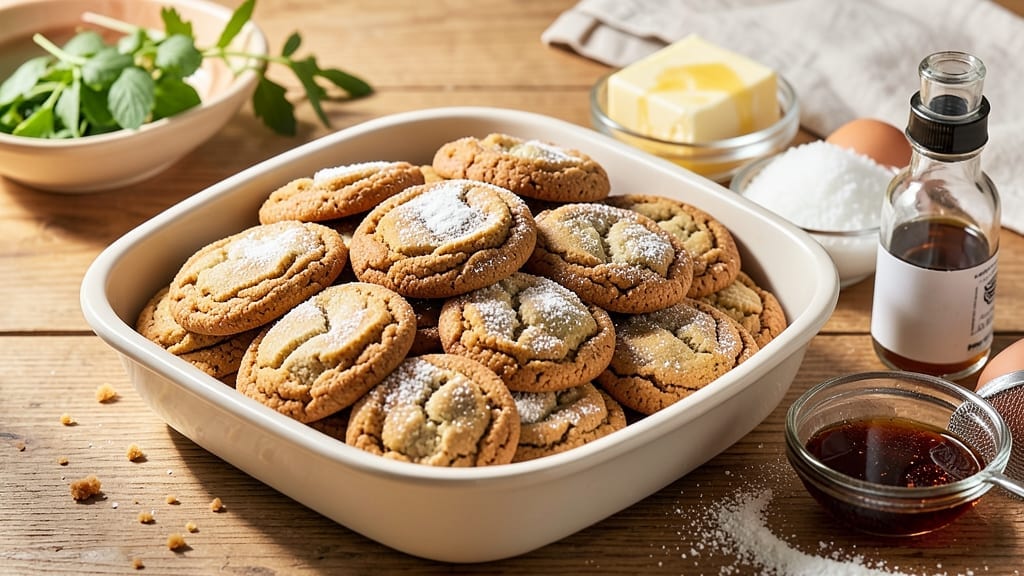
A 1-pound cookie recipe delivers that perfect balance of buttery crunch and chewy centers—every bite is a revelation. 💛 This isn’t just another cookie recipe; it’s a foolproof method that transforms simple ingredients into golden, aromatic cookies with just the right texture.
The secret lies in precise measurements and a cool resting phase that ensures each cookie bakes evenly. What sets this recipe apart is its versatility—whether you’re baking for a holiday gathering or a quiet afternoon treat, these cookies rise to the occasion.
The dough comes together in minutes, but the magic happens during the 12-minute bake, where edges crisp and centers stay tender. No special equipment needed—just a standard oven and a little patience. The result?
A batch of cookies that’s restaurant-quality at home, with a buttery aroma that fills your kitchen and a texture that’s impossible to resist. The edges are crisp enough to shatter, while the centers remain soft and chewy, proving that perfection is within reach for any home baker.
Serve warm with a glass of milk or save them in an airtight container for days. Here’s how to make them perfect every time.
Ingredients for 1 pound cookie
Twelve simple ingredients transform into golden, perfectly balanced cookies with crisp edges and chewy centers.
| Ingredient | Amount | Notes |
|---|---|---|
| Unsalted Butter 🧈 | 12 oz | Cold, cubed for even baking |
| Granulated Sugar 🍚 | 1 cup | White or light brown preferred |
| Packed Brown Sugar 🍚 | ½ cup | Light or dark variety |
| Large Eggs 🥚 | 2 whole | Room temperature for smooth dough |
| Vanilla Extract 🌿 | 2 tsp | Pure vanilla preferred |
| All-Purpose Flour 🌾 | 2 ½ cups | Sifted for light texture |
| Baking Soda 🧂 | ½ tsp | Freshly opened |
| Salt 🧂 | ½ tsp | Fine sea salt preferred |
| Chocolate Chips 🍫 | 1 ½ cups | Semi-sweet or milk chocolate |
| Flaky Sea Salt 🧂 | 1 tbsp | For finishing |
| Granulated Sugar 🍚 | ¼ cup | For topping |
The butter is non-negotiable here—use high-quality unsalted like Plugrá or Land O’Lakes. Keep it cold when measuring to avoid melting, which affects texture. King Arthur flour or Bob’s Red Mill are my go-tos for consistent results. Chocolate chips should be high-quality brands like Ghirardelli—the difference in melt is noticeable. For the brown sugar, light or dark doesn’t matter, but make sure it’s packed firmly into the cup. The vanilla extract should be pure—no imitation.
No vanilla extract? Vanilla bean paste works at half the amount. Substituting butter? Coconut oil works but changes flavor. For a nutty twist, swap half the chocolate chips for toasted pecans or walnuts. If you’re gluten-free, King Arthur GF flour blend works well (adjust liquid slightly). The baking soda must be fresh—if it smells like vinegar, toss it. For extra flavor, add 1 tsp cinnamon or 0.5 tsp espresso powder to the dough.
Store dough in an airtight container for up to 48 hours in the fridge. Baked cookies keep 5-7 days in a sealed tin. For longer storage, freeze dough balls for 3 months—bake straight from frozen, adding 1-2 minutes. Reheat cookies in a 200°F oven for 3-5 minutes to restore freshness. The flaky sea salt topping should be sprinkled immediately after baking while still warm.
Why You’ll Love This Recipe
- No Mixer Needed: I swear by this recipe when my stand mixer’s on vacation—just cream the butter and sugars by hand. That rich, buttery crunch from the brown sugar? Worth every turn of the spoon.
- Buttery Vanilla Bomb: The combo of melted butter and vanilla extract in the dough is next-level—like a warm hug in cookie form. Honestly, I’ve tried store-bought vanilla, but this? It’s the real deal.
- Party in a Pound: Doubles easily for gatherings, and the cookies keep well for days. Freeze half the dough for when you’re too tired to bake—just pop them in later.
- Budget-Friendly Luxury: Uses pantry staples, and the sugar-butter ratio means every bite tastes indulgent. My kids think they’re fancy, but I’m paying grocery prices—win-win.
Step-by-step instructions for buttery crunch and perfectly chewy cores
Follow these precise steps to create cookies with the ideal balance of crispy edges and gooey centers.
🍳 Step 1: Cream Butter and Sugars to Light and Fluffy
In a stand mixer fitted with the paddle attachment, combine the 12 oz unsalted butter (cold, cubed), 1 cup granulated sugar, and 0.5 cup packed brown sugar. Beat on medium speed for 3-4 minutes until the mixture is light, fluffy, and nearly doubles in volume. You’ll notice the color lighten and the texture become pale and airy—this is crucial for achieving that perfect cookie structure.
I press down on the butter mixture with a rubber spatula occasionally to ensure even creaming. If the butter hasn’t softened enough, the mixture will look streaky. If this happens, let it sit at room temperature for 10 minutes before continuing. The butter should be soft enough to leave a slight indent when pressed but not melted.
👨🍳 Step 2: Add Eggs and Vanilla for Rich Flavor
Add the 2 whole large eggs one at a time, mixing on low speed after each addition until fully incorporated. Then add the 2 tsp vanilla extract and mix for another 10 seconds. The mixture will look slightly curdled at first, but don’t worry—this will smooth out once the dry ingredients are added.
Here’s the thing—room temperature eggs mix more smoothly into the butter mixture. If your eggs are straight from the fridge, let them sit in warm water for 5 minutes before using. The vanilla extract should be pure, not imitation, for that authentic flavor. Mix just until combined to avoid developing gluten in the flour prematurely.
🥘 Step 3: Combine Dry Ingredients and Chocolate Chips
In a separate bowl, whisk together the 2.5 cups all-purpose flour, 0.5 tsp baking soda, and 0.5 tsp salt. Gradually add this mixture to the wet ingredients, mixing on low speed for 30-45 seconds until just combined. You should still see some flour streaks—overmixing develops gluten, which makes cookies tough instead of chewy.
Remove the bowl from the mixer and gently fold in the 1.5 cups chocolate chips using a silicone spatula. I like to use a mix of semi-sweet and milk chocolate chips for depth of flavor. Distribute them evenly throughout the dough, ensuring no pockets of chips remain. The dough should be soft and slightly sticky but manageable—if it’s too dry, add 1 teaspoon milk to help bind it.
⏰ Step 4: Chill the Dough for Optimal Texture
Cover the dough bowl with plastic wrap and refrigerate for at least 1 hour (I prefer 2 hours or even overnight). This chilling step is non-negotiable—it allows the flour to fully hydrate, prevents excessive spreading in the oven, and helps develop that perfect chewy center. Cold dough also means the cookies hold their shape better when they hit the hot oven.
While the dough chills, preheat your oven to 350°F and line two baking sheets with parchment paper. Here’s a pro tip: I like to use a cookie scoop to portion the dough into 2-tablespoon portions for consistent size. Place the scooped dough 3 inches apart on the prepared sheets—this gives them room to spread without touching.
🔥 Step 5: Bake to Golden Perfection and Finish with Flaky Salt
Bake the cookies for 11-13 minutes until the edges are golden brown but the centers still look slightly underdone. They’ll continue cooking on the hot baking sheet after removal. I know it seems counterintuitive, but slightly underbaking ensures that perfect chewy center while the edges crisp up.
Remove the cookies from the oven and let them cool on the baking sheet for 5 minutes before transferring to a wire rack. While still warm, sprinkle each cookie with a pinch of the 1 tbsp flaky sea salt and the 0.25 cup granulated sugar for that classic cookie finish. The salt enhances the sweetness, and the sugar adds a delightful crunch.
Pro Tips For Making 1 Pound Cookie
- CREAM BUTTER SLOWLY: I learned this the hard way—dumping cold butter into hot sugar makes a greasy mess. Instead, melt the butter just until it softens (it should be pourable but not greasy), then whisk it into the sugars while the mixer runs. This keeps the dough smooth and prevents a sad, lumpy texture.
- MEASURE BROWN SUGAR RIGHT: Packed brown sugar isn’t just a suggestion—it’s the thing that matters most. Use a spoon to press it firmly into the cup, then level it off. I used to scoop and shake, and my cookies always turned out denser than they should’ve been.
- STOP WHEN DOUGH HOLDS: Overmixing turns cookies tough. Once the dough clumps together and pulls away from the bowl, stop. If it’s still sticky, add 1-2 tablespoons more flour—but don’t go overboard, or you’ll end up with dry, crumbly cookies.
- ADD VANILLA LAST: Sounds weird, but it works: fold the vanilla into the dough after everything else is mixed. This keeps the flavor bright instead of letting it cook off too fast. (Yes, even if you’re impatient like me.)
Creative variations of this recipe
Classic Chocolate Chip Twist
For a nostalgic yet elevated version, swap out half the chocolate chips for toasted pecans or walnuts (about 0.75 cup total). Toast the nuts in a dry skillet over medium heat for 3-4 minutes until fragrant, then chop roughly.
The nutty crunch contrasts beautifully with the chewy centers. I like adding ½ tsp cinnamon to the dough for warmth—it pairs perfectly with the chocolate. 🌟
Brown Butter Vanilla
Take this recipe to the next level by brown butter and vanilla bean. Melt 12 oz unsalted butter in a saucepan over medium heat, swirling occasionally, until it turns golden brown and smells nutty (about 5-6 minutes).
Let it cool slightly, then proceed with the recipe. Add 1 vanilla bean, split and scraped, instead of extract for deeper flavor. The brown butter adds a rich, caramel-like depth that’s irresistible. ✨
Double Chocolate Decadence
For chocolate lovers, replace the chocolate chips with 1.5 cups chopped dark chocolate (70% cocoa) and add ½ cup cocoa powder to the dry ingredients. The result is a fudgy, intense chocolate cookie with crisp edges.
Enhance the flavor with 1 tsp espresso powder in the dry mix—it deepens the chocolate notes without bitterness. Use milk chocolate chips for sprinkling on top for a sweet contrast. 🍫
Citrus Zest Brightness
Infuse the dough with sunshine by adding 1 tbsp lemon or orange zest (finely grated) to the wet ingredients. The citrus brightens the buttery richness, creating a sophisticated flavor profile.
Pair it with white chocolate chips for a sweet-tart contrast. I recommend using freshly zested lemons or oranges—the difference in flavor is dramatic compared to bottled zest. 🍊
Spiced Chai Delight
Transform these cookies into a cozy spiced treat by adding 1 tsp ground cardamom, ½ tsp ground ginger, and ½ tsp ground cinnamon to the dry ingredients.
Swap the chocolate chips for ½ cup chopped dried apricots or raisins and ½ cup chopped almonds for a chewy, nutty, spiced cookie. The spices work beautifully with a cup of chai tea or spiced milk. 🌶️
Gluten-Free Adaptation
For a gluten-free version, replace the all-purpose flour with 2.5 cups King Arthur Gluten-Free Measure for Measure Flour. Add 1 tsp xanthan gum to the dry ingredients to mimic gluten’s structure. Use 1 extra tablespoon of milk to help bind the dough.
These cookies will be slightly denser but still achieve that perfect chewy center. The texture is surprisingly close to the original! 💪
Nutrition facts
Frequently asked questions
Why does chilling the dough matter for this recipe?
Chilling the dough for at least 1 hour (or up to 24 hours) is essential for three key reasons: it prevents excessive spreading, allows the flour to fully hydrate for better texture, and helps develop that signature chewy center. Cold dough also means the cookies hold their shape better in the oven. Pro tip: If you’re short on time, chill the dough balls for 20 minutes before baking for slightly better results.
Can I make these cookies without a stand mixer?
Use a sturdy bowl and hand mixer (or even a wooden spoon) to cream the butter and sugars. Work in 1-minute bursts with a hand mixer, scraping the bowl frequently. For the brown sugar, pack it firmly into the cup—this ensures accurate measurements and prevents under-sweetened cookies. The texture will be slightly less airy but still delicious.
How do I know when the cookies are done baking?
Look for edges that are golden brown but centers that still appear slightly underdone—this is key for chewy texture. They’ll continue cooking on the hot baking sheet for 2-3 minutes after removal. A toothpick inserted should come out with a few moist crumbs, not wet batter. Overbaking leads to dry cookies, so err on the side of 11 minutes rather than 13.
Can I substitute butter with another fat?
While butter gives the best flavor, you can use 12 oz coconut oil (refined, solid) or 1 cup shortening in a pinch. For coconut oil, chill it first to mimic butter’s firmness. Shortening will make the cookies slightly softer but more stable. Avoid margarine—it lacks the fat content needed for proper texture. If substituting, reduce any added milk by 1 tablespoon to compensate.
Why do my cookies spread too much?
Over-creaming the butter (beating too long) or skipping the chilling step are the most common causes. To fix it: cream butter and sugars on medium speed for exactly 3-4 minutes, measure flour accurately (don’t scoop from the bag), and chill dough balls for 15-20 minutes before baking. Also ensure your oven is fully preheated—cold spots cause uneven baking. If using a different oven, test one sheet first.

- Pea Soup Instant Pot Recipe: Velvety Green Smoothness in 20 Minutes - November 1, 2026
- Pork Loin Pulled Pork Crock Pot Recipe: Slow-Smoked Tenderness With Zero Dryness - November 1, 2026
- Baked Potatoes in Crock Pot Recipe: Buttery Interiors and Crispy Top Magic - November 1, 2026