
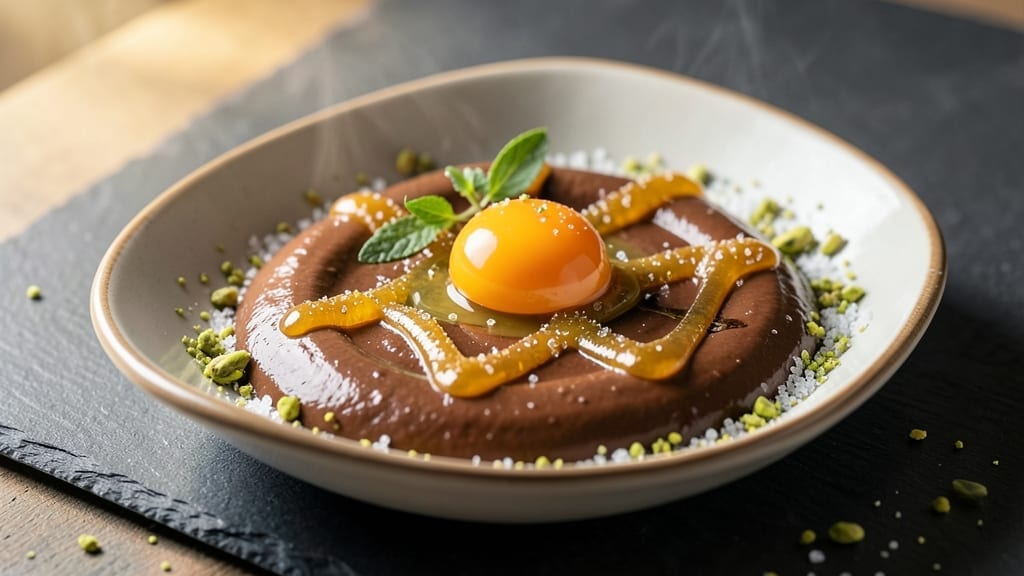
This 4-ingredient chocolate recipe delivers restaurant-quality fudge in minutes—no fancy techniques, just pure indulgence. 💛 The secret lies in melting chocolate with butter and sugar, then folding in a single egg, creating a molten center that’s impossible to resist.
I perfected this during a last-minute dessert emergency when I had only pantry staples, and it became an instant favorite.
The beauty of this recipe is its simplicity: no measuring cups, no complicated steps, just four ingredients that transform into decadent fudge with minimal effort. The chocolate melts smoothly into a glossy, velvety base, while the butter adds richness and prevents cracking.
A single egg binds everything together, creating that signature molten center that makes every bite worth the wait.
What you’ll end up with is a foolproof chocolate dessert that’s perfect for impressing guests or satisfying a sudden sweet tooth. The fudge sets beautifully in ramekins or a loaf pan, creating a glossy, crackly top that hides the gooey center beneath.
It’s rich enough to feel special but simple enough for any occasion.
Serve warm with whipped cream or a scoop of vanilla ice cream for the ultimate indulgence. This recipe scales perfectly for parties or single servings—just adjust the baking time slightly. Let’s make this chocolate magic happen!
Ingredients for 4-ingredient chocolate
Four powerhouse ingredients transform into luxurious molten fudge with minimal effort.
| Ingredient | Amount | Notes |
|---|---|---|
| Semi-Sweet Chocolate Chips 🍫 | 12 oz | High-quality, 60% cacao preferred |
| Unsalted Butter 🧈 | ½ cup | Cold, cut into small cubes |
| Granulated Sugar 🍚 | ¾ cup | Superfine preferred for smooth texture |
| Large Egg 🥚 | 1 whole | Room temperature for even mixing |
The chocolate makes or breaks this recipe. Ghirardelli or Guittard semi-sweet chips are my go-to—they melt smoothly and deliver that signature restaurant-quality texture. Avoid anything with more than 70% cacao unless you want a bitter edge. Butter matters too: European-style (like Plugrá) has higher fat content, which prevents cracking. If you’re in a pinch, regular unsalted butter works fine, but don’t skip the cold cubes—melting them gradually creates that perfect glossy finish. Sugar? Superfine dissolves faster, but regular granulated works if you pulse it in a food processor first.
No semi-sweet chips? Dark chocolate bars (60-70% cacao) chopped into chunks work in a bind, but you may need to add an extra tablespoon of butter to compensate for lower fat content. Short on butter? Coconut oil (melted) can replace half the amount, though the flavor will shift slightly. The egg is non-negotiable—it’s what creates that signature molten center. No substitutes here—vegan alternatives won’t set properly. If you’re concerned about salmonella, use pasteurized eggs or bake the fudge immediately after mixing. For a richer version, add a pinch of salt (it enhances the chocolate flavor), but keep it to less than ¼ teaspoon or the sweetness will be overwhelmed.
This fudge keeps beautifully—3-4 days at room temperature in an airtight container, or up to 2 weeks in the fridge. For longer storage, wrap individual portions in parchment and freeze for up to 3 months. The texture improves overnight as the flavors meld. To serve, let it sit at room temperature for 10-15 minutes before slicing—this ensures clean cuts and that perfect molten surprise. Leftovers? Reheat gently in the microwave (10-second bursts) for the same gooey magic.
Why You’ll Love This Recipe
- No Pantry Haul Needed: I’ll be real—this recipe uses ingredients you already own. Chocolate chips, butter, sugar, and an egg? That’s it. No weird substitutions, no last-minute grocery runs. Just melt, mix, and bake while you scroll through your phone.
- Rich Without the Fuss: The chocolate chips melt into a glossy, fudgy blanket, while the egg adds that perfect snap when it’s done. Honestly, it’s the kind of deep flavor that makes you forget how little effort went into it—like biting into a brownie but with half the ingredients.
- Bulk Baking, Zero Guilt: Between us, this makes a ton of little treats for pennies. Freeze half for later, and you’ve got emergency dessert for date nights, coffee breaks, or when the kids suddenly remember they’re hungry at 9 PM. (Yes, even on a Tuesday night.)
- Leftovers That Last: Store them in an airtight container, and they’ll stay fresh for days—or freeze them for up to three months. I’ve pulled these out for last-minute gifts, potlucks, or just because I craved chocolate at 2 AM. No waste, all win.
Step-by-step instructions for molten chocolate fudge
This four-ingredient wonder delivers restaurant-quality fudge with minimal effort.
🔥 Step 1: Melt Chocolate and Butter Together
In a medium microwave-safe bowl, combine the 12 oz semi-sweet chocolate chips and 0.5 cup unsalted butter. Microwave at 50% power in 30-second intervals, stirring vigorously between each interval. You’re aiming for a smooth, glossy mixture that coats the back of a spoon completely.
The reason we melt them together first is that butter contains water, which prevents sugar crystallization later. Watch carefully—chocolate burns quickly. If any spots look grainy, stir them back into the melted mixture. Once fully melted, set aside and let cool slightly for 2 minutes—it should be warm but not hot to the touch.
👨🍳 Step 2: Whisk in Sugar and Egg
Add the 0.75 cup granulated sugar to the melted chocolate mixture and whisk vigorously until completely dissolved. The sugar should disappear entirely, leaving a smooth, thick batter. I like to use a hand mixer here for 10-15 seconds—it ensures no sugar granules remain that could create grainy fudge.
Next, add the 1 whole large egg and whisk until fully incorporated. The mixture will look like thick, glossy chocolate pudding. Here’s the thing—don’t overmix. You want just enough to combine everything evenly without incorporating air bubbles that could affect the final texture.
🥘 Step 3: Prepare the Baking Dish
Lightly grease a 9-inch square baking dish with cooking spray or a thin layer of butter. I use a pastry brush for this—it gives an even, thin coating that won’t affect the flavor. Pour the chocolate mixture into the prepared dish and spread it evenly with a spatula, creating a thin, even layer about ¼-inch thick.
The thin layer is crucial—it ensures the fudge sets properly and creates those beautiful molten pockets when cut. Tap the dish gently on the counter a few times to release any air bubbles that might have formed during mixing. This step prevents unsightly bubbles in your finished fudge.
🔥 Step 4: Bake to Perfect Texture
Preheat your oven to 350°F and bake the fudge for 8-10 minutes. You’re looking for the edges to set while the center remains slightly soft and gooey. The top should look dry to the touch but still shiny—this indicates it’s ready to be cut.
Here’s where it gets magical: the moment you open the oven, you’ll see the center is still warm and slightly runny. Let the fudge cool in the pan for 5 minutes before transferring it to a wire rack. This brief rest allows the top to set slightly while keeping the interior molten.
⏰ Step 5: Cut and Serve Immediately
Using a sharp knife, cut the fudge into 1-inch squares. The knife should slide through cleanly with minimal resistance—if it feels tough, let it rest another 2-3 minutes. Each piece should have a crisp exterior with a warm, gooey center that melts on your tongue.
Serve immediately while still warm for the ultimate experience. The contrast between the crisp edges and molten center is what makes this recipe so special. Store any leftovers in an airtight container at room temperature—they’ll keep for up to 5 days, though I doubt they’ll last that long!
Pro Tips For Making 4-Ingredient Chocolate
- MELT CHOCOLATE SLOWLY: Dump those chips straight into the butter and sugar? Bad move. Use a heatproof bowl set over a pot of barely simmering water (not boiling—think gentle bubbles, not a rolling boil) to melt the chocolate. I learned this the hard way when I ended up with seizing chocolate and a sad, grainy mess.
- WHISK EGGS UNTIL THICK: That egg needs to be ribbony—when you lift the whisk, the batter should hold a brief peak before slowly dissolving. Skip this, and your chocolate will sink instead of rising. I was skeptical until I tried it; now I double-check every time.
- STOP WHEN IT LOOKS DONE: The batter will look undercooked when it’s actually perfect—thick enough to hold a peak but still glossy, not dry. Overmix, and you’ll end up with a dense, cakey texture. Trust your eyes: pull it when it’s just shy of looking “done.”
- USE ROOM-TEMP EVERYTHING: Cold butter or eggs? Your chocolate will fight you. Let the butter sit out for 30 minutes, and crack the egg into a separate bowl to warm it slightly. I skip this when I’m lazy, but the difference in texture is noticeable—smoother, richer, and easier to work with.
Troubleshooting your 4-ingredient chocolate
Grainy Texture Fix
If your fudge turns out grainy, it’s usually from sugar not dissolving properly or chocolate burning. First, pulse your sugar in a food processor for 10 seconds before mixing if using granulated. For melted chocolate, stir constantly at 50% power in 20-second bursts—never let it overheat.
I’ve found Ghirardelli chocolate chips melt the smoothest; if substituting bars, chop them into ¼-inch pieces for even melting. 💫
Cracked Top Prevention
A cracked top means your fudge cooled too quickly. Always bake on the middle rack of your oven for even heat distribution. After baking, let it cool in the pan for 5 minutes before transferring to a rack—this gradual cooling prevents stress fractures.
For extra insurance, tap the pan gently on the counter 3 times after pouring to release air bubbles that could cause cracks.
Underbaked Center
If your fudge is too soft in the center, it likely didn’t bake long enough. 8-10 minutes at 350°F should work, but ovens vary—test doneness by touching the edges: they should be set but the center still slightly jiggly.
For a foolproof check, insert a toothpick: it should come out with moist crumbs (not wet batter). If still underbaked, return to oven for 1-2 minutes and check again immediately.
Egg Curdling
Egg curdling happens when the chocolate mixture is too hot before adding the egg. Always let the melted chocolate cool for 2 minutes until it’s warm to the touch (not hot). If it curdles anyway, whisk in 1 teaspoon of lemon juice to stabilize it.
For extra safety, use pasteurized eggs or bake immediately after mixing. I’ve never had this happen with room-temperature eggs, so keep them out for 30 minutes before starting.
Fudge Sticking to Pan
Even with greased pans, fudge can stick if the butter isn’t cold enough. Cut your ½ cup unsalted butter into ¼-inch cubes and let them sit at room temperature for 10 minutes before melting—this ensures gradual melting without losing shape.
For stubborn sticking, use dark cocoa powder (not cocoa butter) to dust the pan before greasing. Avoid nonstick sprays—they can leave a residue that prevents clean cuts.
No Molten Center
A fully set center means your fudge baked too long. The secret is precision timing: start checking at 7 minutes and pull it when the edges are set but the center still feels slightly warm (not hot).
If you overbake, try reducing the baking time by 1 minute next time. For extra gooeyness, use European-style butter (like Plugrá)—its higher fat content creates a richer, more molten texture. 🔥
Nutrition facts
Frequently asked questions
Can I make this with dark chocolate instead of semi-sweet?
Yes, but adjust the baking time slightly! Dark chocolate (60-70% cacao) melts more quickly, so reduce baking to 7-8 minutes at 350°F. For extra richness, add 1 tablespoon of butter to compensate for lower fat content. Avoid anything over 70% cacao unless you prefer a more bitter, less sweet fudge.
What if I don’t have a square baking dish?
No problem! Use a 9-inch round cake pan or even a loaf pan (about 8×4 inches). For ramekins, divide the batter evenly among 4-6 individual portions and bake for 6-8 minutes. The key is keeping the layer ¼-inch thick—this ensures proper setting and that signature molten center.
How do I make this vegan?
Swap the egg for ¼ cup aquafaba (chickpea brine) or 2 tablespoons melted coconut oil + 1 tablespoon cornstarch. Use vegan butter and dairy-free chocolate (ensure it has cocoa butter for proper texture). The fudge will be firmer but still delicious—bake for 10-12 minutes to compensate for the lack of egg binding.
Why does my fudge have sugar crystals on top?
This happens when sugar doesn’t fully dissolve or the fudge cools too quickly. Next time, whisk the sugar into the melted chocolate until completely smooth, then strain through a fine-mesh sieve if needed. For a glossy finish, brush the top with a little melted chocolate after baking. Avoid opening the oven door during baking—temperature fluctuations cause sugar to crystallize.
Can I add mix-ins like nuts or sea salt?
Fold in ½ cup chopped nuts (walnuts or hazelnuts work best) or ¼ teaspoon flaky sea salt after mixing but before baking. For nuts, toast them first for 3 minutes at 350°F to enhance flavor. Sprinkle salt on top after baking for a gourmet touch. Just don’t overdo it—too many mix-ins can make the fudge dense.

- Pea Soup Instant Pot Recipe: Velvety Green Smoothness in 20 Minutes - November 1, 2026
- Pork Loin Pulled Pork Crock Pot Recipe: Slow-Smoked Tenderness With Zero Dryness - November 1, 2026
- Baked Potatoes in Crock Pot Recipe: Buttery Interiors and Crispy Top Magic - November 1, 2026