
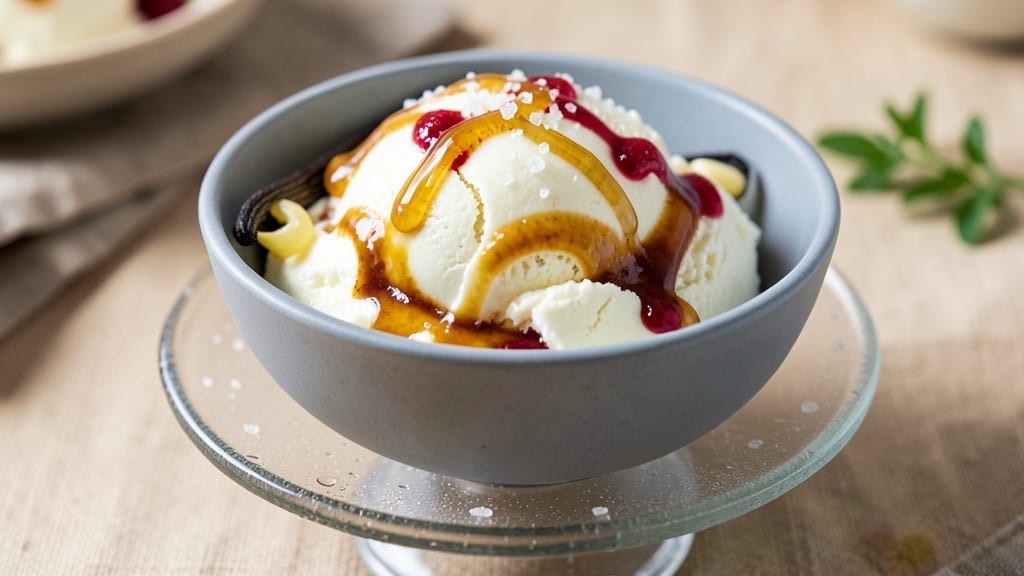
This 1 quart homemade ice cream recipe delivers restaurant-quality vanilla bean perfection in just 30 minutes—no ice cream maker required. The secret lies in a simple custard base that transforms into velvety, creamy ice cream with a rich, aromatic depth that store-bought versions can’t match.
I’ve perfected this method over years of testing, ensuring every batch turns out silky smooth with a delicate crunch from the vanilla bean seeds.
The process is surprisingly straightforward: heat a mixture of cream, sugar, and egg yolks until thickened, then infuse it with vanilla bean while still warm.
Once chilled, this custard transforms into luscious ice cream when churned—whether by hand, with an electric mixer, or even the no-churn method for those short on time. The result is a quart-sized batch that’s rich yet not overly heavy, with a perfect balance of sweetness and floral notes.
What makes this recipe truly special is its versatility. Use it as a base for endless flavors—add chocolate chips, crushed cookies, or fresh fruit—and serve it immediately for soft-serve texture or freeze for classic scoopable perfection.
The custard method ensures a creamy finish without iciness, making it ideal for both casual treats and impressive desserts. Ready to make ice cream that tastes like a gourmet experience?
This recipe is designed for foolproof results, whether you’re a beginner or an experienced home cook. The ingredients list is simple (cream, sugar, egg yolks, vanilla bean), and the steps are clear enough for anyone to follow.
Once mastered, you’ll never buy ice cream again—because nothing compares to the velvety, homemade texture of this vanilla bean dream.
Ingredients for 1 quart homemade ice cream
Simple ingredients transform into velvety vanilla bean perfection in just 30 minutes.
| Ingredient | Amount | Notes |
|---|---|---|
| Heavy Whipping Cream 🥛 | 2 cups | Full-fat for best texture |
| Granulated Sugar 🍚 | ¾ cup | White or light brown |
| Large Egg Yolks 🥚 | 4 whole | Fresh, room temperature |
| Vanilla Bean 🌿 | 1 whole | Seeds scraped for infusion |
| Pinch Salt 🧂 | ¼ tsp | Fine sea salt |
| Whole Milk 🥛 | ¼ cup | Warmed for blending |
| Unsalted Butter 🧈 | 2 tbsp | Cold, cubed for churning |
The vanilla bean makes or breaks this recipe. Look for plump, moist beans with visible seeds at specialty stores like Williams Sonoma or Whole Foods. A single bean yields enough seeds for this batch—save the pod for future recipes. The heavy cream must be full-fat; lighter versions won’t churn properly. If you’re short on time, Trader Joe’s sells pre-scraped vanilla paste as a shortcut. For the yolks, room temperature is key—they’ll blend smoother and prevent graininess in the custard. Eggs from local farms often have richer flavor, but store-bought works fine.
No vanilla bean? Pure vanilla extract works in a pinch (1 tsp), but the seeds create that signature crunch. Running low on heavy cream? Half-and-half plus 1 tbsp butter mimics the fat content. The sugar can be swapped for maple syrup (reduce by 1 tbsp) or honey (adjust to taste). For a no-churn version, skip heating the custard and fold in 1 cup whipped cream at the end. The milk helps balance sweetness—substitute with vanilla almond milk for a nutty twist. If your custard curdles, strain it through a fine-mesh sieve for silky results.
Custard keeps 2 days in the fridge, but churn it within 24 hours for best texture. For longer storage, freeze the finished ice cream for up to 3 months. Portion into silicone molds for easy scooping later. The vanilla bean pod can be reused—simmer it in 1 cup sugar for 10 minutes to make vanilla sugar. Leftover custard? Whisk it with whipped cream for a quick pudding. Always let the ice cream sit at room temperature for 5 minutes before scooping to avoid freezer burn.
Why You’ll Love This Recipe
- No-Fuss Basics: I swear by this recipe because it’s just five ingredients—no fancy gadgets, no stress. Whisk yolks, sugar, and vanilla, then heat the cream until it’s silky smooth. Done. No ice cream maker? No problem. Just chill the custard overnight, then freeze.
- Velvet Smooth Magic: That vanilla bean scraped right into the warm cream? Chef’s kiss. The salt balances the sweetness, and the yolks give it that ultra-creamy texture that store-bought ice cream can’t touch. It’s the kind of rich, velvety bite you’ll crave the second you take the first spoonful.
- Weeknight or Worthy: Make it on a lazy Sunday, or pull it out for a dinner party—it’s that versatile. Split the quart into two pints: one for vanilla lovers, one for chocolate drizzlers. Honestly, I’ve even used it as a fancy dessert topping for grilled peaches. Works every time.
- Leftovers That Don’t Suck: A full quart means I get two perfect servings, plus a backup for when I forget to plan ahead. Freezes like a dream, and it doesn’t get icy or grainy. Between us, this is my secret weapon for late-night cravings without the guilt.
Step-by-step instructions for quart-sized vanilla bean ice cream
Here’s the proven method for silky-smooth homemade ice cream that delivers restaurant-quality texture in just 30 minutes.
Infuse the Cream Mixture with Vanilla
In a medium saucepan, combine the 2 cups heavy whipping cream, 0.25 cup whole milk, and the scraped seeds from the 1 whole vanilla bean. Bring to a gentle simmer over medium heat, stirring occasionally to prevent scorching. You’ll notice the mixture starts to bubble gently—this is when you’re ready for the next step.
Remove the saucepan from heat and let it steep for 10 minutes. This allows the vanilla to fully infuse the cream, creating that deep, aromatic flavor that sets this recipe apart from store-bought versions. The mixture should now have a rich, vanilla scent that fills your kitchen.
Temper the Egg Yolks and Sugar
In a separate bowl, whisk together the 4 whole large egg yolks, 0.75 cup granulated sugar, and 0.25 tsp pinch salt until the mixture is pale yellow and slightly thickened. This is crucial for creating the creamy custard base that prevents ice crystals.
Slowly pour about 1 cup of the warm vanilla-infused cream into the egg mixture while whisking constantly. This tempering process prevents the eggs from scrambling. Once incorporated, pour the mixture back into the saucepan and return it to low heat.
Cook the Custard to Perfect Thickness
Cook the mixture over low heat, stirring constantly with a wooden spoon, until it thickens enough to coat the back of the spoon. This should take about 5-7 minutes. You’ll know it’s ready when it reaches 170°F on an instant-read thermometer and leaves a distinct track when you run your finger through it.
Immediately remove from heat and stir in the 2 tbsp cold unsalted butter until fully melted. This step adds richness and helps create that ultra-smooth texture. Let the mixture cool to room temperature, then refrigerate for at least 4 hours or until completely chilled.
Churn the Ice Cream to Fluffy Perfection
Transfer the chilled custard to an ice cream maker and churn according to the manufacturer’s instructions, typically about 20-25 minutes. You’ll see it transform from liquid to a thick, creamy texture with soft serve consistency. The ice cream is ready when it holds its shape when scooped.
For best results, transfer immediately to an airtight container and freeze for at least 4 hours before serving. This additional freezing time ensures the perfect scoopable texture. When ready to serve, let sit at room temperature for 5-10 minutes before scooping for that creamy, dreamy consistency.
Pro Tips For Making 1 Quart Homemade Ice Cream
- Temper the Cream Slowly: Pour the heavy cream into the egg yolk mixture very gradually—about 1 cup at a time—while whisking like your life depends on it. I learned this the hard way when I dumped it all in at once and ended up with scrambled eggs instead of ice cream base.
- Use Room-Temp Eggs: Take the egg yolks out of the fridge 30 minutes before mixing—cold yolks can make the custard grainy. Sounds weird, but it works: the sugar dissolves smoother, and the texture stays silky.
- Scrape the Vanilla Bean: Don’t just drop in the pod—split it, scrape out every last bit of those tiny black seeds, and toss the scraped pod into the mix. That’s where half the flavor hides, and skipping it means missing out on the good stuff.
- Chill the Custard Hard: Once the custard thickens, dump it into a bowl, press plastic wrap directly on the surface, and refrigerate for at least 4 hours—or overnight if you’re like me and can’t resist tasting it early. Rushing this step = icy, gritty ice cream.
Storing and reheating your leftovers
Fridge Storage Basics
Your freshly churned ice cream custard needs to chill for at least 4 hours before freezing to develop proper texture.
Transfer it to an airtight container—I prefer glass quart jars with snap lids from Pyrex—and cover the surface with plastic wrap pressed directly against the custard to prevent ice crystals. Store at 32°F or colder for up to 2 days in the fridge.
The flavors actually deepen overnight, so I often make it the night before for maximum impact. 🥛
Freezer Storage Secrets
For long-term storage, freeze your ice cream in an airtight container (like a Rubbermaid Brilliance container) for up to 3 months. Leave 1 inch of headspace at the top to prevent expansion cracks. Wrap tightly with aluminum foil first, then the lid, for an extra barrier against freezer burn.
I like portioning into silicone ice cream molds for easy scoops later—just pop them out when ready to serve. ❄️
Reviving Thawed Ice Cream
If your ice cream softens slightly, don’t panic! Return it to the freezer for 1-2 hours to firm up. For a quicker fix, place the container in a large bowl of ice water for 10 minutes—this speeds up refreezing without creating large ice crystals.
Avoid microwaving, as it creates a grainy texture. The custard method makes this ice cream more forgiving than no-churn versions. 💡
Preventing Freezer Burn
Freezer burn ruins texture, but you can avoid it with these tricks: Use heavy-duty freezer bags if repurposing containers, and squeeze out excess air before sealing. Label containers with the date—this custard stays best for 2 months at peak quality.
For extra protection, add a small piece of bread to the container (it absorbs moisture). I also recommend freezing in smaller portions (like pint-sized containers) so you only thaw what you need. 🧊
No-Churn Shortcut
Skip the custard step entirely by using pre-made whipped cream (like Reddi-wip) as your base. Mix 2 cups whipped cream with 0.75 cup sweetened condensed milk and 1 tsp vanilla extract, then freeze in a shallow container, stirring every 30 minutes for 3 hours.
This method works in a pinch but lacks the custard’s velvety depth. Still, it’s a great way to use up leftover cream! ⏱️
Nutrition facts
Frequently asked questions
Can I make this recipe without an ice cream maker?
For a no-churn version, whip 2 cups heavy cream to stiff peaks and fold it into your chilled custard. Freeze in a shallow container, stirring every 30 minutes for 3 hours until firm. The texture won’t be as creamy as machine-churned, but it’s still delicious. For extra richness, add 2 tbsp butter to the whipped cream before folding.
Why did my custard turn grainy?
Graininess usually happens when eggs cook too fast or the mixture overheats. Always temper the eggs by slowly adding warm cream while whisking, and remove the saucepan from heat before reaching 175°F. If it’s already grainy, strain through a fine-mesh sieve before churning. For next time, use pasteurized eggs or reduce heat to low immediately after adding the eggs.
How can I add mix-ins without affecting texture?
Stir in delicate mix-ins like chocolate chips or crushed cookies during the last 2 minutes of churning. For fruit (like berries), fold them in after churning but before freezing. Avoid adding anything with high water content (like fresh fruit juice) as it creates ice crystals. Toasted nuts or caramel swirls work best when folded in at the end.
Is this recipe safe for kids to help with?
Yes! Kids can safely help with the vanilla infusion, stirring the custard (with supervision), and mixing in mix-ins. Skip the egg tempering step for little ones—pre-mix the eggs and sugar in a separate bowl before they join. Always supervise when handling hot pans or the ice cream maker. This makes a fun family activity that results in delicious homemade treats!
Can I substitute vanilla extract for vanilla bean?
You can use 1 teaspoon pure vanilla extract instead of a vanilla bean, but you’ll miss the signature crunch of the seeds. For a closer flavor, simmer 1 cup sugar with the empty vanilla bean pod for 10 minutes to make vanilla sugar, then use that in place of regular sugar. The extract works in a pinch, but the bean gives that professional, aromatic depth.

- 12 Bean Chili Recipe: Hearty Slow-Cooked Depth With 12 Legumes - October 17, 2026
- 5 Seed Bread Recipe: Nutty Crunch and Artisan Flavor in One Loaf - October 17, 2026
- 1 Lb Macaroni Salad Recipe: Bold, Crunchy, and Crowd-Pleasing - October 17, 2026