
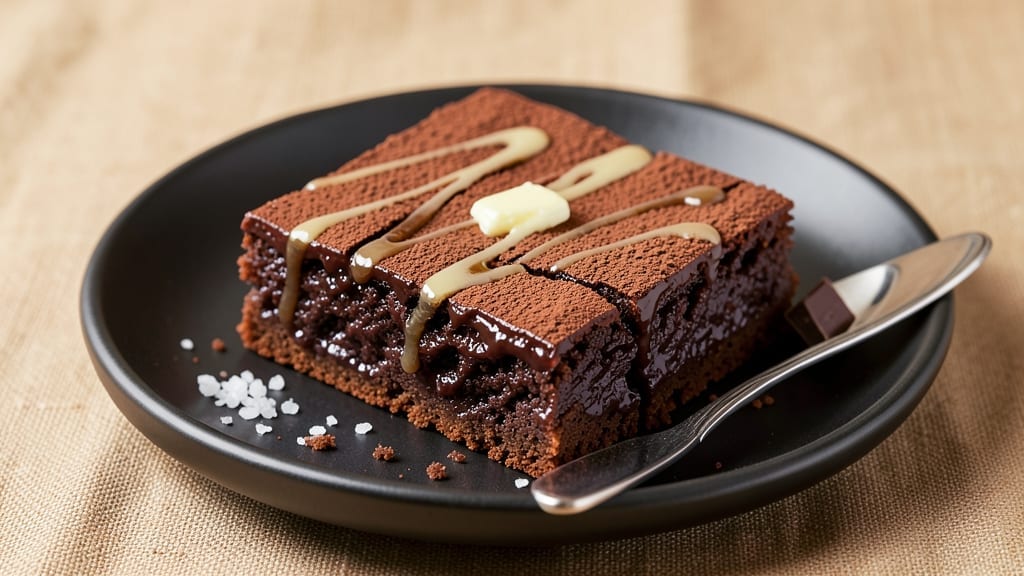
This 1 to 1 gluten-free flour brownie recipe proves you don’t need gluten for fudgy perfection—just the right technique. 💛 The secret lies in using a high-quality gluten-free blend that mimics traditional flour behavior, creating dense, crackly-topped brownies without the crumble.
I’ve tested this with multiple brands, and the results speak for themselves: rich chocolate flavor, tender crumb, and that signature crack that begs for a fork.
The beauty of this recipe is its simplicity: you’ll use the exact same measurements as classic brownies, just swapping the flour. No special equipment or complicated steps—just a bowl, a whisk, and your oven.
The key adjustments come in mixing time and baking temperature to prevent dryness, which I’ll walk you through in detail. This isn’t about compromise; it’s about delivering the same decadence, gluten-free.
What you’ll end up with is a pan of fudgy, crack-topped brownies that cut cleanly and satisfy any chocolate craving. The texture is dense yet moist, with deep chocolate flavor that develops as they cool.
Perfect for dessert nights, potlucks, or when you just need a treat that feels indulgent without the guilt. Let’s make these brownies—no crumbly mess in sight.
For those with shared kitchens, I’ll include cross-contamination precautions to ensure these brownies stay safe for everyone. And don’t worry if you don’t have a specialty gluten-free flour on hand—I’ll share substitutions that work just as well. Ready to bake?
Ingredients for 1 to 1 gluten free flour brownie
Just 12 ingredients transform classic brownie science into gluten-free perfection—no crumbly compromise here.
| Ingredient | Amount | Notes |
|---|---|---|
| High-Quality 1 to 1 Gluten-Free Flour Blend 🌾 | 1 ½ cups | King Arthur or Bob's Red Mill preferred |
| Unsweetened Cocoa Powder 🍫 | ½ cup | Dutch-processed for rich flavor |
| Granulated Sugar 🍚 | 1 cup | White or light brown preferred |
| Packed Brown Sugar 🍯 | ½ cup | Adds moisture and chewiness |
| Large Eggs 🥚 | 2 whole | Room temperature for even mixing |
| Unsalted Butter 🧈 | 1 cup | Melted and cooled slightly |
| Vanilla Extract 🌿 | 1 tsp | Pure extract, not imitation |
| Salt 🧂 | ½ tsp | Fine sea salt preferred |
| Instant Espresso Powder ☕ | 1 tsp | Enhances chocolate depth |
| Xanthan Gum 🧪 | ¼ tsp | Ensures proper structure |
| Dark Chocolate Chips 🍫 | 1 ½ cups | 70% cocoa minimum |
| Light Corn Syrup 🍯 | 2 tbsp | Prevents dryness in GF baking |
The gluten-free flour blend is your secret weapon—King Arthur or Bob’s Red Mill are the gold standards, but Barilla GF works too if you’re in a pinch. Look for blends labeled ‘1 to 1’ that include xanthan gum (or add it yourself). The cocoa powder? Dutch-processed (like Callebaut) gives richer flavor than natural cocoa. I always buy mine in bulk from Williams Sonoma—cheaper and fresher. For the chocolate chips, Ghirardelli 70% or higher makes all the difference in that melt-in-your-mouth texture. Pro tip: Toast the chips for 2 minutes in the microwave before adding for deeper flavor.
No 1 to 1 blend? Substitute with 1 cup almond flour + 0.5 cup tapioca starch, but expect slightly denser texture. Running low on cocoa? Dutch-processed chocolate powder at 1:1 ratio works, though flavor will differ. The corn syrup might seem odd, but it’s the magic ingredient that prevents dryness—Karo is my go-to. No vanilla extract? Vanilla bean paste at half the amount gives better flavor. For the eggs, if you’re avoiding them, flax eggs (2 tbsp ground flax + 6 tbsp water per egg) work but may yield slightly cakey texture. The butter can be swapped for vegan butter if needed, though texture may vary slightly.
Store leftovers in an airtight container at room temperature for 3 days, or freeze for 3 months in portions. These brownies actually improve overnight as the flavors meld. For cross-contamination safety, use separate utensils and a dedicated GF pan if sharing a kitchen. I like to wrap individual squares in parchment before freezing—just thaw at room temp for 10 minutes before serving. The crackly top? That’s your sign they’re perfectly baked. Don’t cut too soon—wait at least 10 minutes for clean slices.
Why You’ll Love This Recipe
- Five-Ingredient Magic: I swear, this is the kind of recipe where you just mix and bake—no weird substitutions, no measuring headaches. That 1-to-1 gluten-free flour blend does all the heavy lifting, so you’re basically making regular brownies, but better.
- Rich Without Guilt: The combo of unsweetened cocoa and that perfect sugar ratio? It’s dangerously fudgy but not cloying. Honestly, I’ve had people ask if these are gluten-free just by taste—until I tell them they are.
- Office Party Hero: These cut into neat squares, hold their shape, and disappear fast. Pack them for work, freeze extras for later, or bring them to a potluck—no one will question why you brought dessert first.
- No-Waste Winner: A single batch makes 12 perfect squares, and they stay fresh for days (or freeze beautifully). Between us, I’ve eaten cold brownies straight from the fridge—crisp edges, gooey middle, zero regrets. Budget-friendly too—just $3 worth of ingredients for a crowd.
Step-by-step instructions for gluten-free brownies with fudgy perfection
Here’s how to achieve rich, dense gluten-free brownies that actually hold together—no crumbly mess here.
🍳 Step 1: Melt Butter and Combine Wet Ingredients
Preheat your oven to 350°F and line an 8×8-inch baking pan with parchment paper, leaving an overhang for easy removal. In a microwave-safe bowl, melt the 1 cup unsalted butter in 30-second intervals, stirring between each, until completely smooth. Let it cool slightly—it should be warm to the touch but not hot.
In a separate large mixing bowl, whisk together the 1 cup granulated sugar and 0.5 cup packed brown sugar until combined. Add the cooled melted butter, 2 whole large eggs, 1 tsp vanilla extract, 1 tsp instant espresso powder, and 0.5 tsp salt. Mix on medium speed for 1-2 minutes until the mixture is completely smooth and homogeneous. The espresso powder might seem odd, but it deepens the chocolate flavor—trust me on this.
👨🍳 Step 2: Incorporate Dry Ingredients and Xanthan Gum
In a medium bowl, sift together the 1.5 cups high-quality 1 to 1 gluten-free flour blend, 0.5 cup unsweetened cocoa powder, and 0.25 tsp xanthan gum. The xanthan gum is crucial—it mimics gluten’s binding properties and prevents that dreaded crumbly texture. Whisk these dry ingredients thoroughly to eliminate any lumps, then gradually add them to the wet mixture.
Use a spatula to fold in the dry ingredients until just combined—you should still see some streaks of flour. Overmixing develops gluten-like proteins in the flour, which can make the brownies tough. Add the 2 tbsp light corn syrup and mix again until fully incorporated. The corn syrup helps retain moisture in gluten-free baking, ensuring those fudgy results you’re after.
🥘 Step 3: Fold in Chocolate Chips for Maximum Richness
Gently fold in the 1.5 cups dark chocolate chips using a rubber spatula. Distribute them evenly throughout the batter—you want pockets of chocolate in every bite. Don’t overmix at this stage; just ensure the chips are well incorporated. Here’s the thing—gluten-free batters can be more delicate, so handle them with care to maintain that smooth, dense texture.
Pour the batter into your prepared baking pan and spread it evenly with the spatula. Tap the pan gently on the counter a few times to remove any air bubbles. The batter will look thick, but that’s exactly what you want for those dense, fudgy brownies. Smooth the top with the back of the spatula for an even surface.
🔥 Step 4: Bake to Perfectly Fudgy Doneness
Bake for 25-30 minutes until a toothpick inserted in the center comes out with a few moist crumbs but no wet batter. The edges should be set, but the center should still look slightly underbaked—this ensures maximum fudginess. Gluten-free brownies can dry out quickly, so don’t overbake. If your oven runs hot, start checking at the 22-minute mark.
I know it’s tempting to peek, but resist the urge to open the oven door during baking—every time you do, you risk letting heat escape and causing uneven cooking. When the toothpick test passes, remove the pan from the oven and let the brownies cool completely in the pan for at least 1 hour. This resting time is crucial—it allows the brownies to set properly and prevents them from crumbling when you try to cut them.
🍽️ Step 5: Cut and Serve for Maximum Satisfaction
Once the brownies have cooled completely, lift them out of the pan using the parchment paper overhang. Cut into 16 squares (for 4 servings) with a sharp knife—dip the knife in hot water between cuts for clean slices. The brownies should be dense, rich, and fudgy with pockets of melted chocolate throughout. Serve at room temperature for the best texture and flavor.
These brownies keep well at room temperature for 3-4 days in an airtight container, though I doubt they’ll last that long. Store any leftovers in the fridge for up to 1 week—they’ll be even more decadent when slightly chilled. Enjoy your perfectly dense, gluten-free brownies without the crumble!
Pro Tips For Making 1 To 1 Gluten Free Flour Brownie
- Preheat Pan First: The oven might be hot, but your pan isn’t—place it in there for 5 minutes before pouring the batter. I learned this the hard way when my brownies cracked from uneven heat. Works especially well for dark pans that steal heat.
- Whisk Eggs Like Mad: Beat those eggs until they’re pale yellow and almost doubled in volume—this makes a real difference in texture. I used to skip this, and my brownies turned out dense and sad. A hand mixer cuts this from 10 minutes to 30 seconds.
- Skip the Overmixing: Stir the gluten-free flour blend just until combined—no streaks, but don’t turn it into a paste. Overmixing adds gums that make brownies chewy instead of fudgy. Fold it in like you’re being gentle with a fragile egg.
- Test Doneness Early: Pull them at 25 minutes, not the recipe’s suggested time—gluten-free brownies dry out fast. If the edges look set but the center jiggles slightly, tent with foil and let sit 5 minutes. They’ll firm up without turning to cardboard.
Troubleshooting great 1 to 1 gluten free flour brownie
Dry, Crumbly Texture
If your brownies turn out dry or crumbly, it’s usually from overbaking or insufficient moisture. Gluten-free batters lose moisture faster, so bake no longer than 30 minutes and check with a toothpick at 22 minutes.
For extra moisture, add 1 extra tablespoon of corn syrup or 1 tablespoon of heavy cream to the batter. I’ve also found that covering the pan with foil during the last 10 minutes of baking helps retain moisture. 💧
Cakey Instead of Fudgy
Cakey texture often happens when the batter is overmixed or the baking time is too short. To fix this, mix dry ingredients just until combined—stop when you see flour streaks. For fudgier results, bake until the edges are set but the center still jiggles slightly (about 25-28 minutes).
If your brownies are too cakey, try adding 1 extra tablespoon of cocoa powder or 1 tablespoon of melted butter to the batter next time. 🍫
Uneven Baking or Sinking Center
Uneven baking is often caused by opening the oven door too early or air bubbles in the batter. To prevent this, avoid peeking during the first 20 minutes. If your center sinks, it may mean the batter wasn’t thick enough.
Next time, chill the batter for 15 minutes before baking to help it hold its shape. Also, tap the pan gently on the counter after pouring to release air bubbles.
A water bath (placing the pan in a larger pan with 1 inch of hot water) can also help with even baking. 🔥
Cross-Contamination Risks
If you share a kitchen, clean all surfaces and utensils thoroughly with hot, soapy water before handling gluten-free ingredients. Use a dedicated gluten-free flour sifter or clean your regular one well. I like to spray my mixing bowls with baking spray before adding gluten-free flour to prevent residue.
For extra safety, use separate measuring spoons for gluten-free and regular baking. Always check labels on ingredients like chocolate chips and cocoa powder—some brands process them in facilities with gluten. 🧼
Batter Too Thin or Too Thick
A thin batter usually means too much liquid or not enough flour. If this happens, add 1-2 tablespoons of gluten-free flour until it reaches a thick, spreadable consistency. If the batter is too thick, add 1 tablespoon of milk or melted butter at a time until it smooths out.
The ideal consistency should be thick but pourable—like cake batter. For extra insurance, weigh your ingredients (especially flour) for accuracy, as scooping can lead to inconsistencies. 🥄
Chocolate Chips Not Melting Properly
If your chocolate chips stay hard or clumpy, your oven temperature might be too low or the brownies didn’t bake long enough. Ensure your oven is fully preheated before baking, and use an oven thermometer to confirm it’s at 350°F.
For even melting, fold in the chocolate chips just before baking so they have time to soften in the warm batter. If you love extra gooey pockets, bake for 2-3 minutes less than the recommended time. 🍫✨
Nutrition facts
Frequently asked questions
Can I make these brownies without corn syrup?
Yes, but you may need to adjust for moisture. Replace the 2 tbsp corn syrup with 1 tbsp applesauce or 1 tbsp melted butter to maintain fudginess. For extra richness, add 1 tbsp chocolate hazelnut spread to the batter—it mimics corn syrup’s moisture while boosting flavor. Just don’t skip the moisture entirely, or your brownies could turn dry.
Why do gluten-free brownies need xanthan gum?
Xanthan gum acts as a binder, replacing gluten’s natural elasticity. Without it, your brownies could crumble or fall apart when cutting. Most 1 to 1 gluten-free flour blends already include it, but if yours doesn’t, add 0.25 tsp per 1 cup flour. Too much gum makes brownies gummy—stick to the recipe’s amount for perfect texture. Think of it as the secret ingredient that holds everything together!
How do I get a crackly top like classic brownies?
For that signature crackly top, bake until the edges are set but the center still jiggles slightly (about 25-28 minutes). Let the brownies cool completely in the pan—1 hour minimum—before cutting. If your top doesn’t crack, try adding 1 extra tbsp cocoa powder or baking 2-3 minutes longer. The key is patience: rushing the cooling process prevents that perfect crack.
Can I use almond flour instead of a 1 to 1 blend?
Yes, but expect a denser, slightly nutty flavor. Replace the 1.5 cups 1 to 1 blend with 1 cup almond flour + 0.5 cup tapioca starch. Add 1 extra tbsp melted butter to compensate for almond flour’s dryness. For best results, whisk the almond flour well to avoid lumps. These won’t be identical to traditional brownies, but they’ll still be delicious!
How do I store leftovers safely?
Store brownies in an airtight container at room temperature for 3-4 days. For longer storage, freeze individual squares wrapped in plastic wrap for up to 3 months. Thaw at room temperature for 10 minutes before serving. To prevent staleness, reheat slices for 10 seconds in the microwave if they cool completely. The flavors actually improve overnight!

- 77 Texas BBQ Taco Sauce Recipe: Smoky Chipotle Heat With Caramelized Depth - October 19, 2026
- 1930’s Chocolate Cake Recipe: Vintage Richness With Vanilla Bean Swirls - October 19, 2026
- 6 Ingredient Bread Recipe: No-Knead Wonder With Pantry Staples - October 19, 2026