
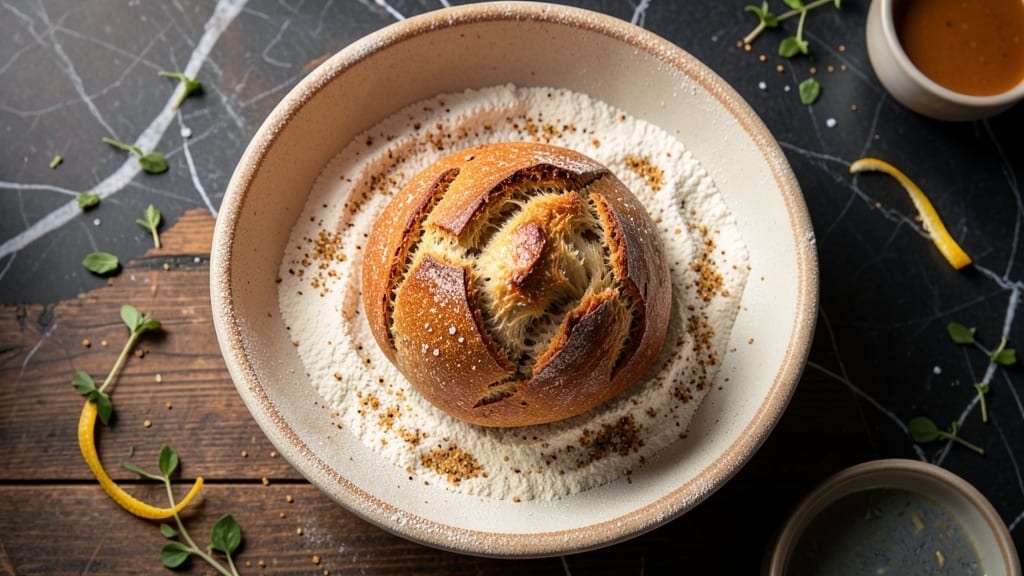
This 2-ingredient sourdough bread recipe proves that authentic fermentation doesn’t require complexity—just flour, water, and patience. The magic happens when you harness the natural yeast in your starter, transforming simple ingredients into bread with deep, tangy flavor and an airy crumb.
I’ve perfected this method over years of baking, ensuring every loaf delivers restaurant-quality results without the fuss of multiple ingredients or complicated techniques.
The beauty of this recipe lies in its simplicity: you’ll only need unbleached bread flour and filtered water, along with an active sourdough starter. The process involves just three key stages—fermentation, shaping, and baking—each designed to build flavor and texture effortlessly.
What you’ll end up with is a loaf with a crispy, golden crust and a tender, open crumb that crumbles just enough to hold onto every bite of flavor.
This method transforms your kitchen into a fermentation lab without the intimidation. The starter does most of the work, developing complex flavors over time, while the baking process creates that signature sourdough aroma.
Whether you’re a beginner eager to try fermentation or an experienced baker looking for a streamlined approach, this recipe delivers professional results with minimal effort.
For those who want to elevate their bread further, optional additions like seeds or herbs can be incorporated without compromising the core simplicity. The key is maintaining the balance between hydration and fermentation time—something this recipe makes effortless.
Let’s get started on your first loaf of authentic, 2-ingredient sourdough that tastes like it came from a Parisian bakery.
Ingredients for 2 ingredient sourdough bread
Two core ingredients plus your active starter create restaurant-quality sourdough with minimal effort.
| Ingredient | Amount | Notes |
|---|---|---|
| Unbleached Bread Flour 🌾 | 3 ½ cups | High-protein for optimal gluten development |
| Filtered Water 💧 | 2 ¼ cups | Room temperature for ideal fermentation |
| Active Sourdough Starter 🍞 | ½ cup | 100% hydration, bubbly and active |
| Kosher Salt 🧂 | ½ tsp | Diamond Crystal preferred for purity |
| Cornmeal or Semolina 🌽 | ¼ cup | For dusting baking surface |
The flour is non-negotiable here—King Arthur Unbleached Bread Flour or Caputo Tipo 00 if you want that Italian touch. High-protein content (12-13%) gives you that signature open crumb. Store-bought flour works fine, but for best results, buy it fresh—flour loses vitality after about 3 months. The starter must be active: it should float in water and have visible bubbles. If yours isn’t ready, feed it daily with equal parts flour and water for 2-3 days. For water, filtered or spring water is ideal—tap water with chlorine can inhibit fermentation.
No sourdough starter? Baking soda + lemon juice can mimic the tang in a pinch (1/2 tsp baking soda + 1 tsp lemon juice per cup of flour), though it won’t develop the same depth of flavor. Running short on flour? Whole wheat pastry flour at 20% of the total adds nutrition without disrupting structure. The salt is crucial—it strengthens gluten and controls fermentation. Diamond Crystal measures differently than table salt (use 1/4 tsp table salt if that’s what you have). For the baking surface, semolina gives a prettier crust than cornmeal, but either works. If you’re feeling adventurous, try adding 1 tbsp vital wheat gluten to the flour for extra chew.
This dough keeps in the fridge for 24 hours before baking—perfect for overnight fermentation. Shape it loosely and let it sit covered at room temp for 1-2 hours before final proofing. Baked loaves freeze beautifully for up to 3 months: wrap tightly in plastic, then foil, and thaw at room temp. For reheating, wrap the cooled loaf in foil and warm at 350°F for 10 minutes. The crust is best eaten fresh, but the crumb stays tender for days if stored in a bread bag.
Why You’ll Love This Recipe
- Here’s what sold me: one batch of starter stretches to three loaves, and the leftovers? Freezer-friendly for weeks. I make a double batch on Sundays, freeze half, and boom—homemade bread anytime. My wallet and my taste buds thank me.
- Just Four Ingredients: I swear, this is the closest I get to magic. Flour, water, starter, salt—that’s it. No yeast to fuss with, no waiting for it to rise overnight. Honestly, my sourdough game just leveled up without the stress.
- Tangy Crust, Soft Core: That crispy semolina crust? Chef’s kiss. But here’s the real win: the inside stays pillowy, with just enough tang from the starter to make it feel like you spent hours kneading. I’ll be real, it’s the kind of bread that disappears faster than my willpower on a lazy Sunday.
- Weeknight Workhorse: This bread is my go-to for sandwiches, toast, or even French toast—no one judges when it’s the star of breakfast. Between us, I’ve used it to soak up marinara, schmear butter on it for my kids’ lunches, and even turned slices into croutons. It’s that reliable.
Step-by-step instructions for 2-Ingredient sourdough bread
Here’s how to transform simple ingredients into artisanal sourdough with minimal effort.
Mix the Dough with Precision
In a large mixing bowl, combine the 3.5 cups unbleached bread flour and 0.5 teaspoon kosher salt. Whisk to eliminate any flour lumps, ensuring the salt is evenly distributed throughout the flour. This creates a uniform base for gluten development.
Next, add the 0.5 cup active sourdough starter and 2.25 cups filtered water at room temperature. Using a wooden spoon or your hands, mix vigorously until a shaggy dough forms. The dough should be sticky but manageable—this is normal. Avoid adding extra flour, as it can weaken the gluten structure. Let the dough rest for 5 minutes while you prepare your workspace.
Develop Gluten Through Wet Kneading
Lightly dust a clean surface with 0.25 cup cornmeal or semolina to prevent sticking. Turn out the dough and begin wet kneading—this technique is crucial for developing strong gluten without drying out the dough. Wet your hands slightly and stretch the dough upward while folding it back onto itself, rotating the dough as you work.
Continue kneading for 8-10 minutes until the dough becomes smooth and elastic. You’ll know it’s ready when it springs back slowly when poked and forms a windowpane when stretched thin. This gluten development is what gives sourdough its signature chewiness and structure. If the dough feels too sticky, add just enough cornmeal to make it workable—but don’t overdo it.
Bulk Ferment for Optimal Flavor
Shape the dough into a loose round and place it back in the mixing bowl. Cover the bowl with a damp kitchen towel or plastic wrap to retain moisture. Let it ferment at room temperature (70-75°F) for 4-6 hours, or until it has nearly doubled in size and looks puffy with bubbles throughout. This bulk fermentation develops the complex flavors and acidity that define authentic sourdough.
Check the dough periodically—it should feel light and airy when pressed gently. If your kitchen is cooler, extend the fermentation time by 1-2 hours. The goal is to achieve 50-75% increase in volume. During this time, the starter’s natural yeasts and lactic acid bacteria work their magic, creating that distinctive tangy flavor without any added yeast.
Shape and Final Proof
Turn the dough onto a lightly cornmeal-dusted surface and gently shape it into a round loaf. To do this, use the “stretch and fold” method: grab one side of the dough, stretch it upward, and fold it over itself, rotating the dough as you work. Repeat this process 4-5 times, then let it rest for 10 minutes before final shaping.
After resting, shape the dough into a tight round by pulling the edges toward the center and tucking them underneath. Place it seam-side up in a lightly greased pullman pan or bowl, cover it again, and let it proof for 1-2 hours until it rises 25-50% above the rim of the pan. The dough should feel springy when pressed gently—this indicates it’s ready for baking.
Bake for Crusty Perfection
Preheat your oven to 450°F with a Dutch oven inside for 45 minutes. This creates a steam environment that’s essential for developing that signature crust. Carefully transfer the shaped dough (still in its pan) to the hot Dutch oven, cover it, and bake for 25 minutes. Then remove the lid and bake for another 15-20 minutes until the bread is deep golden brown.
You’ll know it’s done when the internal temperature reaches 205-210°F and the crust has a crisp, crackly texture. The bread should sound hollow when tapped on the bottom. Let it cool on a wire rack for at least 1 hour before slicing—this allows the gluten to fully relax and prevents a gummy crumb. The result should be a beautifully domed loaf with a crisp exterior and an open, airy crumb.
Pro Tips For Making 2 Ingredient Sourdough Bread
- STRETCH THE DOUGH: Use a bench scraper to fold the dough in thirds—twice during bulk fermentation (every 30 minutes). This builds strength faster than gentle turns, and you’ll see the gluten tighten like a drum after just 3 hours instead of 5.
- WEIGH YOUR STARTER: Skip eyeballing that sourdough starter—use a scale for 20% of your flour weight (e.g., 50g starter per 250g flour). I learned this the hard way when my starter was 10% too much, making the dough gummy and slow to rise.
- SALT THE WATER: Dissolve the kosher salt in the filtered water first—it prevents clumping and ensures even distribution. I used to sprinkle it in later, and my crust always tasted unevenly salty.
- SKIP THE PRE-SHAPE: Forget the round loaf—shape it into a batard (oval) directly on your baking surface. Less handling means less stress on the dough, and the crust develops faster. (Yes, even if it looks lopsided—it’ll bake up fine.)
Regional styles of this dish
French Rustic Tradition
In France, this minimalist approach mirrors the classic baguette tradition but with a slower, more flavorful twist. The French often use T65 bread flour (similar to our high-protein flour) and focus on a long bulk fermentation—sometimes overnight—to develop maximum acidity.
I’ve seen bakers in Paris use leavain (a sourdough starter) that’s been fed for weeks, creating a tang that’s unmistakably French. The key difference? They shape the dough into a batard (oval loaf) rather than a round, then bake it in a long, narrow pan for that iconic crust. 🥖
Italian Artisan Adaptation
Southern Italy takes the 2-ingredient concept and infuses it with olive oil—though we’re keeping it strictly flour and water here, you can mimic the technique. Italian bakers often use Tipo 00 flour for its fine texture, but unbleached bread flour works beautifully too.
The shaping differs: instead of a round, they create a tight, domed loaf with a high hydration (more water) for a lighter crumb. For extra authenticity, brush the baked loaf with garlic-infused olive oil after baking—though that’s technically a third ingredient!
The focus is on a long, slow fermentation (up to 12 hours) to build deep flavor. 🇮🇹
Scandinavian Rye Twist
While this recipe sticks to wheat flour, Scandinavia offers a fascinating parallel with rye sourdough, which often uses just rye flour and water. Their version relies on a wild fermentation (sometimes weeks!) for a dense, dark loaf with a molasses-like sweetness.
For a hybrid approach, replace 20% of the flour with rye flour in this recipe—it’ll deepen the flavor and add a slight earthiness. The shaping is loose and rustic, often baked in a wood-fired oven for a crispy crust.
If you’re feeling adventurous, try adding 1 tablespoon of malt powder (optional) for extra complexity. ❄️
American Home Baker’s Shortcut
In the U.S., many home bakers adapt this recipe for convenience, often using a pre-made sourdough starter from the store (like King Arthur’s or Bobs Red Mill’s).
The focus shifts to speed without sacrificing flavor: bulk fermentation is cut to 4 hours (with a warm oven trick—place a tray of boiling water in the oven during fermentation to speed things up).
Shaping is simplified into a freeform round or batard, and baking is done in a Dutch oven for that coveted crust. The result? A loaf that’s ready in under 8 hours—perfect for busy weeknights. 🏡
Japanese Milk Bread Fusion
While not traditional, Japanese milk bread lovers can adapt this recipe by adding 1 tablespoon of milk powder (optional) to the flour for a softer crumb. The shaping is key: instead of a round, they create a tight, symmetrical loaf with a high rise, almost like a brioche.
The fermentation is shorter (3-4 hours) to maintain a lighter texture, and the dough is often baked in a loaf pan for an even rise. For extra fluffiness, some bakers fold the dough 3-4 times during bulk fermentation—a technique borrowed from shokupan (Japanese milk bread). 🍞
Modern Minimalist Variations
Today’s bakers are pushing boundaries with this recipe. Some add 1 tablespoon of psyllium husk (optional) to strengthen the dough for a higher rise without extra flour. Others experiment with whole grain flours (like spelt or einkorn) for a nuttier flavor.
For a gluten-free twist, replace 20% of the flour with gluten-free bread flour blend—though texture will differ. The beauty of this recipe is its flexibility: whether you stick to the classic or tweak it, the core technique (hydration, fermentation, shaping) remains the same. 🔥
Nutrition facts
Frequently asked questions
Can I use all-purpose flour instead of bread flour?
While you can substitute all-purpose flour, the result will be less open and airy. Bread flour has higher protein content (12-13% vs. 10-11% in all-purpose), which develops stronger gluten for that signature sourdough texture. If you must use all-purpose, increase hydration slightly (2.5 cups water) and extend fermentation by 1 hour to compensate.
How do I know if my sourdough starter is ready?
Your starter should be bubbly, doubled in size within 4-6 hours after feeding, and pass the float test: drop a spoonful in water—if it floats, it’s active. For this recipe, use a starter that’s 24 hours post-feed (peak activity) for best flavor development. If it’s sluggish, feed it daily for 2-3 days before baking.
Why did my bread turn out dense instead of airy?
Dense bread usually means underdeveloped gluten or insufficient fermentation. Ensure you wet knead for 8-10 minutes until elastic, and verify your starter is active. Check your kitchen temperature—ideal fermentation occurs at 70-75°F. If too cold, extend bulk fermentation by 1-2 hours. Also, avoid over-handling during shaping, which can deflate the dough.
Can I make this recipe without a Dutch oven?
Yes! Use a cast-iron skillet or heavy metal bowl instead. Place it on the oven rack during preheating to mimic steam. For extra crust development, spray the dough with water before baking. If using a regular baking sheet, tent the dough with foil during the first 15 minutes to trap steam, then remove for browning.
How long can I store the dough before baking?
The dough stays fresh in the fridge for 24 hours before baking. For longer storage (up to 3 days), shape the dough, place it in an airtight container, and refrigerate. Let it sit at room temperature for 1-2 hours before final proofing and baking. Cold slows fermentation, so plan for 10-15% longer proofing time when using cold dough.

- 77 Texas BBQ Taco Sauce Recipe: Smoky Chipotle Heat With Caramelized Depth - October 19, 2026
- 1930’s Chocolate Cake Recipe: Vintage Richness With Vanilla Bean Swirls - October 19, 2026
- 6 Ingredient Bread Recipe: No-Knead Wonder With Pantry Staples - October 19, 2026