
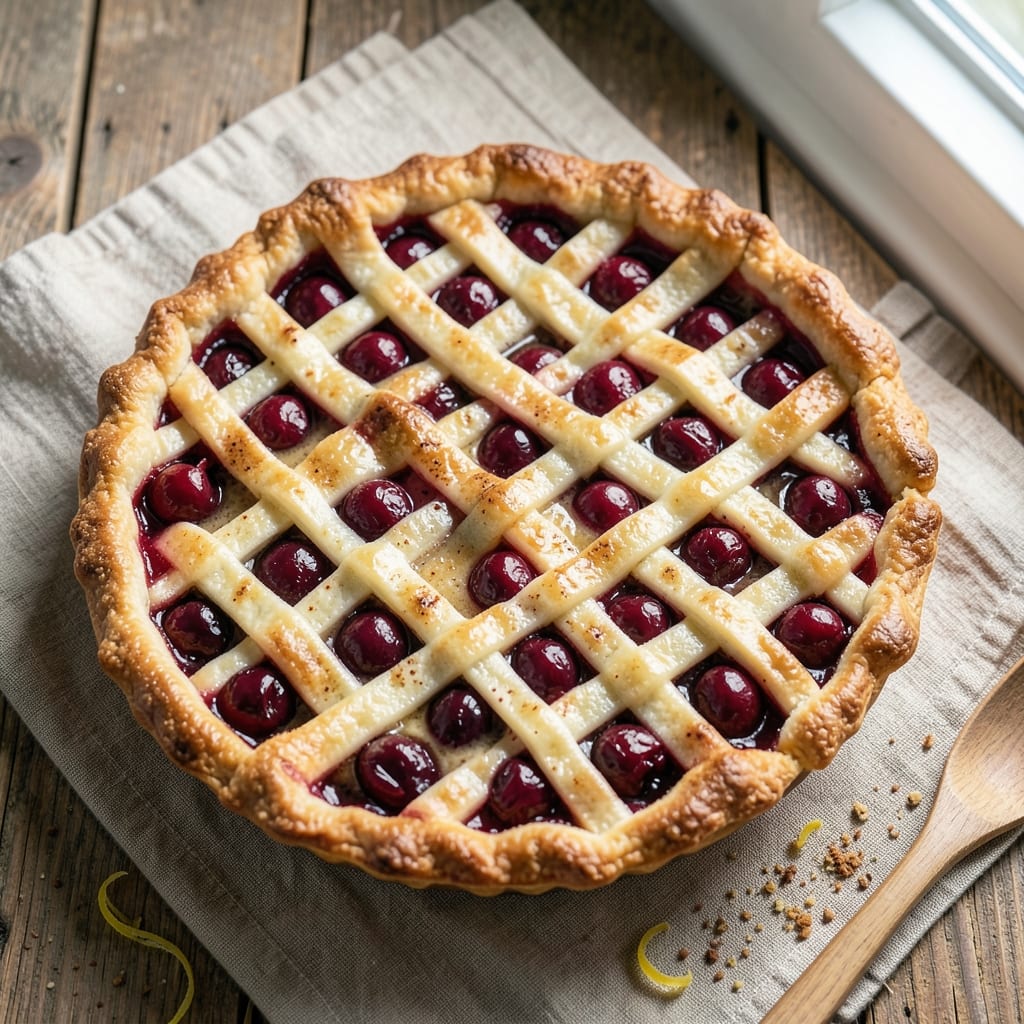
A 10-inch cherry pie with a lattice crust that cuts cleanly and bakes to golden perfection is the ultimate dessert for summer gatherings. The secret lies in a sturdy pie dough that holds its shape while creating delicate, crisp lattice patterns—no rolling pin required.
I’ve perfected this recipe after years of testing, ensuring the filling stays juicy and the crust stays flaky, even when sliced.
The filling balances tart cherries with just the right amount of sugar and spices, creating a flavor that’s rich yet bright. A simple cornstarch slurry keeps the juices from turning into a soggy mess, while a light egg wash on the crust guarantees a beautiful, glossy finish.
This pie isn’t just impressive—it’s foolproof, with step-by-step instructions that even beginners can follow.
By the time it emerges from the oven, you’ll have a pie with a lattice crust that’s crisp enough to cut through with a fork, yet tender enough to melt in your mouth.
The aroma of warm cherries and cinnamon will fill your kitchen, and every slice will be packed with juicy fruit and a perfect balance of sweetness. The best part? It’s ready in under an hour, so you can spend more time enjoying it than making it.
Serve it warm with a scoop of vanilla ice cream or whipped cream for the full experience. This pie is perfect for holidays, potlucks, or just a cozy weekend dessert. Let’s get started—your guests won’t believe it’s homemade.
Ingredients for 10 inch cherry pie
Juicy cherries, flaky crust, and a lattice that cuts cleanly—this pie has it all.
| Ingredient | Amount | Notes |
|---|---|---|
| Pitted Tart Cherries 🍒 | 5 cups | Fresh or frozen, pitted (canned works too) |
| Granulated Sugar 🍚 | 1 ½ cups | White or light brown preferred |
| All-Purpose Flour 🌾 | 3 cups | For dough, spooned and leveled |
| Unsalted Butter 🧈 | 1 cup | Cold, cubed for dough |
| Ice Water 💧 | ½ cup | Chilled for dough handling |
| Cornstarch 🌾 | 2 tbsp | For slurry, not flour |
| Granulated Sugar 🍚 | ½ cup | Extra for filling |
| Ground Cinnamon 🌿 | 2 tsp | Freshly ground preferred |
| Salt 🧂 | ½ tsp | Fine sea salt |
| Large Egg 🥚 | 1 whole | For egg wash |
| Heavy Cream 🥛 | 1 tbsp | For egg wash |
| Lemon Juice 🍋 | 1 tbsp | Freshly squeezed |
The cherries make or break this pie. Fresh Bing cherries are ideal, but frozen work perfectly too—just don’t thaw them first. Pitting cherries can be tedious, so I always grab a bag of pre-pitted frozen cherries from Costco if I’m short on time. For the dough, King Arthur flour is my go-to—it gives that perfect balance of flakiness and structure. If you’re using store-bought dough, grab the Pillsbury pie crust and let it sit at room temp for 15 minutes before rolling. The butter needs to be cold, so pull it from the fridge right before mixing.
No cornstarch? Arrowroot powder works in a 1:1 swap—just don’t use flour. Short on cinnamon? Vanilla extract at half the amount adds warmth without the same intensity. The lattice is the star here, so if you’re nervous about cutting strips, use a pastry brush and water to create a simple crisscross pattern instead. For the filling, I always add a splash of cherry brandy or bourbon (about 1 tbsp) if I’ve got it—it deepens the flavor without overpowering. The egg wash is non-negotiable for that golden finish, so don’t skip it.
Make the dough first—it needs to rest for at least 1 hour (or overnight for best results). The filling can be prepped ahead and stored in the fridge for 2 days before baking. Once baked, pies reheat beautifully—just wrap tightly in foil and warm at 350°F for 15 minutes. The lattice stays crisp for 3 days at room temp, but the filling is best eaten within 2 days. Freeze any leftovers for up to 3 months**—just thaw overnight in the fridge before serving.
Why You’ll Love This Recipe
- No-Fuss Crust: I swear by that cold butter and ice water trick—it’s foolproof. You can’t mess up a pie crust when you let the dough rest while you prep the filling, and honestly? The flaky layers are worth the five minutes of waiting.
- Cherry Perfection: That balance of tart cherries and sugar? It’s like summer in a slice. The cherries caramelize just enough to make every bite taste like a bakery’s secret, and the buttery crust ties it all together—no artificial flavors needed.
- Weekend Hero: Between us, this is my go-to for potlucks or lazy Sundays. It’s big enough to share but not so huge you’ll be stuck with leftovers for days. Plus, the 10-inch size means it’s easy to slice and serve—no awkward pie servers required.
- Budget-Friendly Luxury: You’d think a pie this good would break the bank, but it’s not. Tart cherries in season are cheap, and you’re using basic pantry staples. I’ve made this for under $8, and it still tastes like I spent an hour decorating it. (Spoiler: I didn’t.)
Step-by-step instructions for 10-Inch cherry pie with lattice crust
Here’s how to create a showstopping cherry pie with a lattice crust that slices cleanly every time.
Prepare the Cherry Filling
In a large bowl, combine the 5 cups pitted tart cherries, 1.5 cups granulated sugar, 2 tbsp cornstarch, 2 tsp ground cinnamon, and 0.5 tsp salt. Stir gently to mix everything evenly—no need to mash the cherries, just distribute the sugar and spices throughout. Let the mixture sit for 15 minutes at room temperature while you prepare the dough. This resting time helps the cornstarch absorb into the juices, creating a thicker, less runny filling.
After resting, give the filling one more stir. You want it to look like a thick, slightly syrupy mixture with whole cherries distributed evenly. If you’re using frozen cherries, make sure they’re completely thawed before mixing. The filling should coat the back of a spoon but still be loose enough to spoon into the pie crust easily.
Make the Pie Dough and Roll Out
In a large mixing bowl, combine the 3 cups all-purpose flour and 0.5 tsp salt. Cut in the 1 cup unsalted butter using a pastry cutter or your fingers until the mixture resembles coarse crumbs with pea-sized butter pieces. Gradually add the 0.5 cup ice water, one tablespoon at a time, mixing gently with a fork until the dough just comes together. Be careful not to overwork it—just until it forms a shaggy mass.
Turn the dough out onto a lightly floured surface and knead it 4-5 times just to smooth it out. Wrap it tightly in plastic wrap and refrigerate for at least 1 hour (or up to 2 days). This chilling step is crucial—it relaxes the gluten and makes the dough easier to roll out. When you’re ready, roll the dough between two sheets of parchment paper to 1/8-inch thickness for the bottom crust and 1/16-inch thickness for the top lattice strips.
Assemble the Pie Crust
Roll out the bottom crust to fit a 10-inch pie dish, leaving about 1 inch of overhang all around. Gently transfer it to the pie dish, pressing lightly to help it conform to the shape. Trim the edges to 1/2-inch overhang. Sprinkle the bottom crust with 0.5 cup granulated sugar—this creates a sweet barrier between the crust and filling that prevents a soggy bottom.
Pour the cherry filling into the prepared crust, spreading it evenly. The filling should come up to within 1/2 inch of the top edge. Roll out the remaining dough for the lattice top, cutting it into 12 strips (about 1/2-inch wide). Arrange 6 strips horizontally across the pie, spacing them evenly. Fold back every other strip and lay a perpendicular strip over them, then unfold to create the classic lattice pattern.
Finish and Bake the Pie
Whisk together the 1 whole large egg, 1 tbsp heavy cream, and 1 tbsp lemon juice in a small bowl. Brush this egg wash over the lattice crust, being careful not to let it drip into the filling. This creates a beautiful golden finish and helps the crust crisp up nicely. Sprinkle any remaining sugar from the bottom crust over the lattice for extra shine.
Place the pie on a baking sheet lined with parchment paper (to catch any drips) and bake in a preheated 375°F oven for 50-55 minutes, or until the crust is deep golden brown and the filling is bubbling gently. The lattice should look crisp and the cherries should be tender but not mushy. If the edges start to brown too quickly, tent the pie with aluminum foil.
Cool and Serve
Remove the pie from the oven and let it cool on a wire rack for 2 hours before slicing. This resting time allows the filling to set and the crust to firm up, making those clean lattice cuts possible. Serve warm or at room temperature with a scoop of vanilla ice cream or whipped cream. The lattice not only looks stunning but also makes serving individual slices effortless—each piece will hold its shape perfectly.
Pro Tips For Making 10 Inch Cherry Pie
- Preheat That Pan: Pop your 10-inch pie dish into a 375°F (190°C) oven for 10 minutes before adding the crust—this prevents soggy bottoms and helps the butter in your filling melt evenly. I learned this the hard way after pulling out a pie that looked perfect but had a gummy base.
- Drain Cherries Twice: After pitting, drain your cherries in a colander for 5 minutes, then transfer to a towel and pat dry—excess moisture makes the filling watery and weakens the crust. Yes, it’s tedious, but your pie will hold its shape and taste richer.
- Chill the Dough: Roll out your pie dough on a floured surface, then wrap it tightly and refrigerate for at least 30 minutes (or up to 2 days). Cold dough is easier to handle, less likely to shrink, and gives a flakier crust—no more fighting sticky, warm dough mid-assembly.
- Sugar in Layers: Sprinkle half the sugar over the cherries before adding the top crust, then dust the remaining sugar on top after baking. This balances sweetness—some cherries soak up more sugar than others—and prevents a cloying syrup at the bottom.
Make-ahead tips for this recipe
Filling Prep Ahead
Prepare the cherry filling up to 2 days in advance and store it in an airtight container in the refrigerator. The flavors deepen as the spices meld with the juices, and the cornstarch creates a thicker consistency that prevents a soggy crust.
When ready to bake, simply pour the chilled filling into your assembled pie crust and proceed with baking. 💫
Dough Prep Timeline
Make the pie dough the night before and refrigerate it overnight for maximum flavor development. Cold butter creates flakier layers, and the dough’s long rest prevents shrinking during baking. Roll out the dough just before assembling the pie to keep it cool and easy to handle.
For extra convenience, use Pillsbury pie crust and let it sit at room temperature for 15 minutes before rolling.
Lattice Assembly
Cut the lattice strips while the dough is still cold for cleaner cuts. Arrange the strips in a 6-over-6 pattern (6 horizontal, 6 vertical) and fold back every other strip before laying perpendicular strips over them.
This creates the classic lattice look while maintaining structural integrity. Brush the lattice with egg wash after assembly to ensure even browning. ✨
Baking Prep
Preheat your oven to 375°F for 30 minutes before baking to ensure even heat distribution. Place the pie on a baking sheet lined with parchment paper to catch any filling drips.
For even browning, rotate the pie halfway through baking if your oven has hot spots. The lattice should be golden brown and crisp by the time the filling bubbles gently.
Cooling Strategy
Let the pie cool completely on a wire rack for at least 2 hours before slicing. This resting time allows the filling to set properly and the lattice to crisp up fully. For quicker cooling, place the pie on a rack over a baking sheet to catch any drips.
The longer you wait, the cleaner each slice will cut and the better the texture will be. 💡
Storage Secrets
Store baked pie at room temperature for up to 3 days in an airtight container. For longer storage, freeze the pie (unwrapped) for up to 3 months. To reheat, wrap the pie in foil and warm at 350°F for 15 minutes.
The lattice stays crisp, while the filling reheats beautifully—just add a splash of water if it seems dry. 🍒
Nutrition facts
Frequently asked questions
Can I substitute frozen cherries for fresh in this recipe?
Yes, frozen cherries work perfectly—just make sure they’re completely thawed before mixing into the filling. For best results, use pitted frozen tart cherries (like Bing cherries) and drain any excess liquid after thawing. If using frozen, add them to the filling mixture while still slightly cold to prevent a watery consistency.
What if I don’t have a 10-inch pie dish?
No problem! Adjust the recipe by scaling ingredients up or down based on your dish size. For example, a 9-inch pie requires about 75% of the filling and dough. Always leave 1/2 inch of space between filling and crust edge to prevent overflow. The lattice pattern will need fewer strips for smaller pies—use 5 strips for a 9-inch version.
How do I fix a soggy bottom crust?
Prevent it by sprinkling 0.5 cup sugar on the bottom crust before adding filling (as in the recipe). If it happens, try this quick fix: After baking, remove the pie from the oven, place a baking sheet on top, flip it over, and chill for 10 minutes. This firms up the bottom. For future pies, pre-bake the bottom crust for 8-10 minutes at 375°F before adding filling.
Can I make this pie gluten-free?
Use a 1:1 gluten-free flour blend (like Bob’s Red Mill) for the dough, and add 1 tbsp xanthan gum. For the filling, ensure your cornstarch is certified gluten-free. The lattice will still crisp beautifully, though gluten-free dough may require slightly more handling. Chill the dough longer (2 hours) to prevent cracking during rolling.
Why did my lattice turn out uneven?
Uneven lattice often happens when strips aren’t cut evenly or the dough isn’t rolled uniformly. For perfect results, cut strips while the dough is cold (not room temp) and use a ruler for straight edges. Press strips gently into place before folding—this creates a flat surface for the perpendicular strips. If gaps appear, brush with egg wash and bake until crisp.

- 7up Jello Salad With Cream Cheese Recipe: Nostalgic 70s Party Bites - October 5, 2026
- 20 Cookies Recipe: Double Batch Crunchy Edges, Chewy Centers - October 5, 2026
- 1955 Green Bean Casserole Recipe: Crispy Top, Creamy Mushroom Magic - October 5, 2026