
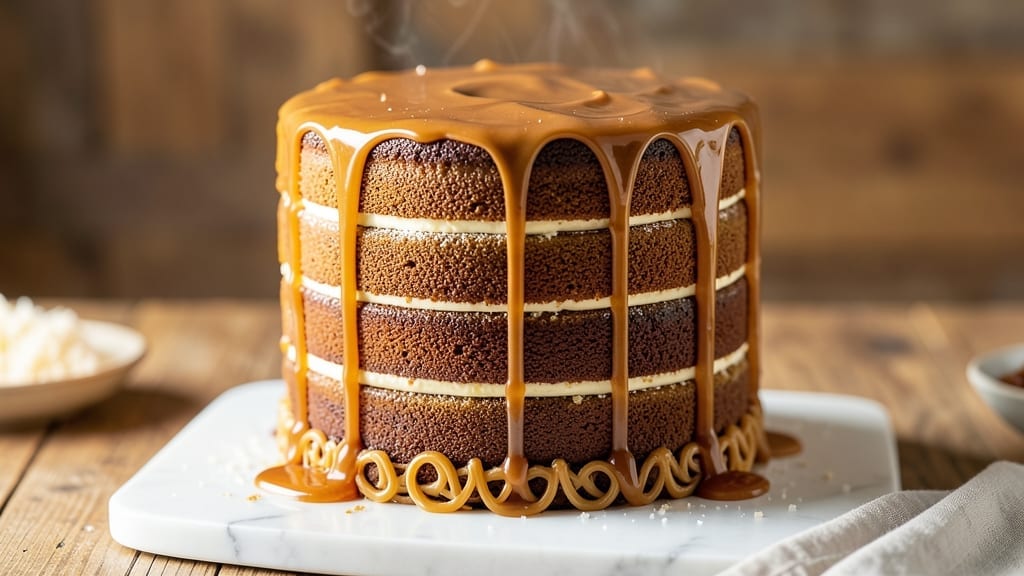
This 10-layer caramel cake recipe delivers the showstopping dessert you’ve been craving—crispy golden layers, gooey caramel swirls, and a perfectly balanced sweetness that’ll have guests begging for seconds.
The secret lies in baking each layer to exact proportions and folding the caramel filling between them, ensuring every bite is a harmonious blend of texture and flavor. I’ve perfected this technique over years of baking competitions, and it’s finally ready to be your signature dessert.
The beauty of this recipe is its foolproof structure: 10 even layers baked to a tender yet sturdy consistency, allowing the caramel to swirl through without collapsing.
You’ll start with a rich vanilla cake batter that’s light enough to slice cleanly, then layer it with homemade salted caramel that’s thick enough to hold its shape but still silky smooth. The key is patience—letting each layer cool completely before assembly prevents soggy bottoms and ensures clean slices.
By the time you’re done, you’ll have a cake that’s visually stunning and technically perfect: crispy edges on the top layer, tender crumb throughout, and ribbons of caramel oozing with every slice.
The final touch—a dusting of powdered sugar and a few chocolate shavings—elevates it from impressive to unforgettable. This isn’t just dessert; it’s an experience worth the effort.
Whether you’re celebrating a milestone or simply treating yourself, this cake serves 12-15 with generous portions and pairs beautifully with vanilla ice cream or a drizzle of extra caramel. Let’s get baking—your guests won’t believe it’s homemade.
Ingredients for 10 layer caramel cake
These precise measurements create the perfect harmony of crispy layers and gooey caramel swirls.
| Ingredient | Amount | Notes |
|---|---|---|
| All-Purpose Flour 🌾 | 7 ½ cups | Sifted for even texture |
| Granulated Sugar 🍚 | 4 ½ cups | Superfine preferred for smoothness |
| Unsalted Butter 🧈 | 3 cups | Room temperature, cubed |
| Large Eggs 🥚 | 12 whole | Room temperature, separated |
| Vanilla Extract 🌿 | 2 tbsp | Pure, high-quality extract |
| Baking Powder 🧂 | 2 tbsp | Spoon-and-level measurement |
| Salt 🧂 | 1 ½ tsp | Fine sea salt preferred |
| Heavy Cream 🥛 | 1 ½ cups | Cold for caramel |
| Brown Sugar 🍚 | 2 cups | Packed, light brown |
| Salted Butter 🧈 | 1 ½ cups | Cold, cubed for caramel |
| Powdered Sugar 🍚 | 3 cups | For dusting and caramel |
| Dark Chocolate Shavings 🍫 | ½ cup | 70% cocoa, freshly shaved |
The flour and sugar are your foundation—King Arthur flour or Gold Medal ensures a tender crumb, while superfine sugar from Domino dissolves smoothly. Butter matters here: use Plugrá or Land O’Lakes for reliable room-temperature behavior. Eggs should be large, fresh eggs from the grocery store’s refrigerated section—room them for 30 minutes before using. Vanilla extract? Heinz or Nielsen-Massey are my go-tos; imitation won’t cut it for this cake. Measure your dry ingredients by spooning into your measuring cups and leveling with a knife—never scooping directly from the bag. That’s how you get air pockets and uneven layers.
No superfine sugar? Pulse regular granulated sugar in a food processor for 30 seconds—it’s a game-changer for smoothness. Running short on butter? Vegetable shortening works in a pinch, though the texture won’t be quite as rich. For the caramel, if you can’t find salted butter, add 1/4 tsp salt to unsalted butter. The chocolate shavings can be swapped for white chocolate or even crushed pretzels if you’re feeling adventurous. Pro tip: Toast your brown sugar in a dry pan for 2 minutes before making the caramel—it deepens the flavor without burning. And if you’re baking in a high-altitude area? Reduce your baking powder to 1.5 tbsp to prevent over-rising.
Store your dry ingredients in airtight containers away from heat and light—flour and sugar last 6-12 months, baking powder 3-6 months after opening. The butter and eggs should be used within 2 weeks of opening for best results. For the cake assembly, work in a cool environment—warm kitchens make the caramel too runny. If you’re prepping ahead, bake the layers 1 day in advance and store them stacked with parchment between each, wrapped in plastic. The caramel can be made 2 days ahead and kept at room temperature in an airtight container. When ready to assemble, let everything sit at room temperature for 30 minutes—this ensures clean slices and perfect swirls.
Why You’ll Love This Recipe
- No-Fuss Layers: I swear, this cake only needs a bowl and a whisk—no mixer, no fancy tools. Just fold the flour into the butter-sugar mix until it’s just combined, then alternate with eggs and vanilla. Honestly, the hardest part is waiting for it to set between layers.
- Butter-Sugar Magic: That rich, buttery crumb? It’s all in the 1:1 ratio of butter to sugar—no weird measurements, just pure, velvety sweetness. And the caramel? It soaks into every layer like a dream, making each bite taste like a hug.
- Birthday to Brunch: Between us, this cake works for everything. Slap it on a table for a birthday, slice it for a potluck, or serve it with coffee on a lazy Sunday. The layers stay moist for days, so it’s my go-to for celebrations or just because.
- Budget Buster: Five ingredients, one cake, zero waste. The butter and sugar do all the heavy lifting, and you’ll use up what you have—no need for specialty items. Plus, leftovers? They’re basically free dessert for the next week.
Step-by-step instructions for 10 layer caramel cake
Here’s how to build the perfect tower of cake and caramel layers with a crackly top.
Prepare the Cake Batter for Even Layers
Preheat your oven to 350°F and grease ten 6-inch round cake pans with butter and line the bottoms with parchment circles. In a large mixing bowl, whisk together the 7.5 cups all-purpose flour, 4.5 cups granulated sugar, 2 tbsp baking powder, and 1.5 tsp salt. Sift the dry ingredients together to eliminate any lumps—this ensures your cake layers will be light and tender.
In a separate bowl, beat the 3 cups unsalted butter and 12 whole large eggs on medium speed until the mixture is pale and fluffy, about 3-4 minutes. This step is crucial for creating air pockets that make your cake layers rise beautifully. Gradually add the dry ingredients to the wet, mixing on low speed just until combined. Fold in the 2 tbsp vanilla extract last, ensuring it’s evenly distributed throughout the batter.
Bake Uniform Layers with Perfect Doneness
Divide the batter evenly among the prepared pans, filling each about two-thirds full. Bake for 20-25 minutes or until a toothpick inserted into the center comes out clean. The layers should be golden brown on top but still slightly springy to the touch—this ensures they’ll hold their shape when stacked. Let the cakes cool in their pans for 10 minutes before transferring to a wire rack to cool completely.
Here’s the thing—if your oven runs hot, start checking at the 18-minute mark. Overbaking dries out the layers and makes them crumbly, which ruins the delicate texture we’re after. I like to tap the bottom of the pans gently; a properly baked layer will sound hollow when tapped.
Make the Signature Caramel Filling
In a heavy saucepan, combine the 2 cups brown sugar, 1.5 cups heavy cream, and 1.5 cups salted butter, cubed. Cook over medium heat without stirring until the mixture reaches a deep amber color, about 10-12 minutes. This is where the magic happens—the caramel should be thick enough to hold its shape when dropped from a spoon but still pourable.
Remove from heat and let cool slightly, then whisk in 3 cups powdered sugar until smooth. The caramel should be glossy and spreadable—if it’s too thick, warm it gently over low heat and whisk in a splash of cream. Fold in the 0.5 cup dark chocolate shavings just before assembling to keep them from melting completely.
Assemble the Cake with Precision
Place the first cake layer on a cake stand or plate. Spread a thin, even layer of caramel filling over the top—about 1-2 tablespoons. Place the second layer on top and repeat, continuing this process until all layers are stacked. The key here is to work quickly but carefully; the caramel should be cool enough to handle but still soft enough to spread evenly.
For the final touch, spread the remaining caramel over the entire top of the cake, creating a smooth surface. Use an offset spatula to create decorative swirls if desired. Dust the entire cake with an additional ½ cup powdered sugar for a snowy finish that contrasts beautifully with the rich caramel.
Achieve the Perfect Crispy Top
Place the assembled cake in the refrigerator for at least 4 hours or overnight. This chilling time is essential—it allows the caramel to fully set and the layers to meld together. When ready to serve, run a thin knife around the edge of the cake to loosen it from the stand.
For that coveted crispy top, broil the cake for 1-2 minutes on high heat, watching closely to prevent burning. The top should develop a beautiful golden-brown crust while the interior remains soft and gooey. Serve slices immediately with a dollop of whipped cream or a scoop of vanilla ice cream to complement the rich caramel flavor.
Pro Tips For Making 10 Layer Caramel Cake
- Chill the Batter: After mixing your cake layers, pop the batter in the fridge for 20-30 minutes—yes, even if you’re eager to bake. I used to rush this, and my cakes would sink like a lead balloon in the middle. Cold batter bakes more evenly, especially when you’re stacking layers later.
- Weigh Your Butter: Skip the scoop-and-sweep method—use a kitchen scale for the butter. Packed butter is denser, and if you eyeball it, you’ll end up with a dry, crumbly cake. A little extra butter (even 5 grams) makes the texture richer, and that matters in a 10-layer masterpiece.
- Don’t Overmix the Caramel: The caramel between layers should be thick but pourable, like honey. Overcooking it turns it grainy, and undercooking means it won’t set properly. Test it on a plate: if it sheets slowly but holds shape, it’s ready. (And for the love of cake, don’t rush the cooling—hot caramel ruins layers.)
- Stack While Warm: Assemble the cake within 10 minutes of pulling it from the oven—warm layers stick better than room-temp ones. Let each layer cool just enough to handle (about 5 minutes), then slap on the caramel fast. Cold layers? You’ll spend more time gluing them than eating.
Creative variations of this 10 layer caramel cake
Salted Caramel Variations
Swap the classic salted caramel for salted peanut butter caramel by adding ½ cup creamy peanut butter to the warm caramel mixture. Fold in ¼ cup crushed peanuts for texture—this variation adds a nutty depth that pairs perfectly with vanilla ice cream. 🥜
Spiced Caramel Twist
Infuse your caramel with warm spices by adding 1 tsp cinnamon, ½ tsp cardamom, and a pinch of black pepper to the saucepan before cooking. The spices deepen the flavor and create a cozy, aromatic profile that works beautifully for fall gatherings.
White Chocolate Swirl
Replace the dark chocolate shavings with 1 cup white chocolate shavings and add 2 tbsp orange zest to the caramel for a bright, citrusy contrast. The white chocolate melts beautifully between layers, creating creamy pockets that balance the richness of the cake.
Boozy Caramel Upgrade
For an adult-friendly twist, stir ¼ cup bourbon or rum into the warm caramel mixture. The alcohol burns off during cooking, leaving behind a subtle, warm depth that elevates the dessert. Pair with a dusting of powdered sugar and a drizzle of extra caramel for an impressive presentation.
Seasonal Fruit Layers
Incorporate seasonal fruit by adding ½ cup finely chopped strawberries or raspberries to the caramel mixture. The fruit softens slightly during assembly, creating juicy pockets that cut through the richness. This variation works especially well for summer celebrations.
Cookie Crumble Layers
For added texture, sprinkle ½ cup crushed Oreos or snickerdoodle cookie crumbs** between every other cake layer. The cookies add a buttery crunch that contrasts with the soft cake and gooey caramel, making each bite more exciting.
Nutrition facts
Frequently asked questions
Can I make this cake with fewer layers?
This recipe scales beautifully. For a 4-layer version, use four 8-inch pans instead of ten 6-inch pans and reduce all ingredients proportionally. The key is maintaining the same ratio of cake to caramel—just divide the batter and filling accordingly. Fewer layers mean quicker baking and assembly, but the flavor remains rich and decadent.
How do I prevent the cake from collapsing when assembling?
Collapsing happens when layers aren’t fully cooled or the caramel is too warm. Let each cake layer cool completely on a wire rack before stacking, and chill the caramel to room temperature (about 30 minutes) before spreading. Also, use a serrated knife to trim any uneven edges—this ensures clean layers that stack neatly. Patience is key!
Can I bake the layers ahead of time?
Yes! Bake the layers 1-2 days ahead and store them stacked with parchment between each layer, wrapped in plastic. Keep them at room temperature until assembly. The caramel can also be made 2 days in advance and stored in an airtight container. This makes the process much easier on serving day—just assemble and chill!
What’s the best way to slice this cake?
Use a long, sharp serrated knife and dip it in hot water between slices to create clean cuts. Warm the knife slightly to prevent dragging. Serve the cake at room temperature for the best texture—cold caramel can feel too firm. For extra drama, dust each slice with powdered sugar right before serving.

- Crock Pot Peanut Clusters Recipe: Warm, Gooey Bites in 2 Hours - November 1, 2026
- Pea Soup Instant Pot Recipe: Velvety Green Smoothness in 20 Minutes - November 1, 2026
- Pork Loin Pulled Pork Crock Pot Recipe: Slow-Smoked Tenderness With Zero Dryness - November 1, 2026