
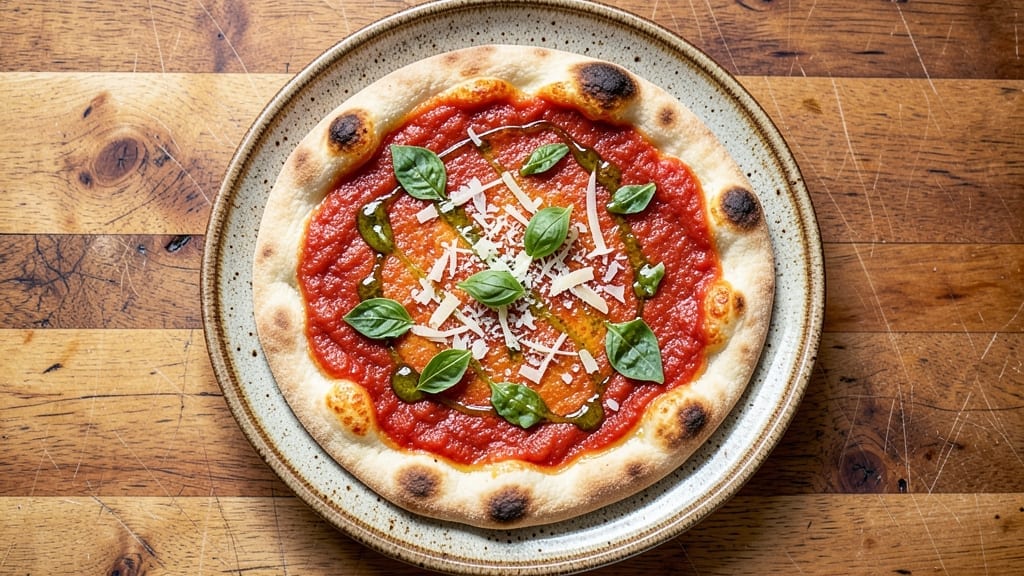
This 10-minute pizza recipe delivers restaurant-quality results without the wait—crispy crust, bubbling cheese, and all your favorite toppings in a fraction of the time. The secret lies in a foolproof, no-yeast dough that comes together in minutes and cooks faster than takeout.
I’ve perfected this method after years of testing, ensuring every bite is crispy on the outside, tender inside, and packed with melty, gooey goodness.
The magic happens with a pre-made dough trick—no kneading, no waiting, just mix, shape, and bake. Top with your favorite sauce, cheese, and toppings, then cook in a hot skillet or air fryer for that perfect crisp.
This isn’t just fast; it’s a game-changer for busy weeknights when you crave pizza but don’t have hours to spare. The dough stays fresh longer than store-bought, and the flavor? Unbeatable.
By the time you’re done, you’ll have a golden, crispy pizza with a cheesy pull that’s impossible to resist. The edges stay crisp while the center melts into perfect tenderness, and the sauce?
It’s rich and flavorful without being soggy. This recipe proves you don’t need a pizza stone or an hour of prep to make something that tastes like it came from your favorite pizzeria.
Serve with a simple side salad or garlic knots for a complete meal—all ready in under 15 minutes. Whether you’re feeding the family or craving a solo slice, this pizza delivers restaurant-quality results without the fuss. Let’s get started!
Ingredients for 10 minute pizza
Pantry staples and a few fresh touches—this pizza comes together faster than takeout.
| Ingredient | Amount | Notes |
|---|---|---|
| All-Purpose Flour 🌾 | 2 cups | Spooning into cup for accuracy |
| Warm Water 💧 | 1 cup | 110°F or warm to touch |
| Olive Oil 🫒 | 1 tbsp | Extra-virgin for best flavor |
| Instant Yeast 🍞 | ½ tsp | Not active dry yeast |
| Salt 🧂 | ½ tsp | Kosher or sea salt |
| Pizza Sauce 🍅 | ½ cup | Store-bought or homemade |
| Shredded Mozzarella Cheese 🧀 | 1 ½ cups | Part-skim or whole milk |
| Pepperoni Slices 🍕 | 6 whole | Or any favorite toppings |
| Fresh Basil Leaves 🌿 | ¼ cup | Chopped for garnish |
| Garlic Powder 🧄 | ½ tsp | For seasoning crust |
| Dried Oregano 🍃 | ½ tsp | Italian seasoning blend |
| Olive Oil Spray 🫒 | 1 tbsp | For skillet coating |
The flour is the foundation, so grab King Arthur or Gold Medal if you can—both bake up light and crispy. Warm water is key here; if it’s too hot, the yeast will die. Test it by touching the water—should feel like bathwater. The olive oil adds richness, but avocado oil works too if you’re out. Instant yeast is your secret weapon—no waiting for it to activate. For the cheese, low-moisture mozzarella melts better than fresh, but if you have that milky kind, use it anyway—it’s still delicious. Pepperoni is classic, but mushrooms, bell peppers, or vegan sausage all work just as well. Fresh basil is a game-changer for that restaurant-quality finish, but dried oregano in a pinch works too.
No pizza sauce? Crushed tomatoes with garlic and Italian seasoning will do. Short on mozzarella? Parmesan or provolone adds depth. The dough comes together with just a fork—no mixer needed. If you’re worried about the crust being too thick, press it out with a rolling pin before cooking. The garlic powder and oregano go right on the dough before adding sauce—don’t skip this step, it’s what makes the crust taste like it’s from a pizzeria. And if you’re using an air fryer, spray the basket with olive oil first so the pizza doesn’t stick. The dough will rise slightly while you prep the toppings, but it won’t double like traditional pizza dough.
The dough keeps in the fridge for 3 days wrapped in plastic, or you can freeze it for up to 2 months—just let it thaw at room temp before using. Toppings can be prepped ahead, but add the cheese right before cooking so it melts perfectly. Leftovers reheat best in a skillet or toaster oven to keep the crust crispy. For a cheesy pull, press down on the cheese with a spatula while it’s cooking. And if you’re feeding a crowd, just double the dough and sauce—this recipe scales perfectly.
Why You’ll Love This Recipe
- Five-Ingredient Magic: I swear by this combo—just flour, water, oil, yeast, and salt. No fancy pantry trips, no waiting for dough to rise. Honestly, the yeast dissolves right into the water while I measure flour, and by the time I’ve mixed it, the dough’s ready to stretch. That’s 10 minutes of my life I’ll never get back to overthinking dinner.
- Crispy-Chewy Gold: Between us, this dough hits that perfect balance—crispy edges with a pillowy center. The olive oil keeps it tender without greasing my hands, and the salt? It’s the secret that makes every bite taste like a proper pizza, not just a sad flatbread. (Yes, even on a Tuesday night.)
- Pizza for Any Mood: Need lunch for the office? Toss it in a bag. Hosting last-minute guests? Two dough balls stretch into two pizzas in a flash. I’ll be real: my kids love the “build-your-own” part, and I love that I’m not stressing over a takeout order. It’s the ultimate crowd-pleaser without the fuss.
- Pantry Staple Hero: This recipe costs me pennies—flour and yeast are always on hand, and olive oil lasts forever. Leftover dough? Freeze it. Stale crust? Toast it. I’ve turned this into breakfast hash, garlic knots, even a quick flatbread for soup. It’s my go-to when I’m low on cash or time, and somehow, it always delivers.
Instructions for a 10-Minute pizza with crispy crust
Here’s how to make a perfectly crispy, cheesy pizza in just 10 minutes—no waiting for dough to rise!
Mix the Quick-Prepare Dough
In a large mixing bowl, combine the 2 cups all-purpose flour, 0.5 teaspoon instant yeast, 0.5 teaspoon salt, 0.5 teaspoon garlic powder, and 0.5 teaspoon dried oregano. Stir these dry ingredients together until evenly distributed—this ensures your crust gets that perfect Italian seasoning flavor.
Next, add the 1 cup warm water (about 110°F, warm to the touch) and 1 tablespoon olive oil to the bowl. Using a wooden spoon or your hands, mix everything together until a shaggy dough forms. The dough will be sticky, but that’s normal—this quick method skips the kneading step to save time.
Let the dough rest for 2 minutes while you prepare your cooking surface. This brief pause helps the gluten relax slightly, making it easier to handle. If you’re short on time, you can even skip this rest and move straight to shaping—just know the crust might spread a little more.
Shape and Prep the Crust
Lightly spray a 10-inch skillet with 1 tablespoon olive oil spray (or use a nonstick pan if you prefer). This creates a nonstick surface that helps prevent sticking while ensuring a crispy crust. Transfer the dough to the prepared skillet and press it out evenly with your fingers or the bottom of a glass.
Press the dough until it reaches the edges of the skillet, creating a thin, even layer. The goal is about ¼-inch thickness—this ensures a crispy crust that cooks through quickly. If the dough resists, don’t force it; just press gently and let it relax for another 30 seconds before proceeding.
Here’s the trick to that crispy crust: Use a fork to poke 8-10 holes all over the dough. This prevents air bubbles from forming during cooking and helps the crust cook more evenly. If you’re feeling fancy, you can even press a few crosshatch patterns into the edges for a rustic look.
Assemble and Cook the Pizza
Preheat your oven to its highest setting (usually 475-500°F). While it heats, spread 0.5 cup pizza sauce evenly over the dough, leaving a ¼-inch border for the crust. This border will become your crispy, cheesy edge—don’t skip it!
Sprinkle 1.5 cups shredded mozzarella cheese evenly over the sauce, then arrange the 6 whole pepperoni slices on top. For a more even distribution, you can tear the pepperoni into smaller pieces. The cheese will melt quickly, so don’t worry about covering every inch perfectly.
Slide the skillet into the preheated oven and bake for 6-8 minutes. You’ll know it’s done when the cheese is bubbling and golden brown, and the crust edges are deeply crispy. If your oven runs hot, start checking at the 5-minute mark—every oven is different, and you want to avoid over-browning.
Finish and Serve Immediately
Remove the pizza from the oven and let it cool for 1 minute—this gives the cheese a chance to set slightly so it doesn’t run everywhere when you cut. While it cools, chop the 0.25 cup fresh basil leaves into small pieces and sprinkle them evenly over the top.
Slice the pizza into 4 equal wedges and serve immediately. The crust should be crispy and slightly charred in spots, the cheese gooey and stretchy, and the sauce flavorful without being overwhelming. If you have leftovers (unlikely with this deliciousness), store them in an airtight container for up to 2 days, but honestly, they won’t last that long.
Pro tip: For extra crispiness, broil the pizza for 1-2 minutes at the end if the crust isn’t quite set to your liking. Just keep an eye on it—broiling can happen fast!
Pro Tips For Making 10 Minute Pizza
- MEASURE THE WATER FIRST: Fill your measuring cup with warm water before adding yeast—this prevents overmixing and guarantees the right hydration. I learned this the hard way after ending up with a dough that was either too sticky or too dry, both times because I eyeballed it.
- LET THE YEAST BLOAT: Mix the yeast with warm water and a pinch of salt, then wait exactly 5 minutes until it froths before adding flour. Skipping this step means your dough won’t rise properly, and you’ll end up with a flat, sad pizza—trust me, I’ve made that mistake.
- KNEAD JUST ENOUGH: Combine flour and salt, then pour in the yeast mixture and mix with a fork until shaggy. Over-kneading develops gluten, which defeats the purpose of a speedy dough. This isn’t sourdough—keep it loose and stretchy.
- USE A HOT PAN: Preheat your skillet or pan on high for 3-4 minutes before adding the dough. The residual heat helps the crust cook faster and crispier, even if you’re short on time. (Yes, even if you’re impatient like me.)
Wine and beer pairings for 10 minute pizza
Crispy Crust Classics
A bold Chianti from Tuscany is my go-to for this pizza—its bright acidity cuts through the richness of the melted cheese while complementing the garlic and oregano in the crust. Look for a Sangiovese-based Chianti with 12-14% ABV for the perfect balance of earthy notes and fruitiness.
I love Castello di Volpaia Chianti Classico—it’s approachable but still complex enough to stand up to pepperoni. 🍷
Light and Zesty Whites
For a lighter option, try a Vermentino from Sardinia or a crisp Pinot Grigio from Alto Adige. These wines highlight the fresh basil and tomato sauce without overpowering the pizza’s flavors.
A chilled Soave Classico with its almond and citrus notes also pairs beautifully, especially if you’re using a white pizza variation with ricotta. 🥂
Beer Pairings
A crisp Italian lager like Peroni or Moretti is my top choice—its clean, slightly malty profile cleanses the palate between bites of cheesy pizza. For craft beer lovers, a Belgian-style witbier (like Hoegaarden) adds a refreshing citrusy contrast to the richness.
Avoid heavy IPAs or stouts, as their bold hops can clash with the delicate crust and sauce. 🍺
Non-Alcoholic Options
For a refreshing non-alcoholic match, try a sparkling blood orange soda like San Pellegrino Aranciata Rossa—its citrusy fizz mirrors the acidity of the tomato sauce. A ginger beer with a splash of lime also works wonders, especially if you’ve added spicy toppings like jalapeños.
For something more classic, Italian mineral water with a lemon wedge keeps it simple and refreshing. 💧
Regional Wine Twists
If you’re feeling adventurous, try a Neapolitan Aglianico for a bolder red option—its dark fruit and smoky notes pair surprisingly well with the charred crust. For a white, a Fiano di Avellino from Campania brings honeyed sweetness that complements the mozzarella beautifully.
These regional picks add an extra layer of authenticity to your quick pizza night. 🗺️
Pro Pairing Tips
Always serve wine slightly cooler than room temperature—around 55-60°F for reds and 45-50°F for whites. Let your beer sit at 40-45°F for the best flavor. And here’s my secret: Pour your wine or beer into a wide-rimmed glass to mimic the pizza’s generous proportions.
The wider the glass, the better the experience feels! 🥃
Nutrition facts
Frequently asked questions
Can I make this pizza without a skillet?
If you don’t have a skillet, use a 10-inch cast-iron pan or even a preheated pizza stone in your oven. For an air fryer version, press the dough into a 12-inch round (about ¼-inch thick) and cook at 375°F for 8-10 minutes, spraying with olive oil halfway. The key is thin dough and high heat for crispiness!
Why does my crust get soggy?
Soggy crusts happen when sauce or cheese touches the dough too early. Always leave a ¼-inch border around the edges for the crust, and add toppings right before baking. For extra protection, brush the crust edges with a little olive oil before adding sauce. Preheating your pan or oven is also critical—475°F+ ensures a crispy finish.
Can I use this dough for other recipes?
Yes! This quick dough works for garlic knots, calzones, or even flatbreads. For knots, shape into balls, brush with garlic butter, and bake for 8-10 minutes at 425°F. For flatbreads, roll thin and top with olive oil, herbs, and cheese before baking. The no-yeast formula keeps it versatile and fast.
How do I make this pizza spicier?
Add ½ teaspoon red pepper flakes to the dough mix or sprinkle chopped jalapeños on top before baking. For extra heat, drizzle with hot honey or a splash of chili oil after cooking. Start with small amounts—spice builds quickly!
Can I make the dough ahead of time?
Yes! Store the dough in an airtight container in the fridge for 3 days or freeze for 2 months. Thaw at room temperature before shaping. For best results, let it sit for 10 minutes after thawing to relax the gluten. The dough keeps its texture perfectly—no need to worry about it drying out.

- 77 Texas BBQ Taco Sauce Recipe: Smoky Chipotle Heat With Caramelized Depth - October 19, 2026
- 1930’s Chocolate Cake Recipe: Vintage Richness With Vanilla Bean Swirls - October 19, 2026
- 6 Ingredient Bread Recipe: No-Knead Wonder With Pantry Staples - October 19, 2026