
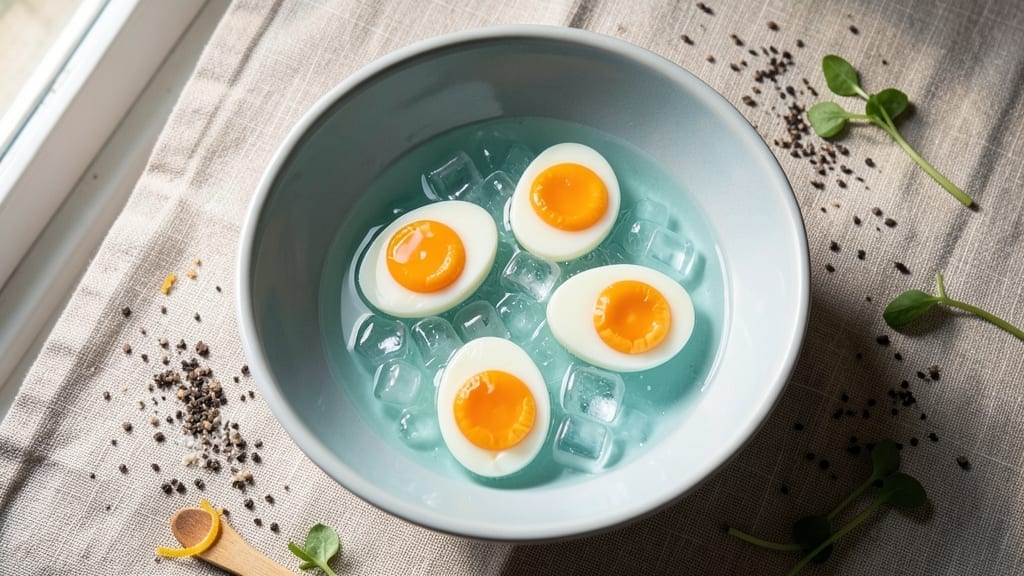
Mastering 3-minute soft-boiled eggs is about precision—not guesswork. I’ve perfected this technique after years of trial and error, and the secret lies in water temperature and timing. Fresh eggs are non-negotiable, and a simple ice bath ensures the perfect runny yolk every time.
This isn’t just breakfast; it’s a game-changer for quick meals, garnishes, or even elegant appetizers.
The magic happens in three critical steps: boiling water at a rolling simmer, cooking eggs for exactly 3 minutes, then shocking them in ice water. No fancy tools—just a pot, timer, and a slotted spoon.
The result? A perfectly set white with a yolk so rich it practically melts off the spoon. This method works for one or a dozen eggs, making it ideal for busy mornings or last-minute entertaining.
What you’ll get is a restaurant-quality egg in minutes—creamy, vibrant, and ready to elevate any dish. Think ramen, avocado toast, or even a classic egg salad. The ice bath stops cooking instantly, preserving that luxurious yolk. No more overcooked yolks or rubbery whites. Just foolproof perfection with minimal effort.
Pro tip: Use room-temperature eggs for even cooking, and always start with cold water. Serve immediately for the best texture, or store in the fridge for up to 24 hours. Ready to transform your breakfast game? Let’s get started.
Ingredients for 3 minute eggs recipe soft boiled
Fresh eggs and precise timing—this is all you need for restaurant-quality perfection.
| Ingredient | Amount | Notes |
|---|---|---|
| Large Eggs 🥚 | 4 whole | Room temperature for even cooking |
| Ice Cubes ❄️ | 2 cups | For immediate shock bath |
| Cold Water 💧 | 4 cups | Starting temperature critical |
| Kosher Salt 🧂 | 1 tsp | For flavor enhancement |
| White Vinegar 🍶 | 1 tbsp | Optional for firmer whites |
| Freshly Ground Black Pepper 🌶️ | ½ tsp | Freshly cracked for best flavor |
| Extra-Virgin Olive Oil 🫒 | 1 tbsp | For serving or finishing |
| Flaky Sea Salt 🧂 | 1 tbsp | For garnish (optional) |
| Freshly Chopped Chives 🌿 | 2 tbsp | For garnish (optional) |
Egg freshness is everything here. Grab the freshest eggs you can find—look for the brightest whites and firmest yolks at the grocery store. Trader Joe’s and Whole Foods usually carry the best, but any store’s refrigerated section will do. Room temperature eggs cook more evenly, so take them out of the fridge 10 minutes before starting. The ice bath is non-negotiable—crushed ice works best for instant cooling, but a bowl of ice cubes in water does the trick too. Pro move: Use a fine-mesh strainer for draining if you’re making more than two eggs at once.
No vinegar? Skip it—it’s optional, but it does help whites set slightly faster. Freshly ground pepper is a must for that bright, peppery kick—pre-ground loses potency fast. If you’re short on time, microwave the eggs for 45 seconds instead of boiling, but the texture won’t be quite the same. For serving, olive oil drizzled over the top adds a luxurious finish. The flaky sea salt and chives are purely for garnish, but they make the presentation pop—worth the extra 30 seconds if you’re serving these as appetizers.
Eggs are best served immediately, but they’ll keep in the fridge for up to 24 hours if stored in their shells in a sealed container. For a quick meal prep hack, boil a dozen at once and store in the fridge—shock them in ice water first to stop cooking. Reheat gently in warm water for 10 seconds if needed. The ice bath water? Save it for watering plants—it’s nutrient-rich from the eggs. And if you’re making these for a crowd, double the ice bath to keep things moving smoothly.
Why You’ll Love This Recipe
- Three-Ingredient Magic: The salt, vinegar, and ice do all the work—no fancy gadgets, no stress. I swear by this method because it’s foolproof: drop the eggs in, set a timer, and walk away. That’s it.
- Creamy-Yolk Perfection: The runny center feels like a hug in your mouth, especially when you crack it over buttery toast or fresh greens. Honestly, the vinegar trick keeps the whites tight while the yolk stays dangerously rich.
- Breakfast or Snack: I make these for lazy mornings, quick lunches, or even as a party appetizer with toast points. They’re my go-to for when I’m too tired to cook but still crave something satisfying.
- Pennies on the Dollar: Five eggs for under a buck? This is my budget-friendly secret weapon. Plus, the leftovers keep in the fridge for days—just reheat in warm water for that same silky texture.
Step-by-step instructions for perfect 3-Minute soft-boiled eggs
Here’s how to nail that signature runny yolk every time—no guesswork, no overcooking.
Prepare the Ice Bath for Shock Treatment
Fill a large bowl with the 2 cups ice cubes and add the 4 cups cold water. Stir in the 1 tsp kosher salt and 1 tbsp white vinegar—this keeps the ice colder longer and helps the whites firm up slightly after cooking. Keep this bowl ready at your workstation because timing is everything here. The ice bath should be ready to go immediately after you cook the eggs, so position it where you can reach it without delay.
I like to use a deep bowl that can hold all four eggs at once. The vinegar is optional but worth it if you prefer slightly firmer whites that still hold their shape when peeling. If you skip it, just make sure your ice water stays below 35°F—that’s the magic temperature for stopping the cooking process instantly.
Bring Water to a Rolling Boil
Fill a medium saucepan with enough water to accommodate the 4 whole large eggs while leaving at least 2 inches of space at the top. Add the 0.5 tsp freshly ground black pepper—this infuses the water with subtle flavor that carries through to the eggs. Bring the water to a full rolling boil over high heat. You’ll know it’s ready when large, steady bubbles break the surface constantly and the water looks like it’s writhing.
Here’s the thing—don’t use a lid yet. Covering the pan too early can cause the water to boil over when you add the eggs. Once the water reaches a rolling boil, reduce the heat to medium-high just before adding the eggs. This maintains the boil without letting it turn into a gentle simmer, which is crucial for precise cooking.
Cook the Eggs for Exactly 3 Minutes
Using a slotted spoon, carefully lower each egg into the boiling water. The water should return to a full boil immediately—if it doesn’t, increase the heat slightly. Set a timer for exactly 3 minutes from the moment the last egg hits the water. This is where the magic happens: the whites firm up while the yolks remain gloriously liquid.
Don’t peek or lift the eggs early! The moment you disturb them, you risk uneven cooking. At the 3-minute mark, use the slotted spoon to transfer each egg directly into the ice bath. The temperature shock stops the cooking process instantly, locking in that perfect runny yolk texture. Work quickly but carefully—hot eggs can crack when they hit the cold water.
Peel and Serve Immediately
Once the eggs have chilled in the ice bath for 1-2 minutes (until completely cool to the touch), remove them and gently tap each egg on a hard surface to crack the shell all over. Roll them between your palms to loosen the shell, then peel under running water if needed. The cold water helps separate the shell cleanly—this is why we shocked them.
Drizzle each egg with 1 tbsp extra-virgin olive oil and sprinkle with 1 tbsp flaky sea salt and 2 tbsp freshly chopped chives. Serve immediately while the yolks are still warm and fluid. The oil adds richness, the salt enhances the egg flavor, and the chives bring a fresh, bright contrast to the creamy yolk. These eggs are perfect on their own, over toast, or tucked into a crisp salad for instant elevation.
Master the Timing for Variations (Optional)
Want slightly firmer yolks? Cook for 2 minutes 45 seconds instead. Prefer a more set yolk with a still-runny center? Go for 3 minutes 15 seconds. The key is always to shock the eggs immediately after cooking—never let them sit at room temperature. If you’re making these ahead, cook them just before serving and keep them in the ice bath until ready to peel and serve.
Pro tip: If you’re serving these as part of a larger meal, prepare the ice bath and water simultaneously while you finish other components. The eggs cook in minutes, so you can have everything ready at the same time. The contrast of the cool, creamy yolk against warm toast or a chilled salad is what makes this technique truly special.
Pro Tips For Making 3 Minute Eggs Recipe Soft Boiled
- USE ROOM-TEMPERATURE EGGS: Cold eggs from the fridge take longer to cook evenly and often crack when dropped into boiling water. Let them sit in a bowl for 10-15 minutes first—this guarantees a perfectly runny yolk every time.
- SALT THE WATER LIKE THE OCEAN: A full teaspoon of kosher salt per quart of water isn’t enough. Double it (2 tsp/quart) to match the salinity of seawater, which prevents the whites from spreading like overworked dough. Trust me, your eggs will hold their shape.
- START WITH ICE, NOT BOILING: Dumping eggs into simmering water guarantees uneven cooking and rubbery whites. Fill your pot with ice cubes first, then add cold water—this creates a shockingly stable 160°F starting point, so the eggs cook uniformly in exactly 3 minutes.
- TEST WITH A THERMOMETER: The water should hit 160°F (71°C) before you add the eggs—not after. Without one, you’re guessing, and that’s how you end up with eggs that’re either undercooked or sad, grayish blobs. A $10 thermometer solves this forever.
Common mistakes when making great 3 minute eggs recipe soft boiled
Overcooking Timing
I’ve seen so many people leave their eggs in the water for even a second too long, and suddenly that perfect runny yolk turns into a sad, rubbery mess. The 3-minute mark is non-negotiable—set a timer the moment the last egg hits the boiling water.
Even 30 seconds extra can turn your yolk from liquid gold to overcooked disappointment. If you’re distracted, trust me, your eggs will pay the price. 🌡️
Skipping the Ice Bath
This is the biggest rookie mistake—letting those eggs sit at room temperature after boiling. The cooking continues even after you pull them from the water! Always transfer them directly to the ice bath to stop the cooking process instantly.
I’ve made this mistake enough times to know: no ice bath means no perfect yolks. Use that 2 cups ice + 4 cups water combo to guarantee success every time.
Cold Eggs Straight from Fridge
Cold eggs from the refrigerator can create uneven cooking—they might not heat through evenly, leaving you with a mix of undercooked whites and overcooked yolks. Take your eggs out of the fridge 10 minutes before cooking to bring them to room temperature.
This simple step ensures consistent results every time. I learned this the hard way when I rushed and ended up with one egg perfectly cooked and another still jiggly in the middle.
Using Old or Stale Eggs
Freshness matters more than you might think. Older eggs have thinner whites that can break apart more easily when peeling, and their yolks don’t hold up as well to the shock of the ice bath.
Grab the freshest eggs you can find—look for the brightest whites and firmest yolks at the store. If your eggs are a few weeks old, they’ll still work, but you might find peeling a bit trickier. Trust me, the difference in texture is noticeable!
Peeling Too Soon
Peeling eggs right after they come out of the boiling water is a recipe for frustration—they’ll be too hot and the shells won’t separate cleanly. Let them chill in the ice bath for 1-2 minutes first.
This cools them down enough to make peeling a breeze. I’ve spent way too much time trying to peel hot eggs, only to end up with broken yolks and a messy kitchen. Patience here pays off!
Ignoring Water Temperature
Starting with cold water and bringing it to a boil is crucial—this ensures even cooking. If you add eggs to water that’s already boiling, the outside can cook too quickly while the inside stays underdone.Fill your pot with cold water first, then bring it to a rolling boil before adding the eggs. This might seem obvious, but I’ve seen more people skip this step than you’d believe. It’s a small detail that makes a huge difference!
Nutrition facts
Frequently asked questions
Why do my soft-boiled eggs turn out rubbery?
Overcooking is the #1 culprit! The 3-minute timer starts when the last egg hits boiling water—even 10 seconds extra can turn that perfect yolk into sad, rubbery disappointment. Always use a timer and transfer eggs immediately to the ice bath to stop cooking instantly.
Can I make these eggs ahead of time?
Yes, but with a trick! Cook them fresh and store in their shells in an airtight container in the fridge for up to 24 hours. Reheat by placing in warm water for 10 seconds before serving. The ice bath preserves texture, but reheating will slightly firm the yolk. Best enjoyed fresh, though!
What’s the best way to peel these eggs?
After the ice bath, gently tap eggs on a hard surface to crack shells all over, then roll between palms. For stubborn shells, peel under cool running water—the temperature contrast helps separate them cleanly. Fresh eggs peel easier than older ones, so always use the freshest you can find!
Can I use this method for brown eggs?
The technique works perfectly with brown eggs—they just might have slightly thicker shells. The cooking time remains the same (3 minutes), but you may need to tap harder when peeling. Brown eggs often have richer yolks, making them ideal for this method.
How do I adjust for high-altitude cooking?
At elevations above 3,000 feet, water boils at lower temperatures, which can affect cooking time. Reduce cooking time by 15-30 seconds and test one egg first. The ice bath remains equally important to stop cooking instantly. For extreme altitudes, consider using a pressure cooker for more precise control.

- 77 Texas BBQ Taco Sauce Recipe: Smoky Chipotle Heat With Caramelized Depth - October 19, 2026
- 1930’s Chocolate Cake Recipe: Vintage Richness With Vanilla Bean Swirls - October 19, 2026
- 6 Ingredient Bread Recipe: No-Knead Wonder With Pantry Staples - October 19, 2026