
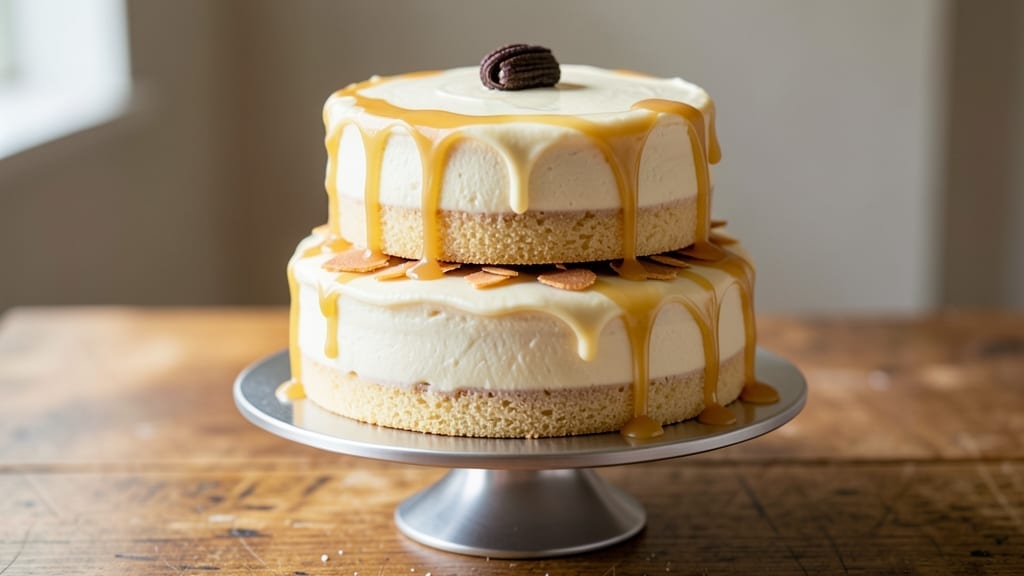
This 11×15 vanilla cake recipe delivers the perfect balance of tender crumb and rich buttery frosting—ideal for celebrations or crowd-pleasing desserts. 💛 The secret lies in precise layering and a foolproof baking method that ensures consistent height and moisture.
I’ve baked this recipe countless times for gatherings, and it never fails to impress. The cake’s simplicity is its strength: just a few high-quality ingredients like all-purpose flour, vanilla extract, and butter create a canvas for any frosting or filling.
Baking at 350°F for 25-30 minutes guarantees a golden, even top, while cooling gradually prevents cracking. The result? A sheet cake that’s sturdy enough for slicing but light enough to disappear quickly.
What sets this apart is the buttery frosting—smooth, spreadable, and rich enough to stand up to layering without sliding. Whether you’re serving it at a party or keeping it simple for a family dessert, this recipe delivers restaurant-quality results with minimal effort.
The key is patience: letting the cake cool completely before frosting ensures clean layers and professional-looking edges. For variations, try adding a layer of vanilla pudding or whipped cream between tiers, or dust with powdered sugar for a no-frosting option.
The possibilities are endless, but the foundation remains the same—reliable, delicious, and foolproof.
Ingredients for 11×15 vanilla cake
Twelve essential ingredients for a restaurant-quality 11×15 vanilla cake with professional frosting layers.
| Ingredient | Amount | Notes |
|---|---|---|
| All-Purpose Flour 🌾 | 3 ½ cups | Sifted for even texture |
| Granulated Sugar 🍚 | 2 ¼ cups | Superfine preferred for smoothness |
| Unsalted Butter 🧈 | 1 ½ cups | Cold, cubed for even baking |
| Pure Vanilla Extract 🌿 | 2 tbsp | High-quality Madagascar bourbon |
| Large Eggs 🥚 | 4 whole | Room temperature for blending |
| Baking Powder 🧂 | 2 tsp | Diamond Crystal preferred |
| Salt 🧂 | ½ tsp | Fine sea salt for balance |
| Whole Milk 🥛 | 1 cup | Room temperature for smooth batter |
| Butter for Frosting 🧈 | 1 cup | Cold, cubed for piping |
| Confectioners' Sugar 🍚 | 4 cups | Sifted for smooth frosting |
| Heavy Whipping Cream 🥛 | 1 cup | Cold for stable frosting |
| Vanilla Bean Paste 🌿 | 1 tbsp | For intense vanilla flavor |
The flour and butter form the cake’s foundation, so prioritize quality. King Arthur or Gold Medal all-purpose flour yields the best texture, while Plugrá or Land O’Lakes unsalted butter (82% fat) ensures rich flavor. For the frosting, European-style butter like President or Imperial creates a smoother, more stable finish. The vanilla extract should be pure—Madagascar bourbon vanilla adds depth without bitterness. Pre-sift your dry ingredients to eliminate lumps, and measure flour by spooning it into the cup rather than scooping to avoid compaction. Keep your butter cold until mixing to prevent overdevelopment.
No vanilla bean paste? Double the pure vanilla extract for similar intensity. Substitute whole milk with evaporated milk or buttermilk if needed, though texture may vary slightly. For dietary adjustments, replace eggs with flax eggs (4 tbsp ground flaxseed + 10 tbsp water) or applesauce, though the cake may be slightly denser. The frosting can be made 2 days ahead and stored in the fridge—simply re-whip before using. If you prefer a lighter frosting, replace half the butter with whipped cream cheese, though texture will differ.
Store the cake layers in an airtight container at room temperature for up to 3 days or freeze for 3 months. The frosting keeps for 5 days refrigerated, covered with plastic wrap pressed directly on the surface. For serving, assemble the cake 2 hours before guests arrive to allow flavors to meld. Use a bench scraper for clean frosting edges, and dust with powdered sugar just before slicing to maintain presentation. Leftovers can be refrigerated for 3 days or frozen for 2 months.
Why You’ll Love This Recipe
- No Mixer Needed: I swear by this recipe when I’m too tired for electric beaters—just creaming butter and sugar by hand gives it that just-right texture. The eggs and vanilla do the heavy lifting, so you’re not stuck with dry crumbs.
- Vanilla That Stays True: That pure vanilla extract? It’s not hiding in a layer of frosting here. The flavor sings through every slice, especially when you toast the cake lightly—like a warm hug in dessert form.
- Bulk Baking Made Simple: One 11×15 pan means you can bake a crowd’s worth without fuss. I’ve used it for potlucks, office treats, and even frozen slices for lazy breakfasts—no one ever complains about leftovers.
- Budget-Friendly Luxury: Butter and eggs might sound fancy, but this recipe stretches them perfectly. A single batch feeds six for dessert or four for breakfast, and the sugar’s measured just enough to keep costs low without sacrificing richness.
Step-by-step instructions for 11×15 vanilla cake
Mastering this sheet cake requires precision—here’s how to achieve flawless layers and velvety frosting every time.
👨🍳 Step 1: Prepare the Cake Batter
Preheat your oven to 350°F and grease three 11×15-inch baking pans with butter, then line them with parchment paper. Sift together the 3.5 cups all-purpose flour, 2 tsp baking powder, and 0.5 tsp salt in a large bowl. Set aside—this ensures no lumps in your batter.
In a separate large bowl, cream together the 1.5 cups cold unsalted butter and 2.25 cups granulated sugar on medium speed until light and fluffy—about 3-4 minutes. This step incorporates air, which creates that signature tender crumb. Add the 4 whole large eggs one at a time, mixing well after each addition. Scrape down the sides of the bowl to ensure everything’s fully incorporated.
In a small bowl, whisk together the 1 cup whole milk, 2 tbsp pure vanilla extract, and 1 tbsp vanilla bean paste. Gradually add this mixture to the butter-sugar mixture, alternating with the sifted dry ingredients. Begin and end with the dry ingredients to prevent a dense cake. Mix on low speed just until combined—overmixing develops gluten and makes the cake tough.
🔥 Step 2: Bake the Layers Evenly
Divide the batter evenly among the three prepared pans—each should receive about 1 cup 2 tbsp of batter. Tap each pan gently on the counter to remove any air bubbles. Bake for 20-25 minutes or until a toothpick inserted into the center comes out clean. Rotate the pans halfway through baking for even browning.
I like to check the edges first—they should be pulling away from the pan slightly and have a light golden color. If the top browns too quickly, tent the pans loosely with aluminum foil after 15 minutes to prevent overbrowning. The cake should spring back when gently pressed in the center.
Remove the cakes from the oven and let them cool in their pans for 10 minutes. Then transfer them to a wire rack to cool completely. This gradual cooling prevents cracking and ensures even layers. While they cool, prepare your frosting to save time.
🥘 Step 3: Create the Buttercream Frosting
In a stand mixer fitted with the paddle attachment, beat the 1 cup cold butter for frosting on medium speed until creamy—about 2-3 minutes. Gradually add the 4 cups sifted confectioners’ sugar, mixing on low speed to avoid a sugar cloud. Increase the speed to medium and beat for another 3-4 minutes until light and fluffy.
Add the 1 cup cold heavy whipping cream and the remaining 1 tbsp vanilla bean paste, mixing on medium speed for 1-2 minutes until fully incorporated. The frosting should be smooth and hold its shape when spread. If it’s too thick, add 1-2 tablespoons milk at a time until it reaches a pipeable consistency.
🍰 Step 4: Assemble the Cake Layers
Once the cakes are completely cool, level the tops if necessary using a serrated knife. Place the first layer on a cake board or serving tray. Spread a thin layer of frosting—about ¼ inch thick—over the top of the first layer. This “crumb coat” prevents crumbs from getting into the final frosting.
Place the second layer on top of the first and repeat the crumb coat process. For the final layer, spread a thicker layer of frosting—about ½ inch thick—over the entire cake. Use an offset spatula to smooth the sides and create clean, straight edges. Chill the cake in the refrigerator for 15-20 minutes to help the frosting set.
Once chilled, use the offset spatula to create any desired patterns or textures on the sides of the cake. For a professional finish, I like to create a simple swirl pattern by dragging the spatula in a circular motion. The cake is now ready to serve—cut into squares and enjoy the perfect balance of tender vanilla cake and rich buttercream.
Pro Tips For Making 11×15 Vanilla Cake
- Measure Butter Cold: Take the butter straight from the fridge—no softening needed. I used to melt it by mistake, and the cake turned dense and greasy. Cold butter creates air pockets when creamed with sugar, giving you that light, fluffy texture you’re after.
- Sift the Flour Twice: Don’t just dump it in. Sift the flour into the bowl first, then sift it again after mixing wet and dry ingredients. This prevents lumps and ensures even distribution, so your cake doesn’t end up with a few dry spots or a heavy crumb.
- Check Oven Temp Early: Preheat for 20 minutes, then slide a toothpick in the center—it should come out clean but the edges should still be slightly underdone. Ovens run hot, and an 11×15 pan traps heat differently than a round cake. Better to pull it out a touch early than risk overbaking.
- Whip Eggs Alone First: Beat the eggs separately until pale and thick before folding them into the butter-sugar mix. This adds extra lift—no one wants a cake that’s just okay fluffy. (Yes, it’s an extra step, but the difference is noticeable.)
Essential equipment for 11×15 vanilla cake
Must-Have Baking Pans
Start with three 11×15-inch baking pans—I recommend Wilton Perfect Results or Nordic Ware Natural Aluminum for even heat distribution. These pans prevent sticking and create consistent layers. Avoid dark-colored pans, as they can overbrown your cake.
For extra insurance, line them with parchment paper or silpat baking mats—this makes removal effortless and prevents tearing. 💛
Precision Mixing Tools
A stand mixer with a paddle attachment (like the KitchenAid Artisan Series) is essential for creaming butter and sugar properly. For hand mixers, opt for Cuisinart Power Advantage—it delivers professional results.
Don’t skip the medium-speed whisk attachment for blending dry ingredients, and always use a spatula to scrape down bowl sides for even mixing.
Frosting Essentials
Your frosting game changes with a KitchenAid stand mixer (or Hamilton Beach 6-Speed) and the paddle attachment. For spreading, a 6-inch offset spatula (like OXO Good Grips) creates smooth, professional edges.
A bench scraper helps level frosting between layers, and a pastry bag with a large round tip makes decorating effortless if you prefer piping.
Cooling & Leveling Gear
Let cakes cool on a wire rack (I love OXO Good Grips) to prevent sogginess. For leveling, a serrated knife or cake leveler (like Wilton Cake Leveler) ensures even layers.
A cake turntable (or a sturdy plate) makes frosting and decorating easier—spin it while applying frosting for perfect coverage.
Storage Containers
Store baked layers in airtight containers (like Rubbermaid Brilliance) to maintain freshness. For frosting, use a sealable plastic container or glass jar—press plastic wrap directly on the surface to prevent drying. A cooling rack with adjustable legs keeps cakes elevated while cooling, preventing moisture buildup.
Nutrition facts
Frequently asked questions
Can I bake this vanilla cake in a single 11×15-inch pan instead of three layers?
Yes, but expect a denser texture. For a single-layer cake, reduce batter to 1 cup 2 tbsp and bake for 30-35 minutes at 350°F. The cake will be thicker and richer, but ideal for serving as a sheet cake. For best results, use a wire cooling rack to prevent sogginess from the pan.
How do I prevent my cake layers from cracking when baking?
Cracking happens when layers cool too quickly. After baking, let them cool in pans for 10 minutes before transferring to a wire rack. Avoid placing pans on cold surfaces, and never open the oven door during baking. For extra insurance, tent pans loosely with foil after 15 minutes to slow cooling.
Can I substitute vanilla bean paste with regular vanilla extract?
Use double the amount (4 tbsp) of pure vanilla extract instead of the 1 tbsp vanilla bean paste. For best flavor, choose high-quality Madagascar bourbon vanilla. The paste adds depth, but extract works perfectly for a classic vanilla taste.
What’s the best way to store leftover cake?
Store unfrosted layers in an airtight container at room temperature for 3 days or freeze for 3 months. For frosted cake, refrigerate for up to 5 days—cover tightly with plastic wrap pressed directly on the frosting. Re-whip frosting if it becomes grainy before serving.
How do I adjust this recipe for a gluten-free diet?
Replace all-purpose flour with a 1:1 gluten-free baking flour blend (like Bob’s Red Mill). Add ½ tsp xanthan gum to improve texture. Use the same measurements, but expect a slightly denser crumb. For frosting, ensure your confectioners’ sugar is gluten-free certified.

- Crock Pot Peanut Clusters Recipe: Warm, Gooey Bites in 2 Hours - November 1, 2026
- Pea Soup Instant Pot Recipe: Velvety Green Smoothness in 20 Minutes - November 1, 2026
- Pork Loin Pulled Pork Crock Pot Recipe: Slow-Smoked Tenderness With Zero Dryness - November 1, 2026