
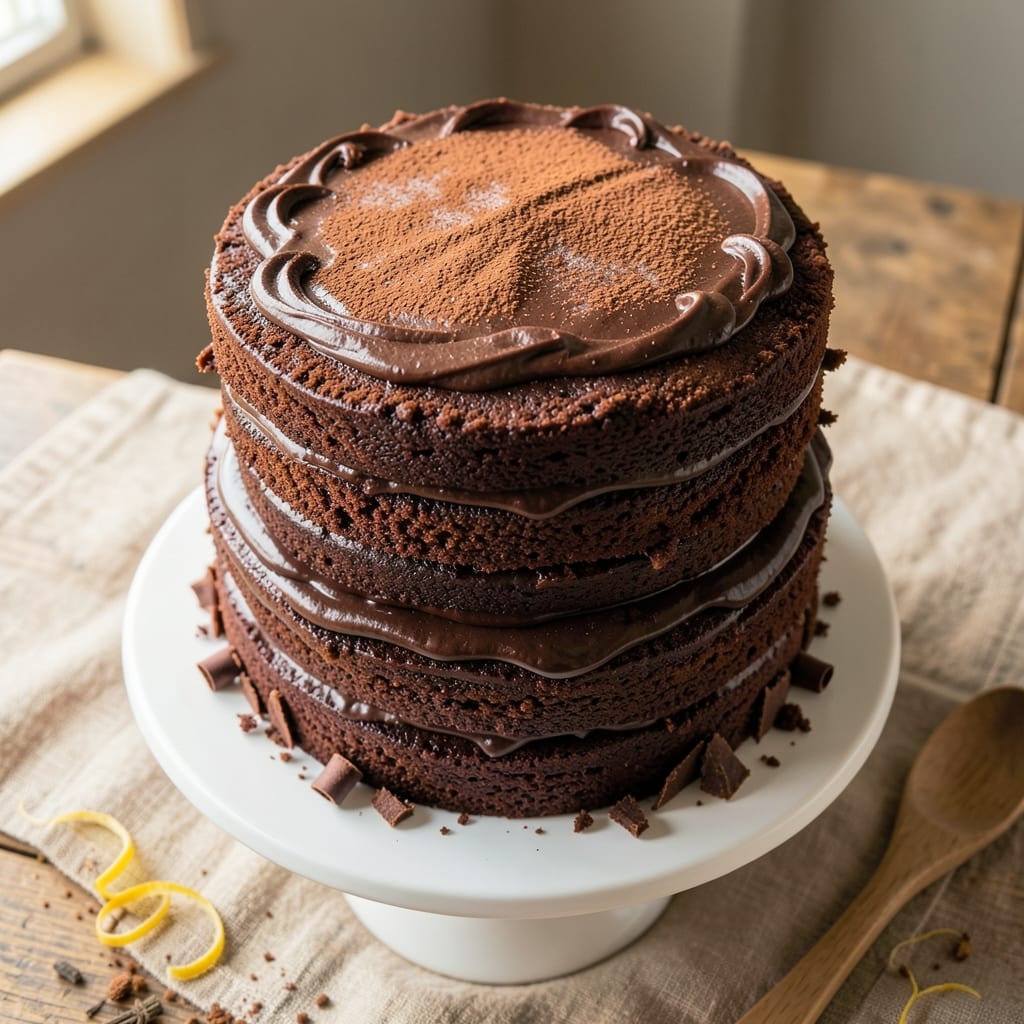
A 12-inch chocolate cake with triple layers and a rich ganache drizzle is the showstopper every celebration deserves. This recipe delivers restaurant-quality height and texture, perfect for birthdays, anniversaries, or simply indulging your sweet tooth. The secret lies in precise layering and a velvety ganache that ties everything together beautifully.
What sets this cake apart is the foolproof technique for achieving even layers and a moist, tender crumb. With just a few simple ingredients and one hour of active time (plus cooling), you’ll create a cake that looks impressive yet is surprisingly straightforward to make.
The ganache drizzle adds that professional touch without requiring advanced skills.
By the time you’re done, you’ll have a towering, decadent cake with crisp edges, a fudgy interior, and a glossy ganache that drizzles down the sides. Each slice reveals layers of chocolate perfection—rich, moist, and irresistibly sweet. This is the kind of dessert that makes every occasion feel special.
The best part? This recipe scales easily for gatherings or can be halved for smaller celebrations. Whether you’re a seasoned baker or just starting out, these instructions will guide you to a restaurant-quality result every time. Let’s get baking!
Ingredients for 12 chocolate cake
Twelve simple ingredients transform into a towering, restaurant-quality triple-layered chocolate cake with velvety ganache.
| Ingredient | Amount | Notes |
|---|---|---|
| Unsalted Butter 🧈 | 1 ½ cups | Cold, cubed for easier mixing |
| Granulated Sugar 🍚 | 2 ½ cups | Superfine preferred for smooth texture |
| Unsweetened Cocoa Powder 🍫 | ¾ cup | Natural or Dutch-processed |
| All-Purpose Flour 🌾 | 2 ½ cups | Sifted for light layers |
| Large Eggs 🥚 | 6 whole | Room temperature for even mixing |
| Baking Powder 🧂 | 1 tbsp | Aluminum-free for stability |
| Salt 🧂 | ½ tsp | Fine sea salt preferred |
| Vanilla Extract 🌿 | 2 tsp | Pure Madagascar preferred |
| Milk 🥛 | 1 cup | Whole milk for richness |
| Dark Chocolate Chips 🍫 | 1 ½ cups | 70% cocoa minimum |
| Heavy Whipping Cream 🥛 | 1 ½ cups | Full-fat for ganache |
| Semisweet Chocolate Chunks 🍫 | 1 cup | High-quality for ganache |
The cocoa powder and chocolate chips make all the difference here. Valrhona or Ghirardelli are my go-to brands for that deep, rich chocolate flavor—don’t skimp on quality. The butter should be cold when you start, so pull it out of the fridge just before measuring. For the eggs, room temperature is key; they’ll mix more smoothly and create lighter layers. If you’re using supermarkets, Trader Joe’s has great cocoa powder and chocolate chips at reasonable prices. The vanilla extract? Madagascar bourbon has the most complex flavor profile, but pure vanilla will work just fine.
No cocoa powder? Melted dark chocolate plus extra flour works in a pinch (use 3 oz melted chocolate + 1 tbsp flour per 1/4 cup cocoa). Running short on eggs? Flax eggs (1 tbsp ground flaxseed + 3 tbsp water = 1 egg) keep the cake moist. The chocolate chips can be swapped for chopped chocolate bars—just chop them yourself for better texture. For the ganache, high-quality chocolate (60-70% cocoa) is non-negotiable. Those cheap grocery store brands make a grainy, bitter mess. If you can’t find full-fat heavy cream, whipped coconut cream works too for a dairy-free version.
Store the cake layers wrapped tightly in plastic wrap in the fridge for up to 3 days—they actually taste better the next day as the flavors meld. For longer storage, freeze the assembled cake (without ganache) for up to 3 months. The ganache keeps separately in the fridge for 1 week—just reheat gently before drizzling. Pro tip: Assemble the cake on a wire rack over a baking sheet to catch any ganache drips, making cleanup a breeze. This cake is worth the extra effort—every slice will be a showstopper.
Why You’ll Love This Recipe
- Foolproof Mixing: I swear by this method—just cream the butter and sugar until it’s light, then fold in the eggs one at a time. No overmixing, no lumps, just effortless cake batter. Even if you’re not a baker, this recipe forgives mistakes.
- Rich Without Bitterness: That unsweetened cocoa powder? It’s the star. The butter and sugar balance it perfectly—deep, velvety chocolate flavor without the harsh aftertaste. Honestly, it’s the kind of cake that makes store-bought look sad.
- Birthday or Breakfast: Slice it for a birthday party, or grab a fork straight from the pan for a midnight craving. The texture holds up whether you’re serving it warm or chilled, and the eggs give it enough structure to handle frosting or fruit.
- Budget-Friendly Leftovers: A single batch feeds six, but it lasts ages in the fridge. Between us, I’ve had this cake for lunch three days in a row—still moist, still delicious. Plus, you’re using pantry staples, not specialty ingredients.
Step-by-step instructions for triple-layered chocolate cake
Here’s how to build a towering, moist chocolate cake with perfect layers and glossy ganache.
Prepare the Cake Batter
Preheat your oven to 350°F and grease three 12-inch round cake pans with nonstick spray, then line the bottoms with parchment paper. In a large mixing bowl, combine the 1.5 cups unsalted butter and 2.5 cups granulated sugar using a hand mixer on medium speed. Beat until the mixture is light and fluffy, about 3-4 minutes. This step incorporates air, which creates a tender crumb.
In a separate bowl, whisk together the 2.5 cups all-purpose flour, 0.75 cup unsweetened cocoa powder, 1 tbsp baking powder, and 0.5 tsp salt. Gradually add this dry mixture to the butter-sugar mixture, alternating with the 6 whole large eggs and 1 cup milk. Begin and end with the dry ingredients to ensure even distribution. Mix on low speed until just combined—overmixing can make the cake dense.
Add the 2 tsp vanilla extract and fold in the 1.5 cups dark chocolate chips by hand. Divide the batter evenly among the prepared cake pans. Tap each pan gently on the counter to release any air bubbles and ensure the batter settles evenly. Bake for 25-30 minutes, or until a toothpick inserted into the center comes out clean. Let the cakes cool in the pans for 10 minutes before transferring to a wire rack to cool completely.
Create the Chocolate Ganache
While the cakes cool, prepare the ganache by combining the 1.5 cups heavy whipping cream and 1 cup semisweet chocolate chunks in a medium saucepan. Heat over low heat, stirring gently until the chocolate melts completely and the mixture becomes smooth. Remove from heat and let it sit for 5 minutes to thicken slightly. The ganache should coat the back of a spoon but still be pourable—this consistency ensures it drizzles beautifully without sliding off.
If the ganache thickens too much, stir in 1-2 teaspoons of hot cream to loosen it. For extra shine, strain the ganache through a fine-mesh sieve to remove any lumps. This step is crucial for achieving that glossy, professional finish that makes the cake look as decadent as it tastes.
Assemble the Triple-Layered Cake
Once the cakes are completely cool, place the first layer on a cake stand or plate. Level the top if necessary using a serrated knife. Spread a thin layer of the ganache over the top of the first cake layer—this helps the filling adhere and prevents crumbs. Place a second layer on top and repeat the process, spreading another thin layer of ganache before adding the final layer.
For the sides, pour the remaining ganache into a piping bag fitted with a large star tip or a zip-top bag with a small corner snipped off. Pipe the ganache in a zigzag pattern over the sides of the cake, allowing it to drip slightly down the edges. Use a spatula to smooth the ganache and create a clean, even finish. Chill the cake in the refrigerator for 1 hour to set the ganache completely.
Serve and Enjoy
Once the ganache is fully set, remove the cake from the refrigerator and let it sit at room temperature for 10-15 minutes before serving. This brief rest ensures the ganache drizzles smoothly when sliced. Cut into 12 equal wedges and serve immediately for the best texture and flavor. The cake will keep well in the refrigerator for up to 3 days, covered tightly with plastic wrap.
The result is a towering, triple-layered chocolate cake with a moist, fudgy crumb and a glossy, decadent ganache drizzle. Each bite delivers rich chocolate flavor balanced by the smooth, creamy ganache—perfect for celebrations or indulgent dessert cravings.
Pro Tips For Making 12 Chocolate Cake
- Whisk Butter & Sugar Foamy: Beat the butter and sugar until it’s pale and thick—like mayonnaise, not just creamy. I learned this the hard way: skipping the extra 2-3 minutes leaves a cake that’s dense instead of light. (Yes, even if you’re impatient like me.)
- Sift Cocoa, Don’t Dump: Sift the cocoa powder twice—once before mixing, once after—into the dry ingredients. Unsifted cocoa packs like dirt, creating lumps that ruin texture. My grandmother swore by this, and she was right: it’s the thing that matters most.
- Room-Temp Eggs Only: Cold eggs from the fridge will curdle your batter. Pop them in warm water for 5 minutes first—just enough to bring them to room temp. I was skeptical until I tried it: the batter stays smooth, and the cake rises better.
- Bake Until Springy: Check for doneness with a toothpick, but don’t stop there—press the center gently. It should spring back slowly, not bounce. Overbaking dries out chocolate cake, and underbaking leaves it gummy. (Your future self will thank you.)
Troubleshooting this dish
Cracked Cake Layers
If your cake layers crack while baking, it’s usually from uneven heat distribution or opening the oven too soon. I’ve found that rotating pans halfway through baking helps—place the middle pan on the top rack and switch positions at the 15-minute mark.
Also, never open the oven door before the 20-minute mark, as temperature fluctuations cause cracks. For extra insurance, preheat your pans in the oven for 5-10 minutes before adding batter. 🔥
Dense or Dry Texture
A dense or dry cake often means overmixing or incorrect ingredient ratios. I’ve learned to mix the batter just until combined—stop as soon as the flour disappears. If your cake turns out dry, try adding 1-2 tablespoons of milk or melted butter to the batter before baking.
For extra moisture, brush the layers with simple syrup (equal parts sugar and water, heated until dissolved) before assembling. 💧
Ganache Issues
If your ganache seizes up or looks grainy, it’s likely from overheating or low-quality chocolate. Always heat the cream on low heat and remove it as soon as the chocolate melts. For a smoother finish, strain the ganache through a fine-mesh sieve before using.
If it’s too thick, warm it gently with 1 teaspoon of hot cream. Pro tip: Use Valrhona or Ghirardelli chocolate—cheaper brands often cause graininess. ✨
Uneven Layers
Uneven layers happen when the batter isn’t divided equally or the cakes cool unevenly. I weigh my pans before and after adding batter to ensure perfect distribution. For cooling, place the pans on a wire rack for 10 minutes, then transfer to a cooling rack completely.
If one layer is thicker, trim the top with a serrated knife before assembling. This ensures clean, even slices. 💡
Ganache Sliding Off
If your ganache drips too much or slides off the sides, it’s either too thin or the cake layers aren’t stable. Let the ganache thicken for 5-10 minutes before piping—it should coat the back of a spoon but still be pourable.
For extra grip, chill the cake layers for 10 minutes before adding ganache. If the cake wobbles, place it on a wire rack over a baking sheet to catch drips while setting in the fridge. 🍫
Baking Time Variations
Oven temperatures can vary, so always check your cake at the 25-minute mark—it’s done when a toothpick comes out clean. If your oven runs hot, reduce the temperature to 325°F and bake for 35-40 minutes.
For convection ovens, reduce the temperature by 25°F and bake for 20-25 minutes. Keep an eye on it, and never rely solely on the timer! ⏰
Nutrition facts
Frequently asked questions
Can I make this cake in a 9-inch pan instead of 12-inch?
Yes, but you’ll need to adjust the baking time and layers. For a 9-inch pan, bake for 30-35 minutes at 350°F and use 2/3 of the batter per pan. You’ll end up with shorter layers, so consider making extra batter to maintain the triple-layer effect. The ganache quantity can stay the same since it’s spread thin between layers.
How do I store leftover cake?
Wrap the entire cake tightly in plastic wrap and store it in the refrigerator for up to 3 days. For longer storage, freeze the assembled cake (without ganache) for up to 3 months. Keep the ganache separately in the fridge for 1 week—just reheat it gently before drizzling. The cake actually tastes better the next day as flavors meld!
Can I substitute cocoa powder with melted chocolate?
Yes, but you’ll need to adjust the recipe. Replace 1/4 cup cocoa powder with 3 oz melted dark chocolate plus 1 tbsp extra flour to maintain structure. For best results, use high-quality chocolate (70% cocoa or higher) and strain any lumps before adding to the batter. The texture will be slightly richer but still delicious.
Why does my ganache sometimes seize up?
This happens when the ganache cools too quickly or contains too much fat. Always heat the cream on low heat and remove it as soon as the chocolate melts completely. Let it sit for 5 minutes to thicken naturally. For extra smoothness, strain through a fine-mesh sieve and avoid using chocolate with high fat content.
How can I make this cake gluten-free?
Replace the all-purpose flour with a 1:1 gluten-free baking flour blend (like Bob’s Red Mill) and add 1/2 tsp xanthan gum to improve structure. Use the same measurements for other ingredients. For best results, let the batter rest for 10 minutes before baking to hydrate the gluten-free flour properly.

- Baked Potatoes in Crock Pot Recipe: Buttery Interiors and Crispy Top Magic - November 1, 2026
- Braised Beef Short Ribs Recipe: Crock Pot Fall-Off-Bone Magic in 6 Hours - November 1, 2026
- Crock Pot Cocoa Recipe: Velvety Warmth With Hidden Spice Magic - November 1, 2026