
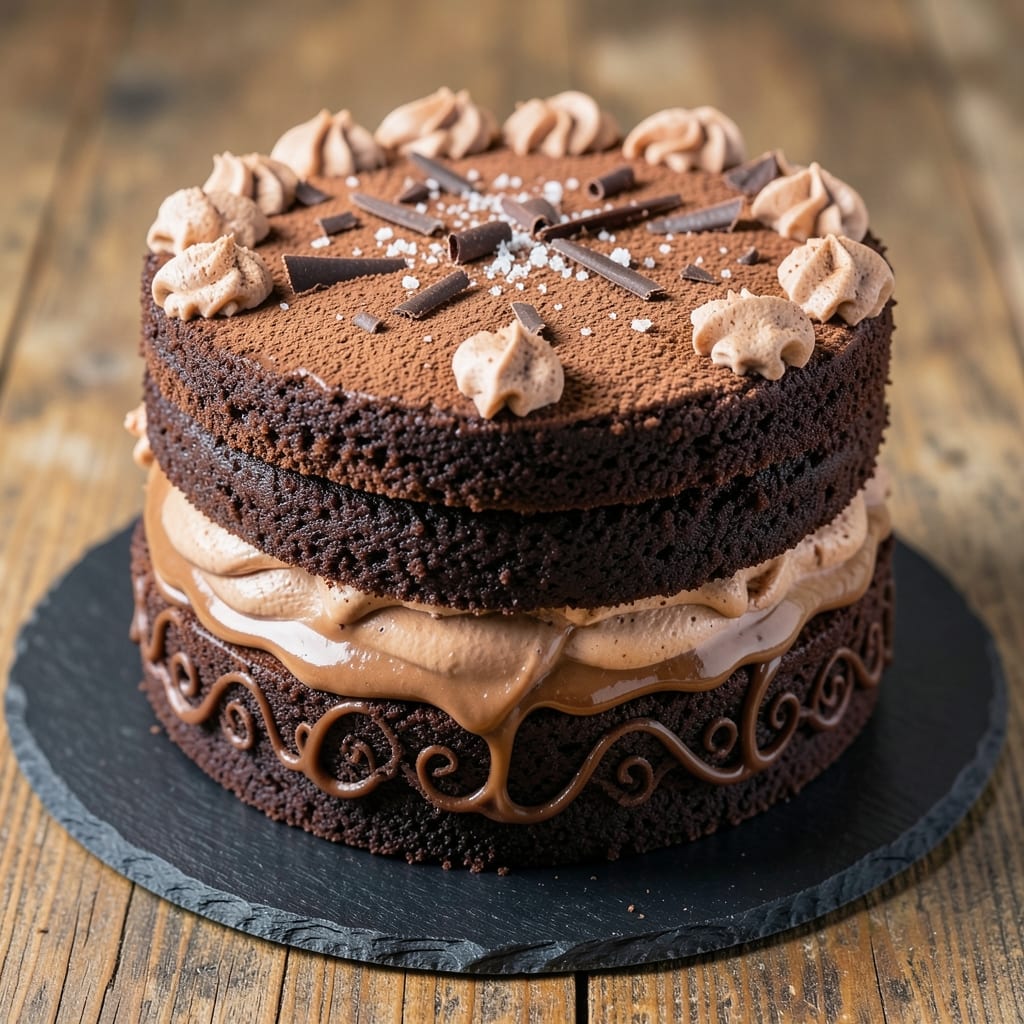
This 3-layer 9-inch chocolate cake recipe delivers the perfect balance of textures—fudgy bottom layers, light-as-air middle, and rich ganache frosting—that’ll make you the star of any dessert table. 💫 The secret lies in precise baking times and a carefully layered assembly that keeps each component distinct yet harmonious. I’ve baked this cake for countless gatherings, and it never fails to impress, even with home bakers. The foundation starts with two fudgy layers baked just until set, then cooled before adding a fluffy cream cheese filling that adds height and tang. While the filling sets, you’ll make a decadent dark chocolate ganache that’s smooth, glossy, and easy to pipe. The key? Patience—letting each layer cool completely prevents soggy results, and the ganache must be at the right temperature to set properly without cracking. By the time you’re done, you’ll have a showstopping cake with a glossy ganache top, crisp edges, and a texture that changes with every bite. The fudgy layers provide depth, the cream cheese filling adds lightness, and the ganache ties it all together with its velvety richness. This is the kind of dessert that makes people ask for the recipe—and then beg for seconds. Whether you’re celebrating a birthday, holiday, or just treating yourself, this cake is restaurant-quality without the fuss. Ready to bake? Here’s everything you need to create it from start to finish.
Ingredients for 3 layer 9 inch chocolate cake
These 15 ingredients create a showstopping 3-layer chocolate cake with perfect fudgy layers and velvety ganache.
| Ingredient | Amount | Notes |
|---|---|---|
| All-Purpose Flour 🌾 | 2 ½ cups | Sifted for light texture |
| Unsweetened Cocoa Powder 🍫 | ¾ cup | Natural or Dutch-processed |
| Granulated Sugar 🍚 | 2 cups | Superfine preferred for smoothness |
| Light Brown Sugar 🍚 | ½ cup | Packed for moisture |
| Baking Powder 🧂 | 1 ½ tsp | Aluminum-free for best results |
| Salt 🧂 | ½ tsp | Fine sea salt preferred |
| Instant Espresso Powder ☕ | 1 tbsp | Enhances chocolate depth |
| Large Eggs 🥚 | 2 whole | Room temperature for even baking |
| Unsalted Butter 🧈 | 1 ½ cups | Softened to room temperature |
| Whole Milk 🥛 | ¾ cup | Room temperature for smooth batter |
| Vanilla Extract 🌿 | 2 tsp | Pure Madagascar preferred |
| Cream Cheese 🧀 | 8 oz | Room temperature for filling |
| Powdered Sugar 🍚 | 2 cups | Sifted for smooth filling |
| Heavy Cream 🥛 | 1 cup | Cold for stable ganache |
| Dark Chocolate Bars 🍫 | 12 oz | 70% cacao, chopped finely |
The cocoa powder is everything here—Valrhona or Guittard are my go-tos, but any high-quality brand works. Look for natural cocoa if you want that rich, rustic flavor, or Dutch-processed for smoother results. The instant espresso powder might seem odd, but trust me, it deepens the chocolate flavor without tasting like coffee. For the butter, Plugrá or Land O’Lakes unsalted are reliable, but any brand works as long as it’s softened properly. Room-temperature eggs and milk are non-negotiable—they make all the difference in texture. I always grab extra vanilla extract since it’s so versatile in baking.
No instant espresso powder? 1 tsp strong brewed coffee works in a pinch, but reduce the milk by 1 tbsp to keep the batter balanced. Dutch-processed cocoa? Swap for natural cocoa and add 1/4 tsp baking soda to the recipe. The cream cheese filling can be made ahead—just whip it up and refrigerate for up to 3 days. For the ganache, heavy whipping cream is ideal, but half-and-half works too if you’re watching calories. The dark chocolate bars should be at least 70% cacao—Ghirardelli or Lindt are my favorites, but any good-quality brand will do. Chop them into tiny pieces so they melt smoothly into the ganache.
This cake keeps beautifully for 5 days in the fridge, covered tightly with plastic wrap. The layers stay moist, but the ganache might firm up slightly—just bring it to room temperature before serving. For make-ahead convenience, bake the layers and filling 2 days ahead, then assemble and refrigerate the cake before adding the ganache. The ganache itself can be made 1 week ahead and stored at room temperature in an airtight container. If you’re freezing the cake, wrap each layer individually in plastic wrap and freeze for up to 2 months. Thaw completely before assembling.
Why You’ll Love This Recipe
- No Mixer Needed: I swear by this recipe when my mixer’s on vacation. The dry ingredients—just flour, cocoa, and baking powder—get folded in by hand, and the brown sugar keeps the texture tender without overworking it. Five minutes of stirring, and you’re done.
- Rich Without Bitterness: That light brown sugar? It’s the secret. It balances the cocoa powder so the cake isn’t overpowering—just deep, fudgy layers with a subtle caramel note. Honestly, it’s the kind of chocolate cake that makes you close your eyes when you take a bite.
- Party in a Box: Slice it for birthdays, stack it for anniversaries, or serve it at 3 PM on a Tuesday. The 9-inch layers are perfect for sharing—no one feels shortchanged, and leftovers? They disappear faster than my willpower around chocolate.
- Budget-Friendly Luxury: Flour, sugar, cocoa—these are pantry staples that won’t break the bank. I’ve made this cake for 12 people for under $10, and it still tastes like a bakery’s best. Plus, the recipe scales down easily for smaller gatherings.
Step-by-step instructions for building a 3-Layer chocolate masterpiece
Here’s how to create layers that balance fudgy density, airy tenderness, and velvety ganache.
👨🍳 Step 1: Prepare the Fudgy Bottom Layer
Preheat your oven to 350°F and grease three 9-inch round pans with butter, then dust with cocoa powder. In a stand mixer, beat the 1.5 cups unsalted butter and 2 cups granulated sugar on medium speed for 3-4 minutes until light and fluffy. This creaming process incorporates air that will create that signature fudgy texture.
Add the 2 whole eggs one at a time, mixing well after each addition. In a separate bowl, whisk together the 2.5 cups all-purpose flour, 0.75 cup unsweetened cocoa powder, 1.5 tsp baking powder, 0.5 tsp salt, and 1 tbsp instant espresso powder. Sift this dry mixture into the butter mixture in three additions, alternating with 0.75 cup whole milk beginning and ending with the dry ingredients. Mix just until combined—don’t overmix.
Divide the batter evenly among the three prepared pans. Bake for 25-30 minutes until a toothpick inserted in the center comes out with moist crumbs (not wet batter). Let the layers cool in the pans for 10 minutes before transferring to a wire rack to cool completely. This gradual cooling prevents cracking when you stack them later.
👨🍳 Step 2: Create the Fluffy Middle Layer
While the bottom layers cool, prepare the cream cheese filling. In a medium bowl, beat the 8 oz cream cheese and 2 cups powdered sugar together until smooth and creamy. Add the 2 tsp vanilla extract and mix until fully incorporated. This filling needs to be perfectly smooth—any lumps will show through the final layers.
For the middle cake layer, reduce the oven temperature to 325°F. In a separate bowl, whisk together 1.5 cups unsalted butter (softened), 1 cup granulated sugar, and 0.5 cup light brown sugar until light and fluffy. Add the 2 whole eggs one at a time, then mix in 1.5 cups all-purpose flour, 0.5 cup unsweetened cocoa powder, 1 tsp baking powder, and 0.25 tsp salt. Fold in 1 tbsp instant espresso powder and 1 tsp vanilla extract.
Spread this lighter batter evenly into one of the prepared pans (you only need one for this layer). Bake for 20-25 minutes until golden on top and springy to the touch. Cool completely before assembling—this layer needs to be firm enough to support the ganache topping without sinking.
🥘 Step 3: Assemble with Cream Cheese Filling
Once all layers are completely cool, place the first fudgy layer on a cake stand or plate. Spread an even layer of the cream cheese filling over the top, leaving about ½-inch border uncovered. Place the fluffy middle layer on top, then spread another layer of cream cheese filling. Finally, place the last fudgy layer on top, pressing gently to ensure good contact.
Here’s the thing—don’t rush this assembly. Each layer should be level and the filling should be spread evenly to prevent the cake from toppling. I like to use a long metal spatula to smooth the filling edges and create clean lines. Chill the assembled cake in the refrigerator for 1 hour to let the filling set and the layers adhere properly.
🍳 Step 4: Create the Decadent Ganache Topping
While the cake chills, prepare the ganache. Chop the 12 oz dark chocolate bars into small pieces and place them in a heatproof bowl. In a saucepan, heat the 1 cup heavy cream until it just begins to simmer (don’t boil). Pour the hot cream over the chocolate and let it sit for 2 minutes to soften the chocolate.
Stir gently until the chocolate is completely melted and the mixture is smooth. Let the ganache cool slightly until it reaches a thick but pourable consistency—it should coat the back of a spoon but still flow freely. Pour the ganache over the top of the chilled cake, allowing it to cascade down the sides. Use a spatula to smooth the ganache and create an even, glossy finish.
Return the cake to the refrigerator for 30 minutes to let the ganache set completely. This final chill ensures the ganache will hold its shape and create that professional-looking finish. Once set, your cake is ready to slice and serve—each bite will deliver that perfect balance of fudgy, fluffy, and velvety textures.
Pro Tips For Making 3 Layer 9 Inch Chocolate Cake
- Sift the Cocoa: I learned this the hard way—lumpy cocoa powder is the fastest way to ruin a smooth batter. Use a fine-mesh sieve and tap it gently over the dry ingredients before mixing. That extra 30 seconds saves you from gritty bites in every slice.
- Measure Brown Sugar Wet: Packing brown sugar is a hassle, but skipping it means your cake will be drier. Instead, spoon it directly into the measuring cup, then level with a knife—no need to press. The moisture stays consistent, and your layers stay moist longer.
- Rotate the Pans Midway: After burning the edges of my first batch, I realized my oven’s top rack runs hotter. Swap the cake pans from front to back at the halfway point (usually 15–20 minutes in). This evens out the baking and keeps the centers from staying underdone.
- Chill the Layers: Sounds weird, but it works: let each layer cool for 10 minutes on a wire rack, then refrigerate for 20 minutes before adding frosting. This prevents the buttercream from melting into a sad, runny mess—especially in warm kitchens. (Yes, even if you’re impatient like me.)
Make-ahead tips for this recipe
Cake Layer Prep
Bake your fudgy bottom layers and fluffy middle layer up to 2 days ahead—they keep beautifully wrapped in plastic at room temperature. I always bake mine the day before to let flavors develop fully.
For the middle layer, bake it slightly underdone (about 18-20 minutes) so it stays tender when assembled. Let all layers cool completely before stacking to prevent sogginess. 💫
Filling Prep
The cream cheese filling can be made 3 days ahead and stored in an airtight container in the fridge. Just whip it up, cover tightly, and let it come to room temperature before spreading.
For extra stability, add 1 tsp cornstarch to the powdered sugar mixture—it helps thicken the filling slightly after chilling. I like to pipe mine through a Wilton 1M tip for clean lines when assembling.
Ganache Mastery
Make your ganache 1 week ahead—it actually improves as it ages! Store it in an airtight container at room temperature. To reheat, place the container in a bowl of warm water for 2-3 minutes, then stir until smooth.
For a glossier finish, add ½ tsp lemon juice to the warm cream before pouring over the chocolate. This prevents dulling and gives that restaurant-quality shine. ✨
Full Assembly
Assemble the cake 1 day ahead if you’re planning to decorate it later. Wrap the stacked layers tightly in plastic and refrigerate. The filling will firm up nicely, and the ganache will stay intact.
If you’re adding decorative elements like chocolate shavings or fresh berries, do this right before serving—they look best when fresh. I always dust the top with powdered sugar right after adding ganache for a snowy effect.
Storage Secrets
This cake keeps for 5 days in the fridge, covered tightly. If you need to store it longer, freeze the assembled cake (before ganache) for up to 2 months. Thaw overnight in the fridge, then add the ganache fresh for the best texture.
For serving, bring the cake to room temperature for 30 minutes before slicing—this ensures clean cuts and prevents the ganache from sliding off. 🍰
Nutrition facts
Frequently asked questions
Can I make this cake in a different pan size?
Yes! For a 2-layer 9-inch version, reduce the batter to 2 pans and skip the middle layer. For 8-inch pans, bake at 325°F for 20-25 minutes (they cook faster). Adjust baking times by 2-3 minutes—always check with a toothpick. The key is keeping the layers proportionate to the pan size.
Why does my middle layer turn out dense instead of fluffy?
Overmixing the batter or overbaking are the most common culprits. The middle layer should be golden and springy to the touch—if it’s firm like the bottom layers, you baked it too long. Also, make sure your butter is room temperature and your eggs are at room temp for proper air incorporation.
How do I fix a cracked ganache top?
Ganache cracks when it sets too quickly. To prevent this, let the ganache cool to 100°F before pouring, and chill the cake for 30 minutes in the fridge. If it cracks, simply reheat the ganache gently (microwave 10-second bursts) and smooth it over the top with a spatula. A cracked ganache is still delicious—just less photogenic!
Can I substitute cream cheese filling with something else?
For a lighter option, try raspberry jam or chocolate pudding between layers. For extra richness, swap for dark chocolate ganache (mix 8 oz melted chocolate with 1 cup heavy cream). Just ensure your alternative filling is stable enough to support the top layer without sinking.
How do I level my cake layers perfectly?
Use a serrated knife and a leveling guide (or a ruler). Place the cake on the guide, press down firmly, then slice off the top with quick, even strokes. For extra precision, use a cake leveler (available at baking stores). Always level layers after cooling completely to prevent crumbling.
