
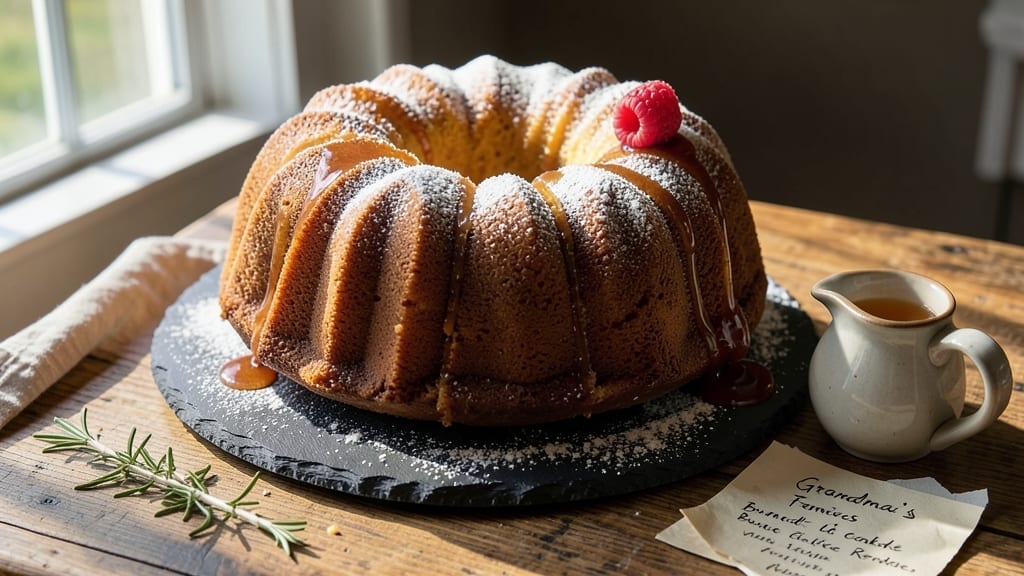
A 12-cup Bundt cake delivers that signature tower of swirled vanilla perfection with a buttery crumb and golden edges that make it impossible to resist. 💛 The secret lies in precise measurements and a gentle baking technique that preserves the cake’s signature rise while keeping the center moist.
This recipe has been refined to guarantee a cake that’s light, tender, and full of those signature swirls that make Bundt cakes legendary.
The foundation of this recipe is a simple yet foolproof batter that balances butter, sugar, and eggs for that classic vanilla flavor without overpowering the delicate texture. Baking at 350°F for 50-60 minutes ensures even cooking while maintaining the cake’s signature dome shape.
The key to success is avoiding overmixing the batter and ensuring your Bundt pan is properly greased and floured to prevent sticking.
Once out of the oven, you’ll be rewarded with a towering cake that’s perfectly golden with those signature swirls visible through the top. The texture is light and tender, with just the right amount of moisture to keep it delicious even the next day.
This cake pairs beautifully with a simple buttercream frosting or a dusting of powdered sugar for an elegant finish.
Perfect for celebrations, family gatherings, or a special treat, this 12-cup Bundt cake is designed to impress with its classic appearance and delicious flavor. Whether you’re a seasoned baker or new to Bundt cakes, this recipe delivers consistent, restaurant-quality results every time.
Ingredients for 12 cup bundt cake
Twelve essential ingredients for that iconic tower of swirled vanilla perfection.
| Ingredient | Amount | Notes |
|---|---|---|
| All-Purpose Flour 🌾 | 2 ½ cups | Sifted for even texture |
| Granulated Sugar 🍚 | 2 cups | Superfine preferred for smoothness |
| Unsalted Butter 🧈 | 1 cup | Softened to room temperature |
| Large Eggs 🥚 | 4 whole | Room temperature for even mixing |
| Pure Vanilla Extract 🌿 | 2 tbsp | High-quality, pure vanilla |
| Baking Powder 🧂 | 2 tsp | Aluminum-free for consistent rise |
| Salt 🧂 | ½ tsp | Fine sea salt preferred |
| Milk 🥛 | 1 cup | Whole milk for richness |
| Powdered Sugar 🍚 | 2 cups | For buttercream frosting |
| Heavy Cream 🥛 | ½ cup | Cold for whipped buttercream |
| Vanilla Bean Paste 🌿 | 1 tbsp | For enhanced vanilla flavor |
| Bundt Pan Grease 🧈 | ½ cup | Vegetable shortening or butter |
| All-Purpose Flour 🌾 | ¼ cup | For dusting Bundt pan |
The butter and sugar are the heart of this cake—use European-style butter if possible for a richer flavor. Wegmans or Land O’Lakes are reliable brands for consistent quality. For the vanilla, Madagascar bourbon extract adds depth, but pure vanilla extract works too. Sift the flour and baking powder together to avoid lumps—Diamond Crystal baking powder is my go-to for reliable rise. Room-temperature eggs and milk blend more smoothly, so take them out 30 minutes before mixing. The Bundt pan must be greased and floured thoroughly to prevent sticking—use a silicone brush for even coating.
No vanilla bean paste? Double the vanilla extract for similar flavor intensity. Running short on butter? Coconut oil works in a pinch, though it alters the texture slightly. For a lighter cake, substitute half the milk with unsweetened almond milk. If your powdered sugar is lumpy, pulse it in a food processor before whipping the buttercream. The buttercream should be thick but pipeable—chill for 10 minutes if it’s too soft. For a dairy-free option, replace the milk with oat milk> and the heavy cream with coconut cream>.
Store the cake in an airtight container at room temperature for up to 3 days—it actually improves overnight. For longer storage, freeze the unfrosted cake for up to 3 months, then frost before serving. The buttercream keeps well in the fridge for 5 days, though it may need rewhipping. To refresh the frosting, microwave for 10-15 seconds> and repipe. Always bring the cake to room temperature before slicing for clean cuts. The swirls are best appreciated when the cake is fully cooled—patience is key>
Why You’ll Love This Recipe
- No Mixer Needed: I swear by this recipe when my mixer’s on the fritz—just cream the butter and sugar by hand (it’s more satisfying than you’d think), then fold in the eggs and vanilla. The flour comes together in minutes, and the batter’s so smooth it practically mixes itself.
- Vanilla Butter Bliss: That rich, buttery crumb? It’s the star. The butter and sugar combo gives it a melt-in-your-mouth texture, while the vanilla extract (don’t skimp!) layers in warmth that lingers with every bite. Honestly, it’s the kind of cake that makes you pause mid-slice to savor it.
- Party or Picnic: This recipe bakes into a showstopper—perfect for birthdays, potlucks, or even a lazy Sunday with coffee. The 12-cup size feeds a crowd without overwhelming your oven, and it’s sturdy enough to travel. (Yes, even on a Tuesday night.)
- Budget-Friendly Leftovers: Flour, sugar, butter, eggs—these are pantry staples that won’t break the bank. And the best part? The cake stays fresh for days, so you can enjoy seconds (or thirds) without guilt. I’ve had it for breakfast, dessert, or even as a snack—it’s that versatile.
Step-by-step instructions for towering vanilla swirls with buttery frosting
Master this classic bundt cake technique for flawless swirls and silky frosting every time.
👨🍳 Step 1: Prepare the Bundt Pan for Perfect Release
Generously grease the bundt pan with the 0.5 cup Bundt Pan Grease, using your fingers to coat every crevice thoroughly. This prevents sticking and ensures clean release. Then dust the entire interior with the 0.25 cup All-Purpose Flour, tapping out any excess. I like to use a flour sifter for even distribution—this creates a barrier between the cake and pan that makes removal effortless.
For extra insurance, I repeat the grease-and-flour process one more time. The pan should look completely coated when you hold it up to the light. This step is worth the extra effort—it’s what separates a cake that slides out perfectly from one that comes out in pieces.
🍳 Step 2: Cream Butter and Sugars to Light and Fluffy
In a stand mixer fitted with the paddle attachment, beat the 1 cup Unsalted Butter (softened to room temperature) with the 2 cups Granulated Sugar on medium speed for 3-4 minutes until light and fluffy. You’re looking for a texture that nearly doubles in volume and becomes pale in color. This creaming process incorporates air, which creates that signature tender crumb.
Scrape down the sides of the bowl with a spatula to ensure even mixing. Here’s the thing—if you rush this step, you’ll end up with a cake that’s dense instead of light. I’ve found that using superfine sugar helps achieve the smoothest texture, but regular granulated sugar works too if you pulse it in a food processor first.
👨🍳 Step 3: Incorporate Wet Ingredients and Vanilla
Add the 4 whole Large Eggs one at a time, mixing on low speed after each addition until fully incorporated. Then add the 2 tbsp Pure Vanilla Extract and 1 tbsp Vanilla Bean Paste, mixing just until combined. The vanilla bean paste adds depth of flavor that pure extract can’t match—it’s worth the extra cost for a professional-quality cake.
Next, whisk together the 2.5 cups All-Purpose Flour, 2 tsp Baking Powder, and 0.5 tsp Salt in a separate bowl. Sift the dry ingredients directly into the wet mixture, mixing on low speed just until combined. You should still see some flour streaks—overmixing develops gluten and makes the cake tough. Stop mixing as soon as the ingredients come together.
🥘 Step 4: Create the Signature Swirl Pattern
Pour the 1 cup Milk into the batter and mix on low speed until just combined. Divide the batter evenly between two mixing bowls. To one bowl, add an additional 1 tbsp Pure Vanilla Extract for enhanced flavor. Using a spatula, fold this extra vanilla into the batter to create a marbled effect.
Carefully spoon half of the plain batter into the prepared bundt pan, then add half of the vanilla-enhanced batter. Using the back of the spatula, gently swirl the batters together in a circular motion. Repeat with the remaining batter, creating a second swirl pattern. This technique creates those beautiful vanilla streaks throughout the cake that make bundt cakes so distinctive.
🔥 Step 5: Bake to Golden Perfection
Transfer the bundt pan to a preheated 350°F oven and bake for 50-60 minutes, or until a toothpick inserted into the center comes out clean. The cake is done when the top springs back when gently touched and the edges pull away slightly from the pan.
I like to tent the pan loosely with aluminum foil after 30 minutes to prevent over-browning. Let the cake cool in the pan for 15 minutes before carefully inverting it onto a wire rack to cool completely. This gradual cooling process helps maintain the cake’s structure and prevents cracking.
🍽️ Step 6: Prepare the Buttery Vanilla Frosting
While the cake cools, prepare the frosting by beating the 1 cup Unsalted Butter (softened) with the 2 cups Powdered Sugar and 0.5 cup Heavy Cream on medium speed until light and fluffy. Add the 2 tbsp Pure Vanilla Extract and 1 tbsp Vanilla Bean Paste, mixing until fully incorporated. The frosting should be smooth, spreadable, and hold its shape on the cake.
Once the cake is completely cool, spread the frosting evenly over the top and sides using an offset spatula. For a professional finish, I like to add a dusting of powdered sugar around the edges. Serve immediately or store covered at room temperature for up to 3 days. The cake keeps well, but the frosting is best enjoyed fresh.
Pro Tips For Making 12 Cup Bundt Cake
- Cream Butter First: Take 5 minutes to beat the butter and sugar until it’s light and fluffy—not just blended. I used to skip this, and my cakes turned out dense. A hand mixer on medium-high for 3-4 minutes (until the mixture looks like wet sand) makes all the difference for that tender crumb.
- Sift the Flour Twice: Don’t just dump the flour into the bowl. Sift it twice—once before mixing and once after adding the dry ingredients—to break up clumps and avoid a heavy texture. I learned this the hard way when my bundt cake came out gummy. A fine sieve or a wire whisk works in a pinch.
- Room-Temp Eggs Matter: Cold eggs? Your cake will fight you. Let the eggs sit in warm water for 10 minutes before cracking them—this ensures even mixing and a smoother batter. I was skeptical until I tried it; now I never skip this step.
- Grease and Flour the Pan: Butter the bundt pan, then dust it with flour—but tap out the excess. Leftover flour in the crevices burns and ruins the look. I used to leave it in, and my cakes always had a weird, floury aftertaste. A quick shake over the sink fixes it.
Storing and reheating your 12 cup bundt cake
Room Temperature Storage
Keep your bundt cake at room temperature in an airtight container for up to 3 days—this is ideal for maintaining that tender crumb and buttery frosting. I like using a cake dome or plastic wrap pressed directly against the frosting to prevent drying.
The flavors actually deepen overnight, so if you’re making it ahead for a celebration, this is the best method. Just bring it to room temperature for 1-2 hours before serving to restore the perfect texture. 💛
Refrigerator Refresh
If you need to store the cake for longer than 3 days, refrigerate it in an airtight container for up to 5 days. The cold air can make the frosting firm up, so let it sit at room temperature for 30-60 minutes before serving.
To refresh the frosting, microwave it for 10-15 seconds and repipe it back onto the cake using a piping bag. This works especially well if you’ve made extra frosting to use as needed. ✨
Freezing Unfrosted Cake
For maximum longevity, freeze the unfrosted cake in a heavy-duty freezer bag for up to 3 months. Wrap it tightly in plastic wrap first to prevent freezer burn, then squeeze out all the air before sealing.
When ready to serve, thaw it overnight in the refrigerator, then frost it with fresh buttercream. The texture will be slightly denser after freezing, but it still tastes amazing. This is my go-to method for holiday baking when I want to make the cake ahead of time. ❄️
Frosting Storage Tips
Store any leftover frosting in the refrigerator for up to 5 days. To use, let it sit at room temperature for 10-15 minutes to soften, then rewhip it with a hand mixer until smooth and fluffy.
If it’s too stiff, microwave it for 5-10 seconds to loosen it up before whipping. For the best results, keep the frosting in a sealed container to prevent it from absorbing fridge odors. 🥛
Reheating Slices
If you’ve sliced the cake and want to reheat individual portions, microwave them for 10-15 seconds> on medium power. This warms the cake without drying out the frosting. For a more even heat, cover the slice with a damp paper towel while microwaving.
Alternatively, you can warm slices in a 300°F oven> for 5-7 minutes> for a gentler reheating process. Just be quick—bundt cake is best enjoyed fresh! 🔥
Nutrition facts
Frequently asked questions
Can I use a different-sized bundt pan for this recipe?
This recipe is specifically designed for a 12-cup bundt pan to achieve the perfect swirl pattern and rise. For a 10-cup pan, reduce the batter by about 10% (about 1 cup total). A 15-cup pan would require increasing the batter by roughly 25% (about 3 cups total). Always adjust baking time based on your pan size—smaller pans bake faster.
Why did my bundt cake stick to the pan?
Sticking usually happens when the pan isn’t properly greased and floured. Always use vegetable shortening or butter for greasing, and apply it generously to every crevice. Dust with flour after each greasing, tapping out excess. A silicone brush helps reach all areas. If your pan is old or has deep grooves, consider using a nonstick spray as a backup.
How do I make this cake gluten-free?
Replace the 2.5 cups all-purpose flour with a 1:1 gluten-free baking flour blend (like Bob’s Red Mill or King Arthur). Add 1 tsp xanthan gum to help bind the cake. For the frosting, use a gluten-free powdered sugar and ensure your vanilla extract is certified gluten-free. The texture may be slightly denser, so don’t overbake—check for doneness at 45 minutes.
Can I add mix-ins like chocolate chips or nuts?
Fold in 1 cup chocolate chips or 1 cup chopped walnuts/toasted pecans after mixing the dry ingredients. For even distribution, gently stir them into the batter by hand. Avoid overmixing—just swirl them in until combined. If using nuts, toast them first for enhanced flavor.
What’s the best way to decorate this bundt cake?
Beyond buttercream, try these ideas: dust with powdered sugar for a snowy look, drizzle with melted chocolate, or add fresh berries. For a festive touch, pipe whipped cream rosettes on top. If you love vanilla, add a vanilla bean slice> on the side for garnish. The key is to keep decorations simple so the cake’s natural beauty shines.

- 15lb Turkey Brine Recipe: Juicy Golden Meat with Science-Backed Moisture Lock - October 18, 2026
- 2 Egg Waffle Recipe: Light and Airy in 10 Minutes - October 18, 2026
- 1 Lb Ground Beef Recipe Ideas: 5 Quick Skillet Meals for Busy Nights - October 18, 2026