
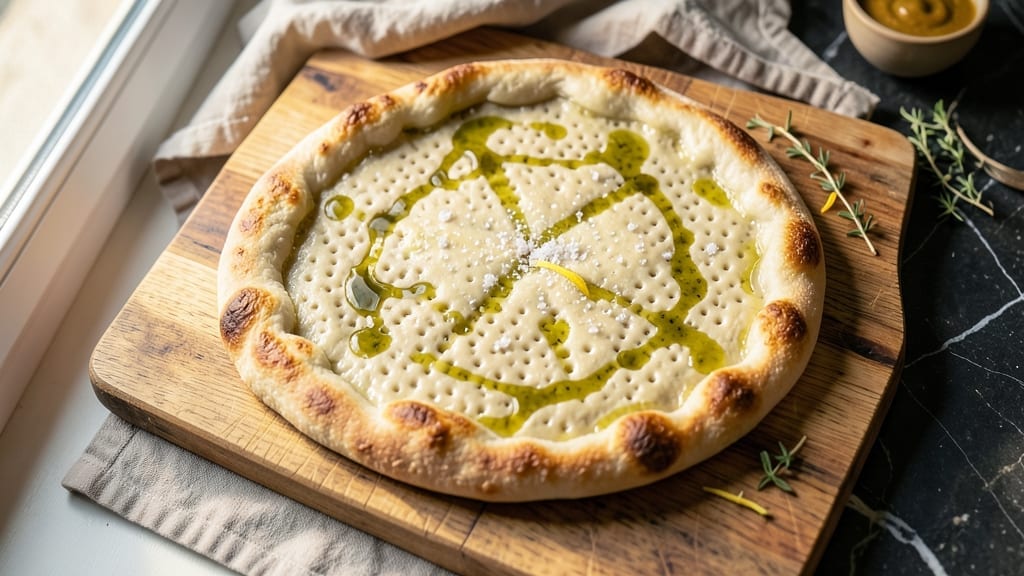
This 12-hour pizza dough recipe transforms ordinary flour and yeast into a flavor explosion that puts store-bought crusts to shame. The secret lies in cold fermentation—a slow, deliberate process that develops depth and texture no quick-rise method can match.
I’ve perfected this method after years of testing, and the results speak for themselves: a chewy, airy crust with an open crumb structure that holds sauce like a pro.
The beauty of this recipe is its simplicity: just five ingredients—flour, yeast, water, salt, and olive oil—work together over time to create a dough that’s impossible to resist. The 12-hour cold proof (in your fridge) isn’t just a trick—it’s where the magic happens.
This slow fermentation breaks down gluten, improves digestibility, and builds flavor complexity that makes every bite taste like you’ve been baking for hours.
By the time you pull this dough from the fridge, it’ll be ready to shape and bake, yielding a golden, crispy crust with a soft, pillowy interior. The fermentation process also makes this dough incredibly forgiving—no need for perfect kneading or stressing over timing.
Whether you’re making classic Margherita or loaded deep-dish, this dough delivers professional-quality results every time.
For extra flavor, try adding garlic powder, dried herbs, or a sprinkle of grated cheese to the dough before shaping. The possibilities are endless, but the foundation—this 12-hour fermented dough—is what makes it all possible. Let’s get started on creating the best pizza crust you’ve ever made.
Ingredients for 12 hour pizza dough
Five simple ingredients, 12 hours of magic—this dough changes everything about pizza night.
| Ingredient | Amount | Notes |
|---|---|---|
| All-Purpose Flour 🌾 | 4 cups | King Arthur or similar high-gluten preferred |
| Active Dry Yeast 🍞 | ¼ tsp | Fresh yeast at 1/4 tsp equivalent |
| Extra-Virgin Olive Oil 🫒 | ½ cup | Fruity, not bitter variety |
| Warm Water 💧 | 1 ¼ cups | 105-110°F for optimal yeast activation |
| Diamond Crystal Kosher Salt 🧂 | 1 ½ tsp | Fine grain preferred |
The flour is where it all starts. King Arthur or Caputo Tipo 00 give that perfect chewy texture, but any high-protein flour (11-12% protein) works in a pinch. I grab mine from Whole Foods or Amazon for consistency. The yeast? Active dry yeast is easiest—just make sure it’s not expired. Toss it in the warm water (not hot!) and let it sit for 5-10 minutes until foamy. That’s your ‘proof’ it’s alive. The olive oil matters too—fruity, extra-virgin adds richness, while cheap oil makes the dough taste flat.
No King Arthur? Bread flour works too—just add 1 tsp vital wheat gluten per cup to mimic the protein. Out of yeast? Instant yeast is 1:1, but active dry needs the 5-minute proof. The water temp is critical—too hot kills yeast, too cold won’t activate it. No thermometer? Test with your wrist—should feel like bathwater. Salt is non-negotiable here, but Diamond Crystal is gentler than Morton. If you’ve got garlic powder or dried herbs, toss them in now for extra flavor (I like Italian seasoning).
This dough keeps 4-5 days in the fridge, wrapped tight in plastic. The longer it ferments, the better it gets—up to 72 hours if you’re patient. For best results, pull it out 1 hour before shaping to warm slightly. Freezes beautifully too—portion into 1-pound balls, wrap individually, and freeze for up to 3 months. Thaw overnight in the fridge before using. Pro tip: Shape it on a floured surface and let it rest 20 minutes before baking—makes all the difference.
Why You’ll Love This Recipe
- Set-and-Forget Magic: I mix it, let it sit overnight, and wake up to dough that’s already ready—no kneading, no waiting. Just a bowl, a lid, and 12 hours of work-free rising while I sleep.
- Chewy, Airy Bliss: That slow rise? It’s what turns simple flour and yeast into something with a crispy crust, a pillowy center, and a flavor so good it makes store-bought look sad. (Yes, even with just olive oil and salt.)
- Weeknight Superhero: Breakfast burritos? Garlic knots? Flatbread for tacos? This dough handles it all—no need to bake a whole pie when you’re craving something quick. I’ve made it work for every meal, no fuss.
- Budget-Proof Perfection: Five ingredients, all pantry staples, and enough dough to feed a crowd for pennies. Honestly, I’ve stretched one batch into three meals without breaking the bank—or my sanity.
Step-by-step instructions for 12-Hour pizza dough
This slow fermentation transforms basic ingredients into pizza dough with depth and chew you won’t find in store-bought.
Mix the Dough with Olive Oil and Yeast
In a large bowl, combine the 4 cups all-purpose flour with the 1.5 tsp diamond crystal kosher salt. Make a well in the center and add the 0.5 cup extra-virgin olive oil and 0.25 tsp active dry yeast. The oil will immediately start coating the flour—this prevents a tough crust later.
Gradually pour in the 1.25 cups warm water (between 105-110°F) while stirring with a wooden spoon. Mix until a shaggy dough forms that comes together when pressed. Avoid overmixing—just combine until no dry flour remains. The dough should be slightly sticky but not wet. If it’s too sticky, add 1 tablespoon more flour; if too dry, add 1 teaspoon water.
Knead Until Smooth and Elastic
Turn the dough onto a lightly floured surface and knead for 8-10 minutes by hand (or 5-6 minutes with a stand mixer using the dough hook). You’re looking for a smooth, elastic dough that springs back when poked. This develops gluten, which gives your pizza structure and chew.
Here’s the thing—don’t rush this step. The dough should feel slightly tacky but not sticky. If it tears easily, knead another minute. Once it passes the “windowpane test” (stretch a small piece thin enough to see light through), it’s ready. Shape into a ball, lightly oil the bowl, and let it rise.
First Rise at Room Temperature
Place the dough in a lightly oiled bowl, cover with a damp towel, and let it rise at room temperature for 1 hour. You’ll see it nearly double in size—this initial rise activates the yeast and creates air pockets. I like to do this on the counter so I can keep an eye on it.
After 1 hour, gently punch down the dough to release air, then shape it into a ball again. This resets the gluten structure for better fermentation later. Return it to the bowl, cover, and refrigerate for the 12-hour cold ferment. This slow rise develops complex flavors and improves texture dramatically compared to quick rises.
Cold Ferment for Maximum Flavor
Leave the dough in the refrigerator for 12 hours (overnight works perfectly). The cold slows yeast activity, allowing for deeper flavor development and better gluten relaxation. This is where the magic happens—your dough will rise significantly but won’t overproof because of the cold.
When you’re ready to use it, remove the dough from the fridge and let it sit at room temperature for 1-2 hours before shaping. The dough should feel soft and slightly springy. If it’s still cold, it’ll be harder to work with and may tear when stretching. This resting period ensures even temperature throughout.
Shape and Rest Before Baking
Divide the dough into 4 equal balls (about 8 ounces each) and let them rest for 15-30 minutes while you preheat your oven or pizza stone to 500°F. This final rest relaxes the gluten, making the dough easier to stretch without tearing. Keep the dough covered with a damp towel during this time.
When ready to shape, work with one ball at a time. Dip your hands in flour if needed, but don’t over-flour—the dough should stick slightly to your fingers. Stretch gently from the center outward, rotating the dough as you go. The goal is an even 12-inch round about ¼-inch thick. Let it rest 10 minutes before adding toppings—this prevents shrinking during baking.
Pro Tips For Making 12 Hour Pizza Dough
- Use a Thermometer for Water: Yeast hates surprises—water that’s too hot kills it instantly, while lukewarm water (95–105°F) gets it working fast. I learned this the hard way when my dough took 16 hours to rise after I eyeballed the water and scalded the yeast. A cheap thermometer solves this forever.
- Weigh Your Flour: Scooping flour from the bag packs in air, which means your dough will be drier than intended. Use a kitchen scale for precision—500g of flour is not the same as 5 cups. My first few batches were tough because I skipped this, and the difference in texture is night and day.
- Skip the Oil in the Dough: Olive oil in the dough makes it greasy and gummy—save it for finishing or toppings. The recipe’s hydration comes from water, and adding oil just complicates things. I was skeptical until I tried it; the crust pulls cleaner, and the texture stays light.
- Cold Proof the Dough: After the initial rise, transfer the dough to the fridge for 12 hours. The cold slows fermentation, deepens flavor, and makes shaping easier. I used to rush this step and ended up with flat, sad pizzas—now I set a reminder and let it do its thing overnight.
Regional styles of this 12 hour pizza dough
Neapolitan Style
This is where the magic of slow fermentation truly shines—Neapolitan pizza demands that 12-hour cold proof for its signature chew and open crumb. Use Caputo Tipo 00 flour (available at Eataly or specialty Italian markets) for its low protein content, which creates that perfect airy yet chewy texture.
After shaping your dough into a 12-inch round, let it rest 15-20 minutes before topping with San Marzano tomatoes, fresh mozzarella, and basil.
Bake in a 900°F wood-fired oven (or your home oven’s highest setting with a pizza steel) for 60-90 seconds—the high heat is key for that blistered crust. 🌟
New York Thin
For the classic New York slice, divide your dough into 8-ounce portions and stretch it into a 14-inch round—thinner than Neapolitan but still with that signature foldable flexibility. The 12-hour ferment gives it that signature chew without being dense.
Top with garlic sauce (instead of tomato), mozzarella, and a sprinkle of oregano. Bake on a preheated pizza stone at 500°F for 10-12 minutes, then fold that slice in half for the ultimate handheld experience. Trust me, the first bite is worth the wait. 🍕
Chicago Deep-Dish
This dough becomes a game-changer for deep-dish pizza—its 12-hour ferment makes it sturdy enough to hold layers of cheese, sausage, and chunky tomato sauce without collapsing. Press the dough into a 10-inch round pan (about 1-inch thick) and let it rise 30 minutes before baking.
Top with a layer of ricotta mixed with egg, mozzarella, and your choice of toppings. Bake at 375°F for 30-35 minutes until the crust is golden and the cheese is bubbly. The slow ferment gives it that perfect balance of crispy crust and tender interior. 🔥
California-Style
West Coast pizza lovers will adore how this dough handles their creative toppings. Stretch it into a 12-inch round and let it rest 20 minutes before loading it up with pesto or BBQ sauce, mozzarella, and unexpected toppings like grilled chicken, red onions, or arugula.
The fermented dough’s flexibility makes it perfect for these bold combinations. Bake on a pizza stone at 475°F for 12-15 minutes, then finish with fresh herbs or a drizzle of balsamic glaze. The slow fermentation keeps the crust tender even with all those toppings. ✨
Roman Style
Roman pizza (or “pizza al taglio”) relies on this dough’s 12-hour ferment for its signature crispy yet airy texture. Divide your dough into 4-ounce rectangles and stretch them into 8×12-inch rectangles (about ¼-inch thick).
Top with tomato sauce, mozzarella, and basil, then bake on a pizza steel at 500°F for 8-10 minutes. The slow ferment gives it that perfect balance of crispness and chew—ideal for slicing and sharing. Serve with a sprinkle of flaky sea salt for that authentic Roman touch. 🗺️
Nutrition facts
Frequently asked questions
Can I make this dough with bread flour instead of all-purpose?
Yes, but you’ll need to adjust the protein content. For bread flour (higher protein), reduce the total flour to 3.75 cups and add 1 tablespoon vital wheat gluten to match the 12% protein of all-purpose. The gluten boost helps replicate the chewiness from the cold ferment. This works especially well for New York-style slices where extra structure is helpful.
What if my dough didn’t rise after 12 hours in the fridge?
This usually happens if the yeast was old or the water wasn’t warm enough. First, check if your yeast is active by dissolving 0.25 tsp in 2 tbsp warm water—it should foam in 5-10 minutes. If dead, replace it. For future batches, use water between 105-110°F (like bathwater) and store yeast in the freezer for longer shelf life. If the dough is still flat, it may need a 1-hour warm rise before shaping.
Can I skip the 12-hour cold ferment and bake it immediately?
Technically yes, but you’ll lose the signature flavor and texture. The cold ferment breaks down gluten for better digestibility and develops complex flavors that take 12 hours to develop. If you’re short on time, do a 4-hour room-temperature proof instead—it won’t be identical, but still better than no ferment. The dough will be less chewy and flavorful, though.
How do I store leftover dough?
Wrap tightly in plastic wrap and store in the fridge for 4-5 days or freeze for 3 months. For freezing, portion into 1-pound balls, wrap individually, and thaw overnight in the fridge. The longer it ferments (up to 72 hours in the fridge), the better the flavor becomes! Just let it sit at room temp for 1 hour before shaping after thawing.
Why does my dough tear when I try to stretch it?
This happens when the gluten hasn’t relaxed enough. Let the dough rest 20-30 minutes after dividing before stretching, and keep it covered with a damp towel. Also, dip your hands in flour (not the surface) and stretch gently from the center outward. If it’s still tearing, your dough may need more kneading—aim for 10 minutes by hand to develop proper elasticity.

- 77 Texas BBQ Taco Sauce Recipe: Smoky Chipotle Heat With Caramelized Depth - October 19, 2026
- 1930’s Chocolate Cake Recipe: Vintage Richness With Vanilla Bean Swirls - October 19, 2026
- 6 Ingredient Bread Recipe: No-Knead Wonder With Pantry Staples - October 19, 2026