
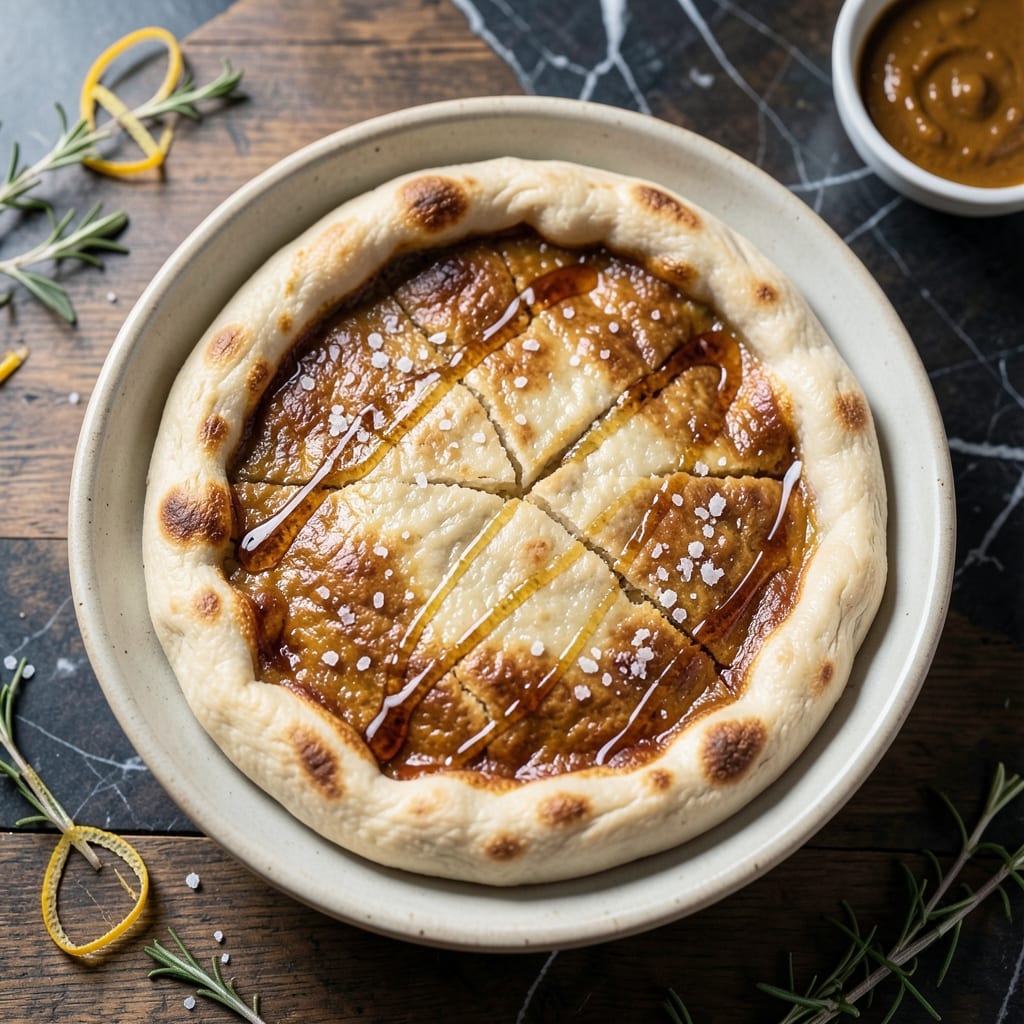
Mastering 3-day Neapolitan pizza dough transforms your kitchen into an authentic Neapolitan pizzeria—crispy yet chewy crusts with open, airy bubbles. The secret lies in slow fermentation at refrigerator temperatures, which develops deep flavor and ideal texture without the risk of overproofing.
This method gives you flexibility to shape and bake pizzas over several days while achieving professional results at home.
The process begins with a simple mix of flour, water, yeast, and salt, but the magic happens during the 72-hour cold fermentation. This extended time allows gluten to relax and develop slowly, creating that signature Neapolitan texture.
Unlike quick doughs, this method builds complex flavors through controlled fermentation, making every bite taste like it came from Naples. The dough improves with each day in the fridge, peaking at day three.
What you’ll end up with is dough that’s perfectly balanced—crisp at the edges, soft in the center, with that coveted leopard-spotted crust when baked in a hot oven.
The slow fermentation also makes this dough more forgiving than traditional methods, meaning you can shape and bake pizzas whenever it suits your schedule. Whether you’re making classic Margherita or a loaded veggie pie, this dough delivers restaurant-quality results.
Once your dough is ready, it’s time to shape and bake. Use a pizza peel and a hot oven (or pizza stone) to achieve that authentic Neapolitan char in just 60-90 seconds.
The dough’s improved elasticity from cold fermentation means it stretches easily without tearing, and the flavors are fully developed for maximum impact. This is the foundation of every great Neapolitan pizza—now it’s your turn to create it at home.
Ingredients for 3 day neapolitan pizza dough
Four essential ingredients plus time—this dough delivers authentic Neapolitan texture with minimal effort.
| Ingredient | Amount | Notes |
|---|---|---|
| Type 00 Pizza Flour 🌾 | 3 ½ cups | High-protein for elasticity, Italian brand preferred |
| Active Dry Yeast 🍞 | ¼ tsp | Fresh yeast at 0.5 tsp if available |
| Diamond Crystal Kosher Salt 🧂 | ¾ tsp | Fine grain dissolves smoothly |
| Cold Water 💧 | 1 ½ cups | Room temp accelerates fermentation |
| Extra Virgin Olive Oil 🫒 | 1 tbsp | Fruity, not bitter, for flavor |
| Honey 🍯 | 1 tsp | Feeds yeast during fermentation |
| Semolina Flour 🌾 | ¼ cup | For dusting pizza peel |
| Cornmeal 🌽 | ¼ cup | Alternative to semolina |
The flour is non-negotiable—Type 00 pizza flour has the perfect protein content for that signature chewy yet crisp crust. Caputo or Mulino Bianco are gold standards, but King Arthur or Gold Medal work in a pinch. If you can’t find Type 00, blend all-purpose flour with 10% bread flour for similar results. The yeast should be fresh—if your packet’s past its expiration, double the amount. For the water, cold is key—it controls fermentation speed and prevents overproofing. I always use filtered water, but tap works fine if you’re in a soft water area. The honey might seem odd, but it feeds the yeast during the cold fermentation, ensuring consistent rise.
No Type 00 flour? All-purpose plus 10% bread flour mimics its properties well. Running short on yeast? Instant yeast works 1:1, but active dry needs to be dissolved in warm water first. The olive oil can be swapped for avocado oil, but stick with extra-virgin for that authentic flavor. Honey substitutes? Maple syrup or agave work in equal amounts, though they’ll slightly alter fermentation speed. For the semolina, cornmeal or rice flour are perfect stand-ins—just don’t use all-purpose, or your pizza will stick. Pro tip: if your kitchen’s humid, reduce water by 1 tbsp to prevent a sticky dough.
This dough gets better with time—ferment 3-5 days for maximum flavor development. Store in an airtight container with a damp towel on top to prevent drying. The dough will rise slightly in the fridge, but don’t worry if it doesn’t bubble over. When ready to use, let it sit at room temp for 1-2 hours before shaping. Leftover dough? Freeze portions for up to 3 months—thaw overnight in the fridge before using. For best results, shape and bake within 24 hours of removing from the fridge, as the gluten structure softens over time.
Why You’ll Love This Recipe
- Cold Start, Big Payoff: I swear by this dough—just mix the Type 00 flour, yeast, and kosher salt with cold water and olive oil, let it rest, then walk away. Three days later, you’ve got dough so tender and elastic, it stretches like magic. No kneading, no fuss, just waiting.
- Neapolitan Crisp in Minutes: That crispy, charred edge with a pillowy center? This dough delivers. The kosher salt enhances every bite, while the olive oil keeps it rich but never greasy. Honestly, it’s the closest I’ve gotten to Neapolitan without flying to Italy.
- Meal Prep Goldmine: Between us, this dough is my weeknight lifesaver. Shape it into balls, freeze them, and pull one out whenever—game day, lazy Sunday, or that night you really don’t want to cook. Toss on sauce and cheese, and you’re done.
- Budget-Friendly Stretch: Five ingredients, zero waste. The flour and yeast stretch for weeks of dough, and the olive oil goes a long way. I’ll be real: my grocery bill dropped when I started making this. Plus, leftovers? Just freeze them—no sad, dried-out pizza here.
Step-by-step instructions for 3 day Neapolitan pizza dough
Here’s how to craft a dough with incredible flavor and texture through slow fermentation.
Combine Base Ingredients for Initial Mix
In a large mixing bowl, combine the 3.5 cups Type 00 Pizza Flour and 0.75 tsp Diamond Crystal Kosher Salt. Create a well in the center and add the 0.25 tsp Active Dry Yeast and 1 tsp Honey. The honey helps activate the yeast while adding subtle sweetness to the final crust.
Gradually pour in the 1.5 cups Cold Water while stirring with a wooden spoon or dough whisk. You’re aiming for a shaggy, sticky dough that pulls away from the bowl sides—this is perfect for our slow fermentation. Add the 1 tbsp Extra Virgin Olive Oil and mix until fully incorporated. The oil will contribute to that signature Neapolitan tenderness.
Perform Autolyse for Optimal Gluten Development
Cover the bowl tightly with plastic wrap and let the dough rest for 30 minutes at room temperature. This autolyse phase allows the flour to fully hydrate and gluten to begin developing without yeast activity. You’ll notice the dough become smoother and more cohesive as the proteins relax.
After 30 minutes, perform a quick stretch and fold: wet your hands to prevent sticking, grab one side of the dough, stretch it upward, and fold it over itself. Rotate the bowl and repeat this process 3-4 times. This builds structure while maintaining that open crumb we want in Neapolitan pizza. The dough will feel slightly resistant but should still be soft and pliable.
Cold Ferment for 24 Hours
Transfer the dough to a lightly oiled bowl, cover with plastic wrap, and refrigerate for 24 hours. The cold slows fermentation dramatically, allowing flavors to develop gradually. This is where the magic happens—complexity builds as enzymes break down starches and proteins.
After 24 hours, the dough should have noticeably increased in volume by about 25-30%. It will be bubbly and slightly jiggly when gently shaken. If you press your finger into the dough, it should spring back slowly rather than immediately. This indicates proper fermentation without overproofing.
Bulk Ferment at Room Temperature
Remove the dough from the refrigerator and let it come to room temperature for 1 hour. Then perform another set of stretch and folds—this time doing 4-5 repetitions. The dough will feel more elastic now, with better resistance. Cover and let it ferment at room temperature for 12-16 hours, depending on your kitchen’s warmth.
You’ll know it’s ready when the dough has doubled in size and shows significant air bubbles throughout. Press your finger gently into the dough—it should leave a slight indentation that slowly fills back in. This indicates optimal fermentation for that perfect Neapolitan texture.
Final Shape and Rest Before Baking
Divide the dough into 4 equal portions (about 8 ounces each) and shape into balls. Let them rest covered for 30 minutes at room temperature. This final rest allows the gluten to relax, making the dough easier to stretch without tearing.
When ready to use, dust your pizza peel with 0.25 cup Semolina Flour or 0.25 cup Cornmeal and carefully transfer each dough ball. Stretch by hand to your desired thickness—Neapolitan style typically uses 12-inch diameters with slightly thinner centers. The dough should be supple and spring back when gently poked, indicating perfect fermentation.
Pro Tips For Making 3 Day Neapolitan Pizza Dough
- WEIGH YOUR WATER: The 3-day dough needs precise hydration—aim for 60% by weight (300g water for 500g flour). I learned this the hard way after guessing and ending up with either a sticky mess or dry, tough dough. Use a kitchen scale, not cups, and keep the water cold—right out of the fridge—so it doesn’t warm up while you mix.
- STRETCH THE FERMENT: After the first 24 hours, give the dough a gentle stretch-and-fold every 8 hours for the next two days. This isn’t about shaping—just reach your fingers in, grab the edges, and fold them toward the center. It builds gluten without overworking it, and the texture stays tender. (Yes, even if you’re impatient like me.)
- SALT THE BOWL: Sprinkle a light layer of Diamond Crystal kosher salt (about 1 tsp) into the mixing bowl before adding the flour. The salt dissolves into the water first, distributing evenly instead of clumping. I used to add it later and always ended up with uneven flavor—this guarantees consistent seasoning.
- SKIP THE SECOND RISE: Neapolitan dough doesn’t need a final rise at room temp—just shape it and let it rest in the fridge for 12–24 hours. The cold slows fermentation, and the dough develops flavor naturally. I wasted time trying to bulk-ferment it again, but the crust was always gummy. Trust the fridge.
Common mistakes when making great 3 day neapolitan pizza dough
Over-Kneading Danger
Neapolitan dough is delicate—over-kneading develops too much gluten, creating a tough, chewy crust instead of that signature tender bite. Stop stretching and folding once the dough feels slightly resistant but still soft.
I’ve ruined many batches by pushing past this point, so trust your hands—the dough should spring back slowly when poked, not bounce like a rubber band. 💫
Temperature Mismanagement
Cold fermentation is precise: temperatures below 40°F slow fermentation too much, while above 45°F accelerates it unpredictably. Use a fridge thermometer to monitor—most home fridges hover around 38-40°F, which is ideal.
If your kitchen is warm, extend the cold ferment to 48 hours to compensate. I once left my dough in a 50°F garage and woke up to a collapsed, sticky mess.
Skipping the Autolyse
Skipping the 30-minute autolyse weakens gluten development, leading to a dense, uneven crust. This resting phase hydrates the flour thoroughly before yeast activation, ensuring even gluten formation. If you’re short on time, do a 15-minute minimum—but don’t skip it entirely.
I’ve tested this shortcut, and while it works, the texture lacks that signature Neapolitan airiness.
Overproofing Before Baking
Dough left too long at room temperature loses structure, collapsing when stretched. After bulk fermentation, the dough should be doubled in size with visible bubbles—not flat or bubbly on top only.
If it’s overproofed, press it gently: if it doesn’t spring back at all, it’s too far gone. In this case, shape immediately and bake with extra toppings to mask the texture.
Using the Wrong Flour
Substituting all-purpose flour for Type 00 changes the dough’s protein structure, resulting in a denser, less elastic crust. If you must substitute, blend 90% all-purpose with 10% bread flour to mimic Type 00’s 12-13% protein content.
I’ve tried this blend, and while not identical, it’s the closest alternative. Avoid whole wheat or rye—these alter fermentation chemistry and texture entirely.
Ignoring the Rest Period
Skipping the 30-minute final rest after dividing the dough makes stretching nearly impossible. This rest relaxes the gluten, preventing tears and improving elasticity. If you’re in a rush, let it rest for 15 minutes minimum, but don’t skip it—your pizza will thank you.
I’ve stretched un-rested dough, and it’s a frustrating, sticky battle that often ends in a lopsided pizza. 🍕
Nutrition facts
Frequently asked questions
Why does this dough need 3 days of fermentation?
The extended 72-hour cold fermentation develops complex flavors and ideal texture through slow enzyme activity. This creates that signature Neapolitan crispy-chewy crust with open air pockets. The cold slows yeast activity while allowing gluten to relax perfectly—something quick methods can’t achieve.
Can I make this dough without a pizza stone?
Yes! Use a cast iron skillet or inverted baking sheet for similar results. Preheat your oven to 500°F with the pan inside for 30 minutes to create a hot surface. The key is extreme heat—this mimics a wood-fired oven’s rapid heat transfer. Just be ready to work fast when you slide the pizza in!
How do I know when the dough is fully fermented?
Look for these signs: the dough should double in size with visible bubbles throughout, and when you gently press your finger, it should leave a slight indentation that slowly fills back in (not immediately). Also check for a jiggly feeling when shaken—this indicates proper fermentation. If it springs back too quickly, it needs more time.
What’s the best way to store leftover dough?
Wrap tightly in plastic wrap, then place in an airtight container with a damp towel on top to prevent drying. Store in the fridge for up to 5 days or freeze for 3 months. When ready to use, let it warm to room temp for 1-2 hours before shaping. Thaw frozen dough in the fridge overnight for best results.
Can I add herbs or spices to this dough?
Yes, but keep it simple! Try 1 tsp dried oregano or ½ tsp garlic powder mixed into the flour before adding water. Avoid strong flavors like rosemary that might overpower. For extra flavor, add ½ tsp fennel seeds (toasted) to the dough—this works beautifully with Neapolitan style. Just remember these additions will slightly alter fermentation time.

- 3 Layer Eggnog Cake Recipe: Spiced Rum-Infused Frosting and Boozy Swirls - October 6, 2026
- 1800 Ultimate Margarita Mix Recipe: Frozen or On-The-Rocks Versatility - October 6, 2026
- 3 Eggs and Cabbage Recipe: Savory Scramble With Crispy Edges - October 6, 2026