
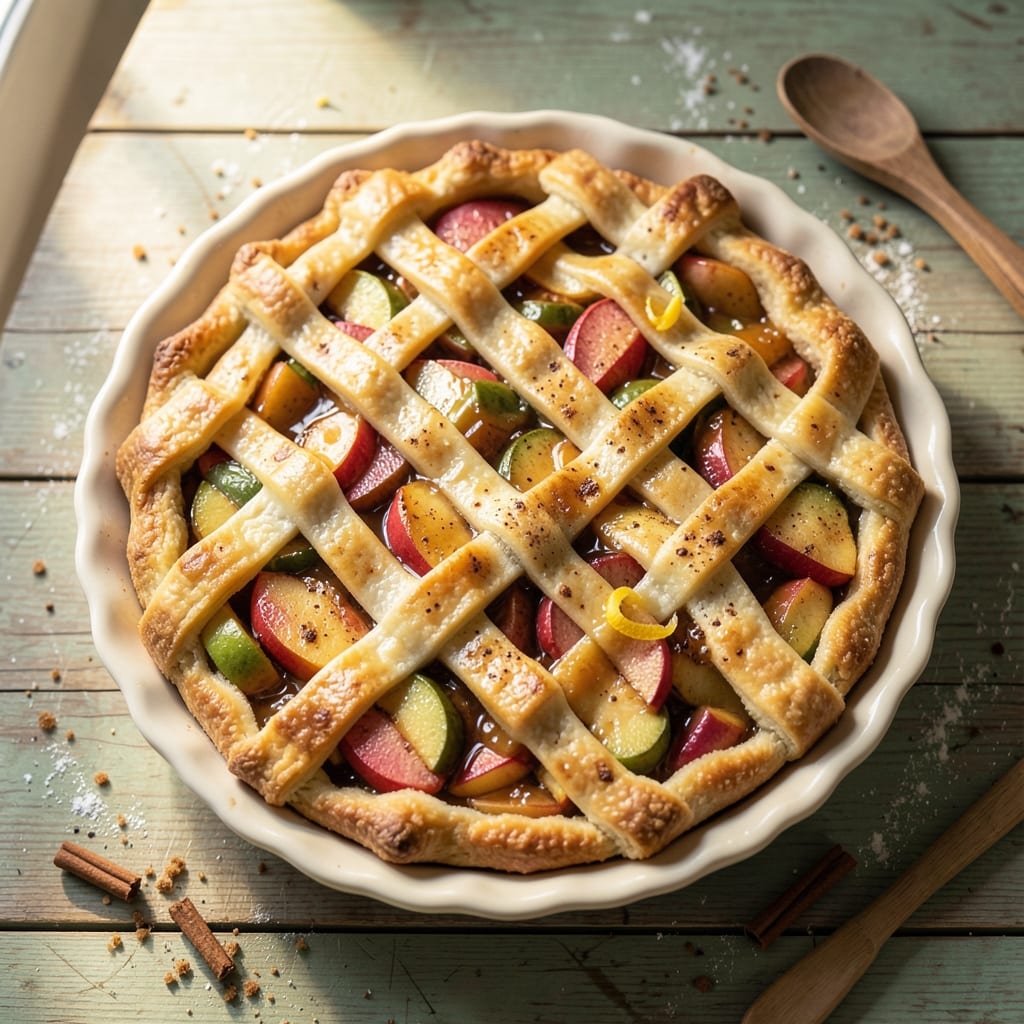
A 12-inch apple pie with a flaky lattice crust and perfectly spiced filling is the ultimate dessert for any occasion. The secret lies in a cold butter crust that layers effortlessly and a filling that balances sweetness with warm cinnamon and nutmeg.
I’ve perfected this recipe over years of baking, ensuring every slice delivers that ideal mix of tender apples and buttery crust.
The lattice design isn’t just decorative—it creates steam pockets that keep the filling moist while adding elegant visual appeal. Using a mix of tart and sweet apples (like Granny Smith and Honeycrisp) prevents a soggy bottom, while a cornstarch slurry thickens the juices just enough to hold their shape.
This isn’t just pie; it’s a showstopper that tastes even better the next day.
Baking at 375°F for 50-60 minutes gives you a golden crust and bubbling filling, while the lattice stays crisp instead of soggy. The cooling process is just as important—the pie needs time to set so the juices distribute evenly.
Serve warm with vanilla ice cream or whipped cream for the perfect balance of textures.
Whether you’re baking for a holiday gathering or just craving comfort, this pie delivers restaurant-quality results at home. The flaky crust and aromatic filling make every bite worth the effort. Let’s get started on creating your signature dessert.
Ingredients for 12 inch apple pie
Cold butter, tender apples, and warm spices—everything you need for a perfect 12-inch apple pie.
| Ingredient | Amount | Notes |
|---|---|---|
| All-Purpose Flour 🌾 | 3 cups | Sifted for flaky texture |
| Unsalted Butter 🧈 | 1 ½ cups | Cold, cubed for crust |
| Granulated Sugar 🍚 | 1 ½ cups | For crust and filling |
| Tart Apples 🍎 | 6 medium | Granny Smith or Honeycrisp |
| Brown Sugar 🍚 | ¾ cup | Packed, for filling |
| Ground Cinnamon 🌿 | 2 tbsp | Freshly ground preferred |
| Ground Nutmeg 🌿 | ½ tsp | Freshly grated |
| Salt 🧂 | ½ tsp | Fine sea salt |
| Cornstarch 🌾 | ½ cup | For thickening |
| Large Eggs 🥚 | 1 whole | For egg wash |
| Lemon Juice 🍋 | 1 tbsp | Freshly squeezed |
| Vanilla Extract 🌸 | 1 tsp | Pure vanilla preferred |
The butter matters most here. Store-brand sticks work fine, but Plugrá or Land O’Lakes are my go-tos—they stay cold longer. Buy it in the freezer section, not the dairy aisle, and let it sit 10 minutes before cubing. The apples? Granny Smith for tartness, Honeycrisp for sweetness. I always buy extra—some get tossed if they’re bruised. The cinnamon should smell vibrant; if it’s dusty, toast it in a dry pan for 2 minutes to wake up the flavor. Nutmeg? Freshly grated makes a world of difference, but pre-ground is fine in a pinch.
No Granny Smith? McIntosh or Braeburn work well too—just toss them in lemon juice to keep them from browning. Running low on brown sugar? White sugar plus 1 tsp molasses gets you close. The cornstarch is non-negotiable for that perfect set—it keeps the filling thick but not gluey. For the egg wash, duck eggs give extra shine if you’ve got them. And if you’re making a lattice for the first time, butter the strips lightly so they don’t stick together—trust me on this.
Butter crust keeps best in the fridge for 3 days before rolling, but it’s worth making ahead. The filling can be prepped a day early—just store it in the fridge. Once baked, pies reheat beautifully: 350°F for 15 minutes with a splash of water in the pan. Leftovers? 3-4 days in the fridge, 2 months frozen. I always slice mine into wedges before freezing—no defrosting needed, just reheat straight from frozen.
Why You’ll Love This Recipe
- I’ll be real: I make this pie on a Sunday and eat it for snacks all week. The crust stays crisp, the apples hold their shape, and reheating a slice in the oven? Pure comfort. And since it uses pantry staples (butter, flour, sugar), it’s the kind of treat that doesn’t break the bank.
- No-Roll-Out Crust: I swear by this trick—just mix cold butter into flour until it resembles crumbs, then add ice water. No chilling, no rolling, no stress. The flaky layers happen while it bakes, and honestly? The edges get that perfect golden-brown without a single tear.
- Sweet-Tart Magic: That brown sugar in the filling? It’s the secret weapon. The tart apples (I use Honeycrisp or Granny Smith) play off the caramelized sugar like a jazz duet—bright, rich, and just sweet enough. The first bite is always the one that makes my kitchen smell like autumn nostalgia.
- Crowd-Pleaser Slice: Between us, this is the pie that gets eaten first at potlucks. It’s not too sweet, not too spiced—just right. Plus, the 12-inch size means you can serve proper slices (no awkward half-pie plates) and still have leftovers. My in-laws bring it to Thanksgiving every year.
Step-by-step instructions for flaky lattice crust with spiced filling
Here’s how to build a perfect 12-inch apple pie with a golden lattice crust and tender filling.
Make the Double-Crust Dough for Maximum Flakiness
In a large bowl, combine the 3 cups all-purpose flour and 0.5 teaspoon salt. Cut in the 1.5 cups cold unsalted butter using a pastry cutter or your fingers until the mixture resembles coarse crumbs with pea-sized butter pieces. This ensures the butter stays cold and creates flaky layers.
Gradually add 4 tablespoons ice water (about 1 tablespoon at a time) while mixing gently with a fork until the dough just comes together. Divide the dough into two equal discs, wrap each in plastic wrap, and chill for at least 2 hours or up to 24 hours. This resting time is crucial—it relaxes the gluten and prevents shrinking during baking.
Prepare the Spiced Apple Filling
Peel, core, and slice the 6 medium tart apples into ¼-inch thick slices. Toss them in a large bowl with the 1.5 cups granulated sugar, 0.75 cup packed brown sugar, 2 tablespoons ground cinnamon, 0.5 teaspoon ground nutmeg, 0.5 teaspoon salt, and 1 teaspoon vanilla extract. The sugar will begin to draw out juices, so let the mixture sit for 10 minutes while you roll out the crust.
Stir in the 0.5 cup cornstarch and 1 tablespoon freshly squeezed lemon juice. The cornstarch helps thicken the filling, while the lemon juice brightens the apples and prevents browning. This mixture should be juicy but not soupy—if it looks too wet, let it sit another 5 minutes to thicken slightly.
Assemble the Pie with a Classic Double-Crust Design
Roll out one dough disc on a floured surface to a 12-inch circle (about ⅛-inch thick). Transfer it to a 9-inch pie dish, pressing gently to fit. Trim the edges, leaving about ½-inch overhang. Roll out the second dough disc to the same size, then cut it into 1-inch wide strips using a pizza cutter or sharp knife.
Arrange half the strips horizontally across the pie, spacing them ¼-inch apart. Fold back every other strip, then lay the remaining strips perpendicularly over the folded ones to create the classic lattice pattern. Crimp the top and bottom crust edges together, then tuck the lattice edges under the bottom crust for a clean finish.
Bake Until Golden and Bubbling
Brush the lattice crust with an egg wash (beat the 1 whole large egg with 1 tablespoon water). Preheat your oven to 375°F and place a baking sheet on the lower rack to catch any drips. Bake the pie for 50-60 minutes until the crust is deep golden brown and the filling is bubbling actively.
Here’s the thing—don’t open the oven early to check. The pie needs that steady heat to develop flavor and texture. If the crust starts browning too quickly, tent it loosely with foil after 30 minutes. The filling is done when it’s thick and the apples are tender but not mushy—you should see just a hint of juices pooling at the edges.
Cool and Serve for Perfect Texture
Let the pie cool on a wire rack for at least 2 hours before slicing. This resting time allows the filling to set and the juices to redistribute, preventing a runny pie. The lattice will crisp up as it cools, giving you that perfect balance of flaky crust and tender filling.
Slice into 8 equal wedges and serve warm with a scoop of vanilla ice cream. The contrast of the warm spiced apples with cold cream is what makes this pie truly special. Store any leftovers in the refrigerator for up to 3 days, though I doubt there’ll be any left!
Pro Tips For Making 12 Inch Apple Pie
- CHILL THE FILLING: After tossing your sliced apples with sugar and spices, pop the filling in the fridge for at least 30 minutes before baking. Cold filling shrinks less, so you won’t end up with a soggy bottom or overflowing crust—trust me, I’ve seen both happen.
- USE COLD BUTTER: Cut that unsalted butter straight from the fridge and cube it before mixing it into the flour. Cold butter creates flaky layers, not greasy messes, and your 12-inch crust will hold its shape under the weight of the apples.
- DON’T SKIP THE VINEGAR: Toss your sliced apples with a teaspoon of lemon juice or apple cider vinegar right after peeling. It keeps the fruit from turning brown and makes the filling taste brighter—no one wants bland apples in their pie.
- WEIGHT THE CRUST: Before baking, fill a pie dish with dried beans or pie weights, then cover the crust with parchment paper and blind-bake it for 15 minutes. This prevents the bottom from puffing up or burning before the filling goes in—your crust will stay crisp, not sad.
Essential equipment for great 12 inch apple pie
Pie Dish Essentials
Start with a 9-inch pie dish—I recommend Ceramic Pie Plates from Pyrex for even heat distribution. Avoid dark-colored metal pans, which can cause uneven browning. If you’re using a glass dish, preheat it for 10 minutes before adding the crust to prevent cracking.
For lattice pies, a deep-dish pan helps prevent the lattice from sagging under the weight of the filling. 🔥
Rolling Tools
A 12-inch rolling pin is a game-changer for even dough thickness. I love the OXO Good Grips model—its textured handles prevent slipping, and the tapered ends help roll edges smoothly. For lattice strips, use a pizza cutter or sharp chef’s knife to cut clean, even lines.
If you’re tight on space, a rolling pin with a built-in dough scraper (like the Norpro) saves counter space while keeping your work organized.
Pastry Cutters
For the crust, a pastry cutter (like the KitchenAid or Microplane) is essential for cutting butter into flour evenly. If you don’t have one, two forks or your fingers work in a pinch—just keep the butter cold!
For lattice strips, a bench scraper helps create straight edges without tearing the dough. I also keep a dough brush handy to dust flour between layers, which prevents sticking and ensures crisp edges. ✨
Baking Tools
An oven thermometer (like the Thermoworks) is non-negotiable—home ovens can run 25°F hotter or colder than set, throwing off your pie’s timing. A pie cooling rack keeps the bottom crust crisp while allowing air circulation.
For lattice pies, I use parchment paper under the lattice strips to prevent sticking to the filling. And don’t forget a pie server—the Dexter-Russell model cuts clean slices without crushing the lattice.
Optional Upgrades
For a professional touch, invest in a pie weight set (like Wilton) to keep the bottom crust from puffing up during baking. A pastry bag with a plain tip makes filling lattice strips effortless.
If you’re making pies often, a stand mixer with a dough hook (like KitchenAid) saves time and effort when mixing the dough. For storage, airtight containers (like Rubbermaid) keep pies fresh for up to 5 days—just reheat at 350°F for 15 minutes to restore crispness. 💫
Nutrition facts
Frequently asked questions
Can I use a different type of apple for this recipe?
While Granny Smith and Honeycrisp work best, you can also use McIntosh, Braeburn, or Fuji apples. For a balanced flavor, mix tart and sweet varieties. Avoid overly soft apples like Gala—they’ll turn mushy during baking. Toss all apples in 1 tablespoon lemon juice to prevent browning while prepping.
Why does my lattice crust get soggy?
Soggy lattice usually happens when the filling is too wet or the crust isn’t baked long enough. Make sure to pre-bake the bottom crust for 10 minutes at 375°F before adding filling. Also, brush the lattice strips with egg wash and bake until golden brown—don’t open the oven early to check. The filling should be thick but not soupy before baking.
How do I make the crust extra flaky?
Cold butter is key! Keep your butter cubed and frozen until mixing, and work quickly to avoid warming. Use a pastry cutter or your fingers to cut butter into flour until you see pea-sized pieces. Chill the dough for at least 2 hours before rolling, and don’t overwork it. Rolling too thin makes the crust tough—aim for ⅛-inch thickness.
Can I make this pie ahead of time?
Yes! The crust can be made 2 days ahead and stored wrapped in plastic. The filling can be prepped 1 day ahead and refrigerated. Assemble the pie 4 hours before baking and refrigerate until ready to bake. For best results, bake it straight from the fridge—no need to thaw. Leftovers keep for 3-4 days in the fridge or 2 months frozen.
What’s the best way to reheat sliced pie?
Slice the pie into wedges before reheating for perfect texture. Warm at 350°F for 10-15 minutes on a baking sheet with a splash of water in the pan. For extra crispiness, broil for 1-2 minutes at the end. Microwaving makes the crust soggy—always use the oven. If reheating from frozen, add 5 extra minutes to the baking time.

- 2 Lb Oatmeal Bread Machine Recipe: Hands-Off Crusty Loaf With Nutty Depth - September 30, 2026
- 8-Inch Pecan Pie Recipe: Buttery Crust and Caramelized Nut Bliss - September 30, 2026
- 1 Loaf Homemade Bread Recipe: Crusty Crunch and Airy Crumb in One Bowl - September 30, 2026