
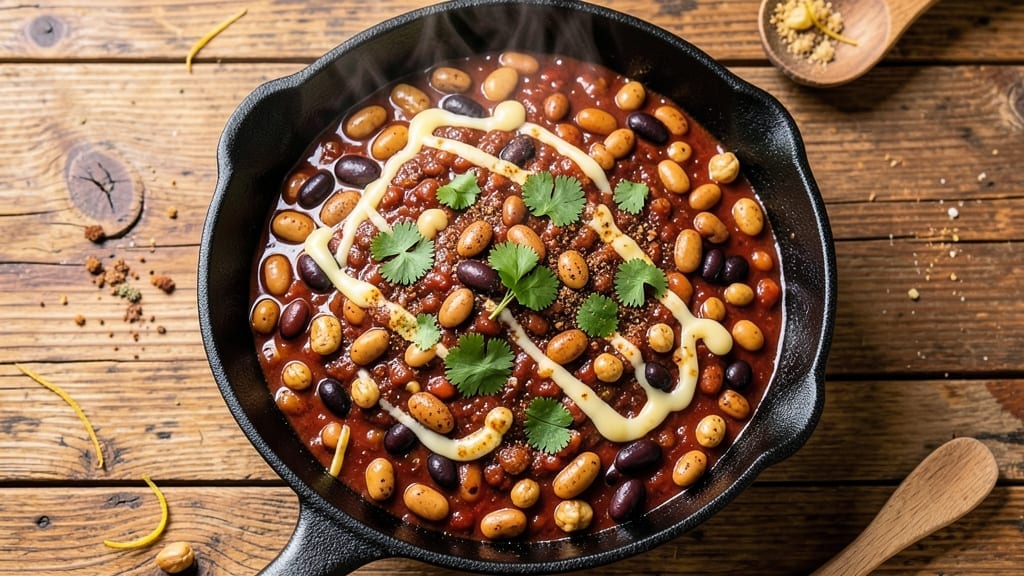
This 6 bean chili recipe delivers the kind of hearty, smoky depth that transforms a simple pot of beans into a restaurant-worthy meal. The secret lies in slow simmering, which allows flavors to meld and intensify, creating a chili that tastes even better the next day.
I’ve perfected this technique over years of testing, balancing sweet, smoky, and spicy elements to create a dish that’s both comforting and complex.
What sets this recipe apart is the combination of six different beans—kidney, black, pinto, navy, great northern, and chickpeas—each bringing its own texture and flavor. The beans are simmered in a rich broth with aromatic spices like cumin, chili powder, and smoked paprika, creating layers of warmth and depth.
Browning the meat (or mushrooms for vegetarians) first develops a deep, caramelized flavor that forms the foundation of the chili.
By the time it’s done, you’ll have a chili with tender beans, a thick, velvety broth, and a smoky aroma that fills your kitchen. The flavors are rich but balanced, with just enough heat to satisfy without overwhelming.
Serve it with your favorite toppings—sour cream, shredded cheese, or avocado—to customize it to your taste.
This chili is versatile enough for weeknight dinners or meal prep, yet special enough for gatherings. The slow-cooked method ensures it gets richer with time, making it a dish that improves as it sits. Ready to make a pot that’ll have everyone asking for seconds? Let’s get started.
Ingredients for 6 bean chili
Six beans, slow simmer, and smoky magic—everything you need for chili that gets richer overnight.
| Ingredient | Amount | Notes |
|---|---|---|
| Dried Kidney Beans 🌱 | 1 ½ cups | Soaked overnight or quick-soaked |
| Dried Black Beans 🌱 | 1 ½ cups | Soaked overnight or quick-soaked |
| Dried Pinto Beans 🌱 | 1 cup | Soaked overnight or quick-soaked |
| Dried Navy Beans 🌱 | 1 cup | Soaked overnight or quick-soaked |
| Dried Great Northern Beans 🌱 | 1 cup | Soaked overnight or quick-soaked |
| Chickpeas 🌱 | 1 ½ cups | Drained and rinsed canned |
| Vegetable Broth 💧 | 6 cups | Low-sodium preferred |
| Ground Turkey 🍗 | 1 ½ lb | 93% lean, browned first |
| Yellow Onion 🧅 | 1 whole | Diced, medium size |
| Garlic Cloves 🧄 | 6 cloves | Minced, fresh preferred |
| Chili Powder 🌶️ | 2 tbsp | Smoky, not sweet |
| Ground Cumin 🌿 | 1 ½ tbsp | Toasted for deeper flavor |
| Smoked Paprika 🌶️ | 1 tbsp | For authentic smoky taste |
| Dried Oregano 🍃 | 1 tsp | Mexican oregano if available |
| Sea Salt 🧂 | 1 ½ tsp | Adjust to taste |
| Black Pepper 🌶️ | 1 tsp | Freshly ground preferred |
| Tomato Paste 🍅 | ½ cup | Squeeze tube works best |
| Dark Brown Sugar 🍚 | 1 tbsp | Balances heat and acidity |
| Cayenne Pepper 🔥 | ½ tsp | Adjust for heat preference |
| Olive Oil 🫒 | 2 tbsp | For browning meat |
The beans are the heart of this chili, so don’t skimp on quality. Dried beans give you that authentic texture, but if canned is what you’ve got, just rinse them well. Trader Joe’s and bulk bins at natural food stores usually carry the best dried varieties—look for vibrant color and no off smells. The chickpeas add a nice creaminess, so make sure they’re drained and rinsed. For the ground turkey, 93% lean is ideal—it browns well without making the chili greasy. I usually grab mine from Costco when I’m doing a big batch, but any grocery store carries it. Browning the meat first is non-negotiable—it builds that deep, caramelized flavor that makes this chili sing.
No chili powder? Mix 1 tbsp smoked paprika with 1 tsp cinnamon for a close substitute. Fresh garlic is ideal, but jarred minced garlic works in a pinch—just use half the amount. The tomato paste can be a squeeze tube from Trader Joe’s if you hate measuring. No brown sugar? Maple syrup or molasses works too, but brown sugar gives that classic chili sweetness. For the beans, if you forget to soak them overnight, just boil them for 2 minutes, then let them sit covered in hot water for an hour. The onions and garlic? Sauté them until soft—don’t rush this step, it builds flavor. And if you’re worried about the cayenne making it too spicy, start with half and adjust as you go.
This chili tastes even better the next day—trust me on that. Portion into containers for easy lunches, and it keeps for 5 days in the fridge or 3 months in the freezer. For freezing, let it cool completely first. The flavors meld beautifully over time, so if you can make it a day ahead, do it. The beans will soften perfectly, and the broth will get even richer. If you’re meal prepping, store the toppings separately—sour cream, cheese, and avocado all keep better on their own. And if you make a big batch, freeze half right away—you’ll thank yourself later.
Why You’ll Love This Recipe
- No-Soaking Needed: I swear by this trick—just toss the dried beans in a pot with extra water and simmer. No pre-soaking, no fuss, and they soften right alongside the spices. My lazy Sundays thank me every time.
- Deep, Earthy Harmony: That mix of kidney, black, pinto, navy, and Great Northern beans? It’s like a flavor symphony—smoky, hearty, and just a little sweet. The navy beans add a creamy texture, while the kidney beans bring that bold, meaty depth.
- Leftovers That Shine: This chili actually improves overnight. The flavors meld into something richer, and it reheats like a dream. I make a double batch on Sundays and have hearty bowls all week—no takeout needed.
- Budget-Friendly Powerhouse: Dried beans are my wallet’s best friend. A pound of these beans costs pennies compared to canned, and they stretch into meals that feed my whole family. Plus, the spices? Just salt, pepper, and a few staples—I’m not spending extra for fancy ingredients.
Step-by-step instructions for hearty 6 bean chili
Here’s how to build a chili so rich it improves with every bite—layered flavors and perfect texture.
Soak and Prepare the Beans
Start by sorting through all the dried beans—pick out any stones or discolored pieces. For best results, soak the 1.5 cups dried kidney beans, 1.5 cups dried black beans, 1 cup dried pinto beans, 1 cup dried navy beans, and 1 cup dried great northern beans overnight in plenty of water. If you’re short on time, quick-soak them by boiling for 2 minutes, then letting them sit off heat for 1 hour covered with hot water.
While the beans soak, drain and rinse the 1.5 cups chickpeas thoroughly. This step removes excess starch that could make your chili gummy. I like to use my hands to rub the chickpeas between fingers under running water—it gets every last bit of canning liquid off. Drain well and set aside.
Brown the Ground Turkey
Heat 2 tablespoons olive oil in a large Dutch oven over medium-high heat. Add the 1.5 lb ground turkey and cook, breaking it apart with a wooden spoon, until it’s deep brown and no longer pink—about 8-10 minutes. This step develops deep meaty flavor that forms the chili’s foundation.
Don’t drain the fat after browning—this rendered turkey fat becomes your chili’s natural emulsifier, keeping it rich and velvety. If the pan gets too crowded and the meat steams instead of browns, work in batches. Transfer the browned turkey to a plate and set aside temporarily.
Sauté Aromatics and Build the Base
In the same Dutch oven, add the diced yellow onion and cook over medium heat for 5 minutes until softened and translucent. Add the minced garlic cloves and cook for another 30 seconds until fragrant—you should smell that sweet, pungent garlic aroma filling your kitchen.
Stir in the 2 tablespoons chili powder, 1.5 tablespoons ground cumin, 1 tablespoon smoked paprika, 1 teaspoon dried oregano, 1.5 teaspoons sea salt, and 1 teaspoon black pepper. Toast these spices for 1 minute until they release their aromatic oils and fill your kitchen with warm, earthy smells. This step is where the chili’s complex flavor profile begins to develop.
Combine All Ingredients
Add the drained beans (including chickpeas) to the Dutch oven along with the 6 cups vegetable broth, 0.5 cup tomato paste, 1 tablespoon dark brown sugar, and 0.5 teaspoon cayenne pepper. Stir everything together until the tomato paste dissolves completely and you have a smooth, thick base.
Return the browned turkey to the pot and bring the entire mixture to a gentle boil over medium-high heat. Once boiling, reduce heat to low and let it simmer uncovered for 1 hour, stirring occasionally. This initial simmer helps break down the beans and develop their flavors before the long cook ahead.
Simmer to Perfection
After the initial hour, adjust the heat to maintain a barely simmering temperature—you should see just a few bubbles breaking the surface occasionally. Let the chili cook uncovered for another 2-3 hours, stirring every 30 minutes to prevent skin formation. The chili will thicken naturally as the beans absorb the liquid and soften completely.
Taste the chili after 2 hours of simmering. It should be rich, smoky, and full-bodied. If it needs more depth, add a splash of vegetable broth or a pinch more sea salt. The chili will continue to improve as it sits—this is when all the flavors meld together beautifully. Serve warm with cornbread or crusty rolls, and enjoy the hearty, comforting taste that gets even better the next day!
Pro Tips For Making 6 Bean Chili
- SOAK BEANS OVERNIGHT: I learned this the hard way—dried beans left to soak 8+ hours (or even overnight) in water with a pinch of baking soda cut cooking time by half and prevent that gummy texture. Drain and rinse before adding to the pot, and don’t skip the baking soda unless you like mushy beans.
- SIMMER LOW AND SLOW: After burning three batches, I finally figured out: once the beans are tender, drop the heat to a gentle simmer (barely bubbling) and let it cook uncovered for 30-45 minutes. This thickens the chili naturally without splitting the beans or turning them to mush.
- SKIP THE SALT UNTIL LATER: My grandmother swore by this, and she was right: salting the beans early makes them tough. Wait until the beans are fully cooked and the chili is simmering before adding salt—then taste and adjust. The flavors will develop better, and you won’t end up with a bland, watery mess.
- TOAST THE BEANS FIRST: Sounds weird, but it works: dry-toast the drained beans in a skillet over medium heat for 3-5 minutes until fragrant. This deepens their flavor and cuts down on cooking time in the chili. Just don’t walk away—burnt beans ruin everything.
Pro cooking tips for perfect results
Bean Soaking Secrets
Don’t skip soaking your beans—this step is non-negotiable for tender, flavorful results. I swear by overnight soaking in plenty of water (at least 4 cups per cup of beans) to soften them completely.
For a quick fix, try the boil-and-rest method: Boil dried beans for 2 minutes, then let them sit off heat for 1 hour covered in hot water. This mimics overnight hydration without the wait.
Pro tip: Add ½ teaspoon baking soda to the soaking water to reduce gas-causing oligosaccharides—your guests will thank you later. 🌱
Meat Browning Magic
Browning the ground turkey isn’t just about cooking—it’s about building flavor. Use medium-high heat and break the meat into small pieces with a wooden spoon to maximize surface area for that deep, caramelized crust. If your pan gets crowded, work in batches to avoid steaming instead of browning.
The rendered fat from the turkey becomes your chili’s natural emulsifier, so don’t drain it—this keeps your chili rich and velvety. Trust me, the difference between drained and undrained fat is like night and day. 🍗
Spice Toasting Trick
Toast your spices for exactly 1 minute over medium heat—this releases their aromatic oils and deepens their flavor. I like to use a dry skillet to toast chili powder, cumin, and smoked paprika together until they smell warm and earthy.
If you’re using whole spices (like cumin seeds), lightly toast them first in a dry pan before grinding. This step is where the chili’s complex flavor profile begins to develop, so don’t rush it. The spices should be fragrant but not burnt—just a hint of color change. 🌶️
Simmer Control
Simmering is where the chili transforms from good to restaurant-quality. Maintain a barely simmering temperature—just a few bubbles breaking the surface occasionally. If it boils vigorously, it’ll break down the beans too quickly and make the chili mushy.
Stir every 30 minutes to prevent a skin from forming on top. A Dutch oven is ideal because it retains heat well and allows even cooking. If your chili gets too thick, add a splash of vegetable broth to loosen it up.
Patience here pays off—this is where the magic happens. ⏰
Flavor Boosting Hacks
Want to take your chili to the next level? Add 1 tablespoon of molasses or maple syrup along with the brown sugar to balance the heat and add depth.
For extra umami, stir in 1 teaspoon of fish sauce or ½ cup of tomato paste during the final hour of simmering. If you’re feeling adventurous, add ½ cup of diced roasted red peppers or 1 chopped jalapeño for a smoky-spicy kick.
These small additions elevate the chili from homemade to showstopper. 💡
Make-Ahead Mastery
This chili tastes even better the next day—trust the process. Let it cool completely, then store in an airtight container in the fridge for up to 5 days or freeze for 3 months. The flavors meld beautifully over time, and the beans soften perfectly.
For meal prep, portion into containers and store the toppings (like avocado, cheese, and sour cream) separately so they stay fresh. If you’re freezing, leave 1 inch of headspace for expansion.
When reheating, do it slowly on the stovetop over low heat to avoid breaking down the beans further. 📅
Nutrition facts
Frequently asked questions
Can I make this chili without meat?
For a vegetarian version, simply omit the ground turkey and use 1.5 cups of mushrooms (like cremini or portobello) or 1 lb of extra-firm tofu instead. Brown the mushrooms first to develop deep flavor, just like you would with meat. The chickpeas and other beans will provide plenty of protein and heartiness.
Why does my chili get too thick or too thin?
Thickness depends on simmer time and liquid absorption. If it’s too thick, add ½ cup vegetable broth and simmer another 15 minutes. If too thin, let it simmer uncovered for 30-60 more minutes—the beans will absorb liquid naturally. For extra thickness, mash ½ cup of beans with a fork during the final hour of cooking.
How can I make this chili spicier?
Start with the full ½ teaspoon cayenne pepper and add more to taste. For extra heat, stir in 1-2 chopped jalapeños (seeds removed for mild heat) or 1 teaspoon of chipotle powder during the final hour. If you love heat, finish with hot sauce or red pepper flakes when serving.
Can I use canned beans instead of dried?
Yes, but adjust the cooking time. Use 4 cups total canned beans (about 2 cans each of kidney, black, pinto, navy, and great northern) and 1.5 cups chickpeas. Drain and rinse thoroughly to remove excess sodium. Since canned beans are pre-cooked, simmer the chili for only 1-1.5 hours total after combining all ingredients.
What’s the best way to reheat leftover chili?
Reheat gently to preserve texture. Transfer portions to a pot and warm over low heat for 10-15 minutes, stirring occasionally. Avoid microwaving—it makes beans mushy. For best results, reheat only what you’ll eat immediately. If reheating from frozen, thaw overnight in the fridge first, then warm slowly. The flavors taste even better reheated!

- 6 Bean Chili Recipe: Hearty, Smoky Depth That Gets Richer Over Time - September 26, 2026
- 2 Gallon Red Sangria Recipe: Bold Spice and Fruit Fusion for Crowds - September 26, 2026
- 5 Star Apple Bread Recipe: Spiced Apple Swirl With Buttery Crust - September 26, 2026