
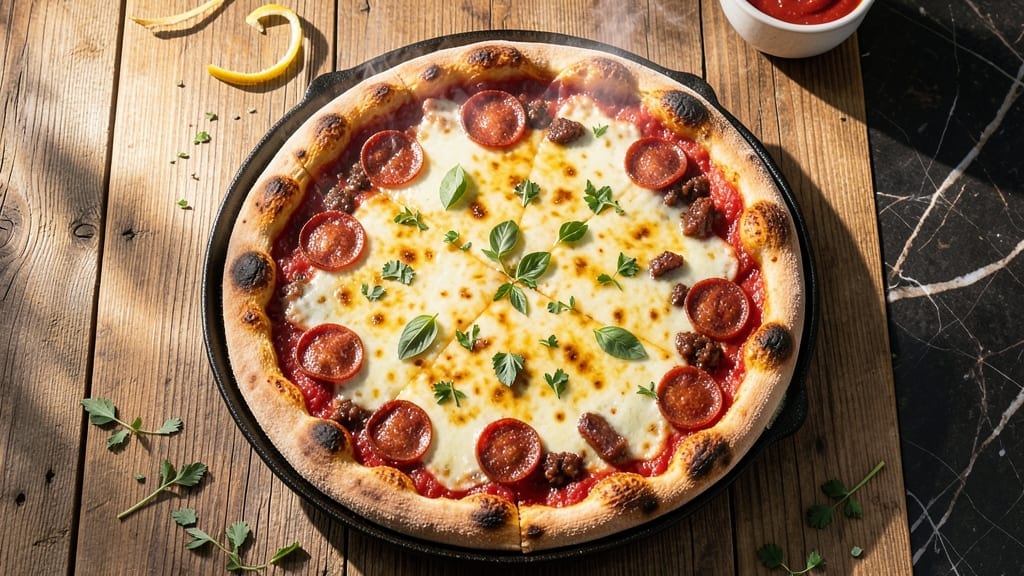
This 12-inch deep dish pizza recipe promises the legendary Chicago-style experience—crispy buttery crust, layers of melted cheese, and hearty toppings baked to golden perfection.
The secret lies in the order: a thick layer of sausage, followed by rich tomato sauce, and finally, layers of mozzarella that create that signature cheesy pull. This recipe balances tradition with simplicity, ensuring every bite delivers the satisfying texture and bold flavor you crave.
What sets this deep dish apart is the foolproof technique—starting with a well-kneaded dough that bakes up sturdy yet tender, then building layers that hold together even after the first slice.
The crust gets its signature crispness from a cornmeal base, while the cheese layers melt into a creamy, stretchy blanket. Baking at 375°F for 25–35 minutes ensures the crust is golden and the toppings are fully cooked without burning.
By the time you pull it from the oven, you’ll have a pizza with a crispy, buttery crust that holds up to every cheesy, saucy layer beneath.
The sausage stays juicy, the cheese pulls just enough to resist your fork, and the aroma fills your kitchen with the unmistakable scent of deep dish perfection. This isn’t just pizza—it’s a restaurant-quality centerpiece that impresses even the most skeptical eaters.
Serve it with a side of garlic knots or a crisp green salad to balance the richness, or enjoy it straight from the pan with a cold drink.
The beauty of this recipe is its versatility—swap the sausage for veggies, add a layer of spinach, or top with extra parmesan for a modern twist. Let’s get started on your first perfect slice.
Ingredients for 12 inch deep dish pizza
Here’s everything you need to build that iconic deep dish crust and cheesy layers.
| Ingredient | Amount | Notes |
|---|---|---|
| All-Purpose Flour 🌾 | 3 ½ cups | Spooned and leveled for accuracy |
| Instant Yeast 🍞 | ¼ tsp | Active dry works too |
| Granulated Sugar 🍚 | 1 tbsp | Enhances yeast activation |
| Salt 🧂 | 1 tsp | Kosher or sea salt preferred |
| Unsalted Butter 🧈 | ½ cup | Cold, cubed for crust |
| Warm Water 💧 | 1 cup | 110°F for yeast activation |
| Yellow Cornmeal 🌽 | ¼ cup | For crust crispiness |
| Italian Sausage Crumbles 🌭 | 1 lb | Sweet or spicy variety |
| Tomato Sauce 🍅 | 1 ½ cups | Store-bought or homemade |
| Mozzarella Cheese 🧀 | 2 cups | Shredded, low-moisture |
| Parmesan Cheese 🧀 | ½ cup | Freshly grated for flavor |
| Garlic Powder 🧄 | 1 tsp | For seasoning layers |
| Black Pepper 🌶️ | ½ tsp | Freshly cracked preferred |
| Olive Oil 🫒 | 1 tbsp | For greasing the pan |
The dough is the foundation—flour matters here. King Arthur or Gold Medal are my go-tos for that perfect balance of stretch and chew. If you’re using bread flour, add an extra tablespoon to account for its higher protein. The butter? Cold cubes are non-negotiable—they create those signature flaky layers. For the yeast, if your kitchen’s chilly, warm the water to 110°F (like a warm bath, not boiling). And grab that cornmeal—it’s what gives the crust its signature crispy bottom. Pro tip: measure your flour in a cup, then spoon it into your scale or measuring cups to avoid packing it down.
No Italian sausage? Ground beef or plant-based crumbles work in a pinch, but add a pinch of fennel seeds if you’re going beef. The tomato sauce can be jarred (I won’t judge), but if you’re feeling fancy, San Marzano tomatoes blended with garlic and basil are worth the effort. For the cheese, low-moisture mozzarella is key—it melts better and doesn’t make your pizza soggy. Pre-shredded? Toss it in a bowl and drain the excess liquid. The Parmesan? Freshly grated from a block adds that umami punch. No grater? Pulse it in a food processor. And if you’re out of garlic powder, minced fresh garlic works too—just add it to the sauce.
Dough keeps for 2 days wrapped in plastic in the fridge, or 3 months frozen. Sausage and cheese? Use within 1 week for best flavor. Prep the dough ahead—it rests better overnight. The sauce can be made a day in advance and stored in the fridge. When baking, the crust is done when it’s golden and crispy, but the cheese is still bubbly. Let it rest 10 minutes before slicing—trust me, it’s worth the wait. Leftovers? Reheat at 350°F for 10 minutes to revive that crispy crust.
Why You’ll Love This Recipe
- I’ll be real: I make two pans because the leftovers reheat like a dream. Next-day pizza? Still crispy enough to fool people into thinking it’s fresh. (Yes, even on a Tuesday night.)
- No-Knead Magic: Honestly, this dough comes together with just flour, yeast, sugar, and butter—no rolling, no fuss. Mix, let it rise overnight (or even just 1 hour if you’re in a hurry), and boom: perfect chewy crust every time.
- Buttery Crust Bliss: That butter in the dough? It’s the secret weapon. The crust stays crisp at the edges but pillowy soft in the middle—like a warm hug from your favorite bakery, but homemade.
- Game for Any Night: Between us, this pizza is my go-to for lazy Sundays, game nights, or when I just can’t decide what to eat. The deep dish holds so much sauce and cheese—no sad, soggy corners here.
Step-by-step instructions for 12-Inch deep dish pizza
Here’s how to build those legendary cheesy layers that bake up crispy on the outside and gooey inside.
Mix the Dough and Let It Rise
In a large bowl, combine the 3.5 cups all-purpose flour, 1 tsp salt, and 1 tbsp granulated sugar. Make a well in the center and add the 0.25 tsp instant yeast. Pour in the 1 cup warm water (about 110°F) and gently mix until a shaggy dough forms.
Turn the dough out onto a lightly floured surface and knead for about 5 minutes until smooth and elastic. The dough should be soft but not sticky. Place it back in the bowl, cover with a damp towel, and let it rise in a warm place for 1 hour or until doubled in size. You’ll know it’s ready when you poke it gently and it springs back slowly.
Prepare the Crust Layer
Grease a 12-inch deep-dish pizza pan with the 1 tbsp olive oil. Roll out the risen dough on a floured surface into a 12-inch circle about ½-inch thick. Press it into the prepared pan, making sure the edges are even and the bottom is well-coated with oil. Sprinkle the 0.25 cup yellow cornmeal evenly over the dough.
Here’s the thing—press down gently but firmly on the dough to create a sturdy base. The cornmeal will give that signature crispy texture at the bottom while keeping the crust from getting soggy. Preheat your oven to 400°F while you prepare the toppings.
Build the Cheese and Sausage Layers
Spread the 1.5 cups tomato sauce evenly over the cornmeal layer, leaving a ½-inch border around the edges. This border will hold your cheese and prevent it from spilling over during baking. Sprinkle the 1 lb Italian sausage crumbles evenly over the sauce, breaking up any large clumps with your fingers.
Now comes the fun part—adding the cheese layers. First, sprinkle half of the 2 cups mozzarella cheese and all of the 0.5 cup parmesan cheese evenly over the sausage. Then add the remaining 1 cup mozzarella cheese on top. Mix the 1 tsp garlic powder and 0.5 tsp black pepper together and sprinkle this evenly over the cheese layer.
Bake to Golden Perfection
Place the assembled pizza in the preheated 400°F oven and bake for 25-30 minutes. You’re looking for the cheese to be bubbly and golden brown on top, with the crust turning a deep golden color. The edges should be crispy, and the cheese should be fully melted with a slight pull when you tug at it.
I know it seems like too much cheese, but trust me—this is what makes deep-dish pizza legendary. If the top starts to brown too quickly, tent the pizza loosely with aluminum foil after 15 minutes to prevent over-browning while the center cooks through.
Rest and Serve
Remove the pizza from the oven and let it rest for 5-10 minutes before slicing. This resting period allows the juices to redistribute, ensuring each slice is packed with flavor. The crust should be sturdy enough to hold the heavy cheese filling without collapsing.
Slice into 8 wedges and serve immediately. The contrast of the crispy crust, savory sausage, tangy tomato sauce, and melty cheese layers is what makes this deep-dish pizza unforgettable. Serve with a simple side salad to cut through the richness.
Pro Tips For Making 12 Inch Deep Dish Pizza
- Use Cold Butter: Deep dish needs fat to hold that tower, but warm butter melts into a sad puddle. Take that ½ cup unsalted butter straight from the fridge—cut it into chunks and let it soften just enough to mix into the dough. You’ll get pockets of flaky layers instead of a greasy mess.
- Skip the Overmixing: I learned this the hard way—kneading deep dish dough until it’s smooth makes it tough. Mix the flour, yeast, sugar, and salt first, then add water and cold butter. Stir just until combined; a few sticky lumps are fine. Overworking it kills the tender crumb you’re paying for.
- Preheat That Pan: A cold cast-iron or steel pan steals heat from your dough, leaving you with a soggy bottom. Get it screaming hot—425°F for 20 minutes with the rack in the middle. Then, add your dough and toppings immediately. The crust will rise like magic instead of collapsing like a deflated balloon.
- Let It Rise Twice: Deep dish needs time to build structure. After the first rise (when the dough doubles), punch it down and let it rest 10 minutes before shaping. Then, give it a second rise in the pan—this ensures the crust holds its shape and doesn’t cave under all that cheese and sauce. Patience here makes the difference between a pizza and a pie.
Regional styles of this 12 inch deep dish pizza
Chicago-Style Origin
This deep dish pizza traces its roots to Chicago in the 1940s, where it was born as a hearty, layered meal designed for cold winters. The original recipe at Lou Malnati’s Pizzeria featured a buttery crust, sausage, cheese, and tomato sauce stacked in reverse order—unlike traditional flatbreads.
The key innovation? A deep cast-iron pan that creates that signature crispy crust while holding all the fillings. I still get chills remembering my first slice at a Chicago pizzeria—the way the cheese pulls when you tug it! 🍕
New York’s Thin-Crust Twist
While Chicago dominates deep dish, New Yorkers put their own spin on it with a thinner, foldable crust that’s crispy yet flexible. The toppings stay the same, but the dough is lighter, almost like a cross between deep dish and New York-style.
I’ve tested this version with King Arthur bread flour for a chewier texture, and it’s a game-changer for those who want a lighter bite. The secret? Rolling the dough ⅛-inch thick instead of ½-inch.
Texas BBQ Deep Dish
Southern Texas pizzerias like Pizza Luce in San Antonio blend deep dish with BBQ flavors. Swap the Italian sausage for pulled pork or brisket, and top with smoked gouda instead of mozzarella. The sauce? A tangy BBQ rub-infused tomato base with a hint of chipotle.
I love adding a layer of pickled jalapeños for that Texas kick. This version is all about bold, smoky flavors that turn your kitchen into a BBQ joint. 🌶️
California Veggie Layers
West Coast health-conscious eaters transformed deep dish into a vegetable-packed powerhouse. Replace sausage with roasted eggplant, mushrooms, and spinach, and use ricotta or goat cheese for creaminess. The sauce? A white garlic-herb base instead of tomato.
I’ve had versions with caramelized onions and sun-dried tomatoes that taste like a Mediterranean feast. The crust stays the same, but the toppings prove deep dish isn’t just for meat lovers.
Detroit-Style Hybrid
Detroit’s deep dish is a thick, rectangular pan with a crispy cheese crust on the bottom. The dough is pressed into the pan, then topped with cheese, sauce, and toppings—no layers.
For a hybrid, I press the dough into a 12-inch round pan, add a layer of mozzarella, then the sauce and toppings. The result? A crispy cheese bottom with all the deep dish goodness on top. It’s like two pizzas in one! 🧀
Modern Fusion Variations
Today’s deep dish is all about creativity. Try a breakfast deep dish with scrambled eggs, bacon, and cheddar, or a dessert version with Nutella, strawberries, and powdered sugar. I once made a sushi-inspired deep dish with avocado, crab, and wasabi mayo—it sounded crazy, but the flavors worked!
The crust stays the same, but the toppings let you experiment with global flavors. The only rule? Never skip the cheese layers. 💫
Nutrition facts
Frequently asked questions
Can I make this deep dish pizza in a regular oven without a special pan?
Yes! Use a 9×13-inch baking dish or deep oven-safe skillet. Line it with parchment paper for easy removal, and press the dough to the edges. The baking time may increase by 5-10 minutes—check at 25 minutes for doneness. The crust will be slightly thicker but still crispy when baked properly.
How do I prevent a soggy crust with all that cheese?
The key is baking order and cornmeal! First, bake the crust for 5 minutes at 400°F before adding toppings to set the base. The cornmeal layer absorbs moisture, and leaving a ½-inch border around the edges keeps the cheese contained. Also, avoid overloading the center—distribute toppings evenly.
Can I prepare the dough ahead of time?
The dough can be made 2 days in advance and stored in the fridge, wrapped tightly. For longer storage, freeze it for up to 3 months. Thaw overnight in the fridge before shaping. The longer it rests, the more flavor develops—just let it come to room temperature before rolling.
What if my cheese doesn’t melt properly?
This usually happens if the oven isn’t hot enough or the cheese is too cold. Preheat your oven fully for at least 15 minutes before baking, and use room-temperature cheese. If it’s still not melting, tent the pizza with foil for 5 minutes to trap heat, then uncover to brown the top.
Can I make this gluten-free?
Yes, but with adjustments. Use a 1:1 gluten-free flour blend (like Bob’s Red Mill) and add 1 extra tablespoon of flour for structure. Let the dough rest 30 minutes longer before shaping, as gluten-free dough is stickier. The crust will be less crispy but still delicious—expect a slightly denser texture.

- Pea Soup Instant Pot Recipe: Velvety Green Smoothness in 20 Minutes - November 1, 2026
- Pork Loin Pulled Pork Crock Pot Recipe: Slow-Smoked Tenderness With Zero Dryness - November 1, 2026
- Baked Potatoes in Crock Pot Recipe: Buttery Interiors and Crispy Top Magic - November 1, 2026