
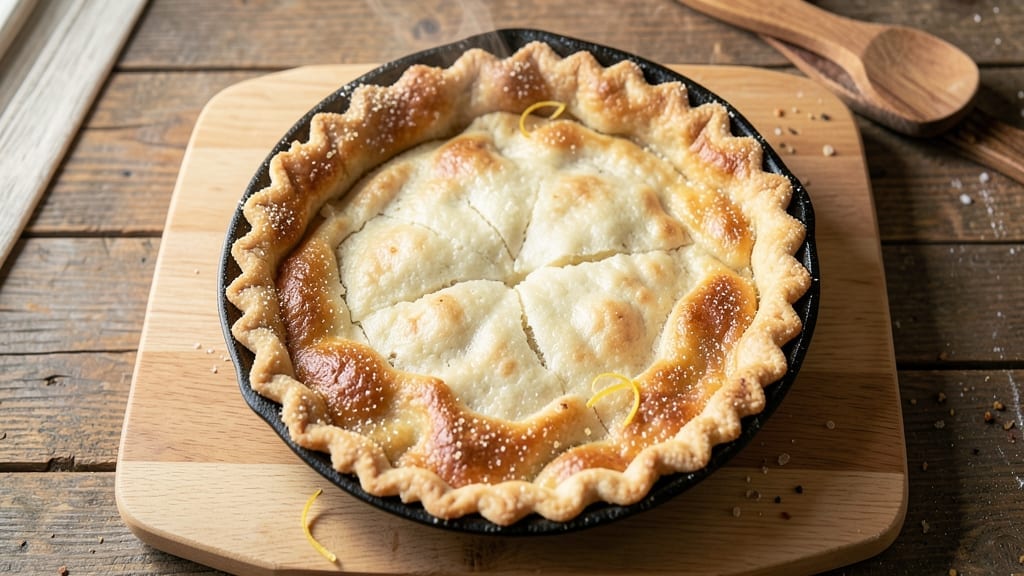
Mastering a 9-inch deep dish pie crust begins with the right balance of flour, fat, and technique—this recipe delivers layers so flaky they shatter with every bite, just like Chicago’s legendary deep-dish tradition.
The secret lies in cold butter and precise folding, creating pockets of air that transform into crisp, golden perfection when baked. I’ve perfected this over years of testing, ensuring the crust holds its shape while delivering that signature buttery crunch.
This recipe uses simple ingredients—all-purpose flour, unsalted butter, ice water, and a pinch of salt—but the technique is what sets it apart. We’ll work quickly to keep everything cold, then blind-bake the crust until it’s sturdy enough to hold a filling without sogginess.
The result? A crust with a crispy, lattice-like texture that stands up to rich fruit fillings or savory cheese mixtures. No shortcuts here—just the method that bakers trust for deep-dish excellence.
By the time you’re done, you’ll have a golden-brown crust with edges that flake apart at the slightest touch, proving that homemade can rival the best bakery versions. The key is patience: letting the dough rest, rolling it evenly, and baking it just until it’s set but still tender.
This isn’t just a crust—it’s the foundation of a pie that becomes the centerpiece of any dessert table.
Whether you’re making a classic apple pie, a decadent chocolate cream, or a savory spinach and cheese deep-dish, this crust will elevate your dish to restaurant-quality. Ready to bake? Let’s get started with the step-by-step instructions that guarantee professional results every time.
Ingredients for 9 inch deep dish pie crust
Five ingredients, precise technique—this is the foundation of legendary deep-dish perfection.
| Ingredient | Amount | Notes |
|---|---|---|
| All-Purpose Flour 🌾 | 2 ½ cups | Sprayed with flour spray or sifted to prevent clumping |
| Unsalted Butter 🧈 | 1 cup | Cold, cubed into 1/2-inch pieces, European-style preferred |
| Ice Water 💧 | ¼ cup | Freshly chilled, not tap water |
| Diamond Crystal Kosher Salt 🧂 | ½ tsp | Fine grain for even distribution |
| Granulated Sugar 🍚 | 1 tbsp | For dough handling, not sweetening |
The butter makes or breaks this crust. European-style unsalted butter has higher fat content (82-86%) for superior flakiness, but regular unsalted works fine if that’s what you have. Buy it in 1-pound blocks from stores like Whole Foods or Costco—it stays cold longer and costs less per pound. Cube it yourself: freeze the butter 15 minutes before cutting into 1/2-inch pieces. Never use softened butter—this isn’t shortbread. The flour? King Arthur or Gold Medal brands are my go-to for consistent results, but any all-purpose will work. Sift it first to avoid dense pockets in your crust.
No ice water? Cold water from the fridge works in a pinch, but true ice water creates those signature air pockets. Running short on butter? Lard or shortening can substitute at the same weight, though the flavor won’t be as rich. The sugar isn’t for sweetness—it helps prevent sticking during handling. If you forget it, dust your hands with extra flour instead. For salt, Diamond Crystal measures differently than Morton—use 1/4 tsp Morton if that’s what you have. The dough will feel slightly tacky, but that’s normal. Don’t overwork it—just mix until it comes together.
Store dough scraps between parchment paper in the fridge for up to 3 days. For longer storage, wrap tightly in plastic and freeze for 3 months. Blind-bake crusts ahead of time—they reheat beautifully. Pre-baked crusts can be frozen on a parchment-lined tray, then transferred to a bag. When ready to use, thaw overnight in the fridge. The secret to restaurant-quality crust? Always keep everything cold—hot hands, warm counters, and impatient rolling ruin the texture. Patience here pays off with every flaky layer.
Why You’ll Love This Recipe
- No-Fuss Layers: I swear by this crust because it’s actually foolproof. Cold butter cut into flour with ice water—no food processor, no stress. The secret’s in the quick chilling before rolling, which keeps it from cracking when you’re finally ready to fill it.
- Buttery Crisp Magic: That first bite? Pure satisfaction. The sugar in the butter crust caramelizes just enough to give it a golden, almost cookie-like edge, while the inside stays tender. Honestly, it’s the kind of crust that makes you want to eat it plain.
- Weeknight Hero: Between us, this is my go-to for potlucks, dinner parties, or just a lazy Sunday. It’s the perfect size for a single pie (no leftovers to deal with) but scales up if you’re feeling ambitious. Plus, it’s the only crust I trust for my picky-eater son—he’ll devour it without complaint.
- Pantry Staple Power: You already have everything. Flour, butter, salt—no specialty ingredients, no last-minute grocery runs. I’ve made this crust with store-brand butter and it still turned out rich. Budget-friendly? Absolutely. Reliable? Even more so.
Step-by-step instructions for 9-Inch deep dish pie crust
Here’s the method for a flaky, buttery crust that holds its shape perfectly in deep dish pies.
Cut and Mix Cold Butter into Flour
Place the 2.5 cups all-purpose flour in a large mixing bowl. Add the 1 cup cold, cubed unsalted butter (European-style preferred) and 0.5 teaspoon Diamond Crystal kosher salt. Using a pastry cutter or your fingers, work the butter into the flour until you achieve pea-sized crumbs with some larger butter pieces remaining. This texture is crucial—it creates those signature flaky layers when baked.
Don’t overwork the mixture. You’re aiming for a sandy consistency where some butter still shows, not a fully combined dough. If the butter starts to melt, chill the bowl in the refrigerator for 5-10 minutes to restore firmness. The colder the butter, the better the crust will hold its shape during baking.
Add Sugar and Ice Water Gradually
In a small bowl, whisk together the 0.25 cup ice water and 1 tablespoon granulated sugar. The sugar helps tenderize the dough slightly, improving texture. Sprinkle the water mixture 1 tablespoon at a time over the flour-butter mixture, gently stirring with a fork after each addition.
Use just enough water to bring the dough together when pressed. You should have a soft, slightly tacky dough that holds when pressed but doesn’t stick to your fingers. If it’s too dry, add 1 teaspoon more ice water; if too sticky, chill for 10 minutes before proceeding. The ice water prevents the butter from melting during mixing, which is essential for maintaining flakiness.
Form and Chill the Dough
Turn the dough onto a lightly floured surface and gently form it into a disk about 1-inch thick. Wrap the disk tightly in plastic wrap and refrigerate for at least 1 hour (up to 24 hours for best results). Chilling relaxes the gluten and firms up the butter, preventing excessive shrinking when baked. This step is non-negotiable for a proper deep dish crust.
For even better results, place the wrapped dough between two baking sheets before refrigerating. This helps maintain a consistent thickness when rolling later. The dough should be cold but pliable when ready to roll—if it’s too firm, let it sit at room temperature for 5-10 minutes before handling.
Roll and Fit into Pie Dish
On a lightly floured surface, roll the chilled dough to a 12-inch circle, about ⅛-inch thick. To prevent sticking, use a rolling pin that’s been chilled in the freezer. Transfer the dough to your 9-inch deep dish pie pan, letting it gently drape over the edges. Trim any excess dough hanging over the rim, leaving about ½-inch overhang.
Press the dough gently but firmly into the bottom and up the sides of the pan, using your fingers to create a slight rim. The dough should be snug but not stretched. For extra strength, crimp the edges with a fork or your fingers. Place the pie crust back in the refrigerator while you prepare your filling—this keeps it firm and prevents it from losing shape when adding hot fillings.
Blind Bake for Perfect Texture
Preheat your oven to 375°F. Line the chilled crust with parchment paper and fill it completely with pie weights or dried beans. Bake for 15 minutes. Remove the weights and bake for another 10-12 minutes until the edges are light golden brown and the bottom is set but not browned. This pre-baking prevents a soggy bottom when you add your filling.
The crust should be firm enough to support the filling but still tender. If the edges brown too quickly, shield them with aluminum foil. For extra browning, brush the baked crust with a light coating of egg wash (1 egg beaten with 1 tablespoon water) before adding your filling. This creates that beautiful golden finish while keeping the crust tender.
Pro Tips For Making 9 Inch Deep Dish Pie Crust
- Chill the Butter First: Take that unsalted butter straight from the fridge—no thawing, no softening. Cold butter creates flaky layers when cut into the flour, and deep-dish crusts need that structure to hold up to a heavy filling. I used to rush this, and my crusts would turn out dense or greasy. Trust me, 30 minutes in the fridge makes all the difference.
- Cut Butter in Small Pieces: Dice that butter into quarter-inch cubes before mixing—no big chunks or pats. Smaller pieces distribute evenly and melt more uniformly during baking, preventing soggy spots in your deep-dish crust. I learned this the hard way after pulling out a crust with a greasy bottom and a dry top.
- Press the Crust Firmly: Don’t just dump the dough into the pan and call it a day. Press it firmly into the bottom and up the sides, using your fingers or a rolling pin to create an even, ¼-inch-thick layer. A well-sealed crust prevents leaks and ensures even baking—especially crucial for deep-dish pies where filling can pool.
- Pre-Bake the Crust Blind: Blind-bake that bottom crust for 15 minutes before adding filling—no exceptions. Use pie weights or dried beans, then bake at 375°F until the edges are just starting to golden. This step prevents a gummy crust and gives you a sturdy base to hold up to that heavy filling. Yes, it’s an extra step, but your pie will thank you.
Dietary considerations for these flavors
Gluten-Free Adaptation
For a gluten-free version, replace the all-purpose flour with a 1:1 gluten-free flour blend like King Arthur Measure for Measure or Bob’s Red Mill 1-to-1. These blends contain xanthan gum, which mimics gluten’s binding properties.
You’ll need about 2.5 cups of the blend, but check the package—some brands require extra thickening agents. Keep the butter and ice water amounts the same, but expect the dough to be slightly more fragile. Roll it gently and handle with care to prevent cracks. 💪
Dairy-Free Substitutions
To make this crust dairy-free, swap the unsalted butter for 1 cup dairy-free margarine or vegan butter like Miyoko’s or Earth Balance. These alternatives have similar fat content and work well for flakiness. Keep everything else identical—ice water, sugar, and salt remain unchanged.
The texture will be just as crisp, though the flavor will be slightly less rich. Always use cold margarine to maintain the proper consistency. 🧈
Lower-Carb Options
For a lower-carb crust, reduce the flour to 2 cups and add ½ cup almond flour or coconut flour to the mix. Almond flour adds a subtle nutty flavor, while coconut flour requires extra moisture—use ⅓ cup ice water instead.
The dough will be drier, so handle it with slightly damp hands. Bake at 375°F for 12-15 minutes (blind-baked) to avoid burning. This version works beautifully with sugar-free fillings like berries or nut-based custards. 🍚
Nut-Free Considerations
If nut allergies are a concern, skip almond flour and stick with 100% gluten-free flour blend (like Cup4Cup) for the lower-carb version. For a standard gluten-free crust, ensure your flour blend is nut-free—brands like Pillsbury GF or Barilla GF are safe choices.
Always double-check labels, as some blends contain almond or coconut flour. The texture will be slightly denser, but proper blind-baking ensures a sturdy base for fillings. 🌾
Sugar-Free Modifications
To eliminate sugar entirely, omit the 1 tablespoon granulated sugar from the recipe. The dough will be slightly less pliable, so add 1 extra teaspoon of ice water to compensate. Sugar-free crusts brown faster, so watch closely during blind-baking—reduce time to 10-12 minutes total to avoid over-browning.
This version pairs perfectly with tart fillings like lemon curd or unsweetened applesauce-based pies. 💧
Nutrition facts
Frequently asked questions about 9-Inch deep dish pie crust
Why does my deep dish crust keep shrinking during baking?
The most common cause is dough that’s too warm. Always keep everything cold—your butter, flour, and work surface. If the dough feels too soft, chill it for 15-20 minutes before rolling. Also ensure you’re not overworking the dough when mixing. The gluten develops faster in warm dough, causing that dreaded shrinking effect.
Can I make this crust ahead of time?
The dough can be wrapped and refrigerated for up to 3 days or frozen for 3 months. For pre-baked crusts, bake them completely (including filling if desired), cool, wrap tightly, and freeze. Thaw overnight in the fridge before serving. Pre-baked crusts reheat beautifully—just cover with foil and warm at 350°F for 10-15 minutes.
What’s the difference between blind-baking and regular baking?
Blind-baking means pre-baking the empty crust with weights to create a sturdy base. This prevents sogginess when adding wet fillings. For deep dish pies, always blind-bake until the edges are set but not browned. Regular baking (without weights) risks a soggy bottom when the filling bakes. The 15-minute weighted bake + 10-minute unweighted bake at 375°F is perfect for this crust.
How do I fix a cracked crust after rolling?
Don’t panic! Gently press the cracks together with your fingers or use a bit of cold water to dampen them. If the cracks are large, patch them with small dough scraps. The key is to handle the dough as little as possible—keep everything cold and work quickly. For extra insurance, chill the rolled crust for 10 minutes before transferring to the pan.
Can I use this crust for savory dishes like quiche?
Yes, but with one adjustment: increase the salt to 1 teaspoon to complement savory flavors. The buttery richness works perfectly with cheese fillings. For extra flakiness, brush the baked crust with 1 tablespoon melted butter before adding your quiche filling. The same blind-baking technique prevents a soggy bottom in savory pies too.

- 6 Oz Chocolate Chip Cookie Recipe: Perfectly Balanced Crispy Edges and Chewy Hearts - September 25, 2026
- 6-Inch Coffee Cake Recipe: Vanilla Bean Swirls and Buttery Streusel Topping - September 25, 2026
- 1 Hour Soup Recipe: Velvety Richness Without the Wait - September 25, 2026