
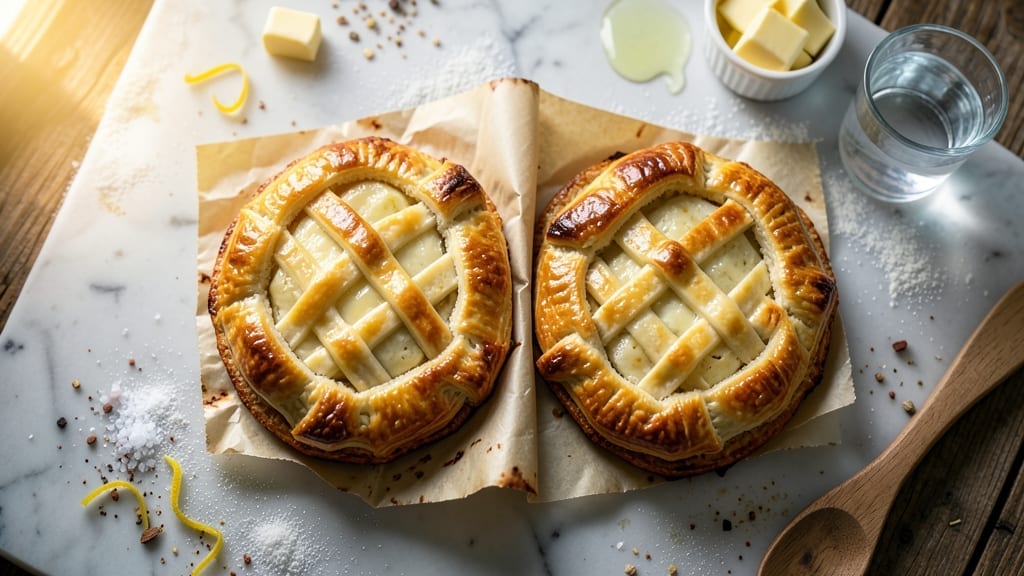
A 12-inch double pie crust that shatters at the touch—without a single tear or soggy spot—is the foundation of every impressive dessert. This recipe delivers flaky, golden layers that stay crisp even after baking, using a proven technique that eliminates the guesswork.
The secret lies in proper chilling, careful handling, and a precise folding method that creates those signature delicate layers. What sets this method apart is the no-rolling approach, which prevents tough crusts and maintains even thickness. Each layer gets folded like a letter, ensuring consistent thickness and maximum flakiness.
The butter stays cold while the dough works, creating those signature air pockets that make every bite melt in your mouth.
By the time you slide your pie into the oven, you’ll have two perfectly shaped crusts ready for filling—whether it’s a classic apple pie, a rich chocolate cream, or a savory quiche.
The crust will hold its shape, resist shrinking, and deliver that shatteringly crisp texture that separates home bakers from professionals. This technique works for both blind-baked and filled pies, and I’ll walk you through every step to ensure success—no matter your skill level.
Let’s build a crust that’s worth the effort.
Ingredients for 12 inch double pie crust
Nine ingredients transform into two perfect 12-inch crusts—flaky, golden, and shatteringly crisp.
| Ingredient | Amount | Notes |
|---|---|---|
| All-Purpose Flour 🌾 | 3 cups | Sifted for light texture |
| Unsalted Butter 🧈 | 1 cup | Cold, cubed into 1/2-inch pieces |
| Ice Water 💧 | ½ cup | Chilled for dough elasticity |
| Diamond Crystal Kosher Salt 🧂 | ½ tsp | Fine grain preferred |
| Granulated Sugar 🍚 | 1 tbsp | For golden crust color |
| White Vinegar 🍶 | 1 tbsp | Adds tenderness and crispness |
| Large Egg Yolk 🥚 | 1 whole | For binding and richness |
| Cornstarch 🌾 | 1 tbsp | Prevents sticking during folding |
| All-Purpose Flour (for dusting) 🌾 | ¼ cup | Extra for dusting work surface |
The butter is non-negotiable—it needs to stay cold (not soft) the whole time. Grab European-style butter from Whole Foods or Trader Joe’s if you can; it has higher fat content for extra flakiness. Cut it into 1/2-inch cubes and freeze for 10 minutes before mixing. The flour? King Arthur or Gold Medal brands work best—they’re sifted and consistent. Store your flour in the freezer to prevent rancidity, but bring it to room temp before using. The egg yolk? Fresh is key—older yolks won’t bind as well. Crack it into a separate bowl first to avoid shell bits in your dough.
No butter? Lard or coconut oil (solid) can work in a pinch, but texture will differ. Short on vinegar? Lemon juice at the same amount gives a similar tang. The cornstarch might seem odd, but it’s a game-changer—it prevents the dough from sticking during the letter-folding process. If you’re gluten-free, swap the all-purpose flour for a 1:1 gluten-free blend (like Bob’s Red Mill), but expect slightly less flakiness. For vegan crusts, replace the egg yolk with 1 tbsp aquafaba (chilled) or 1 tbsp melted vegan butter, but add an extra tbsp of ice water to compensate. The sugar and salt can be adjusted—skip the sugar entirely for savory pies, but keep the salt.
This dough must chill between steps—no shortcuts. Wrap tightly in plastic and refrigerate for at least 1 hour (up to 2 days). For long-term storage, freeze the dough balls for up to 3 months. When ready to use, let them sit at room temp for 10 minutes before shaping. The folded crusts can be blind-baked for 15 minutes at 375°F before adding fillings. If prepping ahead, bake the crusts unfilled and store at room temp in an airtight container for 2 days. For extra crispiness, brush the baked crust with a light egg wash (1 yolk + 1 tbsp water) before filling. Leftovers? Crumble into croutons or pie crust mix-ins—zero waste.
Why You’ll Love This Recipe
- No Fuss, Always Works: I’ve made this crust a dozen times—no rolling pin, no stress. Just pulse the butter and flour in a food processor, add ice water, and press it into a pan. The secret’s in the cold butter; it stays flaky even if I’m not a pastry pro.
- Butter So Good: That cold, cubed butter mixed into the flour? It melts into little pockets of pure richness. Honestly, store-bought crusts can’t compete—this one’s got a golden, caramelized edge that makes every bite worth it.
- Your Crust, Any Filling: Need a pie for Thanksgiving, a pot pie for a Tuesday, or a hand pie for a picnic? This crust handles it all. I’ve used it for apple, savory chicken, and even a sweet lemon curd—just one dough, endless possibilities.
- Budget-Friendly Staples: Five ingredients, zero specialty items. You’re already using flour and butter for everything else, so this is just repurposing what’s in your pantry. Plus, a double crust means leftovers freeze perfectly for next month’s dessert. Smart, simple, and satisfying.
Step-by-step instructions for 12-Inch double pie crust
Here’s how to build two perfect pie crusts that deliver that legendary flaky, shatter-prone texture.
Combine Dry Ingredients and Cut in the Butter
In a large mixing bowl, whisk together the 3 cups all-purpose flour, 0.5 teaspoon diamond crystal kosher salt, 1 tablespoon granulated sugar, and 1 tablespoon cornstarch. This dry blend should be completely homogeneous with no flour clumps—use a whisk for 10 seconds to break up any lumps.
Add the 1 cup cold, cubed unsalted butter to the dry ingredients. Using your fingers or a pastry cutter, work the butter into the flour until you achieve pea-sized crumbles. The butter should remain cold and firm—if it starts to melt, chill the bowl for 10 minutes. This step is critical for creating those signature flaky layers when baked. I like to press the butter pieces against the bowl sides to ensure even distribution throughout the flour.
Add Wet Ingredients and Form the Dough
Create a well in the center of your dry mixture and add the 1 whole large egg yolk, 1 tablespoon white vinegar, and 0.5 cup ice water. Using a fork or rubber spatula, gently mix the wet ingredients into the dry until just combined. The dough should come together but remain slightly crumbly—don’t overwork it.
Here’s the thing—you want the dough to be cool to the touch. If it feels warm, pop it back in the fridge for 15 minutes. This chilled state prevents gluten development, which would make the crust tough instead of flaky. Once cool, divide the dough into two equal portions and flatten each into a disk about 1-inch thick. Wrap each disk tightly in plastic wrap and refrigerate for at least 1 hour (up to 2 days). This resting period relaxes the gluten structure and makes rolling out easier.
Roll Out the First Crust
Lightly dust your work surface with 0.25 cup all-purpose flour for dusting. Remove one dough disk and place it on the floured surface. Using a rolling pin, gently roll the dough from the center outward, rotating it a quarter turn after each roll. Keep the dough about 1/8-inch thick—this ensures even baking and proper flakiness.
Real talk: don’t press down too hard. You want the dough to maintain some structure while still being pliable. If it resists rolling, let it rest for 5 minutes and try again. The goal is to create a smooth, even circle about 12 inches in diameter. Gently transfer the rolled crust to your pie dish, letting it drape over the edges. Trim any excess dough with a sharp knife, leaving about 1/2-inch overhang.
Blind-Bake the First Crust
Preheat your oven to 375°F. Line the bottom crust with parchment paper, then fill it with pie weights or dried beans. This step, called blind-baking, prevents the crust from puffing up when it hits the oven. Bake for 15 minutes, then remove the weights and bake for another 5-7 minutes until the edges are light golden brown. The center should still look slightly pale—it will finish baking when you add your filling.
Watch the oven carefully during this step. If the crust starts to brown too quickly, tent it with foil. The key is even baking without burning. Once done, remove the crust from the oven and let it cool for 10 minutes before adding your filling. This resting period prevents the hot crust from cracking when the filling goes in.
Roll and Assemble the Top Crust
Repeat the rolling process with your second dough disk, keeping it 1/8-inch thick. For a classic lattice top, cut the rolled crust into 12 strips about 1/2-inch wide. Arrange 6 strips horizontally across the pie, then weave the remaining 6 strips vertically through the gaps, creating a crisscross pattern. For a solid top, simply roll the dough to fit your pie dish and trim the edges.
Brush the top crust with a mixture of 1 tablespoon water and 1 tablespoon cold milk (if you have it) for a golden finish. If you’re making a lattice, trim the strips to even lengths before weaving. The edges should extend about 1/2-inch beyond the bottom crust. Fold the overhang under itself to create a neat edge, then crimp with a fork or your fingers for a decorative finish. Bake according to your filling’s instructions, typically at 375°F for 30-45 minutes until golden brown.
Pro Tips For Making 12 Inch Double Pie Crust
- CHILL THE BUTTER FIRST: Take your unsalted butter straight from the fridge and cut it into ½-inch cubes—no need to soften it at room temp. Cold butter creates flaky layers, and I’ve learned the hard way that room-temp butter turns into a greasy mess when rolling out a 12-inch crust.
- WEIGH YOUR FLOUR: Scoop that flour into a scale instead of packing it into measuring cups—trust me, your crust will thank you. A packed cup adds extra weight, and your dough will end up too dense for that perfect flaky texture.
- WORK FAST WITH ICE WATER: Keep your ice water in the freezer until you’re ready to mix—no waiting for cubes to melt halfway through. Cold water keeps the dough from getting gummy, and I’ve ruined more crusts than I’d like to admit by using lukewarm water.
- REST THE DOUGH TWICE: Give your dough a 30-minute rest in the fridge before rolling, then another 15 minutes after shaping. This isn’t just waiting—it’s the difference between a crust that cracks and one that holds together like a dream. (Yes, even if you’re impatient like me.)
Best sauces and condiments for this dish
Classic Apple Filling
Pair your double crust with a spiced apple filling that complements the flaky texture perfectly. I use 6 cups peeled, sliced Granny Smith apples (their tartness balances sweetness), 1 cup brown sugar, 2 tbsp lemon juice, 1 tsp cinnamon, and ¼ tsp nutmeg.
Cook the mixture until thickened, then spoon it into your blind-baked crust. The acidity in the lemon juice prevents the apples from turning mushy while baking. 🍏
Creamy Chocolate Ganache
For a decadent dessert, try a rich chocolate ganache as your filling. Melt 12 oz dark chocolate (I love Ghirardelli 72%) with 1 cup heavy cream over a double boiler, then let it cool slightly before pouring into your crust.
Top with whipped cream and fresh berries for an elegant finish. The contrast between the crisp crust and silky ganache is pure magic. 🍫
Savory Spinach and Cheese
Surprise your guests with a savory quiche-style pie. Sauté 2 cups chopped spinach with ½ cup diced onion, then mix with 6 eggs, 1 cup heavy cream, and 1 cup shredded Gruyère cheese.
Pour into your crust and bake until set. The flaky crust holds up beautifully to the creamy filling, making it a crowd-pleaser for brunch. 🧀
Sweet Potato Pie Filling
For a fall favorite, blend 2 cups mashed sweet potatoes, ½ cup brown sugar, ¼ cup melted butter, 1 egg, and 1 tsp cinnamon until smooth.
Pour into your crust and bake at 375°F for 40 minutes. The crust’s crispness contrasts beautifully with the creamy, spiced filling—perfect for Thanksgiving. 🍠
Lattice Top Variations
Elevate your pie presentation with lattice crust designs. For a herb lattice, sprinkle fresh thyme or rosemary between the strips before weaving. For a sweet twist, brush the lattice with egg wash and sprinkle with crushed pistachios or toasted coconut flakes before baking.
The visual appeal makes your pie look like it came from a bakery. ✨
Post-Bake Glazes
Add a glossy finish to your baked pie with simple glazes. For a honey glaze, mix ¼ cup honey with 1 tbsp warm water and brush over the top crust.
For a buttercream glaze, whip ½ cup softened butter with 2 cups powdered sugar and 2 tbsp milk** until smooth. These glazes add a professional touch without overpowering the filling. 🍯
Nutrition facts
Frequently asked questions
Why does this recipe use ice water instead of regular water?
The ice water keeps the dough cool and prevents gluten from developing too much, which would make the crust tough. Cold water also helps maintain the butter’s firmness during mixing, creating those signature flaky layers. Always use ice cold water straight from the freezer for best results.
Can I make the crust ahead of time?
You can prepare the dough disks up to 2 days ahead and refrigerate them. For longer storage, freeze the wrapped disks for up to 3 months. Let them thaw in the fridge overnight before using. The chilled dough is easier to handle and gives you more flexibility for baking.
What’s the best way to prevent a soggy bottom crust?
Blind-baking is key! Pre-bake your bottom crust with pie weights or dried beans for 15 minutes at 375°F, then remove the weights and bake another 5-7 minutes. This creates a sturdy base that won’t absorb filling juices. For extra insurance, brush the pre-baked crust with a light egg wash before adding filling.
How do I fix a crust that shrinks during baking?
Shrinking usually happens when the dough isn’t chilled enough or the butter melts too soon. To prevent it: keep everything cold, don’t overwork the dough, and roll the crust to exactly 12 inches before baking. If it shrinks slightly, just trim the edges after baking and no one will notice! The secret is patience—let the dough rest properly.
Can I use this crust for savory pies too?
Yes! Skip the sugar in the recipe for savory pies, and this crust works perfectly for quiches, pot pies, or savory galettes. The flaky texture pairs beautifully with creamy fillings like spinach and cheese or chicken and mushroom. Just remember to pre-bake the bottom crust to handle any liquid fillings.

- Pea Soup Instant Pot Recipe: Velvety Green Smoothness in 20 Minutes - November 1, 2026
- Pork Loin Pulled Pork Crock Pot Recipe: Slow-Smoked Tenderness With Zero Dryness - November 1, 2026
- Baked Potatoes in Crock Pot Recipe: Buttery Interiors and Crispy Top Magic - November 1, 2026