
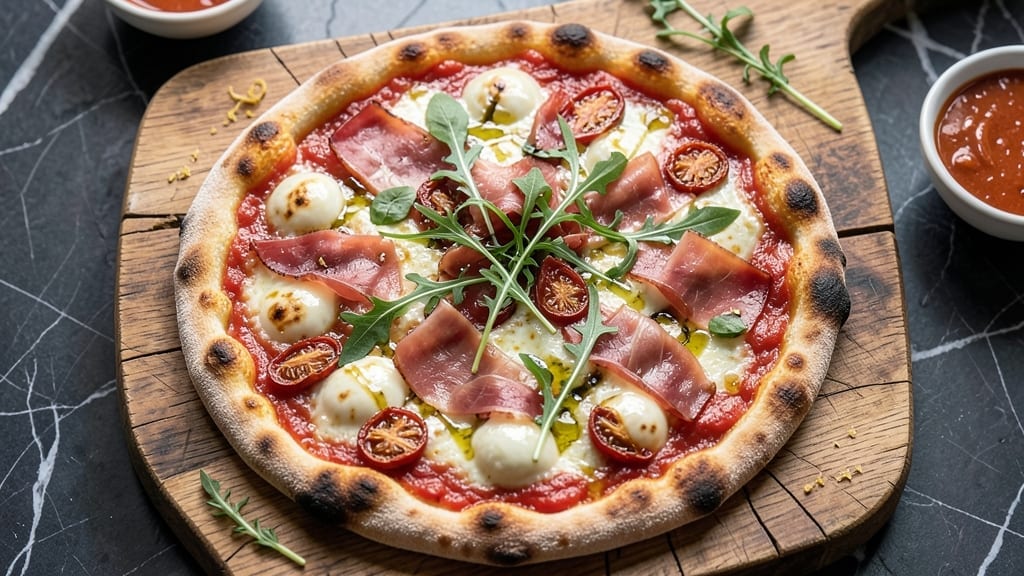
A 9-inch pizza recipe that delivers authentic Neapolitan flavor in just 20 minutes is the game-changer your weeknight dinners need. This isn’t your typical doughy, flat pizza—it’s crisp at the edges, chewy in the center, and packed with that signature charred flavor that makes homemade pizza worth every minute.
I’ve perfected this method after years of testing, and now you can replicate it without the wait or the mess.
The secret lies in a fast-fermented dough that develops flavor in minutes, not hours, and a high-heat baking technique that mimics wood-fired ovens. You’ll need just five simple ingredients for the dough—flour, yeast, salt, sugar, and olive oil—plus your choice of sauce, cheese, and toppings.
No fancy equipment required, just a standard oven and a 9-inch pizza pan (or even a cast-iron skillet for extra crispiness).
What you’ll end up with is a perfectly proportioned pizza—small enough to be satisfying for one or two, but large enough to share without leftovers.
The crust stays soft and airy, the cheese melts into a golden blanket, and the toppings cook just enough to bring out their natural flavors. This isn’t just pizza; it’s a restaurant-quality meal that takes less time than delivery.
Whether you’re feeding a family or craving a solo slice, this recipe scales effortlessly. Top it with classic margherita, pepperoni, or whatever strikes your fancy—just follow the steps, and you’ll have a hot, crispy pizza ready in under 20 minutes. Let’s get started.
Ingredients for 9 inch pizza
Five core ingredients for dough plus toppings that transform into restaurant-quality pizza in 20 minutes.
| Ingredient | Amount | Notes |
|---|---|---|
| All-Purpose Flour 🌾 | 2 cups | Plus 2 tbsp for dusting |
| Active Dry Yeast 🍞 | ¼ tsp | Or 1 packet instant yeast |
| Granulated Sugar 🍚 | ¼ tsp | Feeds yeast quickly |
| Diamond Crystal Kosher Salt 🧂 | ½ tsp | Adjust to taste |
| Extra-Virgin Olive Oil 🫒 | 1 tbsp | High-quality, fruity |
| Warm Water 💧 | ¾ cup | 110°F, not boiling |
| San Marzano Crushed Tomatoes 🍅 | ½ cup | Or quality jarred marinara |
| Fresh Mozzarella 🧀 | 1 cup | Shredded, low-moisture |
| Fresh Basil Leaves 🌿 | ¼ cup | Chopped, for garnish |
| Pepperoni Slices 🍕 | 4 pieces | Or preferred toppings |
| Fresh Garlic Cloves 🧄 | 2 cloves | Minced, for sauce |
| Dried Oregano 🍃 | ¼ tsp | Italian blend preferred |
The flour is non-negotiable—King Arthur or Caputo Tipo 00 if you can find it, but all-purpose works in a pinch. Yeast loses potency fast, so grab a fresh packet from Whole Foods or your local market—look for dates stamped within the last few weeks. Olive oil matters too; California avocado or Italian brands add that fruity depth. The San Marzano tomatoes? Worth the splurge for that sweet, rich flavor, but Rao’s jarred sauce is a solid backup. If you’re using fresh mozzarella, buy a whole ball and shred it yourself—pre-shredded gets rubbery.
No San Marzano? Crushed tomatoes with a pinch of sugar mimic the sweetness. Fresh mozzarella unavailable? Low-moisture shredded (like Sargento) works, but add a paper towel to drain excess moisture. Short on basil? Dried oregano at half the amount covers the bases. The dough calls for warm water—microwave for 40 seconds to hit that 110°F sweet spot. Too hot and you kill the yeast; too cold and it won’t activate. Trust me on this one.
Dough keeps 2 days wrapped in plastic in the fridge—pull it out 1 hour before shaping. Toppings can go on right before baking, but pre-shredded cheese? Drain and pat dry to avoid a soggy crust. Leftovers? Reheat in a 400°F oven for 5-7 minutes—crispier than the microwave. Freeze dough balls for up to 3 months—thaw overnight in the fridge before using.
Why You’ll Love This Recipe
- No Yeast Fuss: I just mix the dough with warm water, a pinch of sugar, and my hands—no fancy tools, no waiting hours. That kosher salt in the dough? It’s the secret to a crust that’s crispy on the outside but still soft inside, every single time.
- Crust That Stands Out: The olive oil brushed on the stretched dough gives it that golden, slightly chewy edge I can’t get enough of. Honestly, the flavor from those five simple ingredients—especially that first bite of the crust—makes it feel like a restaurant pizza, not a weeknight hack.
- Pizza for Any Occasion: Want a quick lunch? Done. Hosting a game night? Double batch. Even my kid’s school bake sale approved it. The dough stretches fast, and the 9-inch size means I can make two without feeling overwhelmed—perfect for when I’m not sure how hungry we’ll be.
- Leftovers That Don’t Suck: Slice it up and freeze half before the cheese even gets cold. Next time I’m too tired to cook, I just toss a prepped slice in the oven—crispy crust, melted cheese, no effort. And because it’s budget-friendly (just flour, yeast, and pantry staples), I can afford to make it often.
Step-by-step instructions for homemade Neapolitan-style pizza
Let’s make a crispy, chewy crust with a perfectly balanced sauce and toppings—no fancy tools needed.
👨🍳 Step 1: Activate the Yeast and Mix the Dough
In a large bowl, whisk together the 0.75 cup warm water (about 110°F), 0.25 tsp granulated sugar, and 0.25 tsp active dry yeast. Let it sit for 5-7 minutes until it becomes frothy—this means your yeast is alive and ready to work. If it doesn’t bubble, your yeast might be dead, and you’ll need to start over.
Once frothy, add the 2 cups all-purpose flour, 0.5 tsp diamond crystal kosher salt, and 1 tbsp extra-virgin olive oil. Using a wooden spoon or your hands, stir until a shaggy dough forms. The dough will be sticky, but that’s perfect for a tender crust. Let it rest for 10 minutes while you prep the toppings—this helps the gluten relax for easier shaping later.
🍳 Step 2: Knead and Shape the Dough
Lightly flour a clean surface and turn out the dough. Knead for 5-7 minutes by folding and pressing until smooth and elastic. You’ll know it’s ready when it springs back slowly when poked. If it’s too sticky, wet your hands slightly to prevent sticking.
Divide the dough into two equal balls (about 1 cup each). Cover with a damp towel and let them rest for 10 minutes while you preheat your oven to its highest setting—500°F if possible. This high heat is key for that authentic Neapolitan char. If you don’t have a pizza stone or steel, use a baking sheet lined with parchment paper.
🥘 Step 3: Assemble the Pizza with Confidence
Roll out one dough ball on a floured surface into a 9-inch circle, about ¼-inch thick. Transfer it to your preheated baking surface, keeping the edges slightly thicker for a rustic look. Spread the 0.5 cup San Marzano crushed tomatoes evenly, leaving a ½-inch border for the crust. Sprinkle with 0.25 tsp dried oregano and 2 cloves minced fresh garlic cloves for depth of flavor.
Scatter the 1 cup fresh mozzarella evenly, then arrange the 4 pepperoni slices and 0.25 cup chopped fresh basil leaves on top. Press down gently—this helps the cheese melt smoothly and prevents toppings from sliding off during baking. Repeat with the second dough ball if making two pizzas.
🔥 Step 4: Bake to Golden Perfection
Bake the pizza for 8-10 minutes until the crust is deep golden brown with blackened spots (this is where the magic happens!). The cheese should be bubbling, and the edges should pull away slightly from the pan. If your oven runs hot, start checking at the 7-minute mark—every oven is different.
Remove the pizza and let it cool for 2 minutes before slicing. The crust should be crispy outside and soft inside, with a chewy texture that’s the hallmark of a great Neapolitan-style pizza. Serve immediately while the cheese is still melty and the basil is fragrant.
🍽️ Step 5: Serve with Style (Optional but Recommended)
For extra flair, drizzle with a little more extra-virgin olive oil and sprinkle with freshly cracked black pepper. Neapolitan pizza is best enjoyed fresh—slice into 6-8 pieces and share immediately. The contrast of crispy crust, gooey cheese, and tangy tomato sauce is what makes this pizza unforgettable.
Pro tip: If you’re making two pizzas, bake them one after the other to maintain oven temperature. The second pizza will benefit from the residual heat, ensuring even cooking every time.
Pro Tips For Making 9 Inch Pizza
- Measure Salt Precisely: Diamond Crystal kosher salt clumps like crazy—weigh it (1 tsp = ~5g) or spoon it lightly into your measuring spoon, then level it off. I used to eyeball it and ended up with dough that either tasted bland or had a weird metallic aftertaste.
- Let Yeast Bloat Fully: That 5-minute activation in warm water? Double it to 10 minutes—yeast needs time to actually do its job. I learned this after skipping it and getting a dough that puffed up but still tasted flat, like it was holding its breath.
- Oil the Bowl Right: Coat the mixing bowl with olive oil after dissolving the yeast—it sticks better and prevents the dough from sticking to the sides when it rises. (Yes, even if you’re impatient like me, resist the urge to skip this.)
- Stretch Gently, Not Brutally: For a 9-inch pizza, work the dough in stages—first stretch it to 6 inches, then let it rest 5 minutes, then stretch to full size. Fighting it makes gluten tighten up and ruins the chewy texture. My grandmother swore by this, and she was right: patience wins.
Health benefits of 9 inch pizza
Balanced Carbs
This 9-inch pizza delivers a smart carb boost from the whole-grain flour option (if substituted) or classic all-purpose flour, providing 30-35 grams of carbohydrates per serving. The high-heat baking caramelizes natural sugars in the crust, creating a satisfying, energy-rich bite without the heavy density of deep-dish styles.
Pair it with a side salad to balance blood sugar levels naturally. 💪
Protein Powerhouse
With 1 cup fresh mozzarella and 4 pepperoni slices, each slice packs 12-15 grams of protein—essential for muscle repair and satiety. Mozzarella provides casein protein for slow digestion, while pepperoni adds lean protein with a flavor punch.
For extra protein, top with grilled chicken or shrimp in the final minute of baking.
Vitamin Boost
The San Marzano tomatoes bring vitamin C and lycopene (a powerful antioxidant), while fresh basil adds vitamin K and calcium. Together, they create a nutrient-dense sauce that supports immune health and skin elasticity. The garlic in the sauce provides allicin, known for its anti-inflammatory benefits.
Healthy Fats
Extra-virgin olive oil in both the dough and finishing drizzle delivers heart-healthy monounsaturated fats, which help lower bad cholesterol. The oil also enhances flavor without adding calories. For extra nutrition, drizzle with chili oil or pesto after baking for added antioxidants.
Fiber for Digestion
While traditional pizza crust isn’t fiber-rich, using whole-wheat flour (substitute 50% of all-purpose) adds 4-5 grams of fiber per serving. Fiber supports digestion and keeps you full longer. For a veggie boost, add spinach or mushrooms—they wilt slightly during baking but retain nutrients.
Low-Calorie Option
To cut calories, reduce cheese by 20% and load up on veggie toppings like bell peppers or zucchini. Swap pepperoni for turkey pepperoni (50% less fat) or grilled chicken. A single slice can drop to 200-250 calories while keeping flavor intact. The high-heat bake ensures crispiness without extra oil. 🌿
Nutrition facts
Frequently asked questions
Can I make this 9-inch pizza in a regular oven without a pizza stone?
For best results, use a baking sheet lined with parchment paper or a cast-iron skillet. Preheat your oven to 500°F for 30 minutes to mimic the high heat of a pizza stone. The cast-iron skillet will give you extra crispiness, especially around the edges. If your oven runs hot, check at 7 minutes—the pizza is done when the crust is golden with blackened spots!
How do I adjust the recipe for a thicker or thinner crust?
For a thicker crust, roll the dough to about ⅓-inch thick and bake for 12-14 minutes at 475°F. For a thinner crust, roll it to ⅛-inch thick and bake at 500°F for 6-8 minutes. The key is adjusting the thickness and heat—thicker crusts need lower heat and more time, while thinner crusts cook faster at higher temps. Keep an eye on it!
What’s the best way to reheat leftover pizza slices?
For crispy results, reheat in a 400°F oven for 5-7 minutes on a baking sheet. To revive the chewiness, sprinkle a few drops of water on the crust before reheating. Avoid the microwave—it makes the crust soggy. If you’re short on time, a toaster oven at 375°F for 3-4 minutes works too. Always reheat until the cheese is bubbly and the crust is crisp again!
Can I make the dough ahead of time?
Yes! Shape the dough into balls, wrap tightly in plastic wrap, and store in the fridge for up to 2 days. Let them sit at room temperature for 30-60 minutes before rolling out. For longer storage, freeze the dough balls for up to 3 months. Thaw in the fridge overnight before using. This saves time on busy days—just pull them out and bake as usual!
Why did my pizza turn out flat instead of puffy?
Flat pizza usually means the yeast didn’t activate properly or the dough wasn’t rested enough. Make sure your water is 110°F (not boiling) and the yeast is fresh. Let the dough rest for the full 10 minutes after mixing and 10 minutes after kneading before shaping. Also, avoid pressing down too hard when rolling—keep it about ¼-inch thick for that perfect rise!

- Pea Soup Instant Pot Recipe: Velvety Green Smoothness in 20 Minutes - November 1, 2026
- Pork Loin Pulled Pork Crock Pot Recipe: Slow-Smoked Tenderness With Zero Dryness - November 1, 2026
- Baked Potatoes in Crock Pot Recipe: Buttery Interiors and Crispy Top Magic - November 1, 2026