
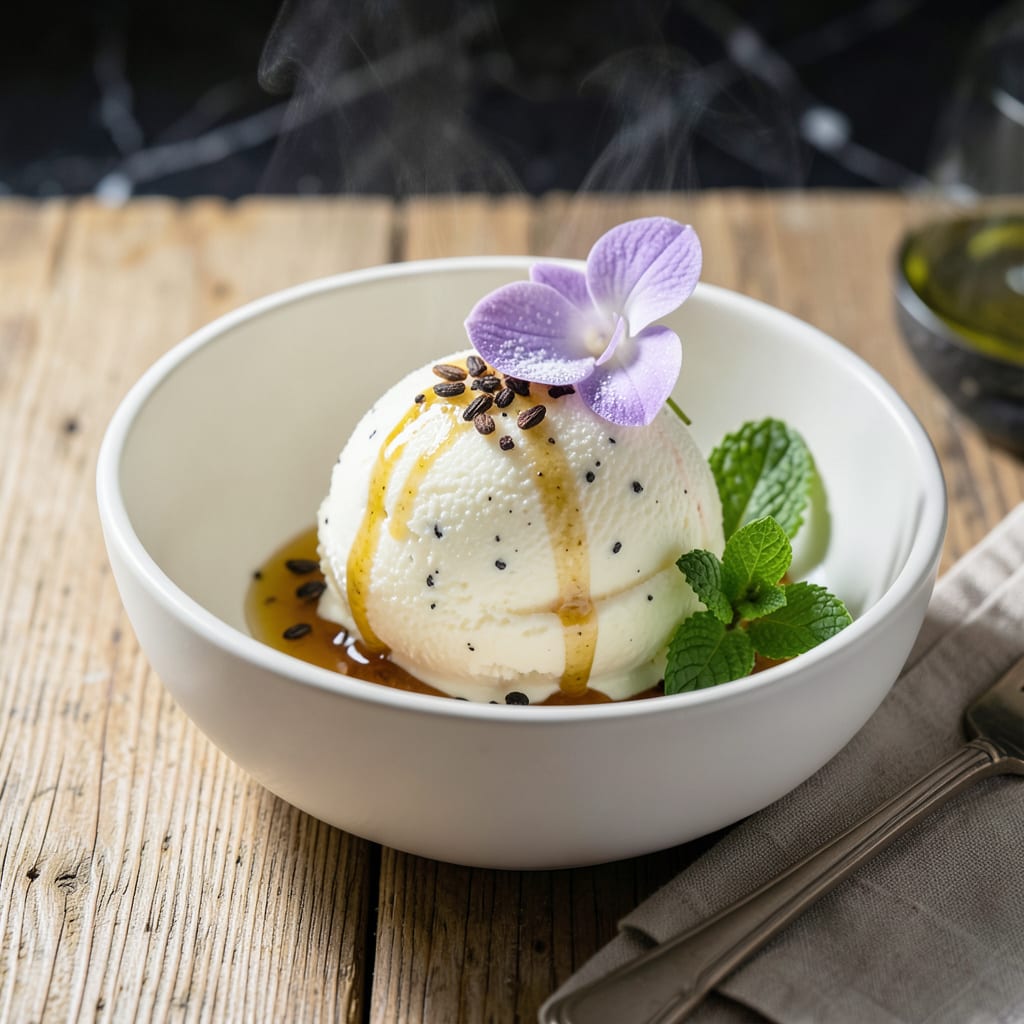
This low fat vanilla bean ice cream delivers the same rich, creamy texture you expect from traditional versions, without the excess calories. The secret lies in using a precise balance of ingredients and proper churning technique.
Real vanilla beans provide authentic flavor, while reduced fat milk and a touch of sugar create that luxurious mouthfeel. You won’t believe this lighter version is actually good for you.
Ingredients for Low Fat Vanilla Bean Ice Cream
Just a few simple ingredients make this creamy, dreamy low-calorie frozen treat possible.
| Ingredient | Amount | Notes |
|---|---|---|
| Whole Milk 🥛 | 2 cups | Reduced fat, 2% preferred |
| Heavy Cream 🥛 | ½ cup | Light cream for lower fat |
| Granulated Sugar 🍚 | ¾ cup | Fine grain for smooth texture |
| Vanilla Bean 🌿 | 1 whole | Split and scraped |
| Vanilla Extract 💧 | 1 tsp | Pure, for depth of flavor |
| Egg Yolks 🥚 | 3 whole | Large eggs, room temperature |
| Corn Syrup 🍯 | 2 tbsp | Light, for smoothness |
| Salt 🧂 | ¼ tsp | Fine sea salt preferred |
| Nonfat Dry Milk Powder 🥛 | 2 tbsp | For creaminess without fat |
| Xanthan Gum 🧪 | ¼ tsp | Stabilizer for texture |
The vanilla bean is non-negotiable here—look for plump, moist pods at Whole Foods or specialty stores. If you can’t find them, Nielsen-Massey vanilla beans are a great mail-order option. The milk should be 2% for the best balance of creaminess and low fat. I always keep a few beans in my freezer (they last forever) so I’m never without that real vanilla flavor.
No vanilla bean? Use 2 tsp of pure vanilla extract instead, but add it at the end for the best flavor. Can’t find light cream? Half-and-half works in a pinch—just know the fat content will be slightly higher. The xanthan gum might seem fancy, but it’s what keeps this smooth without all the fat. Bob’s Red Mill sells it in small bags if you don’t want a huge container.
This base keeps in the fridge for 2 days before churning. Once churned, store in an airtight container for up to 1 week. If it gets too hard, let it sit at room temperature for 10 minutes before scooping.
Why You’ll Love This Recipe
- No Fuss Mixing: I just whisk the milk, cream, and sugar together—no fancy gadgets or complicated steps.
- Real Vanilla Magic: The scraped vanilla bean seeds and extract make every bite taste like a luxury dessert.
- Scoop for Any Day: Honestly, it’s my go-to for summer barbecues or a quiet Tuesday night treat.
- Budget-Friendly Luxe: A single vanilla bean stretches across batches, so it feels indulgent without the splurge.
Step-by-Step Instructions for Low Fat Vanilla Bean Ice Cream
This method delivers creamy, rich flavor while keeping the fat content in check.
Step 1: Infuse the Milk with Vanilla Bean
In a medium saucepan, combine the 2 cups Whole Milk and the seeds from the 1 whole Vanilla Bean (after splitting and scraping). Add the empty vanilla pod as well for maximum flavor. Heat over medium heat until the mixture just begins to simmer—you’ll see tiny bubbles forming around the edges.
Remove from heat, cover, and let steep for 15 minutes. This step extracts all those beautiful vanilla notes into the milk, giving your ice cream that authentic, deep vanilla flavor. Don’t rush it; the longer it steeps, the more pronounced the vanilla taste will be.
Step 2: Temper the Egg Yolks and Thicken the Base
In a separate bowl, whisk the 3 whole Egg Yolks with the 0.75 cup Granulated Sugar until the mixture turns pale yellow and slightly thickens. This is your custard base, and properly tempering the eggs ensures a smooth, lump-free texture.
Slowly pour about 1 cup of the hot milk mixture into the egg yolks while whisking constantly. Then, return the tempered egg mixture to the saucepan with the remaining milk. Cook over medium-low heat, stirring constantly, until the mixture thickens enough to coat the back of a spoon—this should take 5-7 minutes.
Step 3: Add Remaining Ingredients and Chill
Strain the custard through a fine-mesh sieve into a clean bowl to remove any cooked bits of egg or vanilla pod. Stir in the 0.5 cup Heavy Cream, 1 tsp Vanilla Extract, 2 tbsp Corn Syrup, 0.25 tsp Salt, 2 tbsp Nonfat Dry Milk Powder, and 0.25 tsp Xanthan Gum. The xanthan gum acts as a stabilizer, ensuring a creamy texture without excess fat.
Cover the bowl and refrigerate the mixture for at least 4 hours, or preferably overnight. Chilling is crucial—it allows the flavors to meld and the mixture to reach the ideal temperature for churning. If you’re in a hurry, you can use an ice bath to speed up the process, but don’t skip this step entirely.
Step 4: Churn and Freeze to Perfection
Pour the chilled mixture into your ice cream maker and churn according to the manufacturer’s instructions, typically 20-25 minutes. The mixture will thicken into a soft-serve consistency. If you don’t have an ice cream maker, you can freeze the mixture in a shallow container, stirring vigorously every 30 minutes for 2-3 hours to break up ice crystals.
Transfer the churned ice cream to a freezer-safe container and freeze for at least 4 hours or until firm. For the best texture, let it sit at room temperature for 5-10 minutes before scooping. The result? Luxuriously smooth, creamy vanilla bean ice cream with a fraction of the fat.
Pro Tips For Making Low Fat Vanilla Bean Ice Cream
- Chill the Base: Always refrigerate your milk-cream-sugar mixture for at least 4 hours before churning—I learned this the hard way when my first batch turned out soupy.
- Scrape the Bean: Split the vanilla bean lengthwise and scrape out every last speck of seeds, then toss the empty pod into the warming milk to infuse extra flavor.
- Skip the Boil: Heat the dairy just until the sugar dissolves, around 160°F, and resist the urge to boil it or you’ll risk curdling the proteins.
- Use Cold Equipment: Freeze your ice cream maker bowl for a full 24 hours and chill your mixing bowl beforehand—sounds tedious, but it prevents ice crystals from forming.
Regional Styles of This low fat vanilla bean ice cream
French Style
In France, they often use crème fraîche instead of heavy cream for a lighter version. I recommend replacing 0.5 cup heavy cream with an equal amount of low-fat crème fraîche. The result has a subtle tang that pairs beautifully with vanilla bean. 💛
Italian Gelato
For an Italian twist, reduce the milk to 1.5 cups and add 0.5 cup whole milk yogurt. This creates a denser, silkier texture similar to gelato. The yogurt adds creaminess without extra fat.
Southern US
In the South, they love their ice cream sweet and rich. I add 1 tbsp honey to the base for a touch of floral sweetness. Some even fold in 0.5 cup diced peaches after churning for a fruit-infused treat.
Tropical Variation
For a Caribbean-inspired version, replace 0.25 tsp vanilla extract with 0.5 tsp coconut extract. The tropical flavor works wonderfully with the vanilla bean. Toasted coconut flakes make a perfect topping.
Scandinavian Light
Scandinavian cooks often use skyrmilk (a fermented milk product) for extra protein. Replace 0.5 cup heavy cream with 0.5 cup plain skyr. This adds protein while keeping the texture creamy and light.
Vegan Adaptation
For a plant-based version, swap dairy for 2 cups coconut milk beverage and use 1 tbsp cornstarch as a thickener. The vanilla bean flavor still shines through beautifully in this dairy-free alternative.
Nutrition Facts
Frequently Asked Questions
Can I use vanilla extract instead of a vanilla bean?
Yes, substitute 2 tsp pure vanilla extract for the bean. Add it at the end of cooking to preserve its delicate flavor. The taste won’t be as rich, but it’s a good backup.
Why does the recipe include xanthan gum?
Xanthan gum acts as a stabilizer, giving the ice cream a creamy texture without extra fat. Use just 0.25 tsp—it’s potent! This keeps the final product smooth and scoopable.
How long can I store the finished ice cream?
Store in an airtight container for up to 1 week. For best texture, let it sit at room temperature for 5-10 minutes before scooping.

- 8 Bean Soup Recipe Crock Pot: Hearty Vegetable Medley in One Pot - September 25, 2026
- 4C Bread Crumbs Meatballs Recipe: Crispy Crust and Juicy Centers - September 25, 2026
- 6 Oz Chocolate Chip Cookie Recipe: Perfectly Balanced Crispy Edges and Chewy Hearts - September 25, 2026