
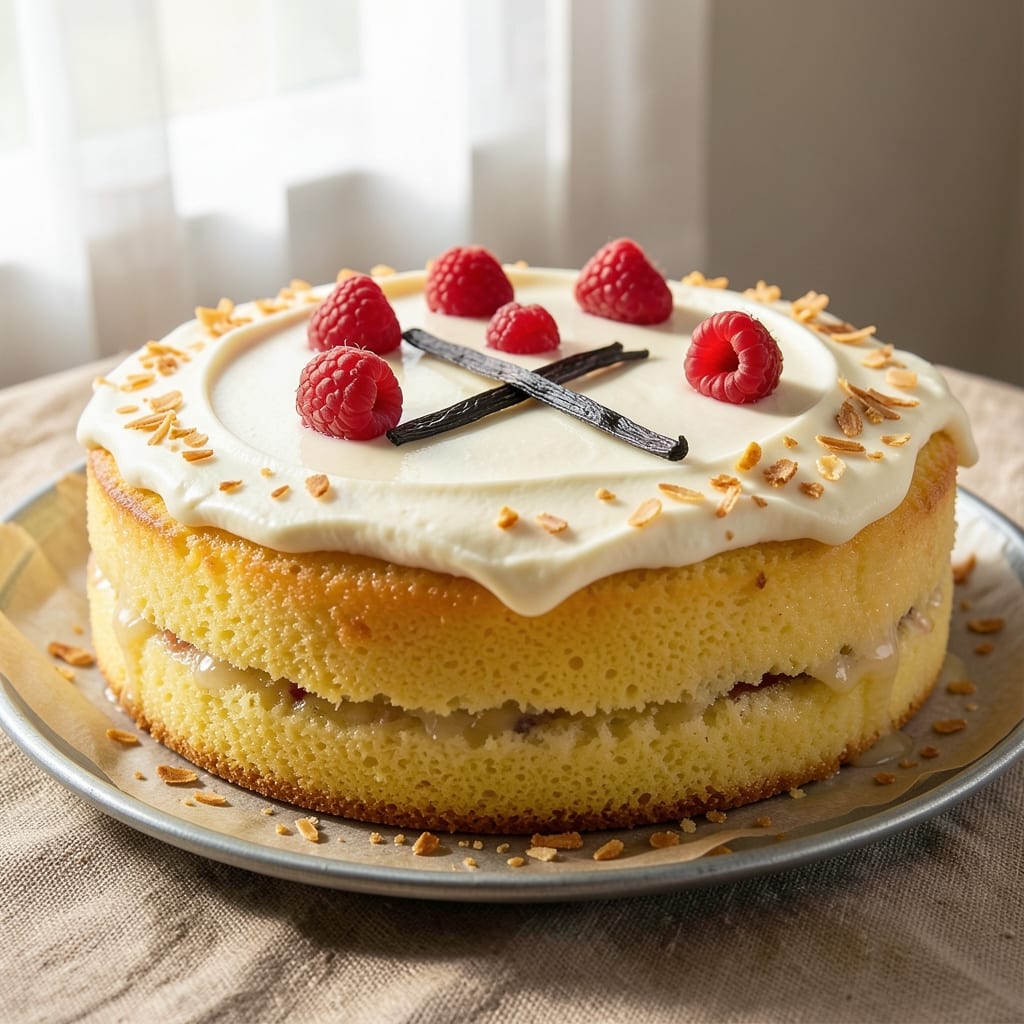
This 13×9 yellow cake recipe delivers the perfect balance of tender crumb and rich vanilla flavor—ideal for birthdays, celebrations, or anytime you crave a classic dessert. The secret lies in precise ingredient ratios and gentle folding of vanilla bean paste for those signature swirls that make every slice feel special.
Baking at 350°F ensures a golden top while keeping the interior moist, and the buttery frosting ties everything together with professional-level smoothness.
What sets this recipe apart is its foolproof technique: no overmixing, no guessing on doneness, and a foolproof method for achieving that signature swirl without tearing the cake.
The cake bakes in 25-35 minutes, depending on your oven, and comes out with a tender crumb that holds up beautifully to frosting. For extra indulgence, I recommend a simple vanilla buttercream or a light cream cheese glaze—both pair perfectly with the cake’s delicate sweetness.
The result is a 13×9-inch masterpiece that serves a crowd effortlessly, with each slice offering that perfect combination of moist cake and rich frosting. The vanilla bean swirls add a touch of elegance without requiring advanced skills, making this recipe accessible for bakers of all levels.
Whether you’re preparing for a celebration or simply treating yourself, this cake delivers restaurant-quality results at home.
For best results, grease your pan thoroughly and line it with parchment paper to ensure easy removal. Test for doneness with a toothpick—it should come out with a few moist crumbs, not wet batter.
Let the cake cool completely before frosting to achieve that professional finish. This recipe is your go-to for any occasion where a classic yellow cake is needed.
Ingredients for 13×9 yellow cake
Twelve essential ingredients for a showstopping 13×9-inch vanilla swirl cake that tastes like a bakery masterpiece.
| Ingredient | Amount | Notes |
|---|---|---|
| All-Purpose Flour 🌾 | 2 ½ cups | Sifted for light texture |
| Granulated Sugar 🍚 | 2 cups | Superfine preferred for smoothness |
| Vanilla Bean Paste 🌿 | 2 tbsp | High-quality for authentic flavor |
| Unsalted Butter 🧈 | 1 cup | Room temperature, not melted |
| Large Eggs 🥚 | 4 whole | Room temperature, separated |
| Baking Powder 🧂 | 2 tsp | Diamond Crystal preferred |
| Salt 🧂 | ½ tsp | Fine sea salt |
| Milk 🥛 | 1 cup | Whole milk for richness |
| Vanilla Extract 🍯 | 1 tbsp | Pure Madagascar preferred |
| Buttercream Frosting 🧈 | 2 cups | Classic vanilla buttercream |
| Parchment Paper 📄 | 1 sheet | For easy cake removal |
The vanilla bean paste is non-negotiable—Nielsen-Massey or Madagascar vanilla makes all the difference. Grab it at specialty stores like Williams Sonoma or online if your local grocery doesn’t carry it. For the flour, King Arthur or Bob’s Red Mill brands are my go-to for consistent results. The butter should be European-style if possible (like Plugrá)—it has higher fat content for that ultra-rich crumb. Eggs? Pasture-raised if you can find them, but regular works fine. Pro tip: separate them while they’re still cold to avoid splatter.
No vanilla bean paste? Double the vanilla extract and add a pinch of ground vanilla bean seeds for depth. Running short on butter? Coconut oil works in a pinch, but the flavor won’t be identical. For the milk, half-and-half adds extra richness, or use almond milk for a lighter version. The frosting can be swapped for cream cheese glaze if you prefer tangy over sweet. And if you’re feeling fancy, add edible gold leaf for that bakery-worthy touch. The baking powder matters—Diamond Crystal is lighter than most brands, so if you have Aluminum-free baking powder, reduce to 1.5 teaspoons.
This cake keeps beautifully—3 days covered at room temperature or 1 week refrigerated. For longer storage, freeze the unfrosted cake for up to 3 months. Let it thaw completely before frosting. The frosting? 2 days in the fridge, or freeze in portions. I always make extra frosting—it’s perfect for cupcakes or cookies later. And if you’re making this ahead? Bake the cake, cool it, wrap it tightly in plastic, and freeze. Frost right before serving for that restaurant-fresh look.
Why You’ll Love This Recipe
- No Mixer Needed: I swear by this recipe when I’m in a rush—just cream the butter and sugar by hand (or use a fork if you’re really lazy), then fold in the flour. That vanilla bean paste? It’s the secret weapon that makes the whole thing taste like a bakery, not a weeknight shortcut.
- Butter So Rich: The moment that butter gets folded into the batter, I know I’m onto something. It’s not just any yellow cake—it’s tender yellow cake, with that melt-in-your-mouth crumb that makes every bite worth the effort. (And honestly, the effort is minimal.)
- Endless Second Life: This cake is my go-to for birthdays, potlucks, or even a lazy Sunday dessert. Slice it fresh, or stash it in the fridge for days—it’s just as good reheated with a little frosting or even plain. My kids beg for it cold, straight from the pan.
- Pantry Staple Magic: Between us, this recipe uses things you already have. No weird ingredients, no last-minute grocery runs—just flour, sugar, butter, eggs, and that little jar of vanilla paste I’ve had for years. It’s the kind of cake that makes me feel like I’m baking something special, even when I’m not.
Step-by-step instructions for 13×9 yellow cake with vanilla bean swirls
Here’s how to create a moist, tender yellow cake with professional swirls and buttery frosting.
Prepare the Cake Pans and Mix Dry Ingredients
Preheat your oven to 350°F and line a 13×9-inch baking pan with the sheet of parchment paper, allowing overhang on all sides for easy removal. Lightly grease the parchment with butter to prevent sticking.
In a medium bowl, sift together the 2.5 cups all-purpose flour, 2 teaspoons baking powder, and ½ teaspoon salt. Whisk gently to combine and set aside. Sifting ensures a light texture without dense pockets. I like to press the mixture through a fine-mesh sieve for extra smoothness.
Cream Butter and Sugar for Maximum Fluffiness
In a stand mixer fitted with the paddle attachment, beat the 1 cup unsalted butter (at room temperature) and 2 cups granulated sugar on medium-high speed for 3-4 minutes until light and fluffy. The mixture should nearly triple in volume and become pale in color.
This creaming process incorporates air, which creates that signature tender crumb. Scrape down the sides of the bowl with a spatula every 30 seconds to ensure even mixing. If the butter feels too soft, chill the bowl in the refrigerator for 10 minutes before continuing.
Add Eggs and Vanilla for Rich Flavor
Add the 4 whole large eggs, one at a time, mixing on low speed after each addition until fully incorporated. Then add the 2 tablespoons vanilla bean paste and 1 tablespoon vanilla extract, mixing on low speed for 30 seconds until just combined.
The vanilla bean paste adds depth of flavor that regular extract can’t match. Here’s the thing—don’t overmix the batter after adding the dry ingredients. You want to maintain that light, airy texture we created earlier. The batter should be smooth but still slightly streaked with flour.
Create the Signature Vanilla Bean Swirls
Reduce mixer speed to low and gradually add about ⅔ of the dry ingredients (about 1⅔ cups flour mixture
Spoon the remaining ⅓ of dry ingredients (about ⅔ cup flour mixture) into the center of the pan. Using an offset spatula or rubber spatula, gently swirl the dry ingredients through the batter in a circular motion, creating marbled patterns. This technique creates those beautiful vanilla bean swirls throughout the cake. Pour the remaining batter over the swirled mixture and gently tap the pan on the counter to release any air bubbles. Bake for 25-30 minutes or until a toothpick inserted in the center comes out clean. The cake should spring back when gently pressed in the center. Immediately after removing from the oven, let the cake cool in the pan for 10 minutes before transferring to a wire rack to cool completely. This gradual cooling prevents cracking. Once fully cooled, spread the 2 cups buttercream frosting evenly over the top and sides using an offset spatula.Bake to Golden Perfection and Cool Properly
Pro Tips For Making 13×9 Yellow Cake
- Sift That Flour: DESCRIPTION:
- Cream Butter Cold: DESCRIPTION:
- Don’t Overmix Eggs: DESCRIPTION:
- Test with a Toothpick: DESCRIPTION:
Creative variations of these flavors
Citrus Twist Version
Brighten up your cake with a zesty twist by adding 1 tablespoon lemon zest and 1 tablespoon orange zest to the butter-sugar mixture. Replace 1 tablespoon vanilla extract with 1 tablespoon lemon juice for a tangy-sweet balance.
Top with a light white chocolate glaze infused with 1 teaspoon orange extract for a showstopping finish. 🍊
Spiced Chai Cake
Transform this classic into a cozy chai-inspired cake by adding 1 teaspoon ground cardamom, 1 teaspoon cinnamon, ½ teaspoon ginger, and ¼ teaspoon cloves to the dry ingredients.
Replace the vanilla bean paste with 1 tablespoon chai spice blend (like Burlap & Barrel), and fold in ½ cup chopped toasted pecans for crunch. A salted caramel glaze ties it all together beautifully.
Chocolate-Dipped Layers
For a decadent twist, divide the batter into three 9×9-inch pans and bake as directed. Once cooled, spread each layer with ½ cup chocolate ganache (melt ½ cup dark chocolate chips with ¼ cup heavy cream) between layers.
Top with a dusting of cocoa powder and fresh berries for a restaurant-worthy dessert. 🍫
Gluten-Free Adaptation
Swap the all-purpose flour for a 1:1 gluten-free baking flour like Bob’s Red Mill or King Arthur Measure for Measure. Add ½ teaspoon xanthan gum to help bind the mixture. Use 1 extra egg to improve texture, and reduce the milk to ¾ cup.
The swirl technique remains the same, but expect a slightly denser crumb. A cream cheese frosting complements the texture perfectly.
Seasonal Berry Swirl
Incorporate fresh berries by folding 1 cup mixed berries (raspberries, blackberries, or strawberries) into half the batter before swirling. Use a white chocolate-raspberry jam for the glaze instead of buttercream.
This variation shines in summer but works year-round with frozen berries. The berries add natural sweetness and a pop of color that makes every slice feel special. 🍓
Nutrition facts
Frequently asked questions
Can I use this recipe for a smaller or larger cake pan?
This recipe is designed specifically for a 13×9-inch pan, but you can adapt it. For a 9×13-inch pan, use the same recipe as written. For a 9×9-inch pan, reduce the batter by about 25% and bake for 30-35 minutes. For a 12×16-inch sheet cake, increase ingredients by 50% and bake for 35-40 minutes. Always check for doneness with a toothpick.
Why does my cake turn out dense instead of light and fluffy?
Dense cake usually happens from overmixing or incorrect ingredient ratios. Make sure to cream the butter and sugar until light and fluffy (3-4 minutes on medium-high), and avoid overmixing after adding the dry ingredients. Also, ensure your baking powder is fresh—old baking powder loses its lift. Another common issue is using cold butter; it should be soft but not melted.
How do I make the vanilla bean swirls look more professional?
For cleaner swirls, use a spatula with a thin, flexible blade (like an offset spatula) to gently drag the dry ingredients through the batter in smooth, even strokes. Work quickly but carefully to avoid tearing the cake. Start from the center and spiral outward, keeping the pressure light. If the batter is too thick, add 1-2 tablespoons milk to loosen it before swirling.
Can I bake this cake ahead of time?
Bake the cake up to 2 days ahead and store it at room temperature wrapped tightly in plastic. For longer storage, freeze the unfrosted cake for up to 3 months. Thaw overnight in the fridge before frosting. Frosting can be made 1 day ahead and stored in the fridge, or frozen in portions for up to 2 months. Always bring frosting to room temperature before spreading.
What’s the best way to level a 13×9-inch cake?
Use a serrated knife or a long metal cake leveler for clean cuts. Lightly spray the knife with cooking spray or dip it in hot water and dry it between slices to prevent sticking. For a 13×9-inch cake, you can cut it into 3 equal strips (like a sheet cake) or divide it into 2 layers by cutting horizontally. Always work quickly to avoid the cake drying out.

- 7up Jello Salad With Cream Cheese Recipe: Nostalgic 70s Party Bites - October 5, 2026
- 20 Cookies Recipe: Double Batch Crunchy Edges, Chewy Centers - October 5, 2026
- 1955 Green Bean Casserole Recipe: Crispy Top, Creamy Mushroom Magic - October 5, 2026