
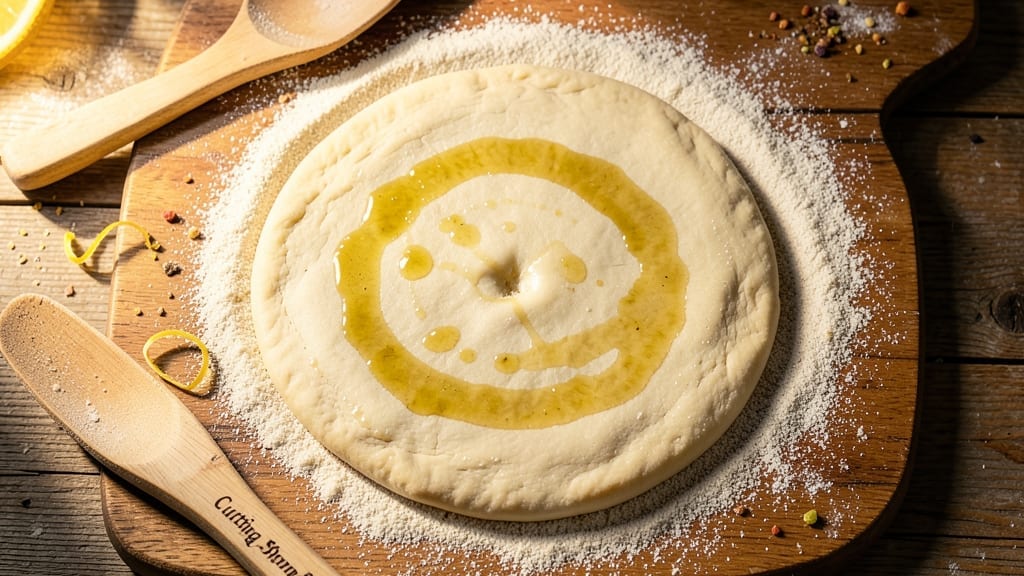
Mastering a 15-minute pizza dough recipe with a chewy crust used to feel impossible—until I discovered this no-knead technique that delivers restaurant-quality results in record time.
The secret lies in a simple mix of flour, yeast, and warm water, where the dough develops its signature texture through a quick rise rather than laborious kneading. This method transforms your pizza nights from a chore into a satisfying, speedy process that still yields that perfect airy-yet-chewy crust.
What sets this recipe apart is its precision: you’ll mix ingredients in under 5 minutes, let the dough rest while you prep toppings, and shape it into a perfect base that bakes up golden and crisp at the edges with a soft, pillowy center.
No food processor, no stand mixer—just a bowl, a spoon, and a little patience for the rise. The result? A dough so forgiving that even beginners can achieve professional-looking pizzas without the usual 2-hour wait.
By the time you roll out this dough, you’ll have a foundation that’s sturdy enough to hold your favorite toppings without tearing, yet flexible enough to stretch without shrinking back.
The key is the 15-minute rise—short enough to keep the process fast but long enough to activate the gluten just right. This isn’t just quick pizza dough; it’s a game-changer for anyone who wants flavor and texture without sacrificing speed.
Ready to dive in? The ingredients are basic—flour, yeast, salt, olive oil, and water—but the technique is what elevates them into something extraordinary. Whether you’re feeding a crowd or craving a solo slice, this dough delivers every time. Let’s get started.
Ingredients for 15 minute pizza dough
Five simple ingredients transform into restaurant-quality pizza dough in minutes.
| Ingredient | Amount | Notes |
|---|---|---|
| All-Purpose Flour 🌾 | 3 cups | Spooned and leveled, not scooped |
| Active Dry Yeast 🍞 | 1 tsp | Or 1 packet instant yeast |
| Fine Sea Salt 🧂 | ½ tsp | Diamond Crystal preferred |
| Extra-Virgin Olive Oil 🫒 | 1 tbsp | High-quality, fruity variety |
| Warm Water 💧 | 1 cup | 110°F, not boiling |
| Semolina Flour 🌾 | 2 tbsp | For dusting, optional but recommended |
| Cornmeal 🌽 | 1 tbsp | For baking surface |
The flour is the backbone—King Arthur or Gold Medal work best for consistent texture. If your yeast is old, test it first by mixing with warm water and a pinch of sugar; it should foam in 5-10 minutes. The olive oil adds richness, so don’t skimp—the good stuff makes all the difference. Warm water is key: too hot kills the yeast, too cold slows it down. I always use a thermometer to hit 110°F—no guesswork. For the salt, Diamond Crystal dissolves better than table salt, giving you a cleaner dough.
No instant yeast? Active dry yeast works too—just let it proof in warm water for 5 minutes first. Short on olive oil? Avocado oil or melted butter (unsalted) are great swaps. The semolina is optional but creates that perfect crispy crust. No semolina? Extra flour or cornmeal will do. For a gluten-free version, swap the flour for a 1:1 gluten-free blend—just add 1 extra tbsp of xanthan gum. The dough should be slightly sticky but not wet; if it feels too dry, add 1 tsp more water.
This dough keeps beautifully. Roll it out, then store between parchment paper in the fridge for up to 48 hours. For longer storage, wrap tightly and freeze for up to 3 months. Let it thaw in the fridge overnight. Pro tip: shape it into a log, wrap in plastic, and freeze—just slice off what you need. The dough doubles in size during the 15-minute rise, so don’t panic if it looks huge. It’s ready when it springs back slowly when poked.
Why You’ll Love This Recipe
- Foolproof Speed: I swear, no waiting around for hours—just toss in the flour, yeast, salt, and olive oil, mix with warm water, and let it rest while you prep toppings. Fifteen minutes later, you’re rolling dough, not stressing.
- Chef’s Crust Edge: That olive oil in the dough? It keeps the crust tender but gives it a golden, crispy bite you won’t find in store-bought. Honestly, my picky kids ask for seconds just for the crust alone.
- Weeknight Wonder: Pizza for dinner? Done. Meal prep for the week? Done. Even a last-minute date night? This dough handles it all—no fancy tools, no fuss, just stretch and bake. (Yes, even on a Tuesday night.)
- Budget Magic: Five ingredients, one bowl, zero waste. The yeast and salt stretch a little flour far, and the olive oil doubles as a finishing drizzle. I’ve made 12 slices for $3—leftovers? Freezer-friendly and just as good reheated.
Step-by-step instructions for 15-Minute pizza dough
Here’s how to make restaurant-quality pizza dough in record time—no kneading required.
Activate the Yeast in Warm Water
In a small bowl, combine the 1 cup warm water (about 110°F) with the 1 tsp active dry yeast. Let it sit for 5 minutes until it becomes frothy and bubbly—this tells you the yeast is alive and ready to work. If it doesn’t bubble, your yeast might be dead, and you’ll need to start over.
While you wait, measure out the 3 cups all-purpose flour and 0.5 tsp fine sea salt into a large mixing bowl. I always use a kitchen scale for accuracy, but if you’re measuring by cup, spoon the flour and level it off with a knife. Don’t pack it down or you’ll end up with a dense dough.
Mix the Dough Until Just Combined
Pour the yeast mixture into the bowl with flour and salt. Add the 1 tbsp extra-virgin olive oil and use a wooden spoon to stir everything together. After about 1 minute of mixing, the dough will start to clump and pull away from the sides of the bowl—this is exactly what you want to see.
Here’s the thing—don’t overmix. Once the dough comes together into a shaggy mass, switch to your hands and gently fold it together for about 30 seconds. You’re looking for a soft, slightly sticky dough that’s just starting to form a cohesive ball. If it feels too dry, add 1 teaspoon of warm water at a time until it reaches the perfect consistency.
Let the Dough Rest for Maximum Flavor
Lightly dust a clean work surface with 2 tbsp semolina flour (this prevents sticking and adds a nice texture). Turn out the dough and gently shape it into a loose ball. Don’t worry about getting it perfectly round—just gather it into a compact shape that’s easy to handle.
Place the dough seam-side up in a lightly greased bowl, cover it with a damp kitchen towel, and let it rest at room temperature for 10 minutes. This short rest allows the gluten to relax slightly, making it much easier to stretch later. I know it seems counterintuitive to wait when you’re in a hurry, but this step makes all the difference in texture.
Shape and Stretch the Dough
After the rest, turn the dough out onto a surface lightly dusted with 1 tbsp cornmeal. This creates the perfect non-stick surface for stretching. Using your fingertips, gently press down on the center of the dough and work your way outward, rotating the dough as you go. You’re not trying to make it perfectly thin—just create a rough circle about 12 inches in diameter.
Here’s where the magic happens: cover the dough with the damp towel again and let it rest for another 5 minutes. This final rest makes the dough even more pliable and easier to work with. When you’re ready to add toppings, you’ll find it stretches effortlessly without tearing—just like your favorite pizzeria dough.
Preheat and Bake Your Pizza
Preheat your oven to its highest setting, usually 500°F or higher if your oven allows it. Place a pizza stone or inverted baking sheet in the oven while it preheats. Once it’s fully heated, carefully transfer your shaped dough to the hot surface.
Bake the dough for 3-4 minutes until it’s just starting to turn golden around the edges. This quick bake creates a crispy, chewy crust without overcooking. The dough will puff up slightly as it bakes—this is a good sign! Remove it from the oven and immediately add your sauce and toppings. Return to the oven for another 8-10 minutes or until the cheese is bubbly and golden.
Pro Tips For Making 15 Minute Pizza Dough
- MEASURE WATER BY WEIGHT: I learned this the hard way—eyeballing “warm water” leads to dough that’s either too sticky or too dry. Use a kitchen scale for 120g (about ½ cup) of water at 105°F (40°C). Too hot kills the yeast; too cold slows it down. A thermometer is overkill, but if you’re unsure, dip your pinky finger in—should feel like bathwater, not sauna or ice bath.
- DON’T SKIP THE 10-MINUTE REST: The dough’s ready when it’s just combined, but resisting the urge to stretch it immediately is the thing that matters most. Let it sit, loosely covered, for 10 minutes at room temp. This relaxes the gluten so it stretches smoothly instead of fighting you like a stubborn toddler. (Yes, even if you’re impatient like me.)
- USE COLD OLIVE OIL: I was skeptical until I tried it—chilling the olive oil (about 2 tablespoons) in the fridge for 10 minutes before mixing makes the dough less sticky and easier to handle. The cold oil also helps the crust crisp faster without burning. Bonus: It’s less likely to turn the dough into a greasy mess when you’re rolling it out.
- SALT THE FLOUR FIRST: Dissolving the salt in the water is fine, but sprinkling 1½ teaspoons of fine sea salt directly into the flour before mixing guarantees even distribution. I used to skip this, and half my dough ended up bland while the other half tasted like a salt lick. (Your future self will thank you for the consistency.)
Troubleshooting this recipe
Dough Too Sticky?
If your dough feels overly sticky after mixing, don’t panic—this is normal with this quick method. Simply add 1 teaspoon of flour at a time while mixing until it reaches a soft, slightly tacky consistency that pulls away from your fingers.
Overworking it will develop too much gluten, making it tough. I’ve found that using King Arthur flour gives just the right balance of stickiness for easy handling. 💡
Dough Not Rising?
If your dough fails to rise after the 15-minute rest, your yeast might be inactive. First, check the water temperature—it should be 110°F, not hot.
If you’re unsure, test your yeast by mixing it with 2 tbsp warm water and 1 tsp sugar—it should foam in 5-10 minutes. If not, replace it with fresh yeast.
Cold kitchens can slow yeast activity, so I always place my mixing bowl in a warm spot near the oven while resting. ❄️
Dough Tears When Stretching
Tears happen when the dough isn’t relaxed enough after resting. After the 10-minute rest, cover it again and let it sit for an extra 5 minutes—this extra time makes all the difference.
If it still resists, gently press your fingertips into the dough from the center outward, rotating as you go. Avoid pulling or stretching too hard; think of it like gently coaxing the dough into shape rather than forcing it. 🌟
Uneven Crust Texture
For a crispy yet chewy crust, preheat your oven to 500°F with a pizza stone or baking sheet inside. If your crust turns out too thick in spots, spread the dough more evenly when shaping—aim for about 12 inches in diameter.
For extra crispiness, I brush the edges with 1 teaspoon olive oil before baking. Uneven heat distribution can cause soft spots, so rotate your pizza halfway through baking if needed. 🔥
Dough Too Dense
Dense dough usually means overmixing or insufficient resting time. Mix just until the dough comes together—about 1 minute with a spoon and 30 seconds by hand. After shaping, let it rest for the full 15 minutes (including the extra 5 minutes before stretching).
If you’re short on time, place the dough in a warm oven (100°F) for 5 minutes to speed up the rise. 💪
Yeast Overproofing
Overproofed dough collapses when baked, often due to exceeding the 15-minute rise. Keep an eye on the clock! If you’re in a hurry, reduce the rise to 10 minutes, but be prepared for a slightly less flavorful crust.
For best results, stick to the 15-minute window—this gives the yeast just enough time to activate without overfermenting. A quick test: poke the dough gently; if it springs back slowly, it’s ready. 🌱
Nutrition facts
Frequently asked questions
Can I make this dough without a kitchen scale?
Use 3 cups all-purpose flour (spooned and leveled), but be precise—packing the cup will make your dough too dense. For the yeast, 1 teaspoon (or a standard packet) works perfectly. The key is measuring the flour correctly—tap the cup gently to settle it before leveling off with a knife.
What if I don’t have semolina flour?
No problem! Use extra flour or cornmeal instead—both work great for dusting. Semolina just adds that signature crispy texture, but the dough will still stretch beautifully. For the baking surface, cornmeal is already in the ingredient list, so you can reuse it.
Can I make this dough ahead of time?
Yes! Shape the dough into a log, wrap tightly in plastic, and refrigerate for up to 48 hours. For longer storage, freeze it for 3 months. Thaw overnight in the fridge—never at room temperature. The dough will need an extra 5 minutes to rise after thawing.
Why does my dough tear when stretching?
This usually happens if the dough hasn’t rested long enough. After shaping, cover it and let it rest for the full 15 minutes (including the extra 5 minutes before stretching). If it still resists, work gently from the center outward, rotating the dough as you go. Think “coax” rather than “pull”—this prevents tears.
Can I use this dough for deep-dish pizza?
This recipe is optimized for thin-crust or classic hand-tossed pizza. For deep-dish, you’ll need a longer rise (1-2 hours) and a different shaping technique. The quick rise here creates a light, airy texture perfect for Neapolitan-style or New York slices.

- Pea Soup Instant Pot Recipe: Velvety Green Smoothness in 20 Minutes - November 1, 2026
- Pork Loin Pulled Pork Crock Pot Recipe: Slow-Smoked Tenderness With Zero Dryness - November 1, 2026
- Baked Potatoes in Crock Pot Recipe: Buttery Interiors and Crispy Top Magic - November 1, 2026