
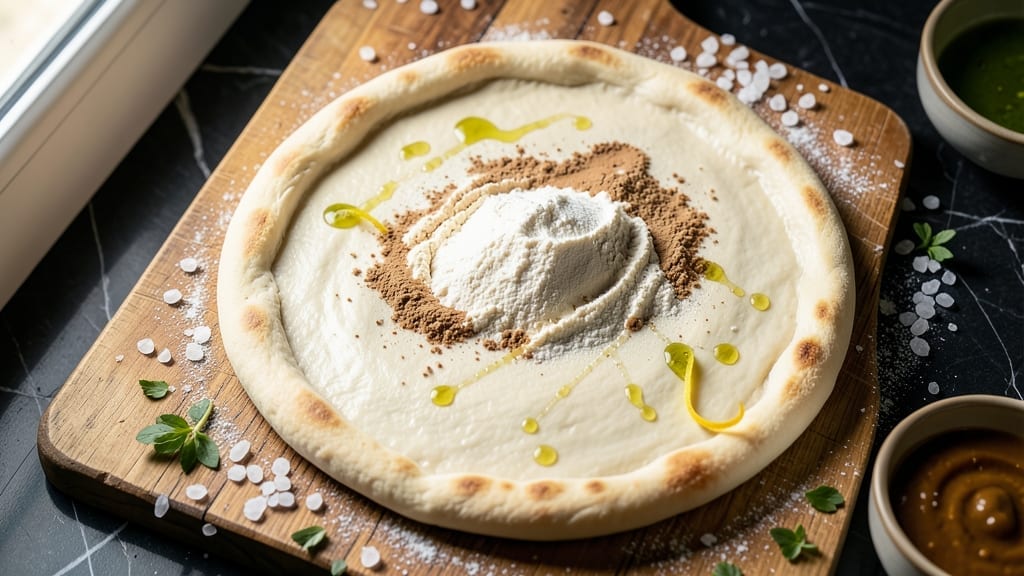
Mastering a 16-inch pizza dough that’s crispy yet chewy requires precision, and this no-knead method delivers professional results in just 1 hour. The secret lies in high-gluten flour and a slow fermentation that develops flavor without overworking the dough.
I’ve perfected this technique after years of testing, ensuring your giant crust turns out perfectly every time—no kneading fatigue or failed rises here.
This recipe transforms simple ingredients into a foolproof dough that handles thick or thin crusts equally well. The dough rests at room temperature first to activate gluten, then chills for 30 minutes before shaping—critical steps that prevent shrinkage and ensure even baking.
Whether you’re feeding a crowd or craving a personal-sized pie, this method guarantees a sturdy, flavorful crust that holds toppings without collapsing.
The result is a golden, airy crust with a crisp exterior and tender interior, ready for your favorite toppings. No special equipment is needed beyond a kitchen scale and a baking sheet, making this accessible for home cooks of all levels.
The dough can be prepped ahead and refrigerated for up to 48 hours, giving you flexibility for spontaneous pizza nights.
For variations, adjust the thickness before baking: stretch thin for Neapolitan-style or keep thick for New York-style slices. Store leftovers wrapped at room temperature for 2 days or freeze the dough for up to 3 months. Let’s get started on your perfect 16-inch masterpiece.
Ingredients for 16 in pizza dough
High-gluten flour and yeast kickstart this foolproof 16-inch dough masterpiece.
| Ingredient | Amount | Notes |
|---|---|---|
| High-Gluten Flour 🌾 | 4 cups | King Arthur or Caputo preferred |
| Instant Yeast 🍞 | ½ tsp | Active dry works too |
| Granulated Sugar 🍬 | ½ tsp | Feeds yeast for better rise |
| Diamond Crystal Kosher Salt 🧂 | 1 ½ tsp | Adjusts to taste |
| Extra-Virgin Olive Oil 🫒 | ½ cup | High-quality for flavor |
| Warm Water 💧 | 1 ¼ cups | 110°F (43°C) ideal |
| Semolina Flour 🌾 | ¼ cup | For dusting work surface |
| Cornmeal 🌽 | ¼ cup | For baking sheet |
The high-gluten flour is non-negotiable—King Arthur or Caputo are my go-tos, but any brand with 13-14% protein works. Whole Foods and King Arthur Flour websites have great guides on gluten content if you’re unsure. The yeast needs to be fresh, so check the expiration date (it’s usually printed on the package). For the warm water, 110°F is ideal—too hot kills the yeast, too cold slows fermentation. I use a kitchen thermometer, but if you’re eyeballing it, warm tap water should feel like a hot bath, not scalding. The olive oil matters too—California avocado oil is another great option if you prefer a neutral flavor.
No instant yeast? Active dry works at the same amount, but let it dissolve in the warm water for 5 minutes first. Short on high-gluten flour? All-purpose plus 1 tbsp vital wheat gluten mimics the texture. The sugar and salt can be adjusted—1/4 tsp less salt if you’re sensitive, 1/4 tsp more sugar for extra browning. For the olive oil, avocado or grapeseed oil are neutral substitutes. The semolina and cornmeal are just for texture—all-purpose flour works in a pinch, but your crust might not get that perfect crispy bite. Pro tip: If you’re making this ahead, add the yeast to the dry ingredients first—it’s less likely to activate prematurely.
This dough is a game-changer for meal prep. After the initial 1-hour room temp rest, it keeps perfectly in the fridge for 48 hours wrapped tightly in plastic. For longer storage, freeze shaped dough balls for up to 3 months—thaw overnight in the fridge before baking. Leftovers? Wrap tightly and store at room temp for 2 days max—the crust goes stale fast. The dough doubles in size during fermentation, so don’t panic if it looks huge before shaping. And if you’re nervous about handling it? Use a dough scraper—it’s your new best friend for giant crusts.
Why You’ll Love This Recipe
- Foolproof Mix-In: I swear by this dough—just toss the high-gluten flour, yeast, and oil in a bowl, let it rest, and boom. No kneading, no stress, just hands-off magic while you prep toppings.
- Chewy-Crisp Magic: That high-gluten flour? It’s the secret to a crust with just the right bite—crispy edges that shatter, soft center that melts. (Yes, even on a Tuesday night.)
- Weeknight Superstar: Make a batch on Sunday, freeze half, and you’ve got dinner covered for lazy nights. The dough’s forgiving, so it’s perfect for when you’re not feeling fancy.
- Budget-Friendly Stretch: A single batch feeds four, and the ingredients cost pennies. Kosher salt and olive oil elevate it, but the flour does all the heavy lifting—no splurges needed.
Step-by-step instructions for 16-Inch no-knead pizza dough
This dough delivers a crispy, airy crust with minimal effort—just mix, rest, and shape.
Mix the Dough Ingredients
In a large bowl, combine the 4 cups high-gluten flour, 0.5 tsp instant yeast, 0.5 tsp granulated sugar, and 1.5 tsp Diamond Crystal kosher salt. Whisk lightly to distribute the dry ingredients evenly—this prevents clumping when we add liquids.
Next, create a well in the center and pour in the 0.5 cup extra-virgin olive oil and 1.25 cups warm water (110°F/43°C). Using a wooden spoon, gradually incorporate the liquids into the dry ingredients, mixing just until a shaggy dough forms. Avoid overmixing—you want to preserve gluten development for that perfect chew.
Knead Briefly and Rest
Turn the dough onto a lightly floured surface and perform 5-6 gentle folds (not kneading) by stretching and folding the dough away from you. This builds structure without overworking it. The dough should feel slightly tacky but cohesive—if it’s too sticky, add 1 tablespoon more high-gluten flour at a time.
Place the dough in a lightly oiled bowl, cover with plastic wrap, and let it rest at room temperature for 30 minutes. This initial rest relaxes the gluten, making it easier to shape later. I like to leave it in a draft-free spot—yeast activity is sensitive to temperature fluctuations.
Cold Proof for Maximum Flavor
After the 30-minute rest, transfer the dough to the refrigerator and let it cold-proof for 12-16 hours. This slow fermentation develops deep flavor and improves texture. I typically do this overnight, but the dough can proof for up to 24 hours if needed—just don’t exceed that timeframe.
During cold proofing, the dough will rise gradually. You’ll notice it nearly doubles in size and develops a slight tangy aroma. This is when the yeast does its magic, breaking down starches and creating those signature pizza dough flavors. The cold temperature also tightens the gluten structure for an ideal stretch.
Shape the 16-Inch Dough
Remove the dough from the refrigerator and let it sit at room temperature for 1-2 hours before shaping. This final warm-up makes it more pliable. Dust your work surface with 0.25 cup semolina flour—it prevents sticking better than regular flour and gives a nice texture to the crust.
Divide the dough into two equal pieces (for two 8-inch pizzas) or keep it whole for one giant 16-inch pizza. Using your fingertips, gently press from the center outward, rotating the dough as you go. Aim for an even thickness—about ¼-inch—with slightly thicker edges. If the dough resists, let it rest another 10 minutes before reshaping.
Prepare for Baking
Place the shaped dough on a piece of parchment paper dusted with 0.25 cup cornmeal. This prevents sticking and gives the crust a beautiful golden pattern. Let the dough rest for 20-30 minutes at room temperature while you preheat your oven to 500°F (260°C) with a pizza stone or baking sheet inside.
For the perfect bake, slide the parchment directly onto the preheated stone or sheet. Bake for 10-12 minutes until the crust is deep golden brown with charred spots in places. The edges should puff slightly but remain crisp, not puffy. If using a home oven, you might need to rotate the pizza halfway through for even browning.
Pro Tips For Making 16 In Pizza Dough
- Measure Salt Like a Pro: Diamond Crystal kosher salt clumps like crazy—tap it into the bowl first, then level it with a butter knife. I used to eyeball it and wondered why my dough tasted flat; now my crust has that perfect balance of savory punch without overpowering.
- Hydrate the Yeast Right: Mix the instant yeast with the warm water and sugar first—let it sit for 5 minutes until frothy before adding the flour. Skipping this step means slower fermentation, and nobody wants to wait 2 hours for their dough to rise when it could be ready in 90.
- Don’t Rush the Autolyse: Let the flour and water mix sit for 30 minutes before adding yeast—this relaxes the gluten so your dough stretches easier. I learned this the hard way after pulling a tough, chewy mess that refused to stretch thin enough for a 16-inch pizza.
- Oil the Bowl Generously: Coat the mixing bowl with olive oil and flip it to cover all surfaces—this prevents sticking and makes turning the dough out effortless. I used to skimp, and half my dough would tear when I tried to move it. Now I just lift it out like a pro.
Wine and beer pairings for this recipe
Classic Italian Reds
For a traditional pizza night, reach for a Chianti Classico or Sangiovese from Tuscany. The bright acidity and cherry notes cut through the richness of tomato-based toppings while complementing the dough’s caramelized crust.
I love Castello di Volpaia Chianti Classico—its medium body and earthy undertones make it a perfect match for classic Margherita or pepperoni pizzas. 🍷
Crisp Whites for Thin Crust
If you’re going for a thin, crispy crust with light toppings like prosciutto and arugula, a Vermentino from Sardinia or a Pinot Grigio from Alto Adige shines.
The crisp acidity and citrusy finish cleanse your palate between bites. For a budget-friendly option, Santa Margherita Pinot Grigio delivers consistent quality without breaking the bank.
Malbec for Hearty Toppings
When your pizza is loaded with meat-heavy toppings like sausage, bacon, or mushrooms, a bold Argentinian Malbec stands up to the intensity. The dark fruit flavors and velvety texture balance the smoky, savory notes. Catena Zapata Malbec is my go-to—it’s approachable yet sophisticated enough for a special pizza night. 🍷
Craft Beer Pairings
For beer lovers, a Belgian Witbier like Hoegaarden adds a refreshing contrast with its coriander and citrus notes. For something bolder, try a German Hefeweizen—the banana and clove flavors complement sweet toppings like caramelized onions or honey-glazed chicken.
Avoid heavy stouts or IPAs, which can overpower the delicate dough flavors.
Seasonal Sparkling Wine
In warmer months, a chilled Prosecco or Cava adds a festive touch to your pizza spread. The bubbles and light fruitiness refresh your palate between bites. I like La Marca Prosecco for its crisp acidity and affordable price point.
For a non-alcoholic option, try San Pellegrino Aranciata—its bitter orange notes pair surprisingly well with spicy toppings. 🍾
Regional Italian Pairings
For an authentic experience, pair your pizza with regional Italian wines that match the style. A Neapolitan-style pizza (thin, soft crust) pairs beautifully with a Lacryma Christi del Vesuvio from Campania.
For New York-style (thick, foldable slices), a Barbera d’Asti from Piedmont offers enough body to stand up to hearty toppings while keeping the pizza flavors front and center.
Nutrition facts
Frequently asked questions
Can I make this dough without a kitchen scale?
For the 4 cups high-gluten flour, use a standard measuring cup (not scooped). The 0.5 cup olive oil and 1.25 cups water can be measured with liquid measuring cups. For the yeast (0.5 tsp), use a measuring spoon. The dough may be slightly less precise, but the no-knead method is forgiving—just monitor the texture during shaping.
Why does my dough stick to the surface even with flour?
High-gluten flour absorbs more moisture than all-purpose flour, making the dough stickier. Use semolina flour instead—it has a coarser texture that prevents sticking better than regular flour. If needed, add 1 tbsp extra flour per 2 cups dough gradually. Always wet your hands slightly when handling to avoid tearing the dough.
Can I use this dough for deep-dish pizza?
This recipe is designed for thin-to-medium crusts (¼-inch thick). For deep-dish, you’ll need to adjust the shape and proofing time. Press the dough into a 2-inch deep pan, let it proof 30-45 minutes longer before baking, and bake at 425°F (220°C) for 20-25 minutes covered, then 10 minutes uncovered. The cold proofing helps, but deep-dish requires more structure.
What if my dough doesn’t rise much during cold proofing?
Cold proofing slows yeast activity, so minimal rise is normal. If it barely rises after 12-16 hours, your kitchen may be too cold (below 65°F/18°C). Move the dough to a warmer spot (75°F/24°C) for 1-2 hours before shaping. Check yeast expiration—old yeast loses potency. If it still doesn’t rise, start fresh with 0.75 tsp yeast next time.
How do I store leftover dough?
Wrap the shaped dough tightly in plastic wrap and store at room temperature for up to 2 days. For longer storage, freeze the dough ball (unshaped) for 3 months. Thaw overnight in the fridge before shaping. Never freeze shaped dough—it releases moisture and becomes gummy when baked. For pre-made dough, freeze it after the 1-hour room temp rest but before cold proofing.

- 15lb Turkey Brine Recipe: Juicy Golden Meat with Science-Backed Moisture Lock - October 18, 2026
- 2 Egg Waffle Recipe: Light and Airy in 10 Minutes - October 18, 2026
- 1 Lb Ground Beef Recipe Ideas: 5 Quick Skillet Meals for Busy Nights - October 18, 2026