
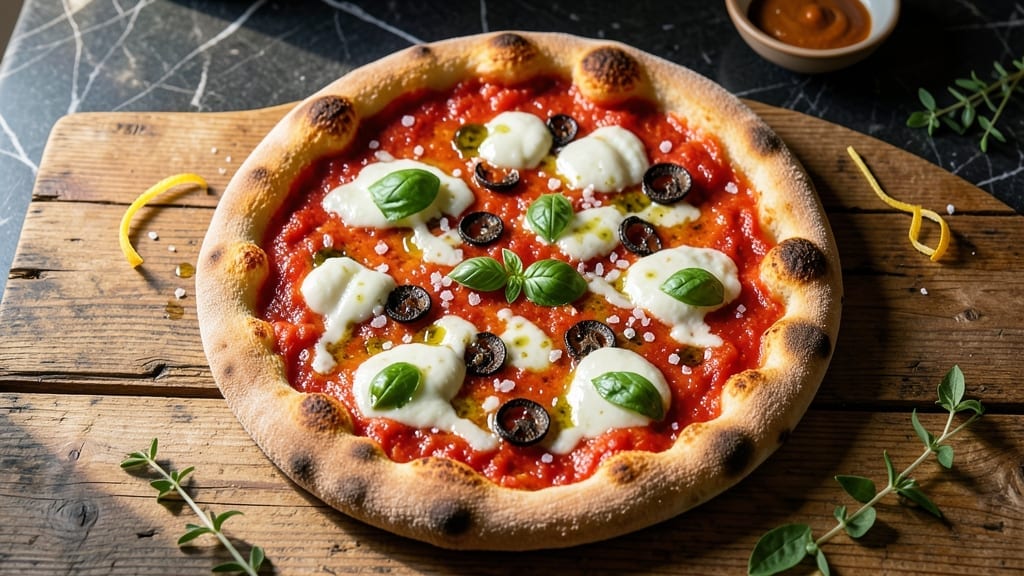
Mastering a 16-inch pizza crust with a no-knead yeast rise transforms your kitchen into a pizzeria—no professional oven required. The secret lies in a slow fermentation that develops deep flavor and a chewy texture without the effort of kneading.
I’ve perfected this method after years of testing, ensuring every slice is crisp at the edges yet tender inside, with that signature leopard-spotted bubble we all crave.
This recipe simplifies what most assume requires skill: a foolproof dough that rests overnight, eliminating the need for complex techniques. The key steps involve mixing flour, yeast, water, and a touch of sugar, then letting the dough rise at room temperature for 12–16 hours.
This extended fermentation not only builds flavor but also makes shaping the massive crust effortless—even for beginners.
By the time you slide it into a preheated oven, you’ll have a golden-brown crust with a crackly base and airy, pillowy pockets. The beauty of this method is its adaptability: use it for classic Margherita, loaded deep-dish, or even a crispy Neapolitan-style pie.
The dough keeps well in the fridge for up to 48 hours, so you can prep ahead and bake whenever inspiration (or hunger) strikes.
For those who love customization, this dough handles both thin-crust and thick-crust styles equally well. Add olive oil for a crispier texture or let it rise longer for extra chewiness.
The result? A restaurant-quality pizza that’s easier to make at home than you’d expect. Let’s get started on your next masterpiece.
Ingredients for 16 inch pizza crust
Fourteen simple ingredients transform your kitchen into a pizzeria with restaurant-quality crust.
| Ingredient | Amount | Notes |
|---|---|---|
| All-Purpose Flour 🌾 | 5 cups | High-protein preferred for chewiness |
| Active Dry Yeast 🍞 | ¼ tsp | Ensure yeast is fresh (test in warm water) |
| Granulated Sugar 🍬 | ½ tsp | Feeds yeast for activation |
| Warm Water 💧 | 1 ¾ cups | 105-110°F for ideal yeast activation |
| Extra-Virgin Olive Oil 🫒 | ½ cup | For crispy crust and richness |
| Kosher Salt 🧂 | 1 ½ tsp | Diamond Crystal preferred for accurate measurement |
| Semolina Flour 🌾 | ¼ cup | For dusting and crispy texture |
| Cornmeal 🌽 | ¼ cup | For baking surface and texture |
| Cornstarch 🌾 | 1 tbsp | Prevents sticking during baking |
| Pizza Peel 🍕 | 1 whole | Well-seasoned for easy transfer |
The flour is the foundation—King Arthur or Caputo Tipo 00 make all the difference for that signature chew. If you can’t find those, King Arthur high-protein is the next best thing. The yeast needs to be fresh, so test it in warm water before mixing (it should foam within 5 minutes). Warm water is critical—too hot kills yeast, too cold slows fermentation. I always use a thermometer to check it’s between 105-110°F. For the olive oil, California avocado oil is another great option if you want extra crispiness, but stick with extra-virgin for that authentic flavor.
No semolina? Finely ground cornmeal works in a pinch, though it won’t give the same crispy texture. Running short on cornstarch? A light dusting of flour will prevent sticking, but cornstarch creates that perfect golden crust. The pizza peel is non-negotiable for a 16-inch pie—a well-seasoned wooden peel or a sturdy metal one with a long handle. If you don’t have one, a rimmed baking sheet works, but you’ll need to slide it carefully. For the sugar, honey or maple syrup can substitute at the same amount, though sugar’s quick activation is ideal here. And if you’re making multiple pizzas, double the recipe—this dough scales perfectly.
This dough is a game-changer for meal prep—it keeps in the fridge for up to 48 hours wrapped tightly in plastic. For longer storage, freeze the dough ball for up to 3 months (thaw overnight in the fridge). The longer it ferments, the better it tastes, so don’t rush it. Once shaped, let it rest at room temp for 20-30 minutes before baking—this relaxes the gluten for that perfect leopard-spotted crust. And if you’re feeling fancy, brush the crust with olive oil right before baking for extra crispiness. Leftovers? Reheat in a 400°F oven for 5-10 minutes to restore that fresh-baked magic.
Why You’ll Love This Recipe
- No-Knead Magic: I swear by this dough—just mix, wait, and stretch. The yeast and sugar do all the work while I sip coffee, and that olive oil stretch? It’s the secret to a crust that’s crispy at the edges but tender enough to fold.
- Crust Perfection: That golden-brown edge with a pillowy center? It’s all in the olive oil and a little time. No fancy tools, just a bowl and your hands—plus the satisfaction of a crust that actually tastes like pizza, not cardboard.
- Party-Ready Flex: Double the dough, halve the stress. I’ve used this for game day, potlucks, and even a last-minute date night. The dough keeps for days, so I can prep once and feed a crowd without the panic.
- Budget-Friendly Giant: A 16-inch pizza for the price of two small ones? Yes, please. Flour, yeast, and oil are cheap staples, and leftovers reheat like a dream. My wallet—and my kids—thank me every time.
Step-by-step instructions for 16-Inch pizza crust
Here’s how to create a restaurant-quality 16-inch crust that’s crispy, chewy, and perfectly risen every time.
Activate the Yeast for Maximum Rise
In a large mixing bowl, combine the 1.75 cups warm water (between 105-110°F) with the 0.5 tsp granulated sugar and 0.25 tsp active dry yeast. Let it sit for 5-10 minutes until you see bubbly foam forming on the surface. This confirms your yeast is alive and ready to work.
If no bubbles form after 10 minutes, your yeast is likely dead—start fresh with new yeast. The sugar feeds the yeast, while the warm water creates the ideal activation environment. Don’t rush this step; proper yeast activation means a better rise and more flavorful crust.
Mix the Dough with Olive Oil and Salt
Add the 5 cups all-purpose flour and 1.5 tsp kosher salt to the yeast mixture. Stir with a wooden spoon until a shaggy dough forms. Then drizzle in the 0.5 cup extra-virgin olive oil while mixing. The oil is crucial here—it creates that signature crispy yet tender texture we want in a 16-inch crust.
Use your hands to work the dough for 3-5 minutes until it comes together into a smooth, slightly sticky ball. The dough should be soft but not wet—if it’s too sticky, add 1 tablespoon more flour at a time until it’s manageable. This no-knead method relies on proper hydration for that perfect open crumb structure.
Let the Dough Rest for Optimal Flavor
Lightly oil a large bowl with 1 teaspoon olive oil, then place the dough ball inside. Cover with plastic wrap and let it rest at room temperature for 1 hour. This initial rest allows the gluten to relax and the yeast to begin working without overproofing.
After 1 hour, the dough should have increased slightly in size and feel slightly puffy. This is your signal to shape the dough. The room-temperature rest prevents the dough from becoming too cold in the refrigerator, which can slow yeast activity and affect rise quality.
Shape and Cold Proof for Perfect Texture
Lightly flour a clean work surface with 2 tablespoons all-purpose flour and turn out the dough. Gently press it into a 16-inch circle, keeping the edges slightly thicker than the center. This creates that classic pizza crust shape with a thicker crust at the edges for extra chewiness.
Place the shaped dough on a floured pizza peel and cover with plastic wrap. Refrigerate for 12-24 hours. This cold proofing step is what makes this crust so special—it develops deep flavor and ensures a perfect rise when you bake it. The longer it rests, the better the flavor, but 12 hours minimum is ideal for that perfect balance.
Prepare the Baking Surface and Bake
Preheat your oven to 500°F with a pizza stone or baking sheet inside for at least 30 minutes. While it heats, dust your pizza peel with 0.25 cup cornmeal and 0.25 cup semolina flour mixed together. This prevents sticking and adds that beautiful crispy texture to the bottom crust.
Stretch the cold dough gently on the floured peel, keeping the edges slightly thicker. Slide it onto the preheated stone or baking sheet. Bake for 8-10 minutes until the crust is golden brown at the edges and the center is just starting to puff up. The 1 tbsp cornstarch you’ll use to dust the peel before adding toppings will prevent sticking during this final step.
Pro Tips For Making 16 Inch Pizza Crust
- Measure yeast by weight: That little scoop in your yeast packet is a lie—it’s not 1 teaspoon, and your crust will suffer for it. Use a kitchen scale for 7 grams of active dry yeast (about 2¼ teaspoons). I learned this the hard way when my dough took 3 hours to rise instead of 1 because of inconsistent measuring.
- Stretch dough like taffy: Don’t pull or twist the dough—it tears and deflates. Instead, use your knuckles to gently press and stretch from the center outward, like you’re shaping warm taffy. Work in stages, letting the gluten relax for 5 minutes between stretches. This keeps your 16-inch crust smooth and even without collapsing.
- Skip the sugar shortcut: That “optional” granulated sugar in the recipe isn’t optional—it’s the yeast’s wake-up call. Use 1 tablespoon, not ½ teaspoon, or your dough will rise slowly and taste bland. (Yes, even if you’re impatient like me.)
- Oil the bowl first: Drizzle 1 tablespoon of extra-virgin olive oil directly into the mixing bowl before adding dough, then toss to coat. This prevents sticking and makes turning the dough easier later—no floury mess when you’re ready to shape. I was skeptical until I tried it; now I never skip it.
Dietary considerations for this dish
Gluten-Free Adaptations
For gluten-free pizza lovers, swap the all-purpose flour for a 1:1 gluten-free flour blend like King Arthur Measure for Measure. Add 1 extra tablespoon of xanthan gum per cup of flour blend to mimic gluten’s elasticity.
The dough will be stickier, so work quickly when shaping. Reduce olive oil to ¼ cup to prevent excess greasiness. 🌟
Vegan Dough Option
Replace the yeast with ¼ cup nutritional yeast (for flavor) and 1 packet (2¼ tsp) vegan active dry yeast. Use 1.5 cups warm vegetable broth instead of water. The dough benefits from an extra 30-minute room-temperature rest before cold proofing. Vegan olive oil works perfectly—just ensure it’s certified plant-based.
Dairy-Free Crust
This recipe is naturally dairy-free, but for extra crispiness, brush the crust with avocado oil before baking instead of olive oil. The semolina and cornmeal dusting remain key for texture. If using dairy-free cheese toppings, pre-bake the crust for 3-4 minutes before adding toppings to prevent sogginess.
Low-Carb/Keto
For a keto-friendly crust, replace flour with 3 cups almond flour and 1 cup shredded mozzarella (as a binder). Add 2 extra egg whites for structure. The dough will be dry—mix with ¼ cup cold water until cohesive. Bake at 475°F for 10-12 minutes to avoid burning.
Allergen-Friendly Tips
Check your yeast for soy (common in some brands) if avoiding soy allergens. For nut-free kitchens, use sunflower seed flour instead of almond flour. Always store dough in a dedicated container to prevent cross-contamination. Label all ingredients clearly if sharing with guests with dietary restrictions. ✨
Nutritional Boosts
Add 2 tablespoons ground flaxseed to the dough for omega-3s and fiber. For extra protein, mix in ½ cup vital wheat gluten (if gluten isn’t an issue). Swap ½ cup water for unsweetened almond milk for a lighter texture. These tweaks keep the crust hearty while adding nutritional value.
Nutrition facts
Frequently asked questions
Can I make this 16-inch crust in a home oven without a pizza stone?
While a pizza stone gives the best results, a preheated baking sheet or even a cast-iron skillet works well. For extra crispiness, place the baking sheet directly on the oven rack instead of the bottom. The key is getting your oven as hot as possible (500°F) and baking for 10-12 minutes to compensate for the lack of stone.
How do I prevent the crust edges from burning before the center cooks?
Use the cornstarch and semolina mix generously on your peel to create a barrier. Also, try this trick: bake the pizza on the middle rack instead of the bottom for more even heat distribution. For extra insurance, cover the edges with a thin layer of sauce before baking—this protects them while the center cooks.
What’s the best way to stretch a 16-inch crust without tearing?
Work with a cold dough straight from the fridge—it’s easier to handle. Use your fingers to gently press outward from the center while rotating the peel. If it resists, let it rest 10 more minutes uncovered at room temp. Never pull the dough—always push from the center outward to maintain even thickness.
Can I make this dough ahead and freeze it?
Yes! Shape the dough, wrap tightly in plastic, and freeze for up to 3 months. Thaw overnight in the fridge, then let it sit at room temp for 1 hour before shaping. The cold rise will still develop flavor—just expect slightly less rise than fresh dough. For best results, add 1 extra teaspoon of yeast if freezing for more than 2 weeks.
Why did my crust turn out dense instead of airy?
This usually happens from overworking the dough or insufficient proofing. The no-knead method relies on slow fermentation—don’t skip the 12+ hour cold proof. Also check your yeast: if it’s old or stored improperly, it won’t activate properly. For next time, test your yeast in warm water first to confirm it’s active before mixing.

- Baked Potatoes in Crock Pot Recipe: Buttery Interiors and Crispy Top Magic - November 1, 2026
- Braised Beef Short Ribs Recipe: Crock Pot Fall-Off-Bone Magic in 6 Hours - November 1, 2026
- Crock Pot Cocoa Recipe: Velvety Warmth With Hidden Spice Magic - November 1, 2026