
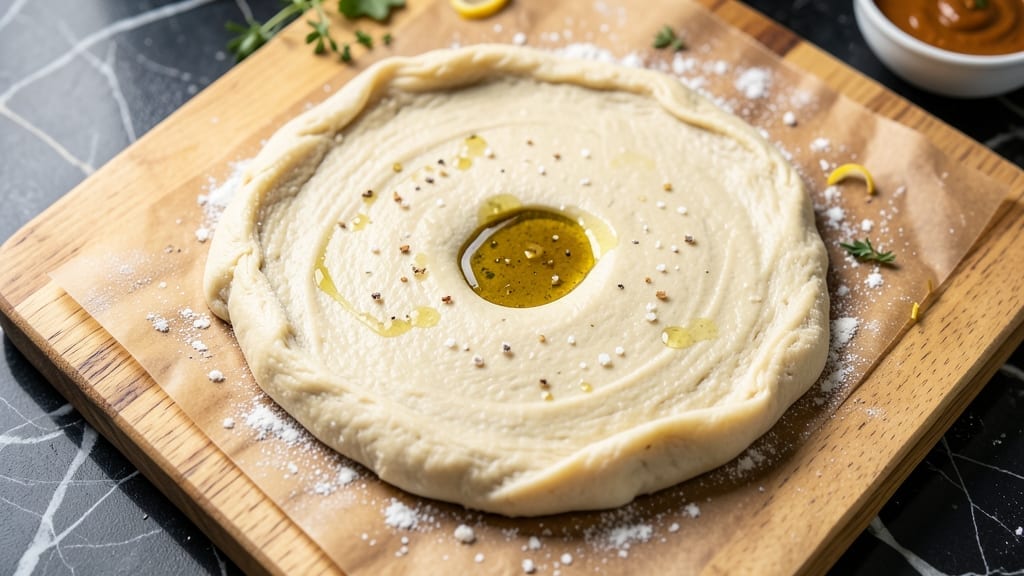
A 16-ounce pizza dough recipe that delivers restaurant-quality results in just 2 hours—no kneading, no fuss, and no waiting days for the perfect rise. This no-knead method transforms simple ingredients into a dough so elastic and flavorful, it becomes the foundation for pizzas that rival your favorite neighborhood spot.
The secret lies in a slow fermentation that develops depth without requiring your constant attention.
What sets this dough apart is its foolproof technique—mix, rest, and shape. No special equipment needed, just a bowl and your time. The dough develops a tender yet sturdy texture, perfect for both thin-crust and deep-dish styles.
Whether you’re a beginner or an experienced baker, this method ensures consistent, professional results every time.
By the time you’re ready to shape and bake, you’ll have a dough that’s springy, airy, and packed with flavor—ideal for any pizza style.
The long fermentation creates those coveted air pockets while allowing the flour to fully hydrate, resulting in a texture that’s impossible to achieve with quick-rise methods. This is the kind of dough that makes pizza night feel like a celebration.
Pair it with your favorite sauce, cheese, and toppings for a pizza that’s crisp on the outside, tender inside, and bursting with flavor. Ready to master the foundation of perfect pizza? Let’s get started with this 16-ounce dough recipe that’s guaranteed to impress.
Ingredients for 16 oz pizza dough
Eight simple ingredients transform into restaurant-quality pizza dough in just 2 hours.
| Ingredient | Amount | Notes |
|---|---|---|
| All-Purpose Flour 🌾 | 4 cups | High-protein for elasticity (12-14%) |
| Active Dry Yeast 🍞 | ¼ tsp | Fresh yeast preferred for best rise |
| Granulated Sugar 🍚 | ½ tsp | Feeds yeast for optimal fermentation |
| Salt 🧂 | 1 tsp | Diamond Crystal preferred for balance |
| Extra-Virgin Olive Oil 🫒 | 1 tbsp | High-quality for flavor development |
| Warm Water 💧 | 1 ¼ cups | 105-110°F for ideal yeast activation |
| Cornmeal 🌽 | ¼ cup | For dusting work surface |
| Semolina Flour 🌾 | ¼ cup | Optional for golden crust texture |
The flour is where the magic happens—King Arthur or Caputo Tipo 00 if you want to splurge, but high-protein all-purpose (12-14%) works perfectly. I always grab my flour from Whole Foods or Amazon for consistent quality, but the store-brand stuff at Kroger is fine too. Fresh yeast is non-negotiable here—those tiny packets lose potency fast. If you’re using active dry yeast, make sure it’s not expired (check the date on the package). The olive oil should be fruity and peppery—California Extra Virgin brands are my go-to. And that warm water? Use a thermometer—yeast needs to be cozy at 105-110°F to wake up properly.
No cornmeal? Semolina or rice flour works just as well for dusting. Short on olive oil? Avocado oil or melted butter (yes, butter!) gives a similar richness. The sugar can be swapped for honey or maple syrup if you’re avoiding refined sugar, but keep it to the same amount. For a lower-protein flour option, bread flour will give you a chewier crust, while all-purpose keeps it tender. And if you’re making this in a cold kitchen, warm the bowl before adding the yeast mixture—it helps with the rise time. The dough should be slightly sticky but not wet; if it’s too dry, add a teaspoon of water.
This dough is all about patience—2 hours at room temperature gives you that perfect fermentation. Store any unused dough in an airtight container with a lightly oiled cloth over it; it’ll keep for 3 days in the fridge or 3 months frozen. For freezing, shape the dough into a log, wrap tightly in plastic, and thaw overnight in the fridge before using. Pro tip: Portion into 8-ounce balls for perfect single-serving pizzas—just pop them in the fridge until ready to use. The longer it ferments, the better it tastes, so don’t rush it!
Why You’ll Love This Recipe
- No-Fuss Mixing: I swear by the 5-minute stir—just flour, yeast, sugar, and a splash of olive oil. No stand mixer, no overthinking, just dump, knead (or don’t, if you’re lazy), and let it rise while you watch one episode.
- Olive Oil Magic: That extra-virgin olive oil? It’s the secret weapon—chewy, tender crust with a subtle richness that makes store-bought dough taste like a sad afterthought. (Yes, even my picky husband notices.)
- Weeknight Flex: Double the dough, freeze half—now you’ve got a backup for Friday night or a last-minute movie snack. Or split it into flatbreads for tacos. Or garlic knots. Or just eat it plain. It’s that adaptable.
- Budget Crust: Five ingredients, all pantry staples, and it stretches to feed two or four. I’ve made this for date nights, game days, and “I can’t afford takeout” nights—same dough, every time. No regrets.
Step-by-step instructions for no-knead pizza dough
This dough transforms simple ingredients into restaurant-quality pizza in just two hours—no kneading required.
Activate the Yeast with Warm Water and Sugar
In a small bowl, combine the 1.25 cups warm water (test temperature with your wrist—should feel like bathwater, 105-110°F) with the 0.5 tsp granulated sugar and 0.25 tsp active dry yeast. Stir gently and let sit for 5-10 minutes until foamy. You’ll see small bubbles forming and the mixture expanding—this confirms the yeast is alive and ready to work.
I always test the water temperature first because yeast dies instantly in water above 120°F. If it doesn’t foam within 10 minutes, your yeast might be old or the water too hot—start over with fresh yeast and cooler water. This activation step is the foundation of your dough’s rise, so don’t rush it.
Mix the Dough Ingredients
In a large mixing bowl, combine the 4 cups all-purpose flour and 1 tsp salt. Make a well in the center and pour in the yeast mixture along with the 1 tbsp extra-virgin olive oil. Using a wooden spoon or dough whisk, gently mix until a shaggy dough forms—it’ll look dry at first, but keep stirring.
Here’s the thing—you don’t want to overmix yet. The dough should come together when you press it, but still have some dry spots. If it’s too sticky, add 1 tablespoon flour at a time until it pulls away from the bowl. The goal is a soft, slightly tacky dough that’s just beginning to form a cohesive mass.
Let the Dough Rest and Develop Gluten
Cover the bowl with plastic wrap or a damp towel and let the dough rest at room temperature for 1 hour. This initial rest allows the gluten to relax and the yeast to begin fermenting. You’ll notice the dough becoming slightly smoother and more cohesive—this is the magic happening as the flour hydrates.
Don’t skip this step, even though it’s tempting to rush. The dough needs this time to develop structure. After 1 hour, you should see some slight activity—small bubbles forming on the surface and the dough expanding slightly. If you’re in a hurry, you can place the bowl in a warm spot (80-85°F) to speed this along by 20-30 minutes, but room temp works perfectly.
Shape and Prepare for Final Rise
Lightly flour a clean work surface and turn out the dough. Gently shape it into a rough ball by folding the edges toward the center. Sprinkle the 0.25 cup cornmeal on the surface and roll the dough in it to coat evenly—this prevents sticking and adds texture. Place the dough seam-side up in a lightly greased bowl.
Cover the bowl again and let the dough rise for another 30-60 minutes until nearly doubled in size. You’re looking for the dough to puff up noticeably and feel springy when pressed gently. The final rise should take less time than the first because the yeast is already active. If your kitchen is cold, extend this to 90 minutes—patience here ensures a light, airy crust.
Shape and Use Immediately or Refrigerate
Once risen, turn the dough onto a floured surface and gently press it down to release excess air. Divide into 4 equal 4-ounce portions (about the size of a baseball) and roll each into a ball. For best results, use immediately, but if you need to prep ahead, cover and refrigerate for up to 24 hours. Cold dough rises slower, so let it sit at room temperature for 30 minutes before shaping if using from the fridge.
This dough is incredibly forgiving—it won’t overproof easily, so you can shape it up to 4 hours after the final rise. The beauty of no-knead is that it develops flavor during the long fermentation, giving you a crispy yet chewy crust that’s perfect for any topping. Now you’re ready to create your perfect pizza!
Pro Tips For Making 16 Oz Pizza Dough
- Measure Yeast by Weight: That 1 teaspoon of yeast in the recipe? Use a kitchen scale instead—it’s 2.5 grams, not the 5-6 grams a heaping teaspoon delivers. I learned this the hard way when my dough rose like a sad soufflé because the yeast was overworked.
- Hydrate the Yeast First: Skip mixing yeast with flour—it’s a waste of energy. Instead, dissolve it in the warm water (not hot!) with sugar first, then let it foam for 5 minutes. This guarantees it’s active before the flour gets involved, and your dough won’t fight you later.
- Oil Your Hands: Dough sticks because flour is clingy, not because you’re doing it wrong. Lightly coat your hands with olive oil before stretching—it keeps the gluten from tearing and makes rolling out a breeze. (Yes, even if you’re impatient like me.)
- Rest Before Stretching: That 2-hour rise isn’t just for show—let the dough chill in the fridge for at least 30 minutes before shaping. Cold gluten relaxes, so you won’t end up with a sad, uneven crust fighting back every time you pull it. Trust the process.
Troubleshooting perfect results
Dough Too Sticky
If your dough feels too sticky to handle, don’t panic—this is common with high-hydration doughs. Simply add 1 tablespoon flour at a time while mixing until it pulls away from the bowl. For a softer crust, I sometimes add ½ teaspoon extra olive oil to help bind the dough.
If the dough still sticks after shaping, dust your work surface with semolina flour instead of all-purpose flour for better texture. 💫
Dough Not Rising
If your dough isn’t expanding after 2 hours, check three things first: yeast freshness, water temperature, and ambient temperature. Use fresh yeast (test it in warm water with sugar—it should foam in 5-10 minutes).
Keep your dough in a warm spot (80-85°F)—try placing it near your oven with the light on. If all else fails, start over with new yeast and slightly warmer water (110°F).
Uneven Rise
Uneven rising often happens when dough isn’t covered properly or the environment is drafty. Cover your bowl with a damp towel or plastic wrap to trap moisture, and avoid placing it near open windows or AC vents.
For extra insurance, place the bowl inside a larger bowl or Dutch oven to create a mini greenhouse effect. If one side rises faster, gently rotate the bowl every 30 minutes during the final rise.
Dough Overproofed
Overproofed dough collapses when shaped, but this recipe is forgiving. If your dough has risen too much, press it gently to release air, then let it rest 15-20 minutes before shaping. For a quick fix, place the overproofed dough in the fridge for 30 minutes to firm it up.
The good news? This dough won’t overproof easily due to its long fermentation—just work with it gently. 🍕
Blisters or Burn Marks
Blisters or dark spots on baked pizza usually mean your oven is too hot or the dough was too wet. Preheat your oven to 500°F (or highest setting) for at least 30 minutes with a pizza stone or steel inside.
If using a wood-fired style, aim for 700°F. For extra insurance, brush your dough with olive oil before adding toppings to prevent sticking and burning.
Dense or Chewy Crust
A dense crust often results from underproofing or insufficient heat. Let your dough rise until it’s nearly doubled in size, and bake at 500°F+ for maximum crispiness. For a lighter crust, try adding ½ teaspoon baking powder to the dough.
If your crust is still too chewy, reduce the flour slightly (3.75 cups) next time to increase hydration and airiness.
Nutrition facts
Frequently asked questions
Can I make this dough with bread flour instead of all-purpose?
Yes, but expect a slightly chewier texture. Bread flour has more protein, which develops more gluten during mixing. For a lighter crust, reduce the bread flour by ¼ cup (use 3.75 cups total) and add ¼ cup cornstarch to maintain tenderness. The flavor will be more robust, but the dough may require 10-15 minutes less of final rise time.
How do I adjust this for a larger batch (e.g., 24 oz total)?
Double all ingredients exactly—8 cups flour, 0.5 tsp yeast, 1 tsp sugar, 2 tsp salt, 2 tbsp olive oil, and 2.5 cups warm water. Use a larger bowl and increase rise times by 15-20 minutes total. For shaping, divide into 6 equal 4-ounce portions (about the size of a tennis ball).
Can I use this dough for calzones or stuffed pizza?
This dough works perfectly for calzones. After the final rise, divide into 4-ounce portions and roll each into a 6-inch circle. Fill with your favorite toppings, fold in half, seal the edges, and bake on a pizza stone at 475°F for 15-18 minutes. For extra stability, brush the dough with egg wash before folding.
Why does my dough need such a long rise time?
The extended 2-hour rise at room temperature creates a slower fermentation, which develops deeper flavor and a lighter, airier texture. This mimics traditional Italian methods where dough rests overnight. The long fermentation also allows the gluten to fully relax, making the dough easier to shape without tearing. Cold fermentation (fridge) works too—just extend the total time to 12-24 hours.
What if I don’t have a pizza stone?
No problem! Use a baking sheet lined with parchment paper for even heat distribution. For a crispier crust, try a cast-iron skillet or inverted baking sheet (place upside-down on the oven rack). Preheat your oven to 500°F for 30 minutes to mimic the stone’s heat retention. A perforated pizza peel also works well for transferring dough.

- 6 Oz Chocolate Chip Cookie Recipe: Perfectly Balanced Crispy Edges and Chewy Hearts - September 25, 2026
- 6-Inch Coffee Cake Recipe: Vanilla Bean Swirls and Buttery Streusel Topping - September 25, 2026
- 1 Hour Soup Recipe: Velvety Richness Without the Wait - September 25, 2026